It's Alive!!

UKworkshop.co.uk

Help Support UKworkshop.co.uk:

This site may earn a commission from merchant affiliate links, including eBay, Amazon, and others.
all sound advice, my brain and imagination is pretty slow at the moment and I can't seem to grasp even basic things - the england game was a shocker!

Thanks chaps, I shall get on with the task at the weekend.
 
Digit":28b48dat said:
I used SRBP for my blade plate, good durability, low co-efficient of friction. Use the original plate as a jig when drilling the holes.

Only if the original holes were accurate in the first place. :roll:
 
I have just invested in and started to assemble the SIP 10 inch cast iron table saw I also intend to make a zero tolerance insert. I have made such an insert in the past and I achieved this by using double sided tape to secure the original to the material to be cut, I then used a bearing guided router cutter to form the profile. Keeping the two pieces together and then transferring to the pillar drill the securing screw holes were drilled through, the original insert plate being the guide.
 
Byron
I made an insert for my Jet saw out of some hardwood that was lying around. I left it as thick as I could so that I could insert wood screws in the right places to act as levelling screws, using the original insert as a template.
It works a treat!

SF
 
Tony made his from sheet aluminium. It cuts quite easily with TCT tools.
 
Hi all
Just noticed this thread. Which saw started the thread off in the first place??.
I assume a SIP table saw?. I`m after a table saw and would be interested in the comments/photos if any are forthcoming :wink: .
Cheers
Steve
 
Use the search facility Steve there has been quite a bit posted of late.
 
HI Steve,

Yes, it's for the 10" SIP CI saw. I spent some more time with it yesterday, sorting out the tops and calibrating the mitre gauge and tape measure for the fence. I have now got the measure within .5 of a mm so it's now quite accurate, although I still hate the fence - maybe I'm doing something wrong, but it seems a bad design. The fence rides along the top of the rail at the front, with just a small plastic thingy holding against the rear rail, therefore there is about 20-30mm of deflection possible unless you move the fence from the middle rather than the handle, even when tightened down I've notice it's quite easy to deflect the fence by about 5mm. I would have thought a fence would be better to run a long a rod shaped rail so that it cannot deflect - am I doing something wrong here?
 
Adjust the fence lock so that its just gripping hard enough and not to hard also check the plastic wheel it rolls on for muck and any casting flashes lub with wd40, adjust height of rear rail to keep fence just clear of table this should then give you min friction. My way to move it, is slide to rough position light lock/part lock use micro adjuster for final position.Hope this helps.
 
Byron I know myself how niggling these new tools can be.

If you fail to get the fence to grip firm by conventional means.

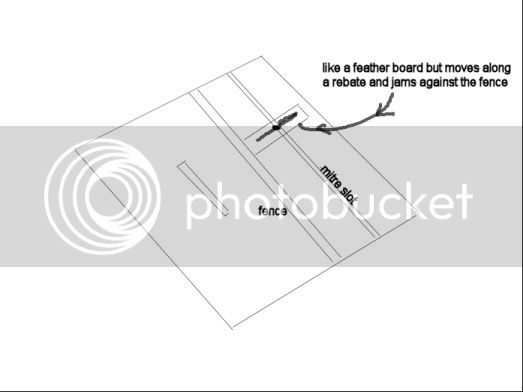
You could always knock up something like this for cutting planks. sheet material you would need to fasten something to the table edge.

fencesupport.jpg
 
Byron
Methinks that you have not set up the rails correctly or adjusted the fence or maybe not cleaned all the gunk off.

The maximum deflection I can get on mine is a couple of mill at the most. You need to make sure the rails front and back are parallel and square to each other. Adjust the clamp on the fence so that there is minimum clearance and maybe use some spray polish to ensure back rail is free from muck and the clamp slides freely, this will prevent it grabbing. When sliding the fence use one hand to push backwards to move back clamp away from rail, it should then slide easily and square.

I personally find it to be an excellent fence and one of the best I have tried.

Les
 
Wot Les said, there's something wrong with your setup BB, I'm off to the workshop in a minute and if I can find the camera I'll try and take a pic or two for you to compare to.

Cheers, Paul.
 
BB,

Here's some pics, hope it helps, the first is the front of the fence

DSCN1428.jpg


The next is the back of the fence

DSCN1430.jpg


In the case of both the back and front rails on which the fence locates, the rails are mounted about 1cm below the top of the cast iron table, flush with or slightly below the bottom of the mitre gauge slots (so the mitre gauge can run through beyond the edge of the tables of course). This should leave the underside of the fence clear of the cast iron table by a mil or so, running only on the front and back rails.

To adjust the clamping pressure on the fence, remove the end panel at the far end of the fence by undoing the two screws, and you'll see a nut on a threaded rod, tightening or loosening this (don't need to turn by much) eases or increases the clamping action at the front of the fence when the front locking handle is pushed down. Mine is adjusted so it only needs light pressure to push the handle into the locked position but it still holds the fence absolutely rigid.

Hope that's of some help. I'm sure you will sort it out with a few minor adjustments.

Cheers, Paul. :D
 
I was the first, (I think) to complain about the SIP fence but that deflection seems excessive I must agree

PS. Putting my coffee aside I went out to take a look at my fence, which is not currently on the saw.
Examination showed that the wheel can jam on the sides of the slot on my example. Another problem to deal with!
 
Byron I mentioned in one of the other threads that you may not have set your rails up properly. As you know I have the 12" model, but I cannot see yours is much different, and in my instruction manual it states that you set the rails up so that both the front and rear of the fence is 2mm above the table.

When I set my rails up the fence was rock solid out of the box, and when you lock the handle there is no movement at all, and I believe that a number of other owners have had the same experience. In fact if you look at my review, I said that one of the best things about the saw is the fence, it was perfectly square the the blade from the off and still is.

Try setting you rails up again and I am sure you will get there in the end. If not send the fence back.

Cheers

Mike
 
Really?

Quote

up so that both the front and rear of the fence is 2mm above the table.


So how would timber lay its surface 100% to the table?
 
DW

Really?

Quote

up so that both the front and rear of the fence is 2mm above the table.


So how would timber lay its surface 100% to the table?

What's your problem? It lays on the table like anyone elses saw :roll: The fence rides on top of the rails but the rails are below the edge of the table.

Just like Chisel's

Chisel,

This should leave the underside of the fence clear of the cast iron table by a mil or so, running only on the front and back rails

See his photo to see what I mean, or do you want a photo of mine? And I might add that his fence is completely rigid too, so it has to be worth a try. :wink:

Cheers

Mike
 
DW, I think Mike means the fence 2mm above the table not the rails 2mm above,

Allan

ooops too late again hehe
 
Back
Top