OPJ
Established Member
I must say that I've really been impressed with this machine since I bought it before Christmas. For only £130, stick a decent set of chisels in and it will serve you very well indeed. One thing I do not like though is the fence. It's neither square to the bed or parallel (vertically) with the chisel, so I decided I would try and do something about it this week.
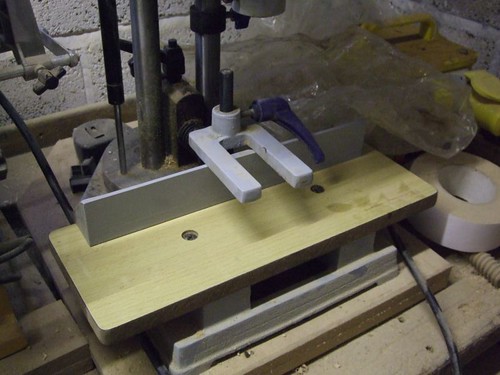
First up, here's a shot of the existing set up. The MDF bed is sturdy enough, but it doesn't make up for a poor quality fence, which can easily offset your mortices if you're not careful (DAMHIKT)!
I began by cutting two sheets of 18mm WBP ply to 400mmx200mm each. If I was going to make a new bed then, I decided I may as well make a second one to sit on top when it comes to morticing narrower workpieces which the hold-down would not otherwise be able to reach. The jig here is based on Roy Sutton's design from his DVDs. After reading the latest British Woodworking however, I think I've a replacement already! :wink:
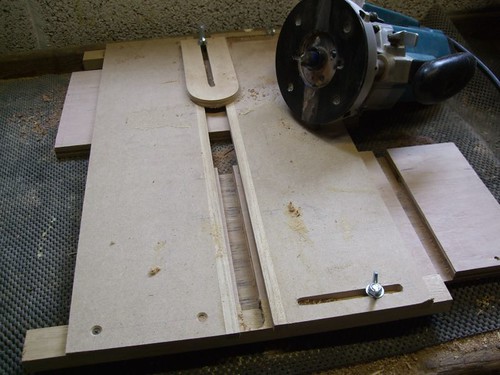
The secondary/"riser" bed sits on top of the existing one and fits in place over four 10mm dowels, so it cannot move anywhere. Keep reading and you'll soon see what the T-track's for... :wink:
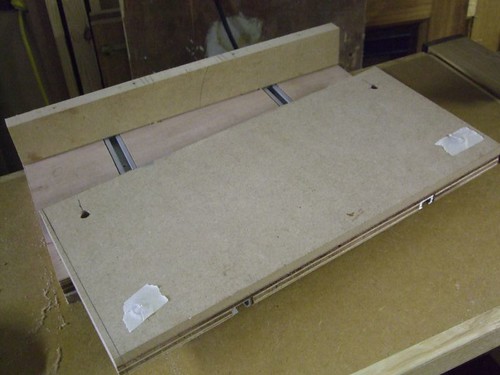
I added a couple of 10mmx5mm Rare Earth Magnets to the base so it will hold to the morticer's bed. A couple more might do the job even better.
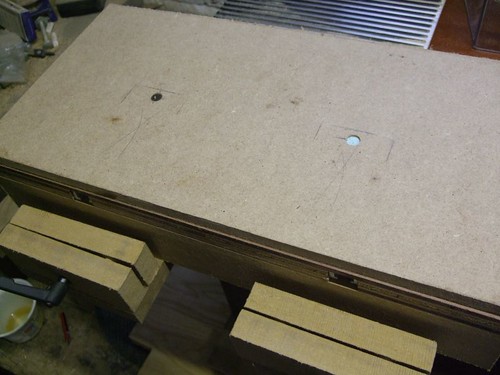
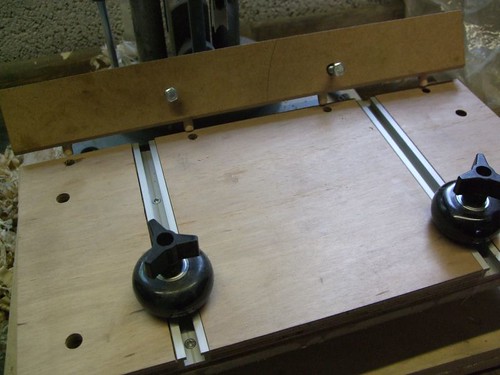
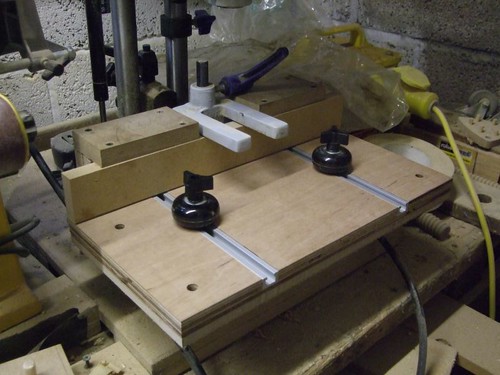
This is designed so that it replaces the MDF bed and so that it clamps over the existing fence. This means I'll be able to keep the fine adjustment of the back and forth movement. The "pressure pad" design is borrowed from Steve Maskery's Short Rip Fence idea. In this case however, it doesn't quite work as well as I'd hoped. I could have set the Bristol levers lightly lower but the back face of the fence is also tapered slightly, which doesn't help. Anyone have any thoughts on this?
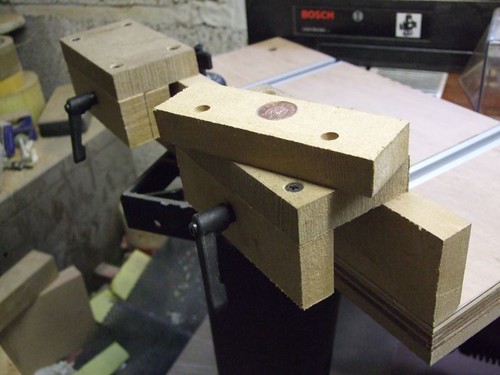
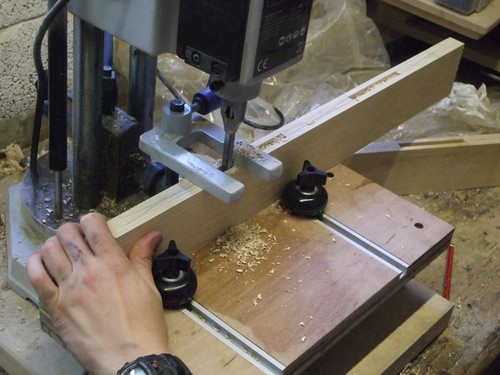
Here you can see what I have so far - and also why I needed to include that T-track! We all hate having to hold the workpiece against the fence and it doesn't help your accuracy when the fence is all over the place either! I noticed Rutlands now stock these excellent Roller Guides and knew they'd be ideal for the job!
...Okay, if I'm being honest, this isn't entirely my own idea... Have a look at Bill-e's Idea.

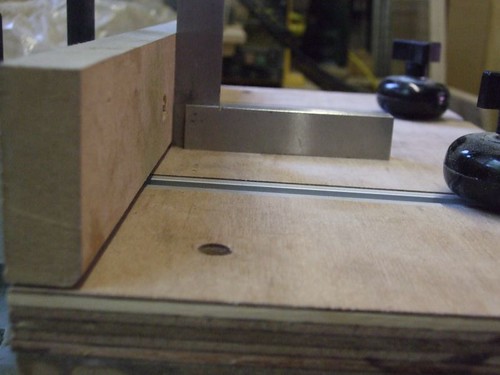
I haven't given it a try yet but the MDF fence is already looking much squarer (?) than the existing one and I haven't looked at shimming it yet. I'm confident it will work well but I'd appreciate any feedback and thoughts from anybody reading this?
Especially if you have any ideas as to how I can secure the fence? I might buy another set of Earth Magnets and see how that goes...
I may also make something similar for my pillar drill now. :wink:
Thanks for looking,
Olly.
First up, here's a shot of the existing set up. The MDF bed is sturdy enough, but it doesn't make up for a poor quality fence, which can easily offset your mortices if you're not careful (DAMHIKT)!

I began by cutting two sheets of 18mm WBP ply to 400mmx200mm each. If I was going to make a new bed then, I decided I may as well make a second one to sit on top when it comes to morticing narrower workpieces which the hold-down would not otherwise be able to reach. The jig here is based on Roy Sutton's design from his DVDs. After reading the latest British Woodworking however, I think I've a replacement already! :wink:

The secondary/"riser" bed sits on top of the existing one and fits in place over four 10mm dowels, so it cannot move anywhere. Keep reading and you'll soon see what the T-track's for... :wink:

I added a couple of 10mmx5mm Rare Earth Magnets to the base so it will hold to the morticer's bed. A couple more might do the job even better.

This is designed so that it replaces the MDF bed and so that it clamps over the existing fence. This means I'll be able to keep the fine adjustment of the back and forth movement. The "pressure pad" design is borrowed from Steve Maskery's Short Rip Fence idea. In this case however, it doesn't quite work as well as I'd hoped. I could have set the Bristol levers lightly lower but the back face of the fence is also tapered slightly, which doesn't help. Anyone have any thoughts on this?

Here you can see what I have so far - and also why I needed to include that T-track! We all hate having to hold the workpiece against the fence and it doesn't help your accuracy when the fence is all over the place either! I noticed Rutlands now stock these excellent Roller Guides and knew they'd be ideal for the job!

...Okay, if I'm being honest, this isn't entirely my own idea... Have a look at Bill-e's Idea.
I haven't given it a try yet but the MDF fence is already looking much squarer (?) than the existing one and I haven't looked at shimming it yet. I'm confident it will work well but I'd appreciate any feedback and thoughts from anybody reading this?
Especially if you have any ideas as to how I can secure the fence? I might buy another set of Earth Magnets and see how that goes...
I may also make something similar for my pillar drill now. :wink:
Thanks for looking,
Olly.


