If you're working on something that's mostly hand tools...

UKworkshop.co.uk

Help Support UKworkshop.co.uk:

This site may earn a commission from merchant affiliate links, including eBay, Amazon, and others.
strangely enough, it's just about the right size. Small wood can be resawn quickly with a regular coarse tooth handsaw

For bigger stuff (anything over about 5-6") this thing is ideal. It's heavy (Which you can't tell from the picture) and supplies its own downforce, it's easy to steer and it's just about long enough for one to lean forward and push out with arms, lean back and do it again.

it will cut somewhere between 2 and 4 inches in 50 strokes, depending on the material (more if the material is narrow, I guess), and that's a good number to take and step forward and look at the back side of the cut. the teeth make resistance like velcro (that kind of feel) - you can tell the combination of the weight and the teeth shearing material off make for legitimate work. It's not the easy going cut like a regular handsaw.

with a second person, you could really do accurate sawing without stopping.
 
making my life difficult....I neglected to account for the door thickness on the front of the bottom cabinet, which means I need to add a moulding that does it, but I don't want that fat thickness around the side of the cabinet - it would look terrible.

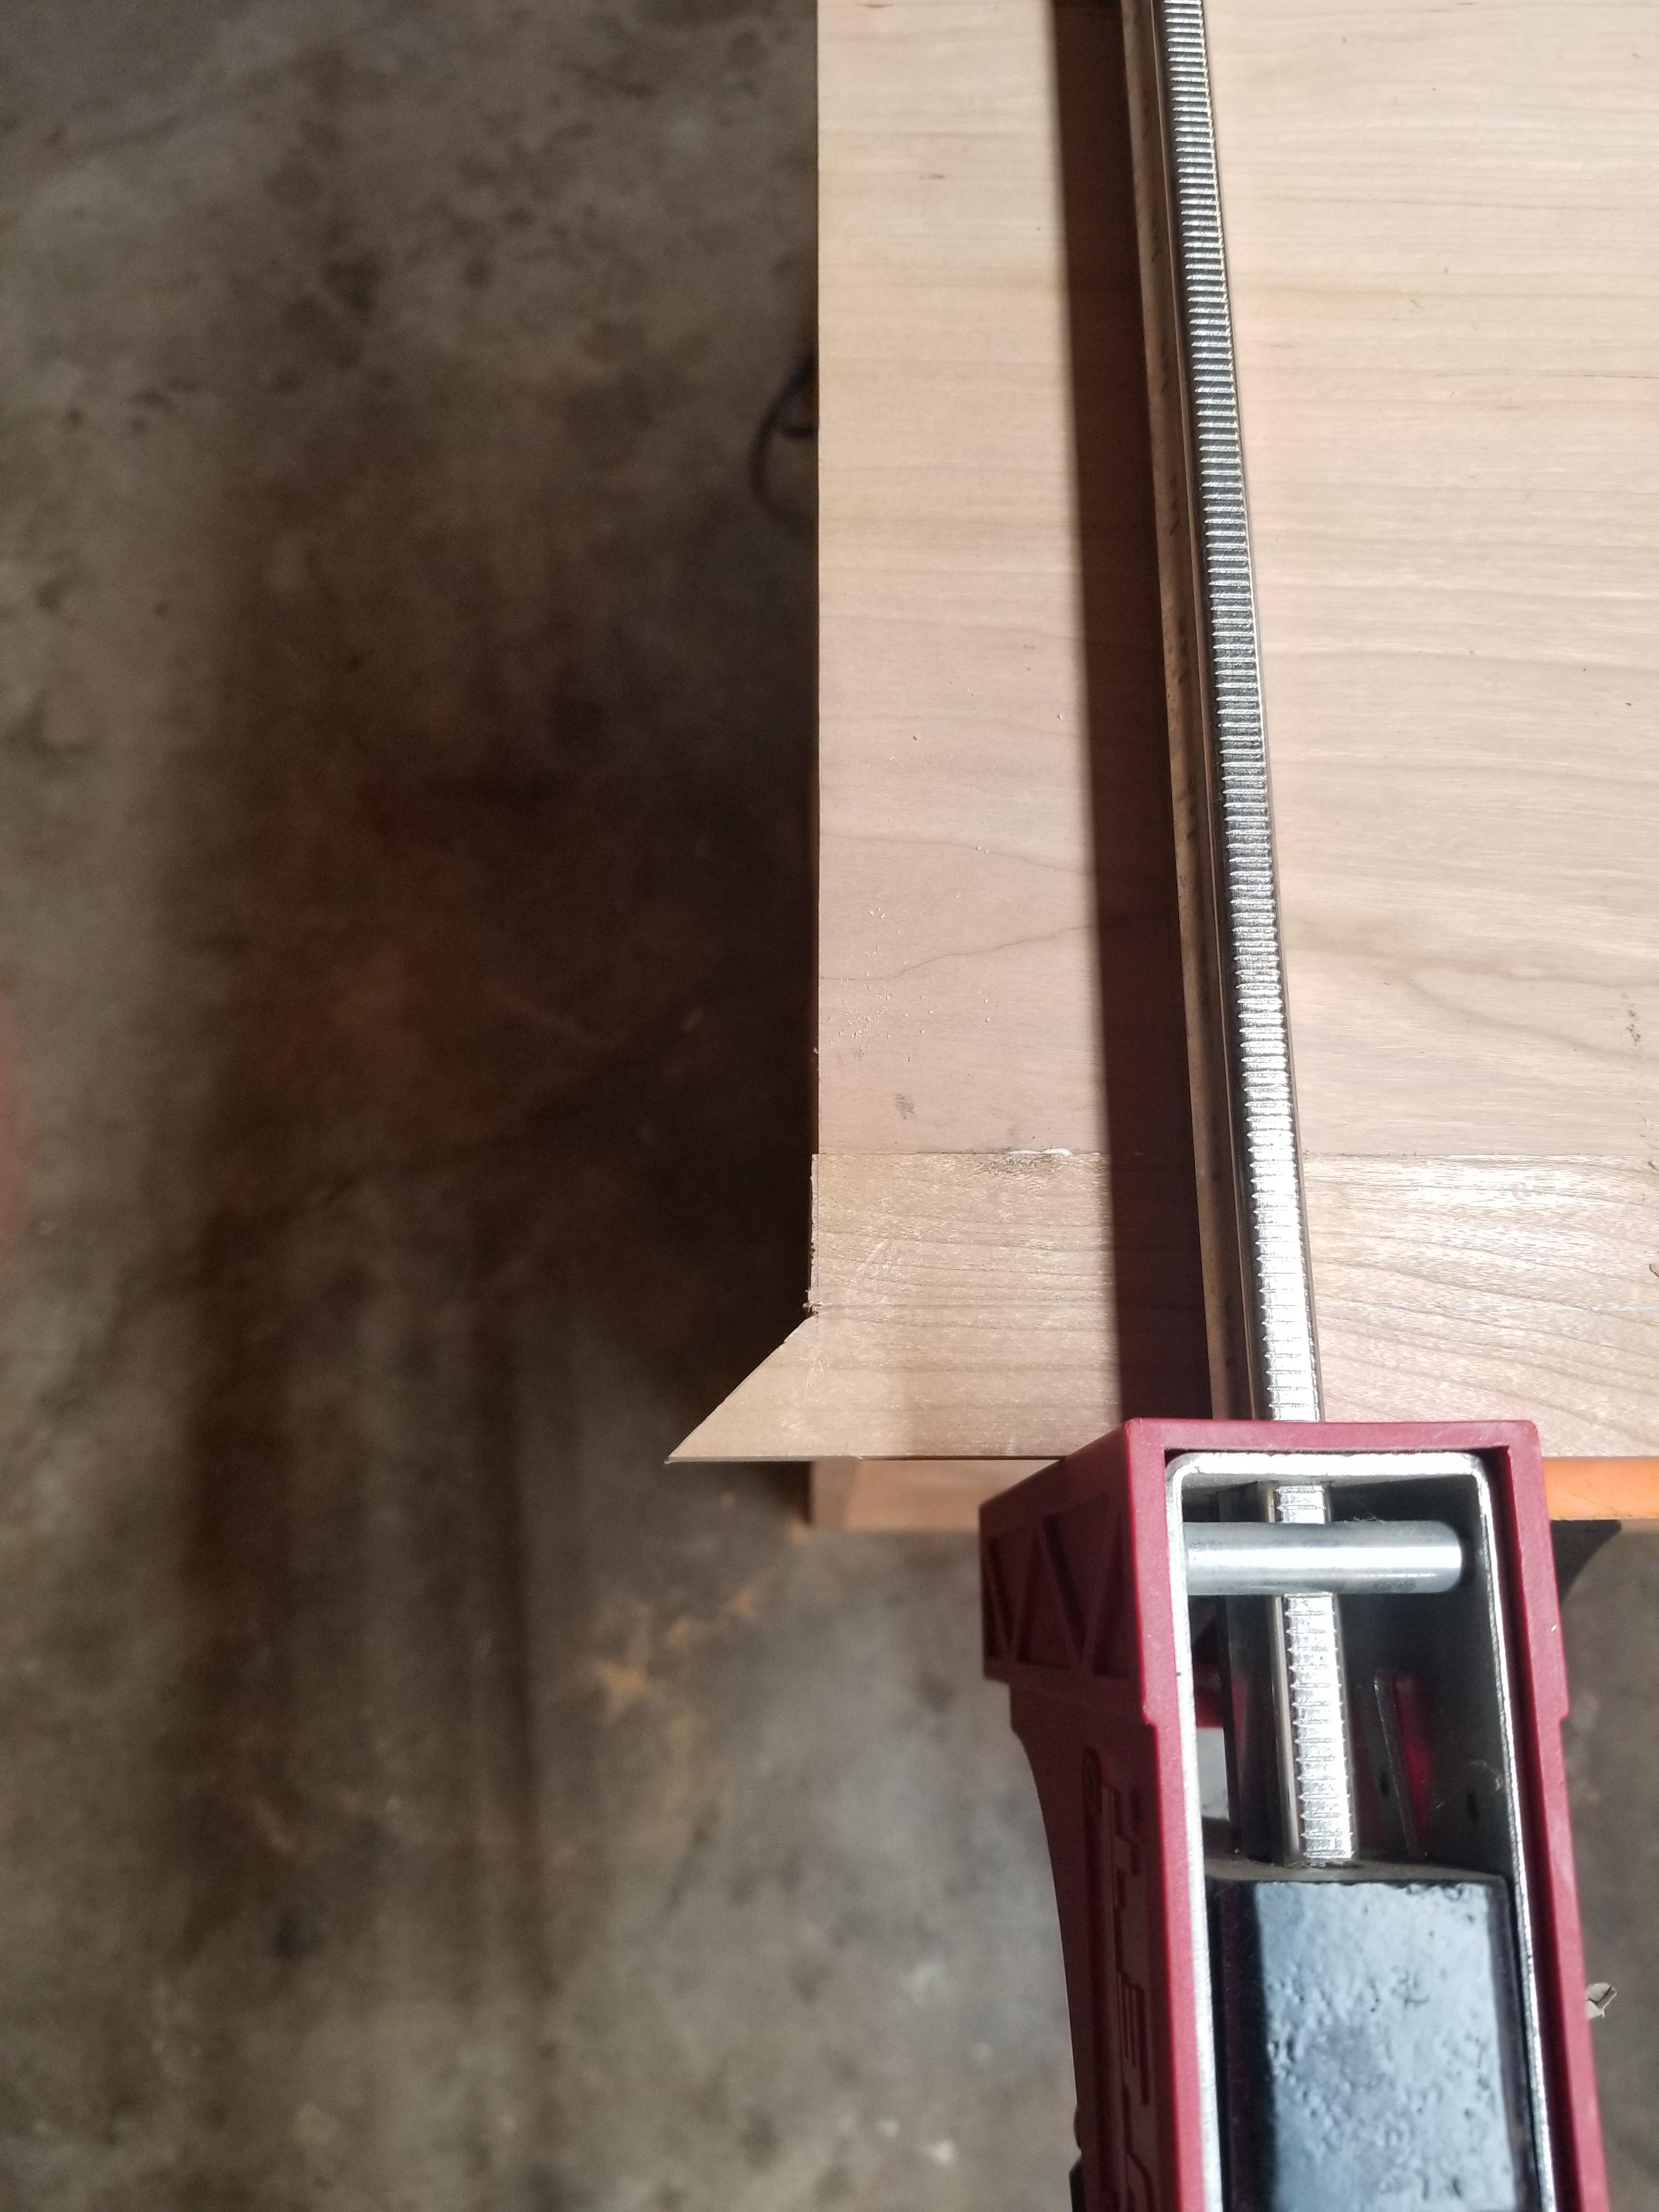
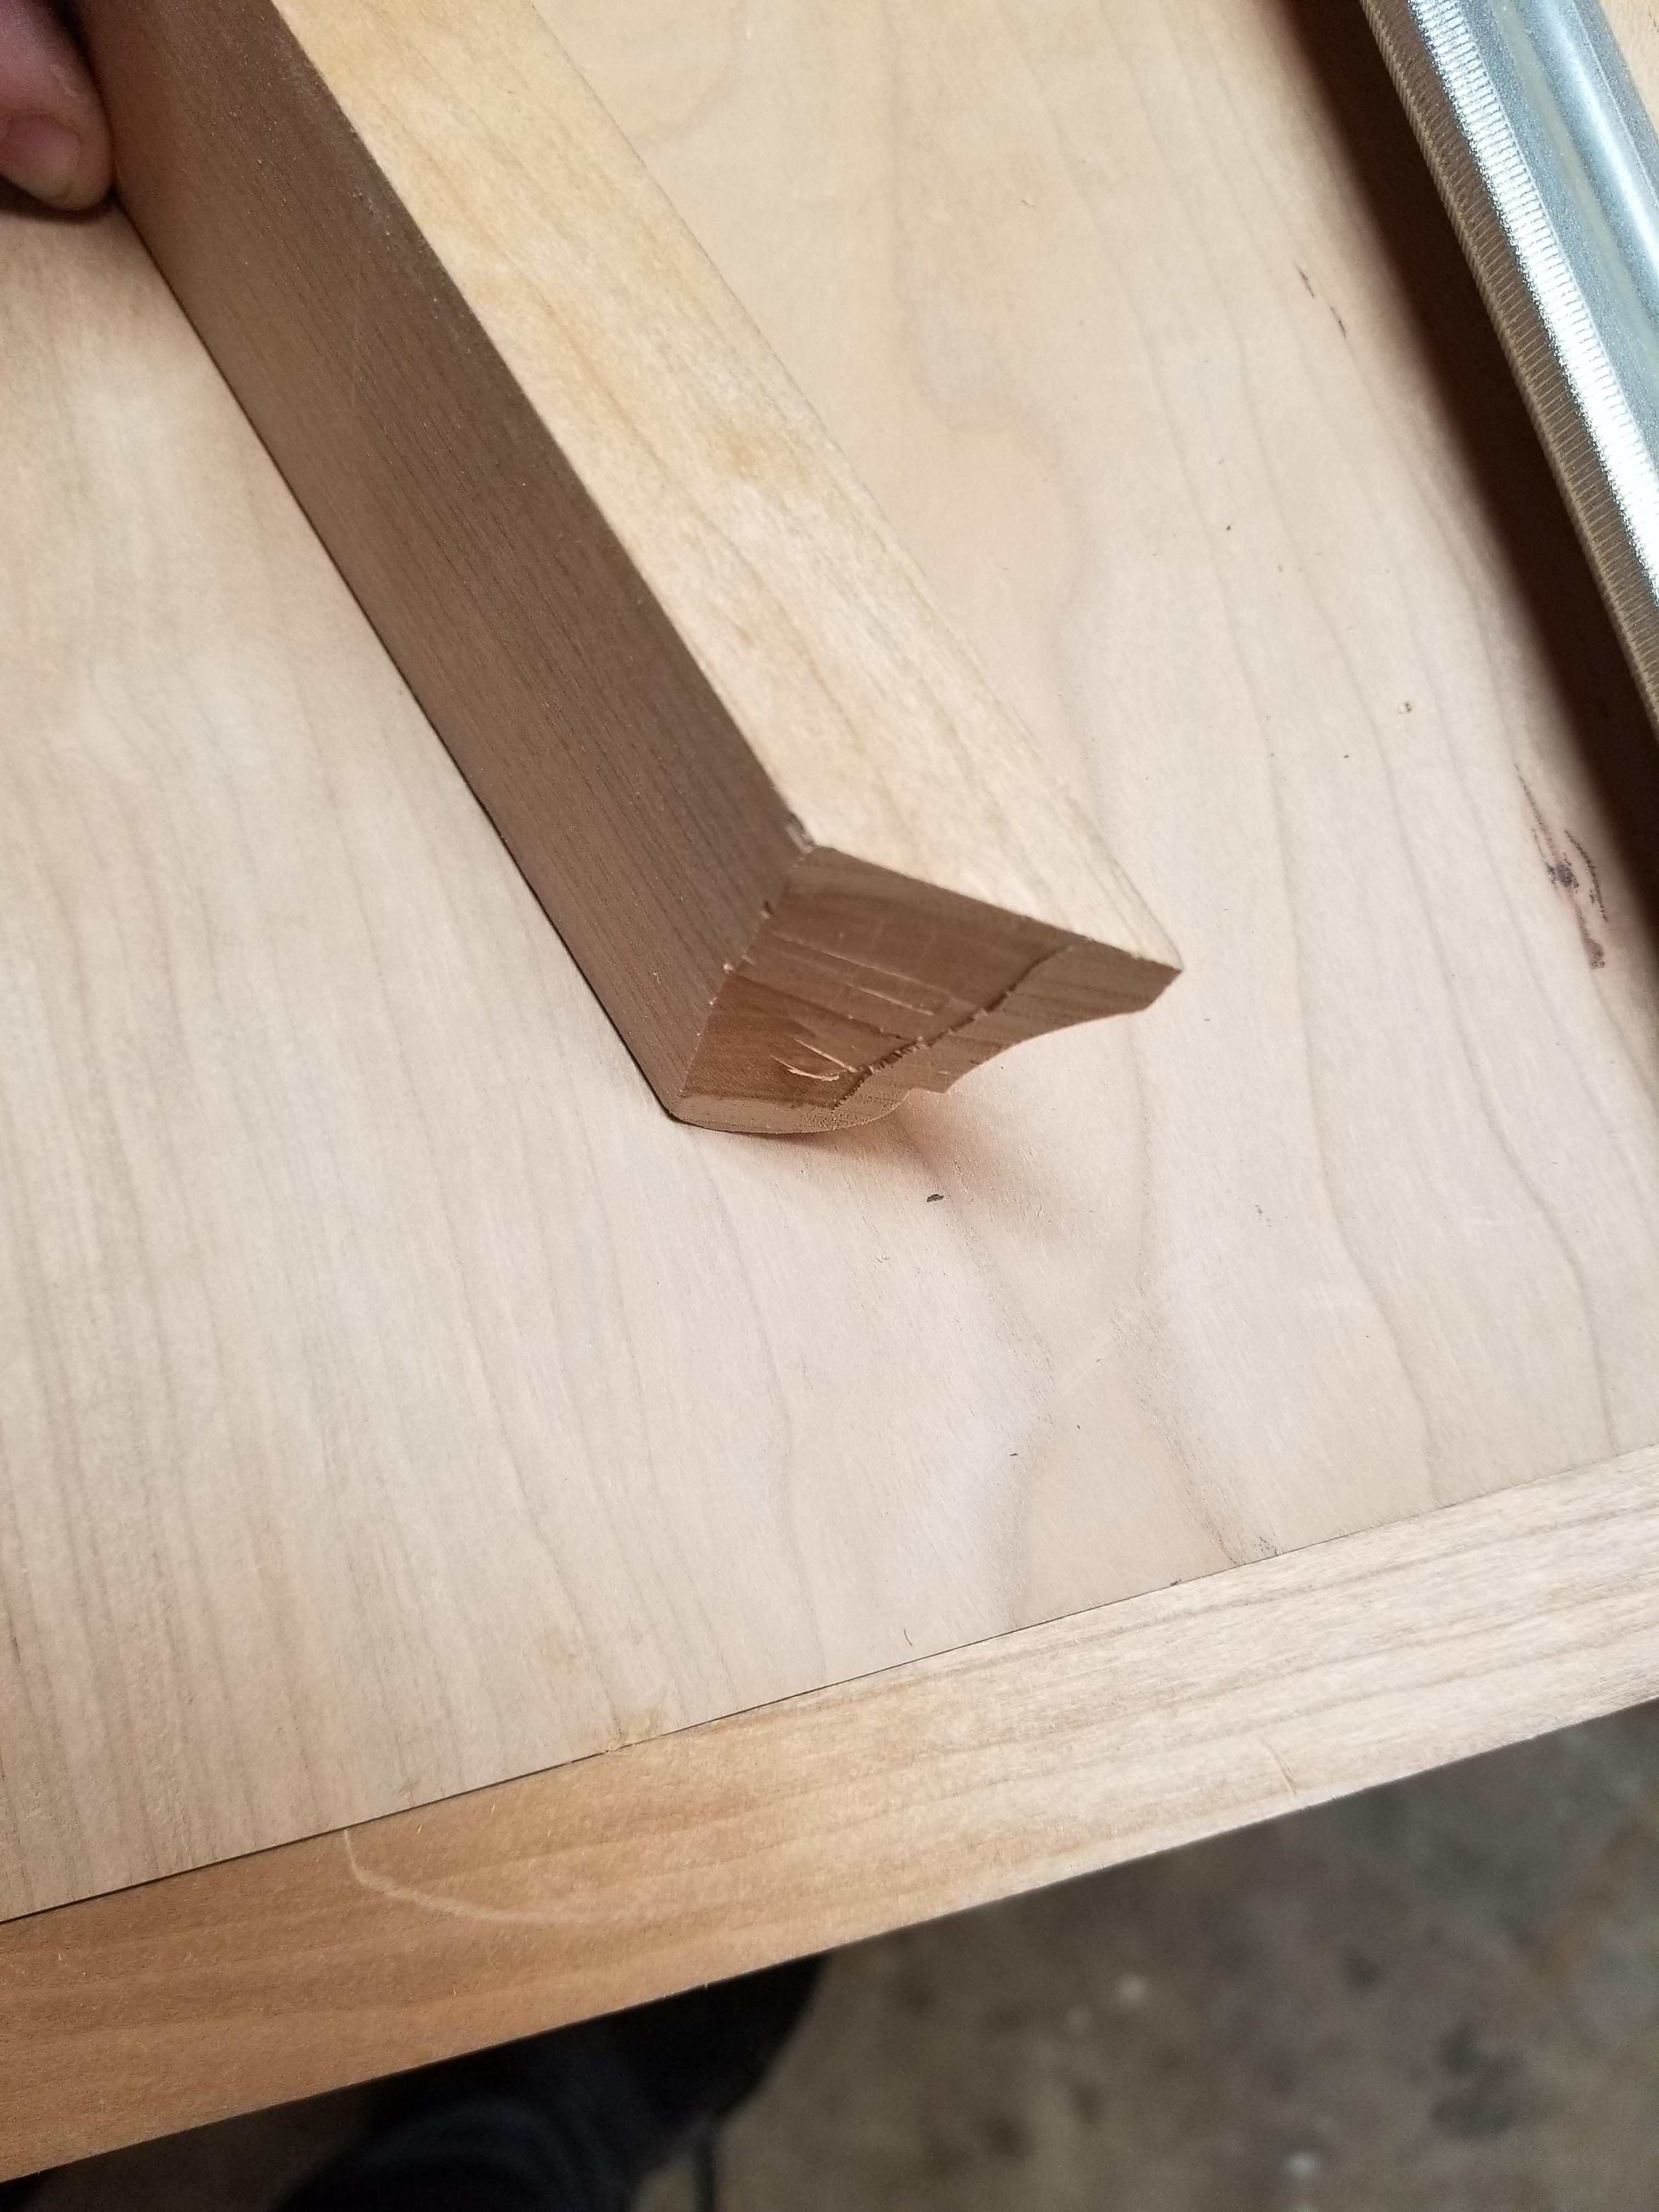
So, the solution is to cut the moulding (this is all by hand, I don't have another way), then resaw the excess thickness off of the sides, leaving me with this little mickey mouse project on the front (the corner of the moulding needs to meet ahead of the case).

This isn't a huge time soak, just a bump in the road, and though it'll look a little funny, this case is going to be stained dark as night, so it won't matter that much.

Quiz question for you guys guessing on how to trim the side of the cabinet into the flat thickness of this - how would you do it. I know the best answer from doing a lot of roughing work by hand, but it may be useful to you sometime (I can tell you how to do it with two tools - just pushing a flat chisel that isn't extremely narrow into it is a bad idea).

bo9RpYr.jpg


hnrHcvU.jpg
 
I know nobody is going to guess this - an incannel patternmaker's gouge is fantastic for cuts like this. They cut so easy into end grain and across end grain vs. a flat chisel. Not sure why, but they're great opening cross grain cavities, too, as they waste material out but shear off the waste so that it can't break out adjacent to the cut.

They're trouble to sharpen, but not if you have a deburring wheel and a buffer.

Option 2 is a crank neck chisel and tip the corner up so that you're taking out only small triangles. Any more force than required for either can result in overcutting into the mortise corner.

Chiseling is into the miter corner rather than across (in the vertical direction of the case) to prevent blowout.
 
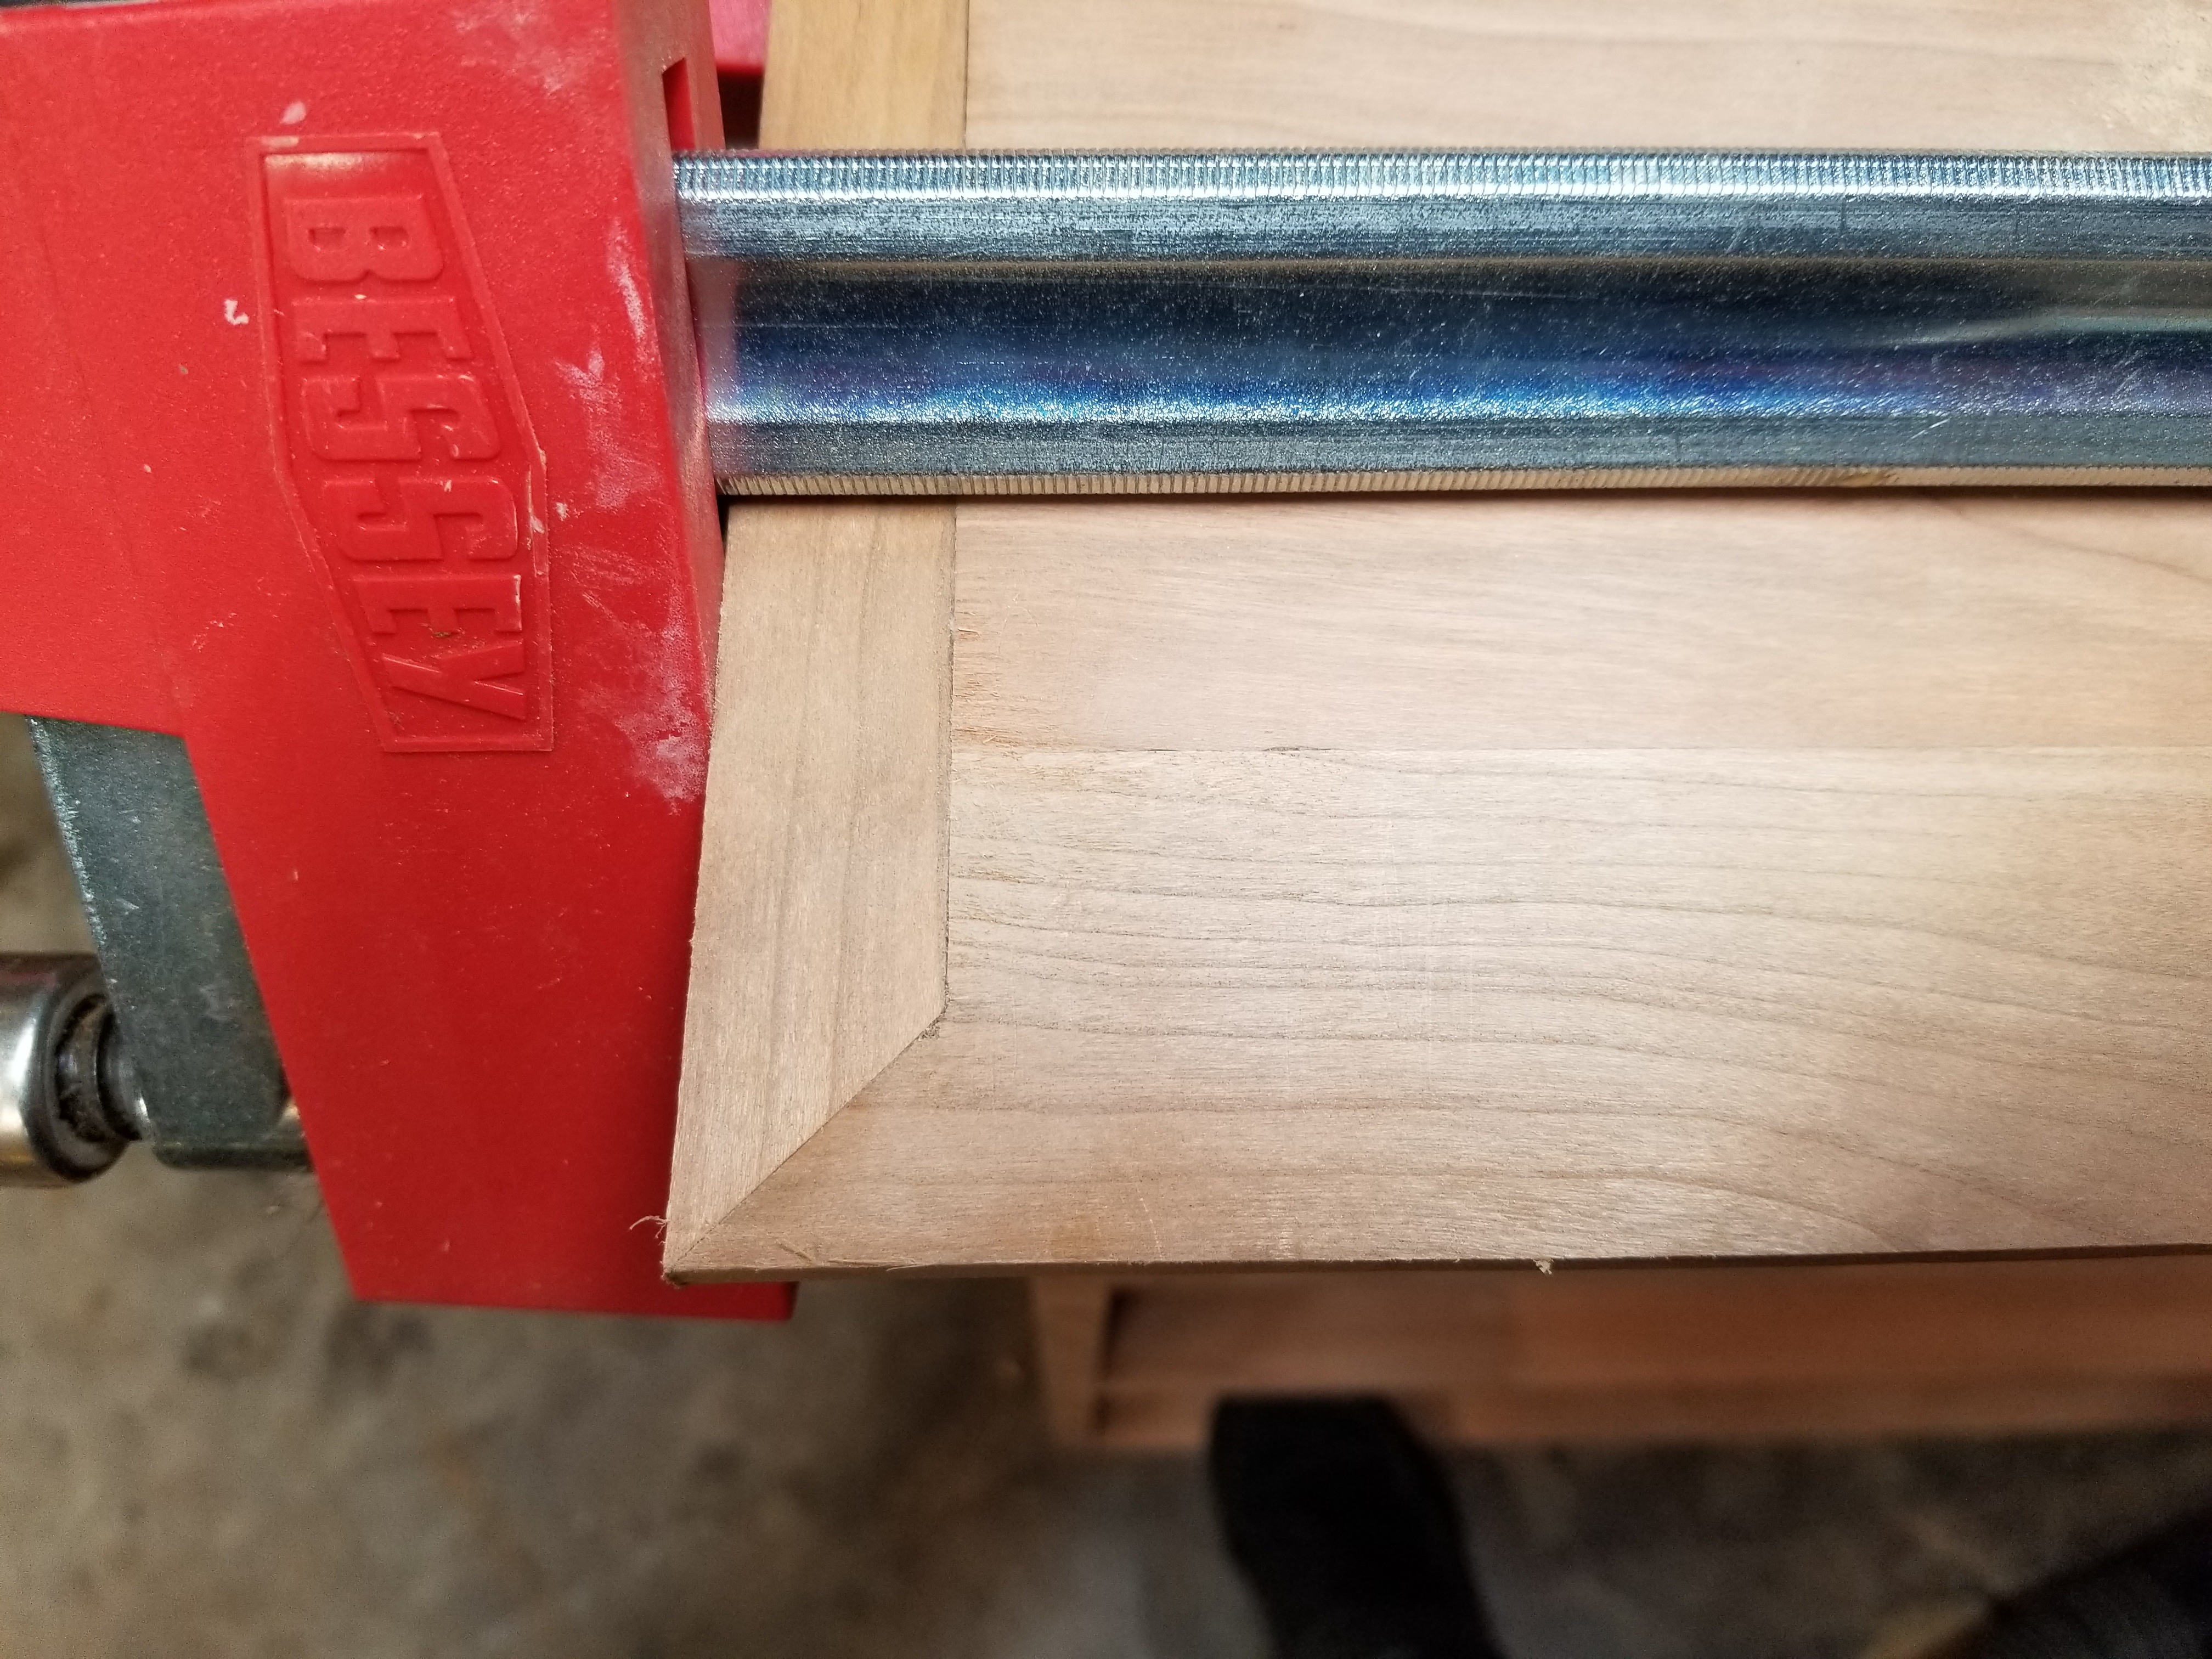
This is what the cork up looks like glued (the back of the mouldings are yet to be pinned in this picture - front 1/3rd glued and back 2/3rds pinned for movement since this isn't on ply. I know nothing about furniture but have learned that's what the hay cabinet shop does here in the states. good enough for me).

lFcCLcI.jpg


2omYkvm.jpg


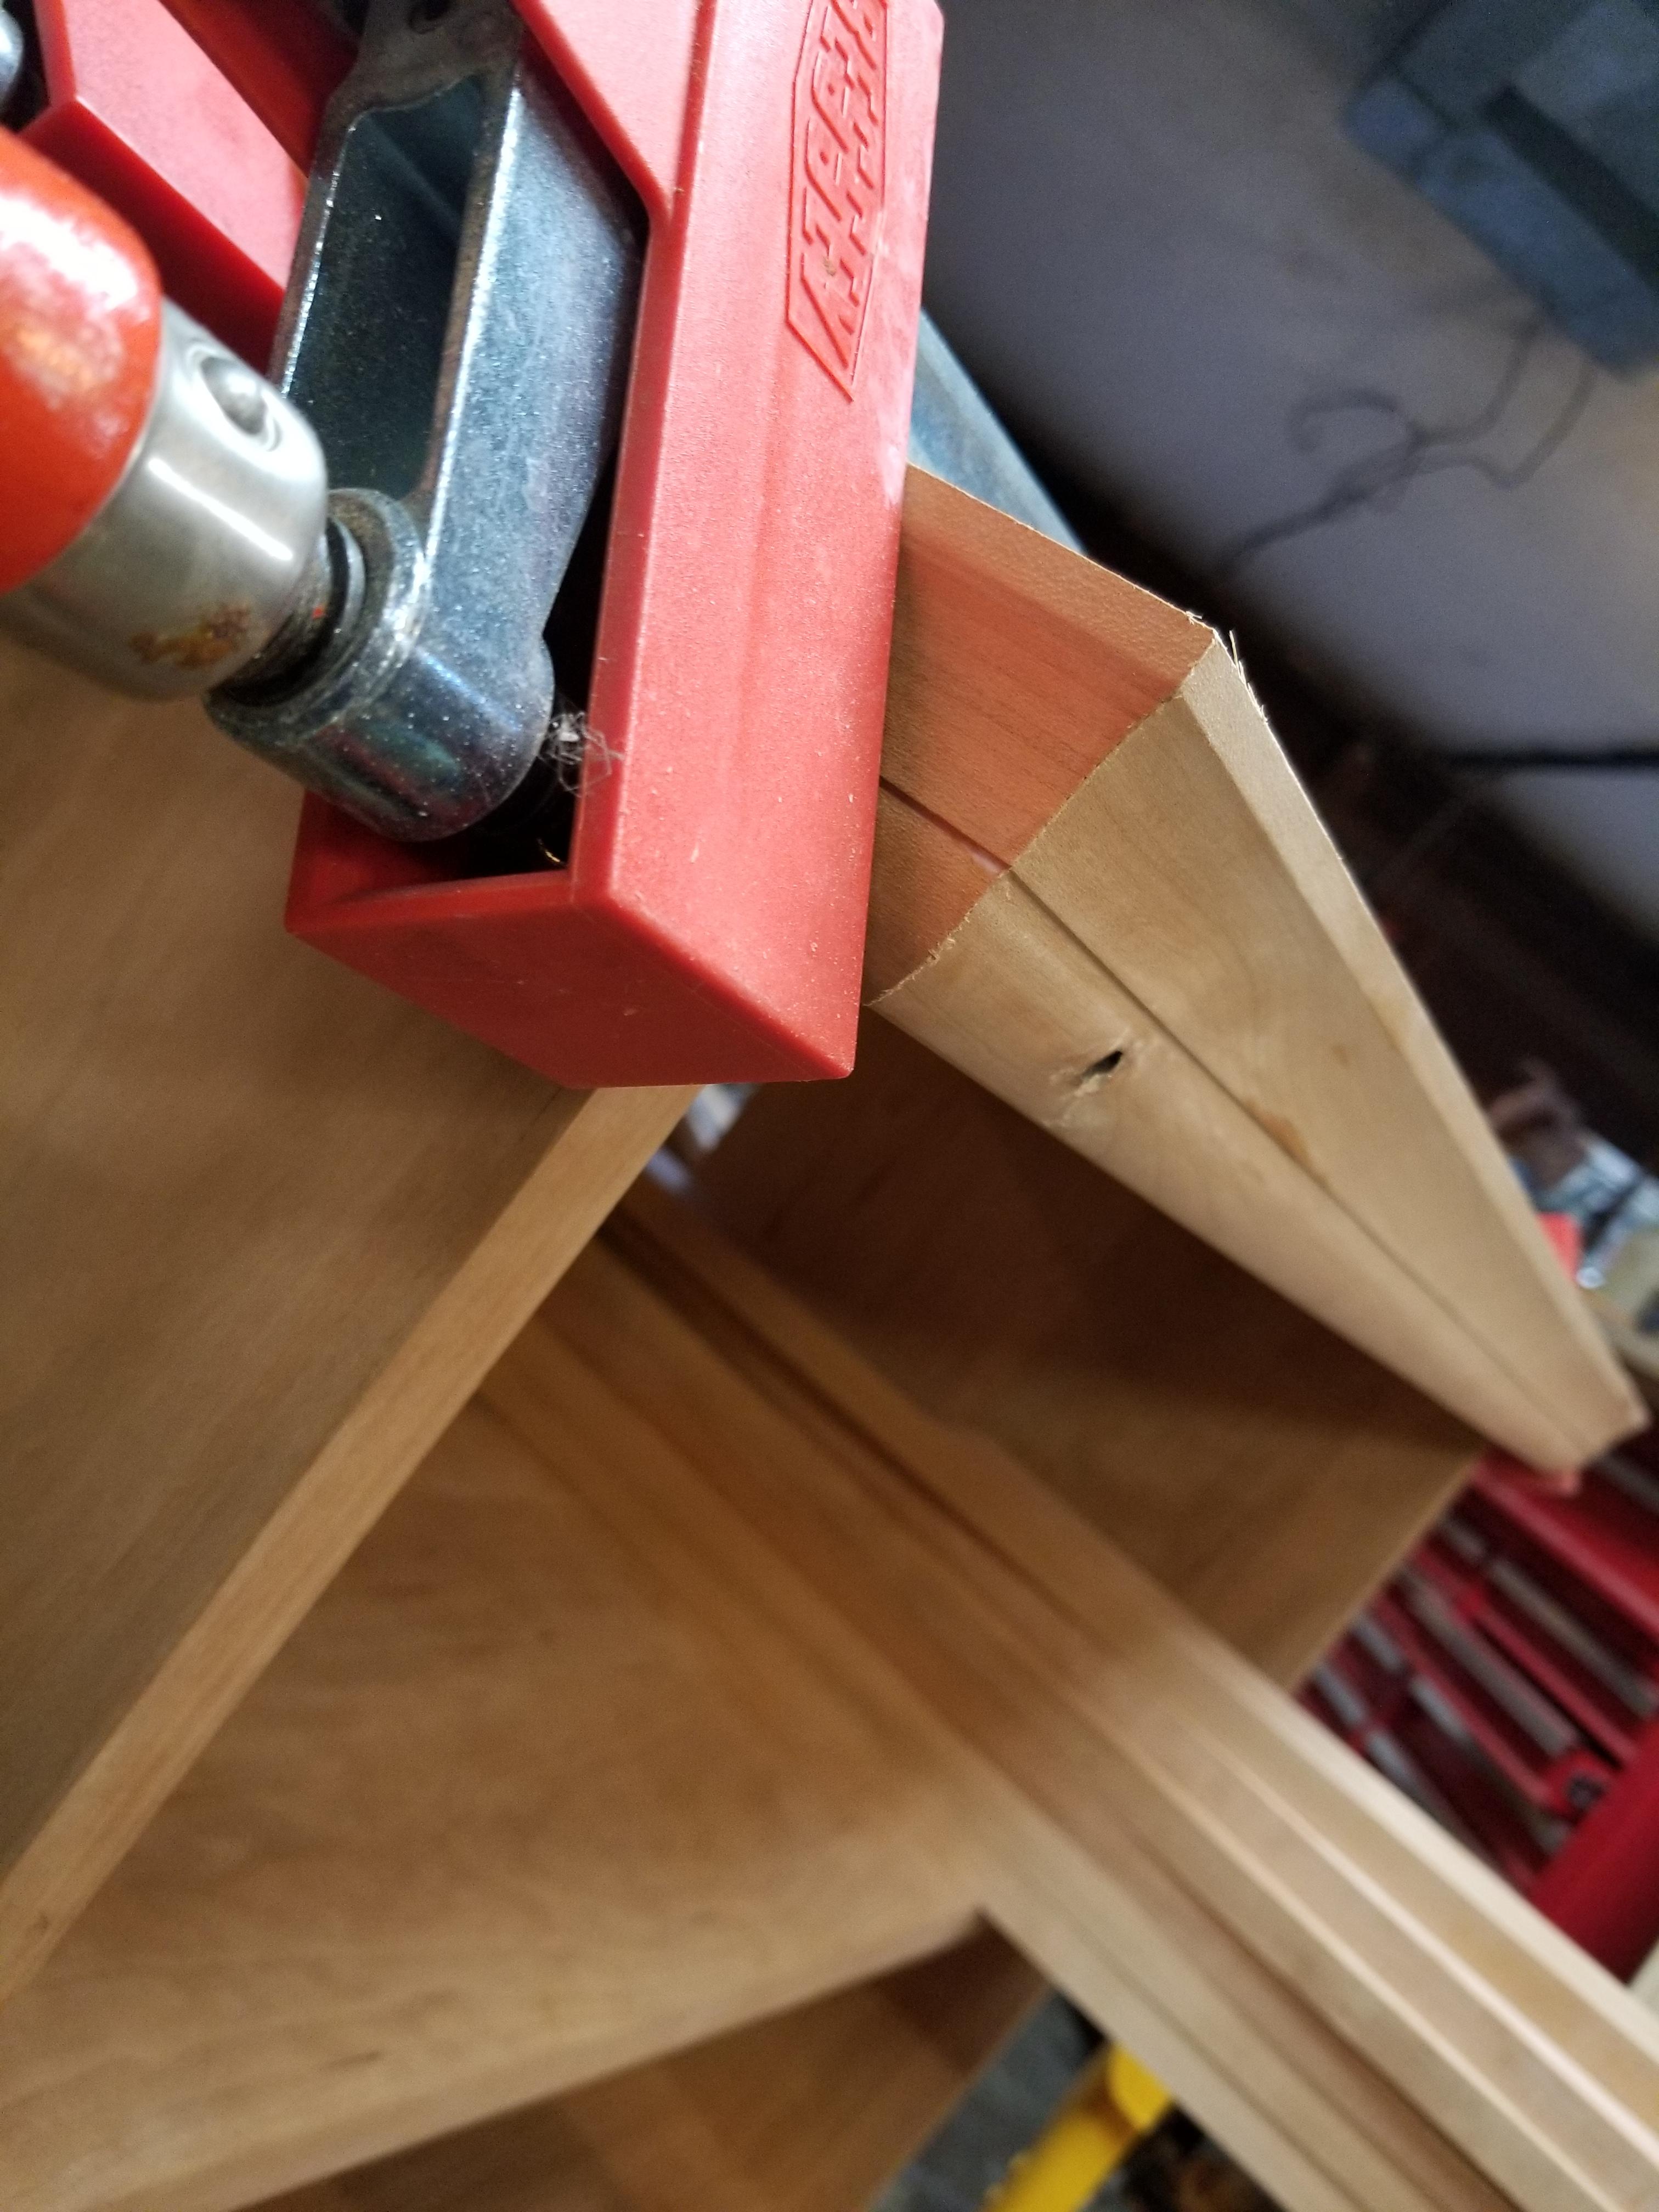
Loved finding that void in the moulding (no sign of it in the wood until cutting into it). The mouldings are plain enough and this cabinet will be dark enough that it doesn't matter. I'll just leave it as is or fill it afterwards.

I did this to the inside of the stock before fitting it by hand adjusting the border to get a tight fit.

pTR6AjQ.jpg


The perhaps not that interesting thing here is the method that I used to fit the miter tight (the fuzz will be sanded off of it once I'm nearly done and am sure I won't damage it and have to fix it again) is lots like what I did to get the large plane bottom flat (hollow out the center and then work on the border).
 
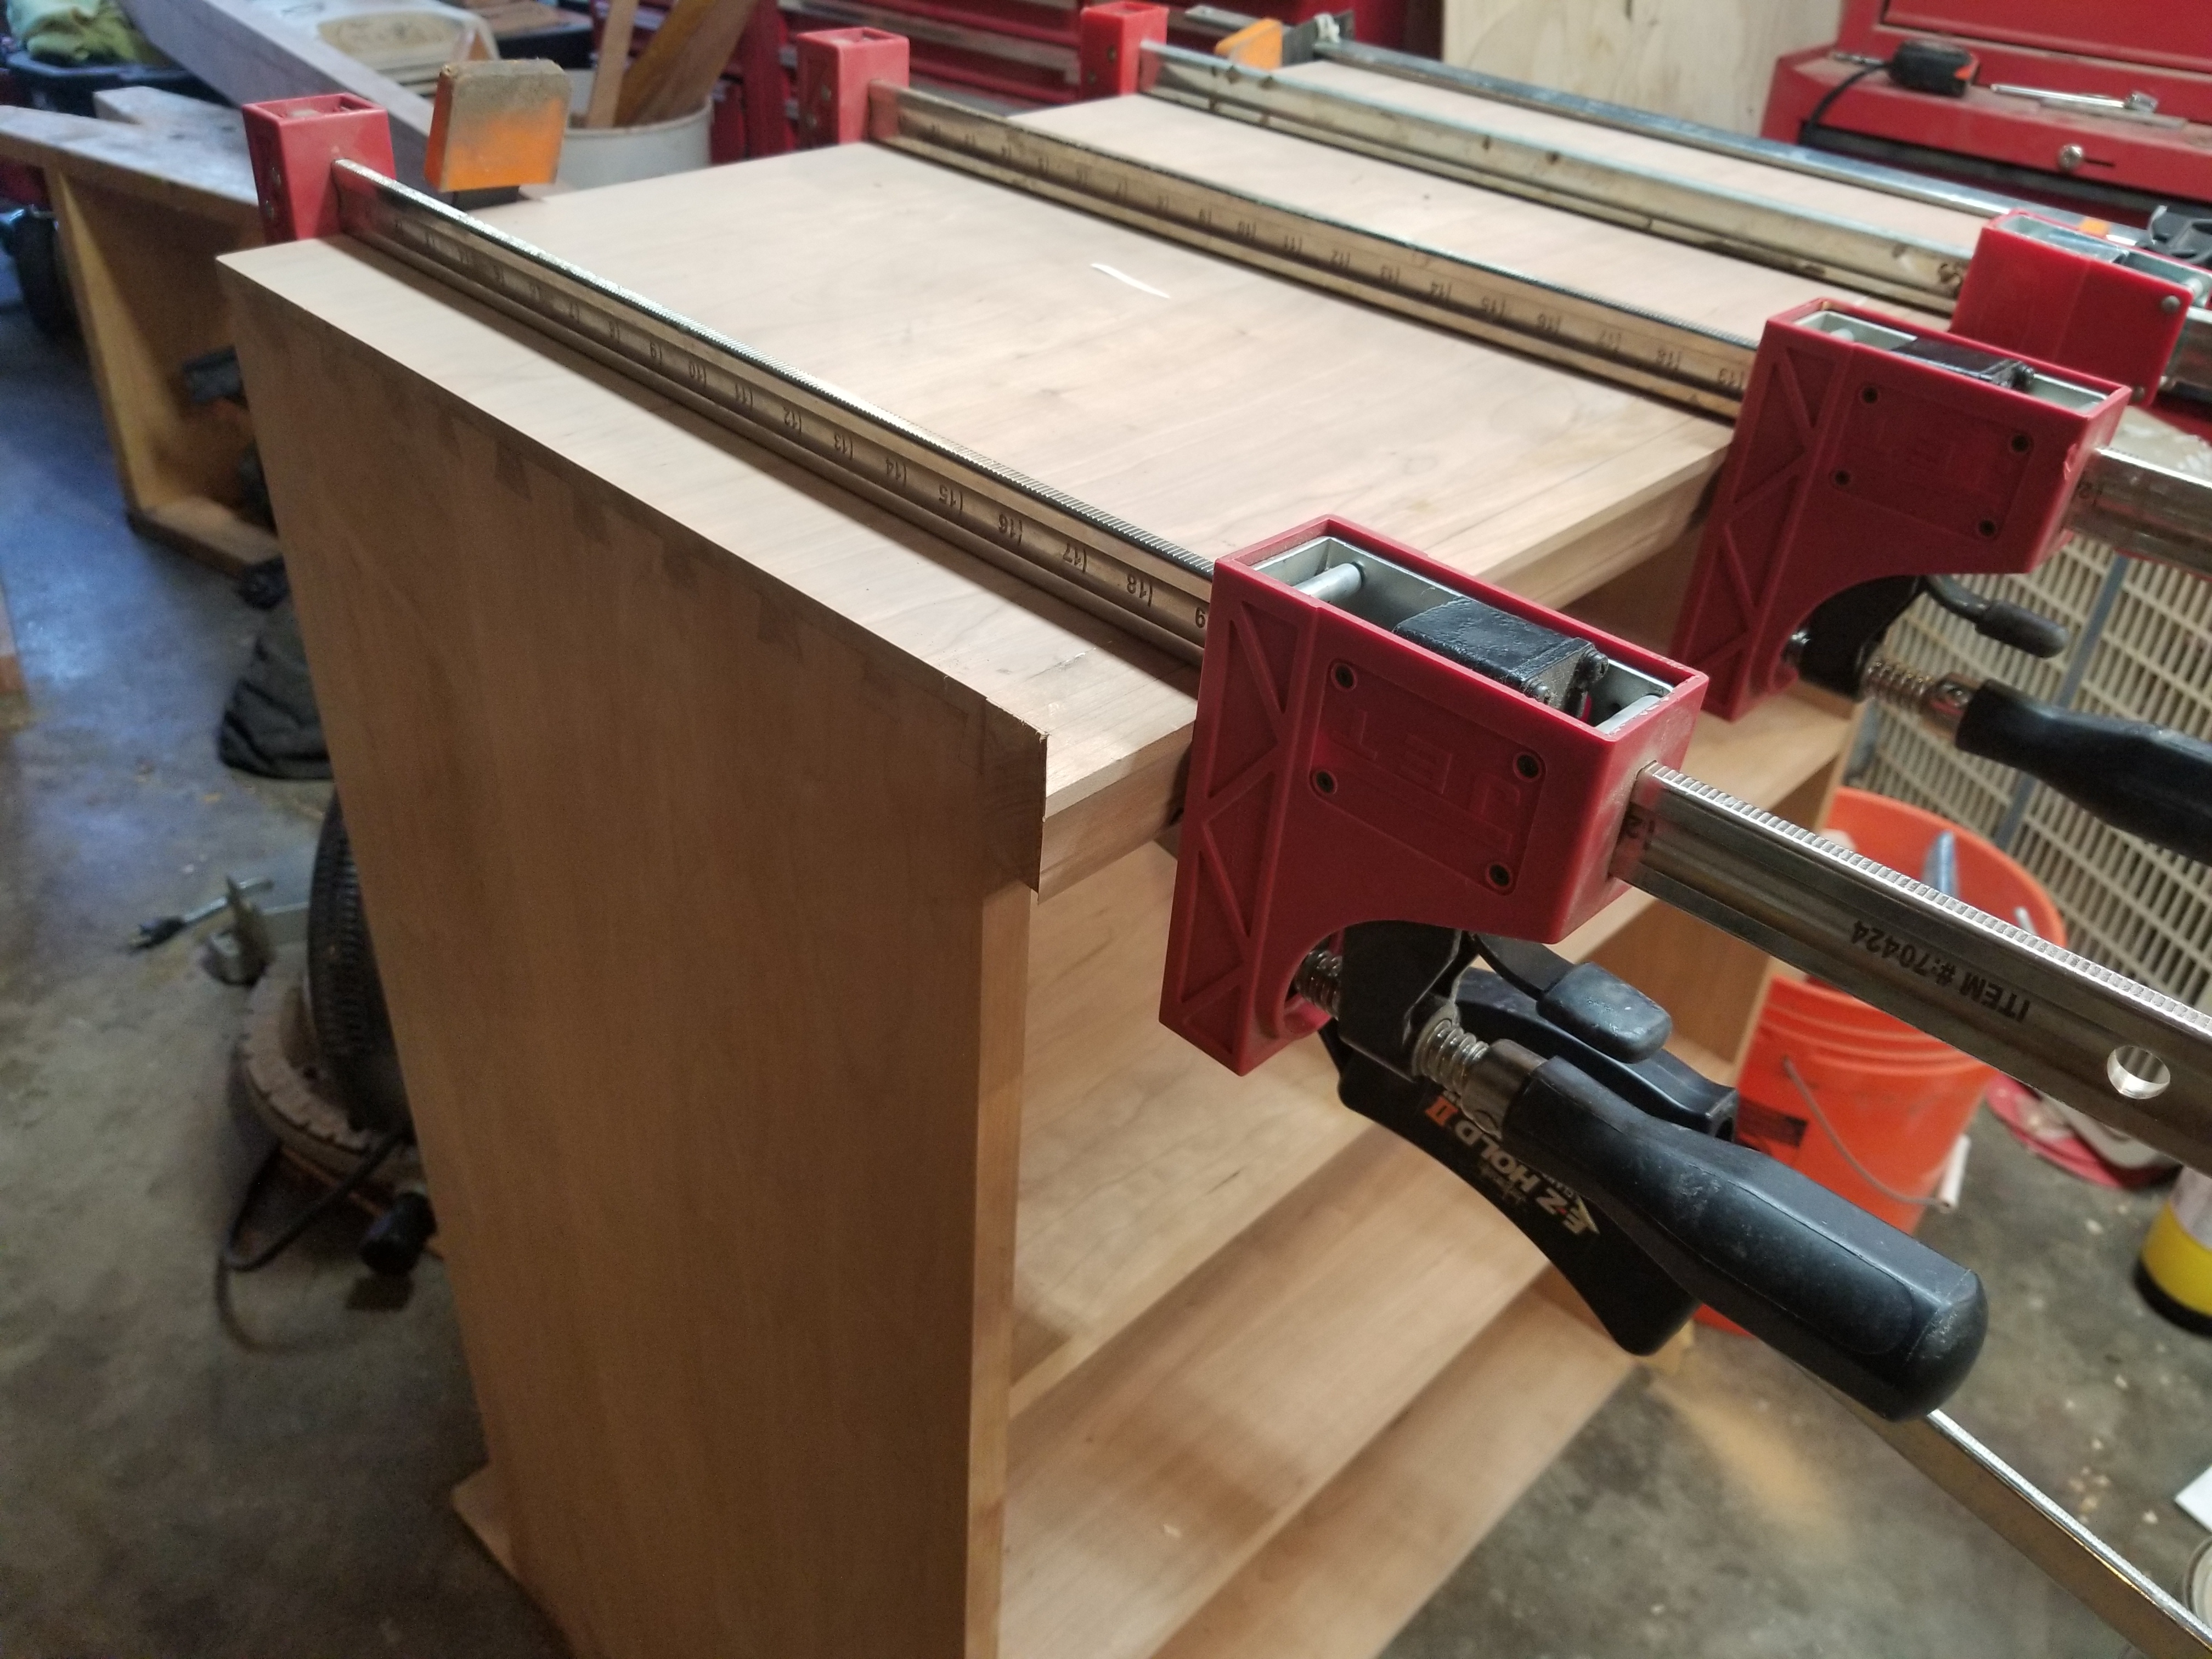
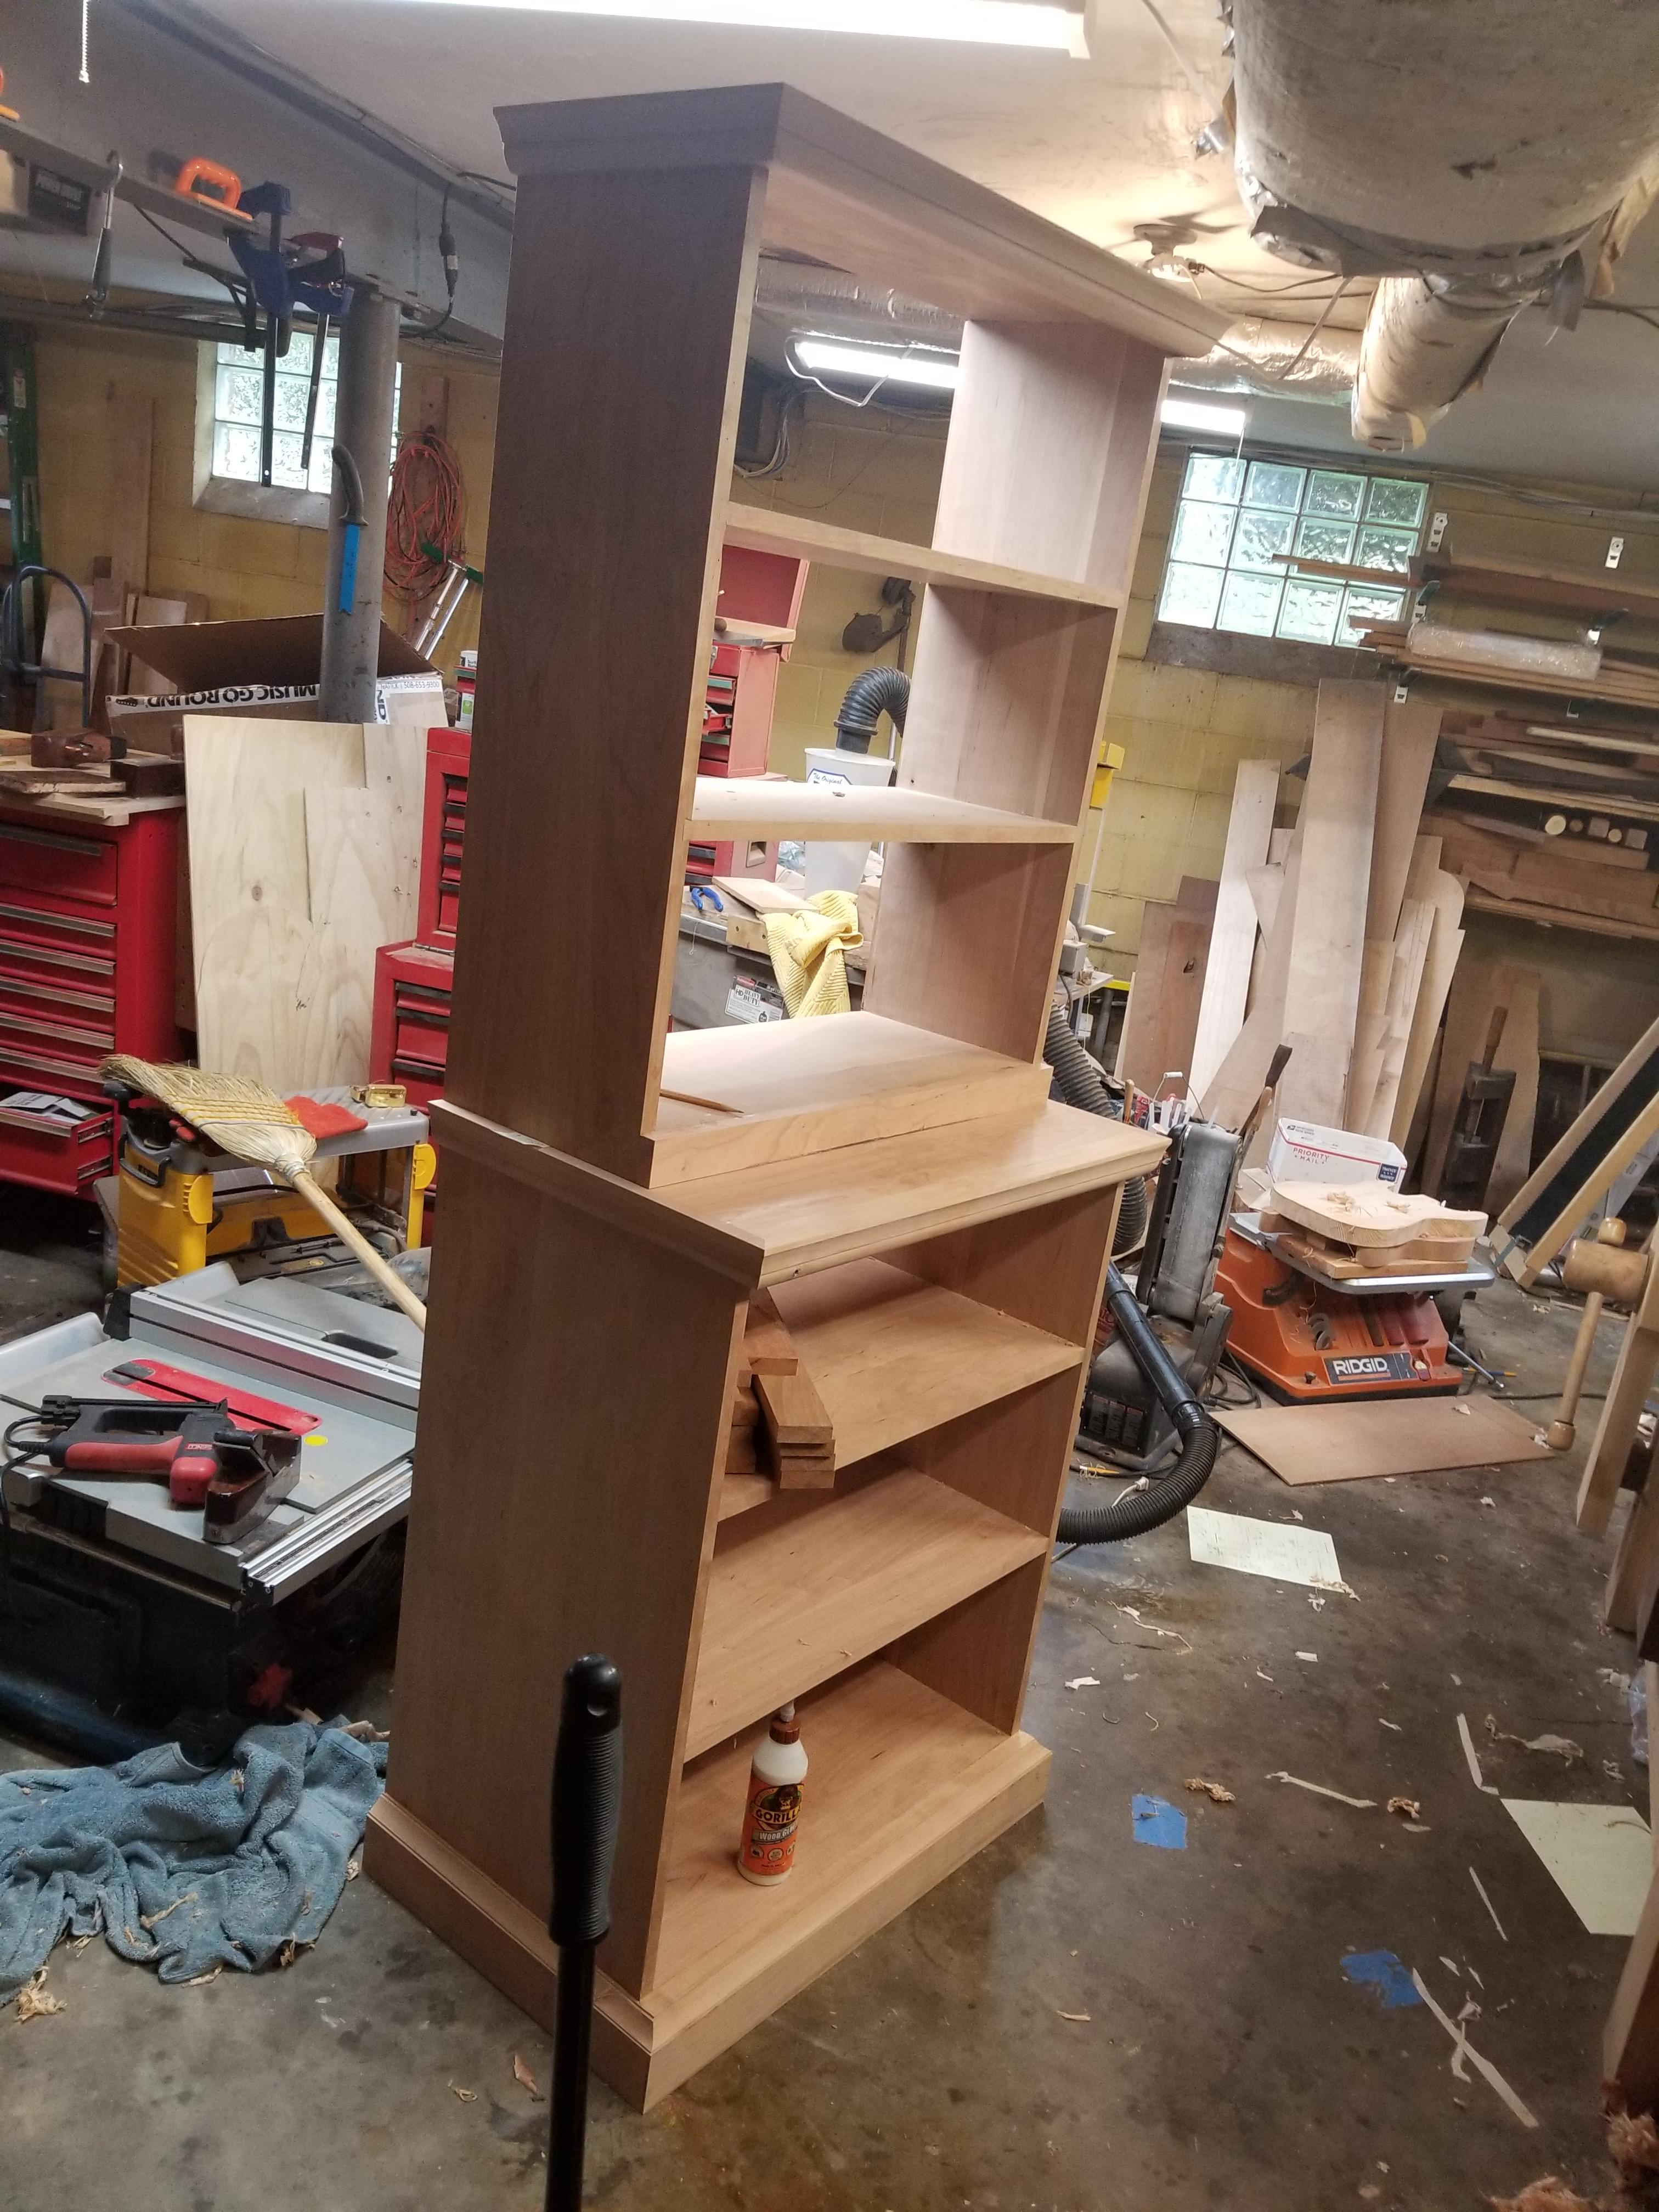
The case is beginning to look like a case. Just lucky that a clear piece of cherry shows a big defect on the moulding after cutting through, but I've wanted to try making beaumontage and have any number of ways on hand to address that void after the finish is applied.

ukUkLS2.jpg


My TS is on the floor behind this. I've used it once to cut garden stakes! As is my condition with disorganization, it doesn't make it back to the wall quickly (where it normally hangs).

I think the top case could be deeper, but the mrs. asked to have something the same dimensions as the RTA case that is currently in situ in our living room corner. I'm lobbying for this thing to be finished natural instead of stained so dark that the life is gone from it (it'll darken to caramel if it's just finished with shellac and then perhaps sprayed (maybe just shellac and no spray, though).

Doors next - the T*G back is already in pieces waiting to be nailed in, but not until it's taken upstairs. A little bit of tidying to do and it's clear that the bottom of the top case will need some kind of decoration around the bottom- something matching but not thick or protruding will be fine. I'll get to it. The mouldings are plain, but of course, they were cut by hand.
 
The perspective of the camera makes it look really funny. The top and the bottom parts are approximately the same height.
 
Looking at the bottom half, I see that your doors will be end-on, not between ends. Is that a personal preference or the normal choice over there?

Also, what's an RTA case? Someone hurt in a Road Traffic Accident?
 
AndyT":23ei7lj2 said:
Looking at the bottom half, I see that your doors will be end-on, not between ends. Is that a personal preference or the normal choice over there?

Also, what's an RTA case? Someone hurt in a Road Traffic Accident?

No, it's not normal. I wanted a frame front and inset or overlay doors, but the mrs has an RTA cabinet that she likes the layout of and she wants no frame or anything in the way and the doors mounted right on top of the sides like that.

It'll get blum soft close hinges - not meant to really be nice or look nice. This is a house of door slammers, too, so strong modern soft close hinges will probably save some trouble.
 
Thanks.
And I gave in and DDGd it.
RTA = Ready to assemble. What we in the UK call a flat pack. ;)
 
Sorry, forgot to address that!! Yes, if you order your cabinets mail order or get them IKEA, they're often called RTA here. flat pack is a good way to put it.
 
WideningGyre":2xf5nltk said:
But his work with bench planes is appallingly inadequate. :wink:

You missed a big opportunity on Knots a decade and a half ago. Or perhaps, you didn't.
 
Turns out you're right. I've refreshed my memory on how to tie a square knot, a slip knot, a bowline, a trucker's hitch, and even a surgeon's knot.

Thanks!
 
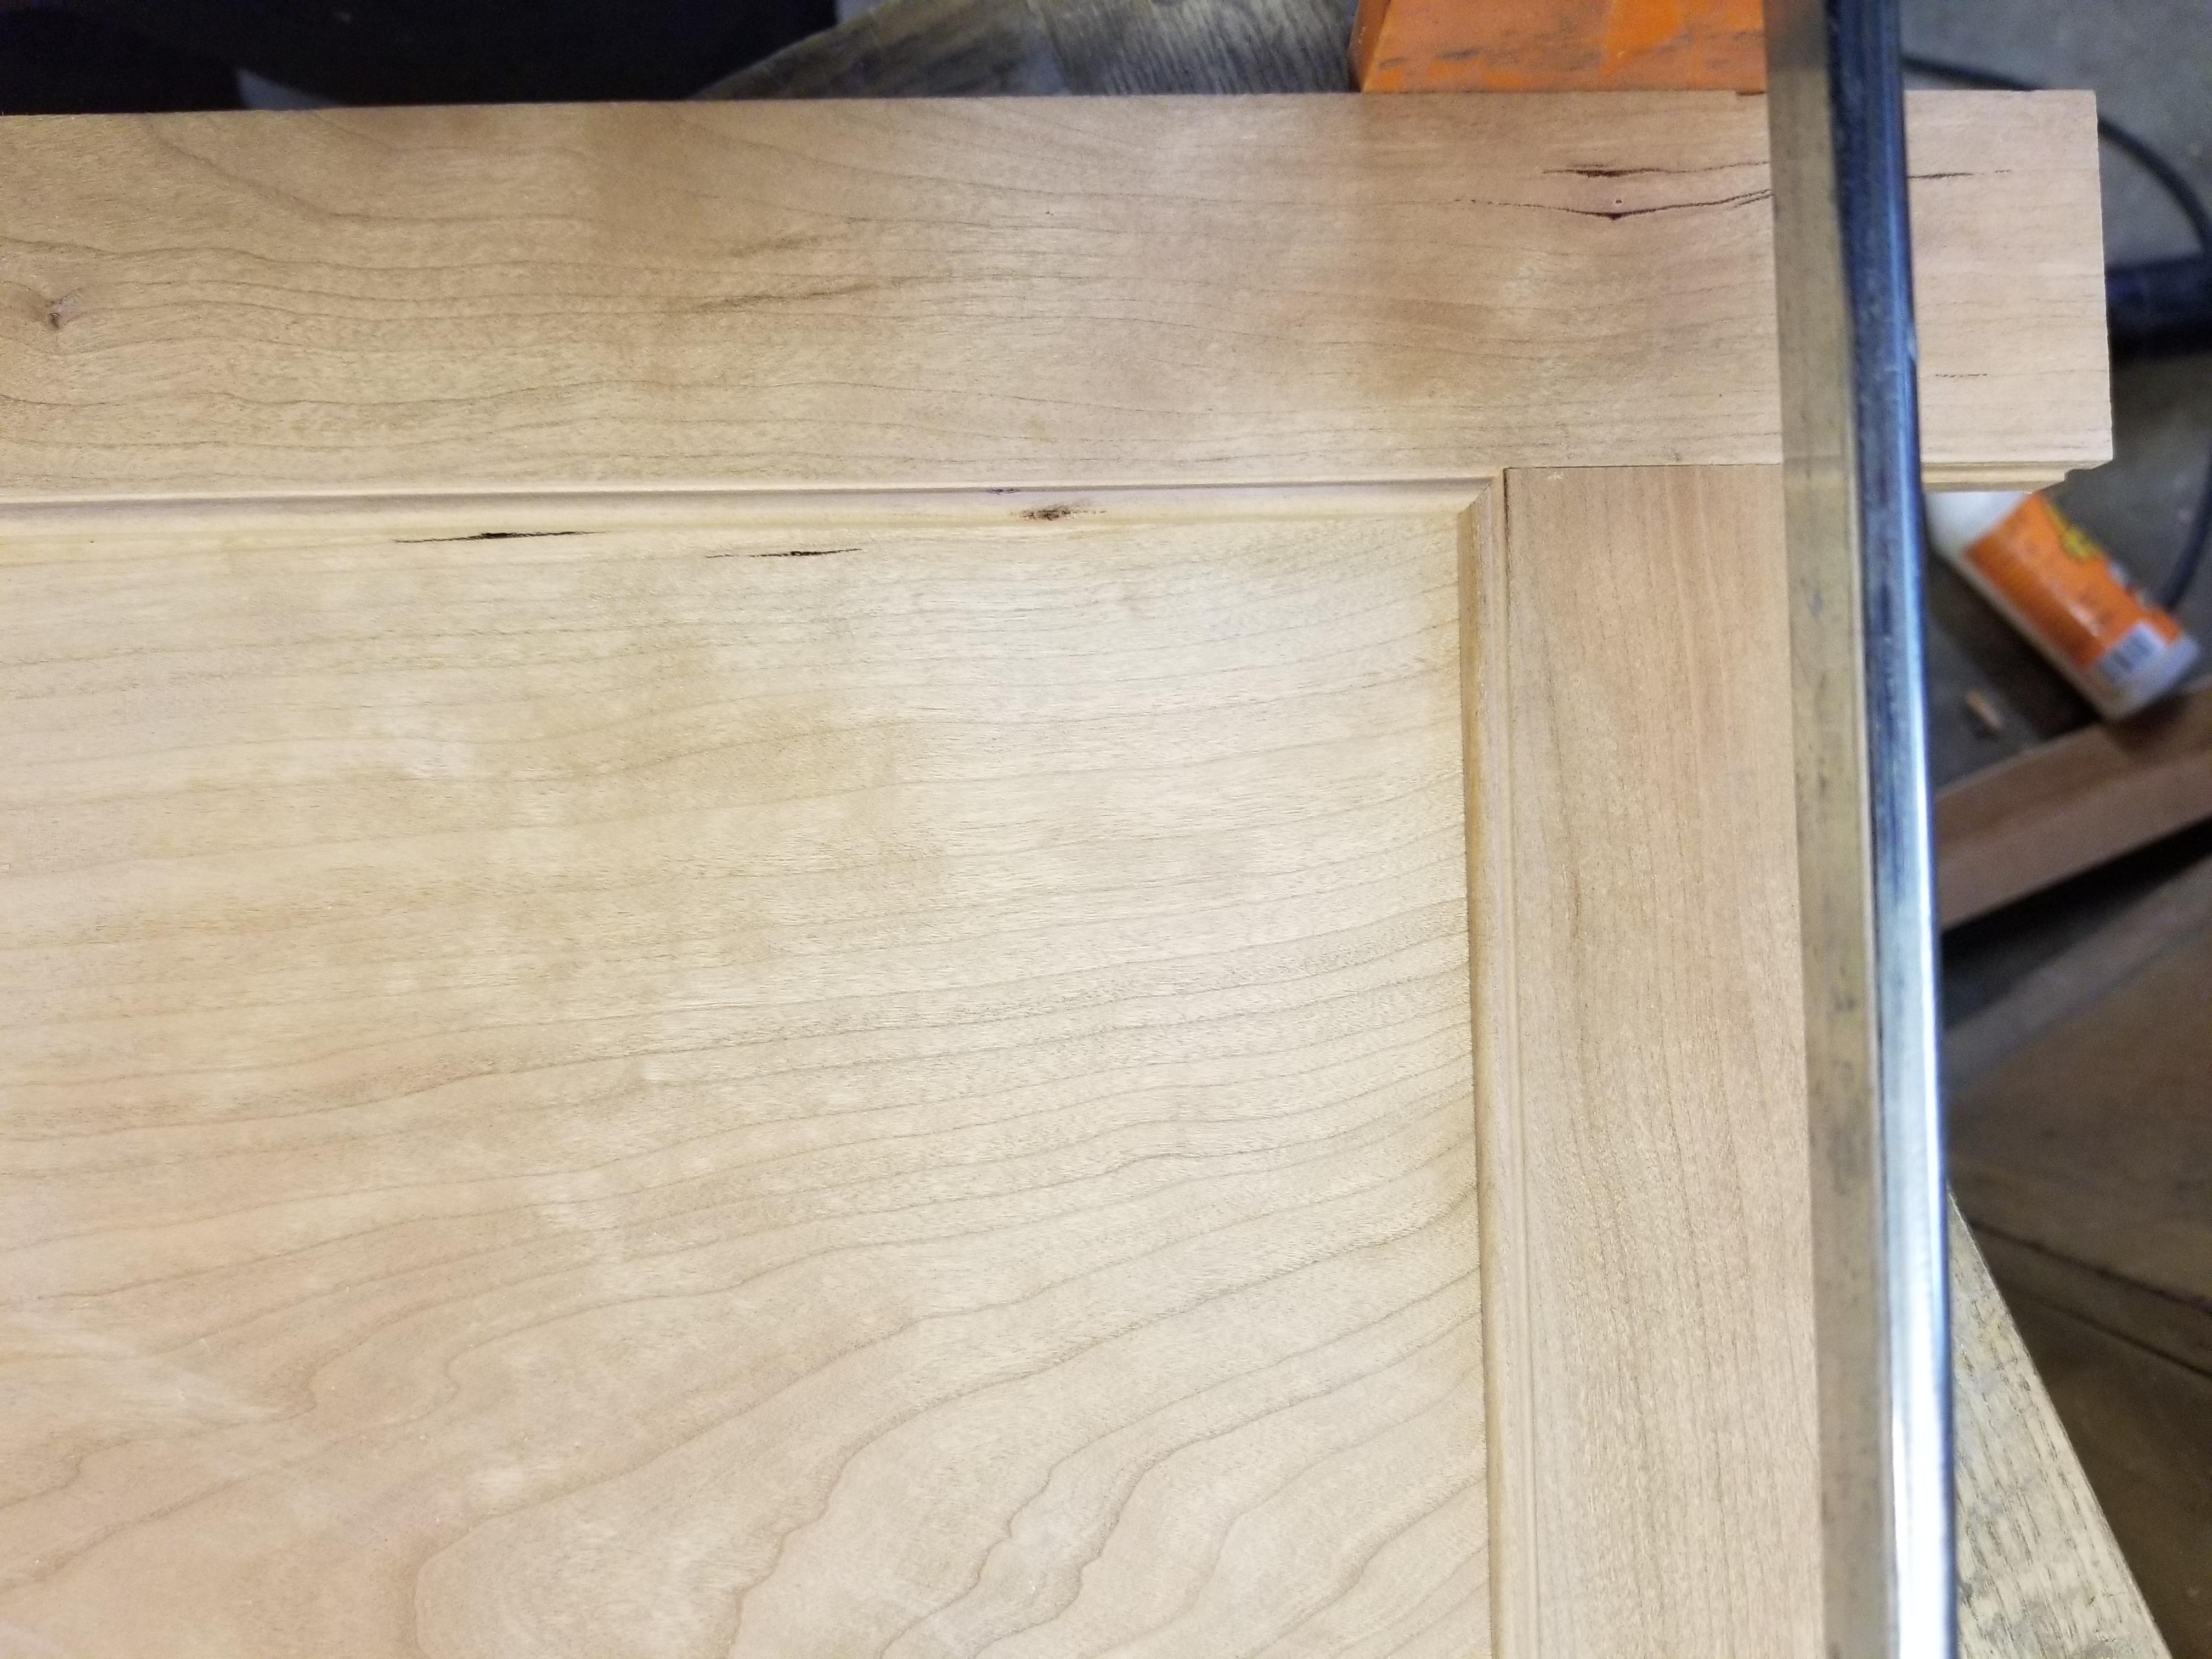
Bead aesthetic on the doors - these are flat panel, but I want to use a small bead instead of a cope. In order for things to not go wonky with the aesthetics, I've moved the groove in the door front of center on the rails and stiles. Else, you end up with a round bead and a straight line down to the door panel. straight lines and curves in a single element are not a good aesthetic.

https://i.imgur.com/K3t8P34.jpg

clamped together - I haven't decided on color and finish yet (wife hasn't decided on color - she wanted this to be stained dark, but I'm lobbying for natural at this point). The panel will need to be finished before assembly.

As I have a fascination with planes, I've figured out a novel way to sharpen the beading plane so that it will cut well coming and going on a board, and quickly. These could be done with a router, but I don't really use routers much on the few things I'd make of furniture and it really doesn't save any time here over a fixed fence grooving plane and a bead.

K3t8P34.jpg
 
WideningGyre":3n8en2qd said:
I'm sorry, what is Knots?

You're in some luck today -well, I doubt you'll consider yourself lucky.

Someone suggested I go find a video or a narrative from paul hamler re: something about scrapers, so I searched, and not surprisingly, knots archives pop up.

https://www.finewoodworking.com/forum/scraper-finish

Have a look at the question asked at the beginning of this thread and see what it turned into. This would've been relatively easy to answer in about four bullet points, but such a thing would be far too considerate.

Some of the handful on that place that repeated the same thing over and over on the site (despite claims of how much they had to just get on with it woodworking and "making a check") had a habit of setting up fake IDs all over the place claiming to live on different continents and have formal training somewhere that they didn't.

Usable advice wasn't common. recently registered IDs and snarky comments were.
 
Just about finished the coffee/side table from oak scraps I'm working on.

It's all hand tool work apart from the shoulder of the tenons for the breadboard ends, which I cut with the track saw.

It's not very complicated - just eight M&T joints plus some shaping of the aprons, tapering of the legs and the aforementioned breadboard ends (glued in the middle and held with drawbore pins). But I hope it will make a useful little table for some friend or family member. I just made it to practice really.

Link to a photo of the unfinished table below. To finish I may go BLO and then shellac. That will give me another chance to stop making tide marks with shellac.

I can't seem to get the photo to appear in the post despite following the how-to link to google photos guide.

AF1QipOpOCl29QkqKwd1jTxEmAL43RBiQiF7197eGG4I
 

Latest posts

Back
Top