FINISHED - Multi-function workbench WIP

UKworkshop.co.uk

Help Support UKworkshop.co.uk:

This site may earn a commission from merchant affiliate links, including eBay, Amazon, and others.
The problem is quite simply the lack of volume in the room with such low ceilings. It just seems that the atmosphere is somehow constantly dusty. I hope to cure the problem with a permanently plumbed in extractor system which will run to every machine + possibly a workshop air filter.
Space is a problem but I've become very creative !

Progress on the bench has been rather slow the past week or so due to other commitments, but I have managed to sort out the centre bench top mounting using rare-earth magnets and I've finished the front vise jaw in beech. No pictures though.
Am currently waiting on an order of t-track from Rockler to mount the SCMS with, as mentioned earlier.
In the meantime I've started on the cupboards and drawers and will post further pictures in a coulple of days when I've had some progress that's worth sharing.

Mark
 
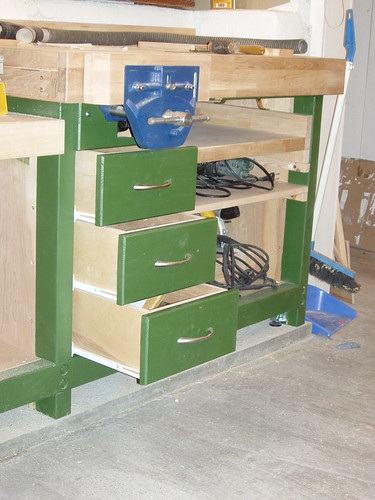
Here are the drawers, made from 12 & 6mm ply with fronts made from offcuts of 18mm timbrboard.
The vise front jaw is beech and is attached with 2 coach bolts from the inside with domed nuts on the outside.
4029648419_daee2d9bdb.jpg


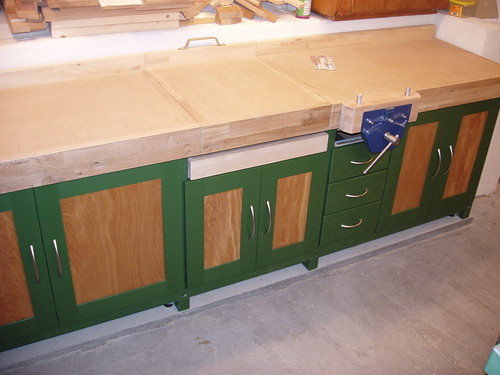
Doors are from more 18mm timberboard offcuts with centre panels from 6mm ply finished with melamine lacquer.
All the handles came from Ikea :oops:
4030404688_be6d04b718.jpg


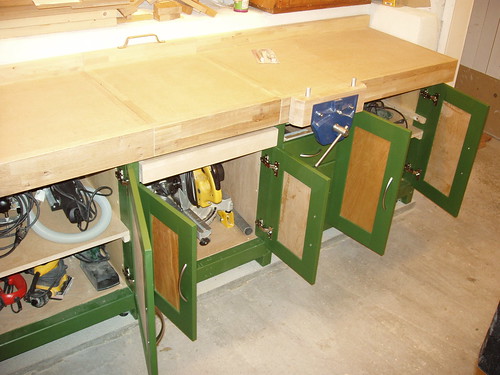
The cupboards contain all my power tools, my compressor (in the far left cupboard not shown in the picture) and the SCMS. The right hand cupboard should also have been able to contain the middle bench section, and I sized it accordingly, but I forgot about the door hinges being in the way ! :roll: :evil:
You can see how it should have been in the close up picture of the drawers.
4029650963_0db2dbd7ea.jpg


I've started on the bench-dog holes and finished two in the vise but I'm a bit unsure as to the best spacing both across the bench and lengthwise. I've marked out with 160mm between each along the front, 80mm in.
Can anyone help me here ?
Is there a standard/norm ?

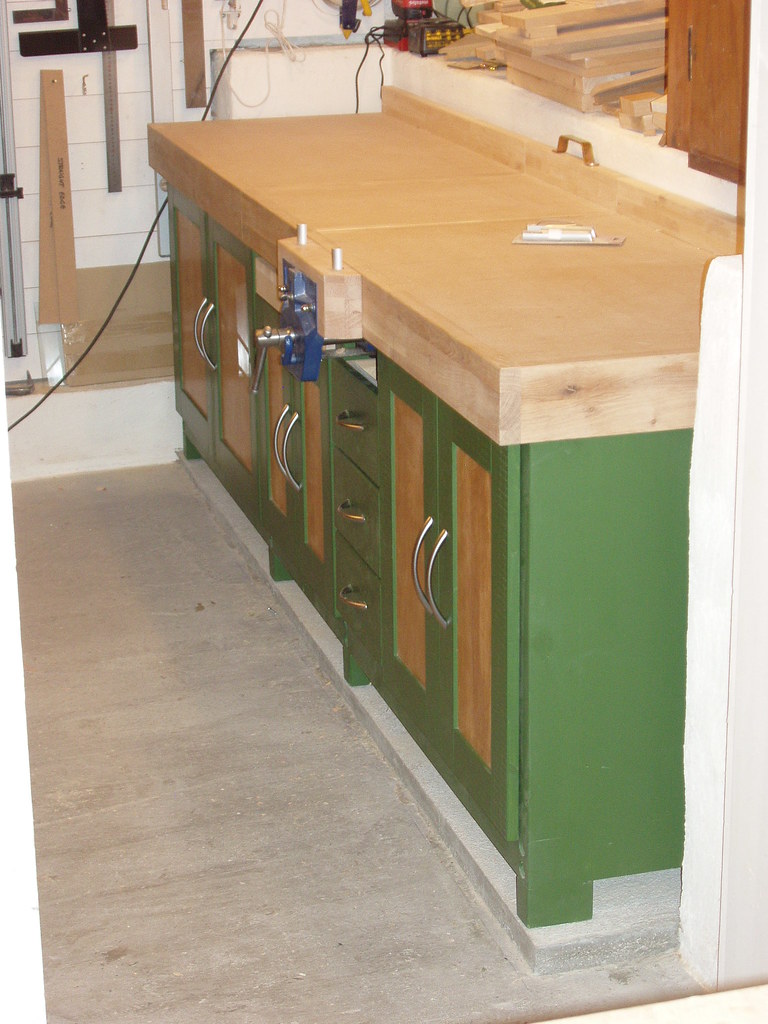
And here's the whole bench as of today. The Rockler t-track has arrived so the next job after the dog holes will be the SCMS mounting arrangement.

Thanks for watching !
Mark
4029652069_3d41ba2d66_b.jpg
 
Very nice Mark!

Seems to be absolute maximum workbench to available space- ratio!
 
Nice looking workshop, what are your carpentry intentions for the future?

If they are are to the standard of your workshop construction they will surely be excellent as well.
 
Excellent Mark, lovely job.

Ref the Dogs, I spent a lot of Google time trying to work out the spacing for mine. Everyone thinks differently, there is no standard, although they are often similar. So I then just sat down with a piece of paper and drew it out.

In my case they were defined by use of a Wonderdog and lamination spacing. Mine are 105mm in from the front edge - works well for me. Spaced 100mm for the Wonderdog. Adequate, means a lot of winding of the Wonderdog thread and not too much hole drilling. I often use packing pieces with the Wonderdog anyway, so not a major issue. For those behind the front vice, although it has a 225mm stroke, I kept it down to 120mm spacing - suited the laminations. Due to the number of laminations, front to back, I actually have one odd spacing of 80mm for the first dog. This works out well with the crossover of the two rows of dogs and provides a closer pair of dogs for lateral workholding. I also have one odd one in the middle at the rear, as it seemed right for me. You can always add other "odd" hole as required while you are working :)

Good luck.

Boz
 
First future project is another bench at the other end of the room !!! Desperately need something to put my new Rexon drill press on (you can glimpse it standing on the floor in one of the earlier pictures)

I'm also working on a design for a dust-cyclone which I really want up and running before I start on anything major.

The first planned proper project is a TV/media cabinet in birch. Maybe sometime after Christmas if I'm lucky :shock:
 
Great Boz, thanks, that's exactly what I wanted to know. :D
I'm planning on wonder-dogs but havn't bought them yet and it was the suitable spacing for them I was worried about.
From your picture it looks like you've only one set of holes behind the front vise although, like me, you've put 2 holes in the front jaw. Why's that ? I was planning 2 rows to match those in the vise jaw but maybe that's unnecessary ?

Thanks for your help
Mark
 
Glad it was useful Mark :) The jaw isn't shown in my photo - there are 4 rebated holes for mounting the vice, then the single rows of dog holes. The vice is a metal quick release one with a single central (metal to be replaced by beech) dog. Hence the single row of dog-holes.

100mm is the absolute maximum jaw motion for the Wonderdog. You may want to make the dog hole spacing it less, I've seen people suggesting 70 - 80mm, but if you're using packing pieces anyway....

Boz
 
OK I understand. I have a similar vise but the central metal dog became useless after I mounted a wooden jaw over the front, hence the 2 new dog holes. I'll need 2 rows of holes then, 120mm spacing.

I think I'll go for the 100mm spacing along the bench to cut down the number of holes I'll need to drill ! Obviously the 160mm spacing I'd planned is too much for wonder dogs.

I'll check the distance in from the edge again this eveing but my initial plan of 80mm was to get the holes over the support frame under the bench instead of having holes just straight through the MDF top (38mm thick).

Mark
 
OK Mark. The 105mm inset of my front dogs was chosen to (just) clear the legs. I think most people end up fitting the dogs in to suit the bench construction, as well as for usability. It all comes down to finding a satisfactory compromise.

I'd decided to not fully cover the top of the metal vice moving jaw so I've still got room for the integral dog to poke up.

I fully agree on minimising the number of dog holes to drill - I spread mine over 2 days :shock:. And only now have I worked out a better way of drilling vertically :evil:.

Boz
 
Hi Mark,

I have four rows of dog holes on my bench

Workbench1.jpg


I find these very useful for holding all sorts of odd shapes, particularly in conjunction with the Veritas bench dogs

Tabletop1.jpg


Competition19.jpg


But if you are a bit undecided, you can always drill more holes later.

Cheers :wink:

Paul
 
Paul - :shock: :shock: So many holes to drill !

Boz - I know what you mean. It took me about 1/2 an hour per hole in the vise jaw and that was with a brand new Wealden forstner bit specially imported for the job ! I should probably have used one of these http://www.axminster.co.uk/product-Axminster-Sawtooth-Cutters-22801.htm but done is done and paying Axi's postage to Norway for one drill bit is not an option :wink:
Wealden took £1.50 :D

Mark
 
Krysstel":1hvaw3zu said:
Paul - :shock: :shock: So many holes to drill !

Yes, but I'd do the same again - they are so useful. I found that it didn't take long. I used a spade bit in my drill, mounted in a drill stand, with the head swung round so that I could place the drill stand on the bench top. My dog holes are 5 1/2" between centres and the rows are 4" apart.

Cheers :wink:

Paul
 
Measured end to end motion on my Wonderdog is 115mm, but the tommy bar won't flip over at the limit, so 100mm is a "comfortable" range to work with.

If you have a guide, excellent, far simpler :). I used a sawtooth cutter (Forstner with teeth) as it worked best in beech when I was trying to decide which bit to use. I find all these big bits are better in some applications than in others, so need testing first.

Boz
 
I based the spacing on how far my end vice opens, as I use the dog holes in conjunction with the end vice mainly. I made the spacing a bit less than the vice opening.

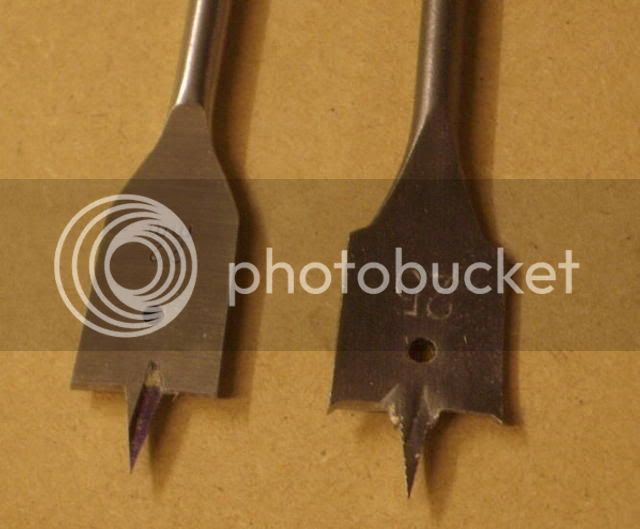
There are two types of spade bits. The ones with spurs, like the right-hand one in this picture, work best and cut a cleaner hole

Spadebit1.jpg


Some of them have a threaded point - I always file this off and make it into a plain point. I find the threaded points quite dangerous as they pull the bit into the wood, whick is OK with a hand brace but not a power drill :shock:

Hope this helps.

Cheers :wink:

Paul
 
Helps a lot, thanks.
I actually ordered the forstner bit without even trying a spade first as I assumed it would just chew up the bench surface on entry. Perhaps a bit stupid of me as I should of course have tried first on a bit of scrap :roll:
The forstner I've tried is one of these :-
http://www.wealdentool.com/acatalog/Online_Catalogue_Forstner_Bit_303.html

In the beech front jaw it took ages even with a shop-vac sucking away the waste at the same time. :shock:

Mark
 
Mark, for what it's worth now, I used a Wood Beaver bit. It's very similar to auger. It cuts with lightening speed and leaves a clean hole as it breaks through the underside! I put three rows of holes in to my 'bench top and there's still loads of life left in the bit. Didn't take too long either. 8)
 
For my Dog holes I use a 19mm Auger bit in a cordless drill. Works brilliantly.

I must get around to drilling more. I didn't do anywhere near enough.
 
I've recently been drilling batches of 25 16mm holes through 2 to 3 inch pieces of oak using spade bits and I would highly recommend drilling an 8mm pilot hole first. The first batch without a pilot hole took me 3 to 4 hours, with a pilot hole I could get the lot done in an hour. This was with a cordless drill. The bits with spurs are much more effective and leave a cleaner entry hole. I find that spade bits can cause a lot of breakout on exit though even with spurs.
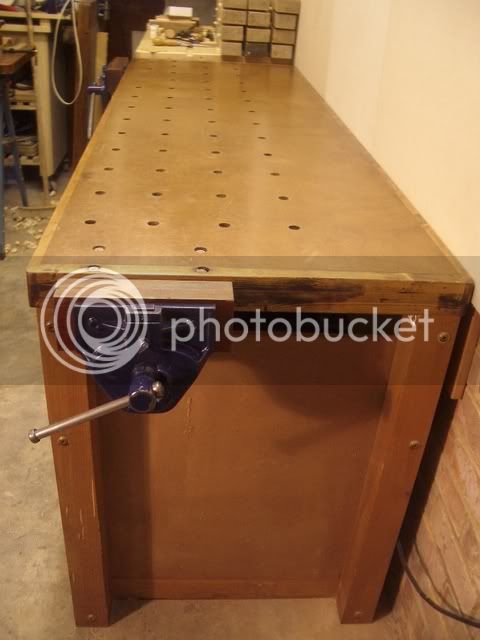
The most annoying problem I have is the bit pushing though suddenly on exit and jamming, setting the drill to the highest torque limit helps to stop it from ripping my arm off when that happens. If I was drilling in a more comfortable position, as oppposed to upside down under the floor, that probably wouldn't be such a problem :)
 
Back
Top