External Folding Sliding (Bifold) Doors - loads of WIP pics

UKworkshop.co.uk

Help Support UKworkshop.co.uk:

This site may earn a commission from merchant affiliate links, including eBay, Amazon, and others.

RogerM

Established Member
Joined
4 Mar 2006
Messages
1,280
Reaction score
35
Location
Devon
After lots of requests for help, here and elsewhere, on the practicalities of making my own external bifold doors I finally made a decision to go for it last autumn. This was primarily after having a quote for £9500 for 2 sets of 3 bifold doors, supply only. The ones in the showroom were admittedly very nice - but £9,500? Plus fitting? Then I went to see some that had been made locally in a neighbours house. When I looked at them I was not impressed and thought that I could do better. The decider came when he said that he had been having problems with them and when I suggested that he call the manufacturers back in under guarantee he told me that it was worthless as they had ceased trading within weeks of the installation.

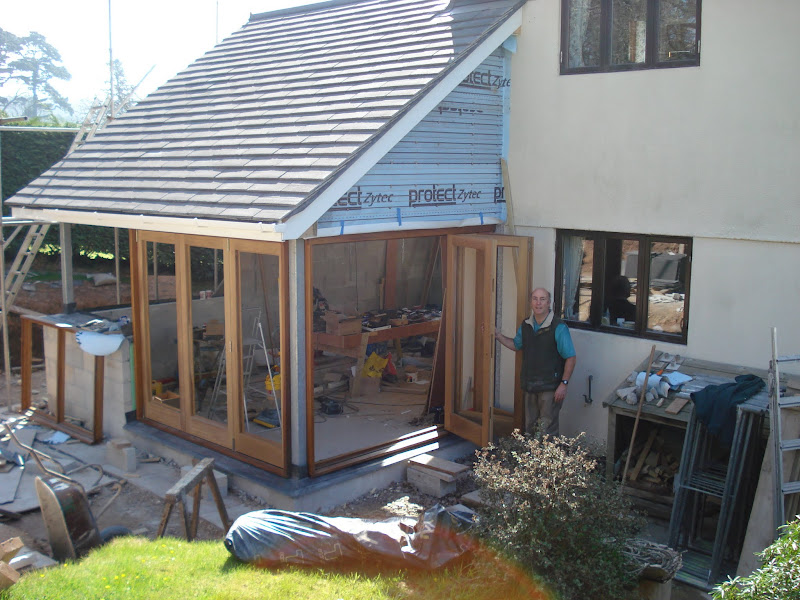
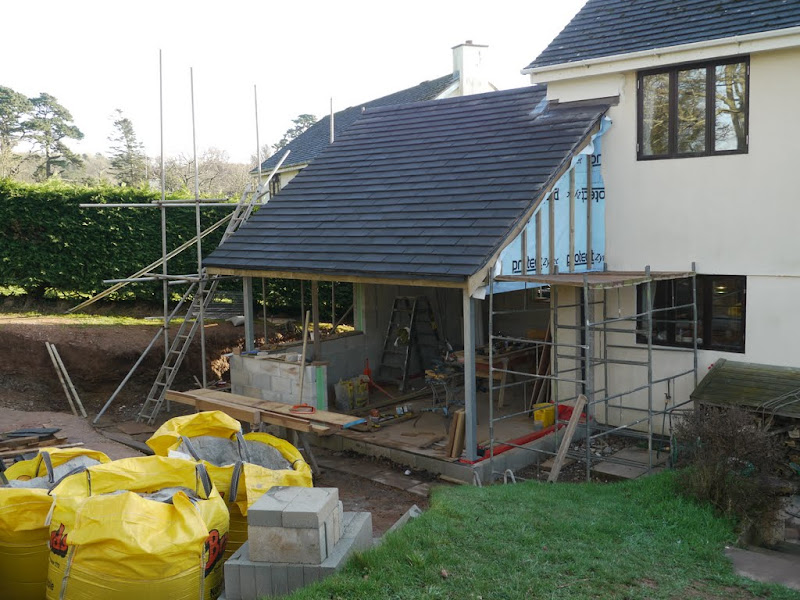
I had already shown an interest in the laminated approach to door making as described by Keith Smith, and had a practice making a new back door, as shown in this post. This seemed to be pretty painless so became the basis for my bifold door build to fit in the space shown in our new kitchen extension.
P1030664.JPG


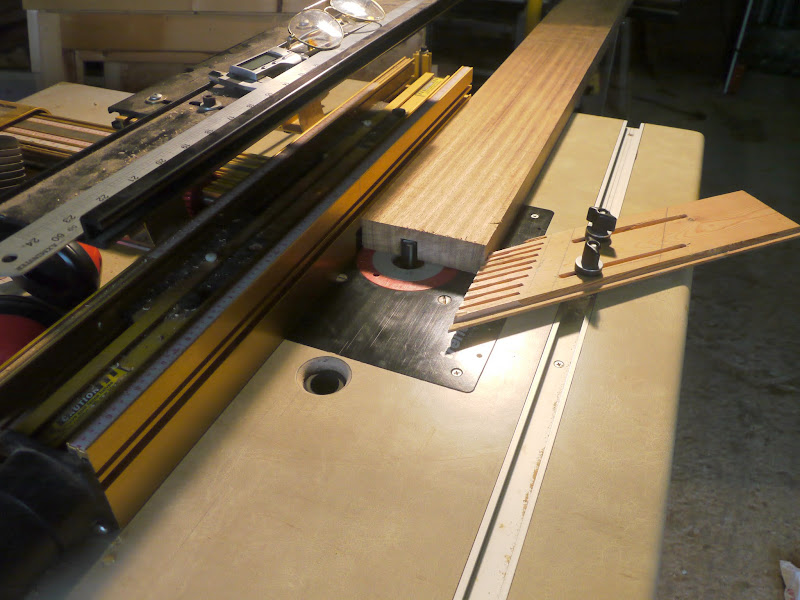
I started with the frame. These are big chunks of iroko and were not easy to manage on my 8” table saw, so I invested in a Festool TS55 track saw. Brilliant piece of kit, although strictly speaking the TS75 would have been better for ripping 50mm iroko. I started with the threshold into which a groove has to be cut for the base track, using the router table.
P1030596.JPG


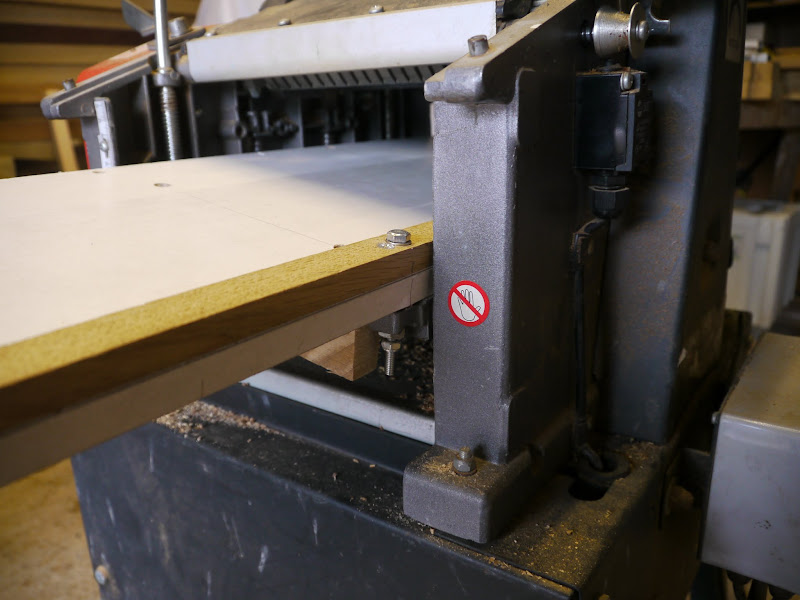
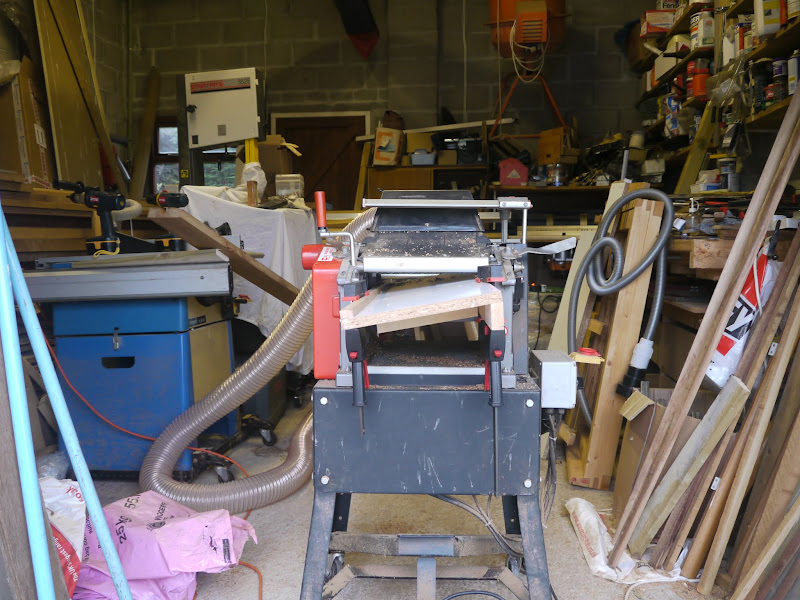
To cut the slope for the sill I made a simple jig which attached to the thicknessing table on my SIP p/t. Initially I tried to hold it in place with clamps but found that to be a hopeless task. Fortunately the SIP thicknessing table has a “lug” at either end with a hole in it so I bolted the jig to these as shown. It was now rock solid ...
P1030631.JPG


...... and the way the slope on the sill is cut is clearly shown here
P1030597.JPG


And the slope can be cut in easy stages until it is jsust short of the base channel.
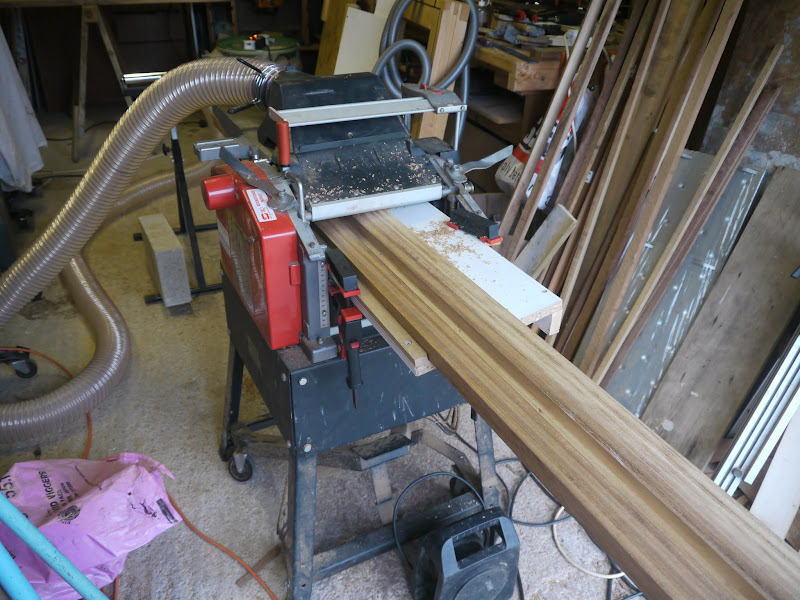
P1030599.JPG


Here is the door head and sill dry fitted and ready for a glue up, having remembered only just in time to cut the groove for the Aquamac 21 door seal first!
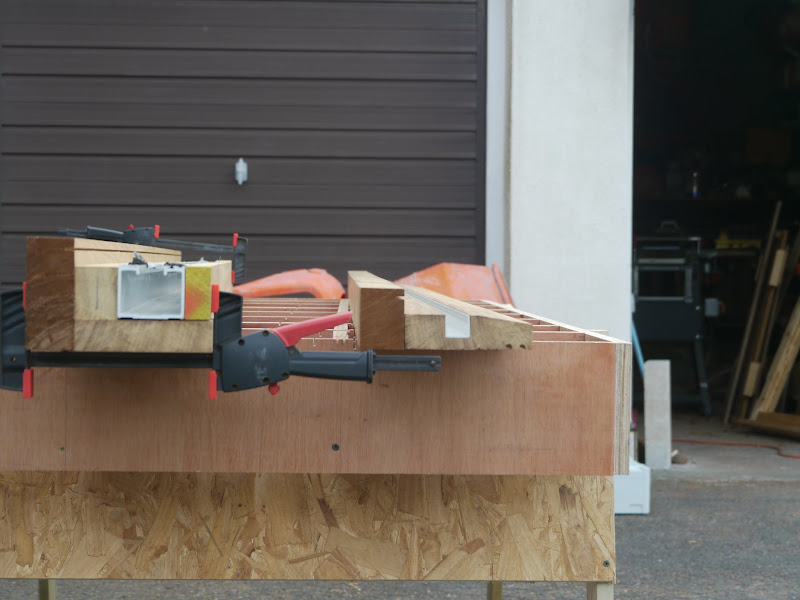
P1030605.JPG


The jambs are made from 175mm x 45mm solid iroko and, again, are hefty pieces of timber to surface plane and thickness using my 10 x 6 SIP, but with a roller stand fore and aft and some running about we had a workable system. Now time to try a dry fit.
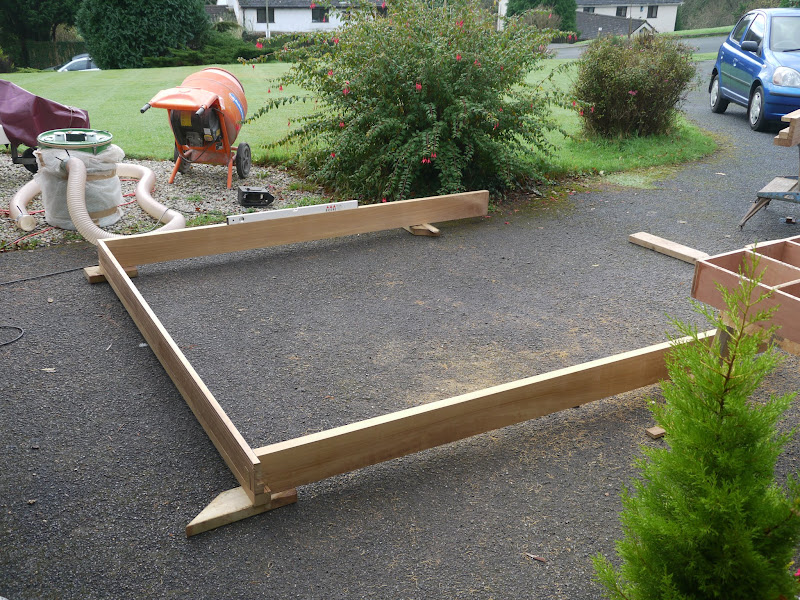
P1030608.JPG


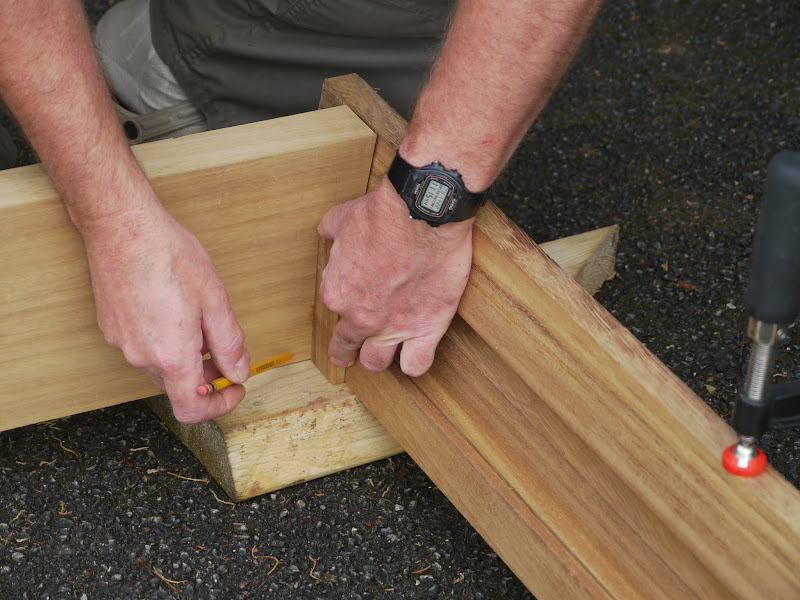
The finished frame is 2600mm x 2175mm so it’s not the sort of thing you can assemble in the average garage, so yet again I worked outside. Initially trying to get the frame square with the sill and head was a nightmare and I tried all sorts of methods using spirit levels and a bevel box held to a post with a clamp, as shown here.
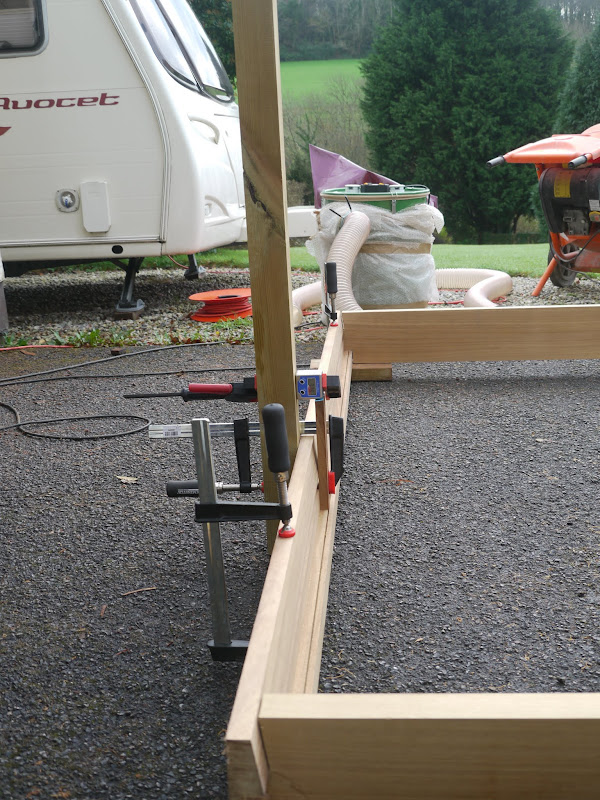
P1030614.JPG


Then I scribed the angle of the sill onto the jambs ...
P1030619.JPG


P1030622.JPG


... and it fits quite nicely.

P1030625.JPG


However, I found the whole process a “bit of a faff”, so when I made the second set of frames, I simply used an offcut from the sill, held it square with the jamb using a set square and just scribed the lines for the cuts onto the jamb. So much more simple, and the end result was just as good.

The joint with the top of the jamb didn’t involve any angles other than 90 degrees so they were simple. So, now I had 2 sets of frames which were stored away until they needed to be assembled prior to fitting. Just as well we have a couple of spare bedrooms.

I seem to have run in to the maximum size of post, so pt 2 follows .....
 
.... here. :D

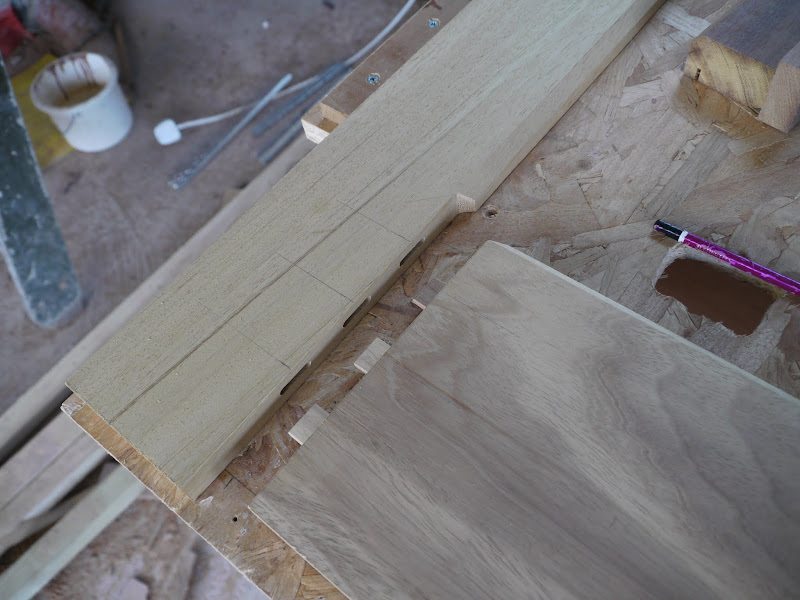
So now for the doors (x6). These were laminated up from 3 layers of 100mm x 20mm iroko. I wanted the internal faces to have chamfered edges where they meet the glass and I dislike the “routed out” look that you so often see where a hand held router is simply run around the inside edge of a square frame, so this involved cutting the chamfer prior to assembly.
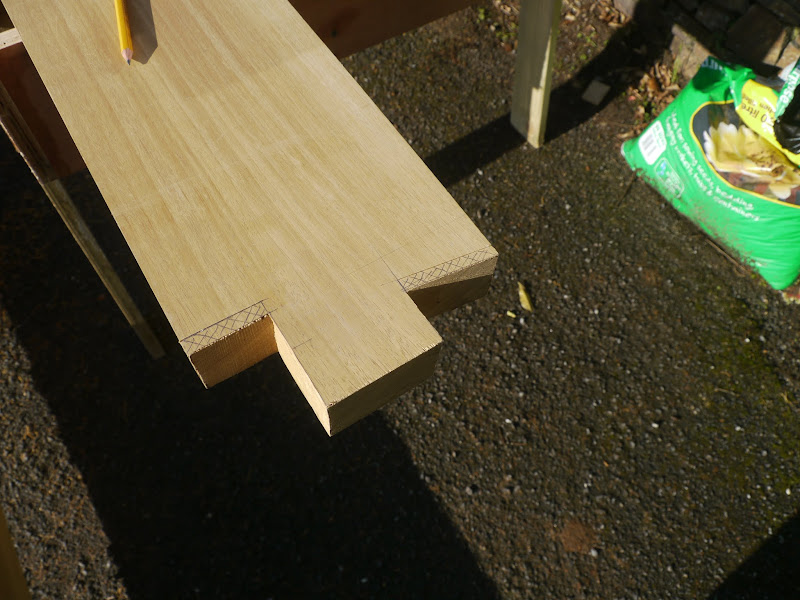
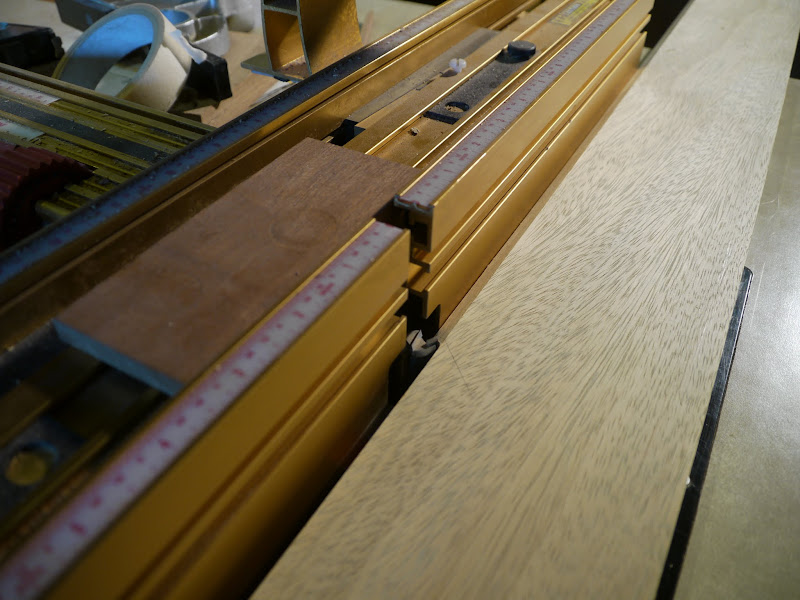
First I ran the edge of the first layer past a cutter on the router table until it was just short of the 45 deg line I needed for the corner of the chamfer.

P1030667.JPG


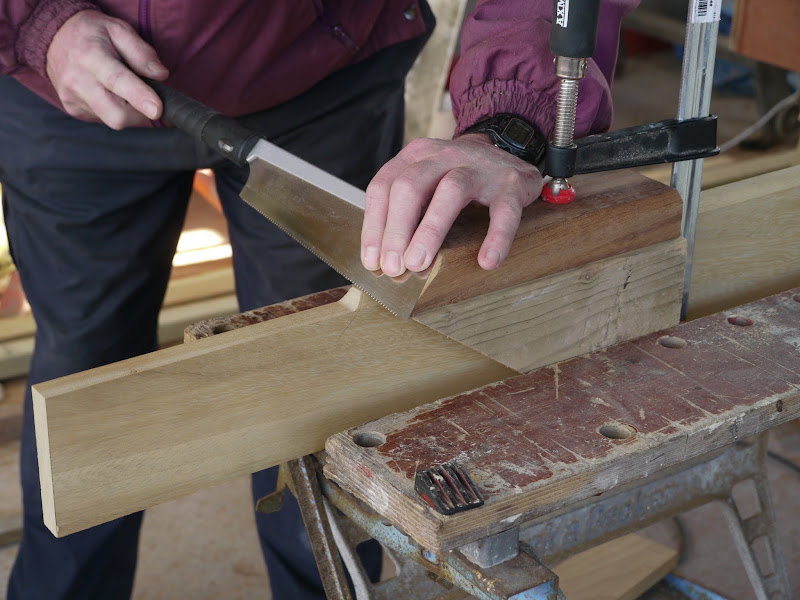
Then I cut a piece of scrap at 45 deg using my SCMS and held it onto the side of the workpiece with a clamp and trimmed the face using a razor saw.

P1030671.JPG


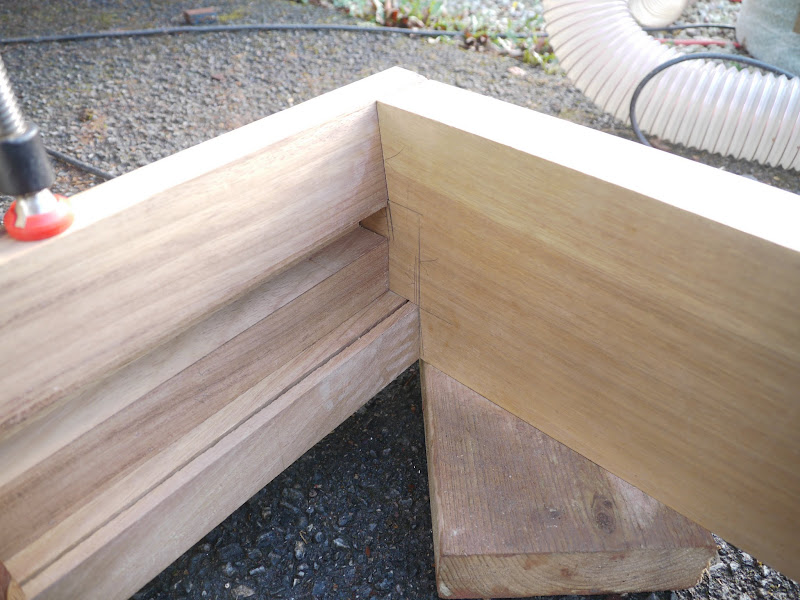
Having done this for all 4 pieces they fit nicely and are “indexed” with a 6mm domino. Not strictly essential I guess, but when you’ve just invested in a “dom” you find any excuse to use it!

P1030676.JPG


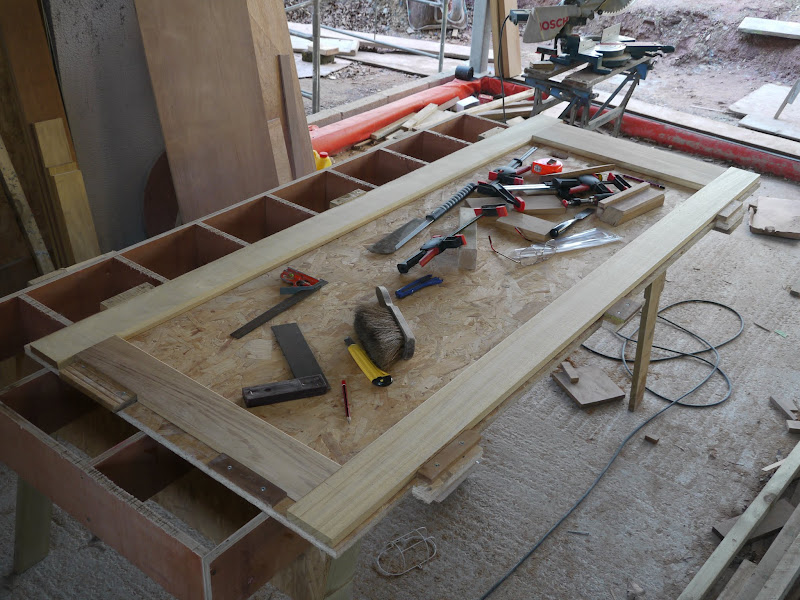
A word now about accuracy. The tolerances on bifold doors are quite tight. Not only do they have to be absolutely square, there is also little room for error on the dimensions. I’m making a set of 3 doors. The gap between each one is 4mm and this is dictated by the size of the hinges which are surface fixed. This is therefore not adjustable after the event. The clearance at the jambs is 7mm, and the only adjustment possible is on the attachment hinges for the first door at the jamb which enables you to move the door along the frame left or right by a few mm. All 3 doors have to be exactly the same if they are to fold back squarely, so it makes sense therefore to assemble each door on the same jig. I chose to make each door 1mm wider than the precise figure calculated to allow for a final trim when complete.

Whilst it would make sense to assemble the first layer face down so that the next layer can be glued on top, I wanted to be able to see that the corners where the chamfers meet had pulled in tightly, and I couldn’t be certain unless they were visible - and so this is why I chose to assemble the first layer face up. Here it is after gluing and after the clamps have been removed. The new kitchen is making a useful assembly area.

P1030675.JPG


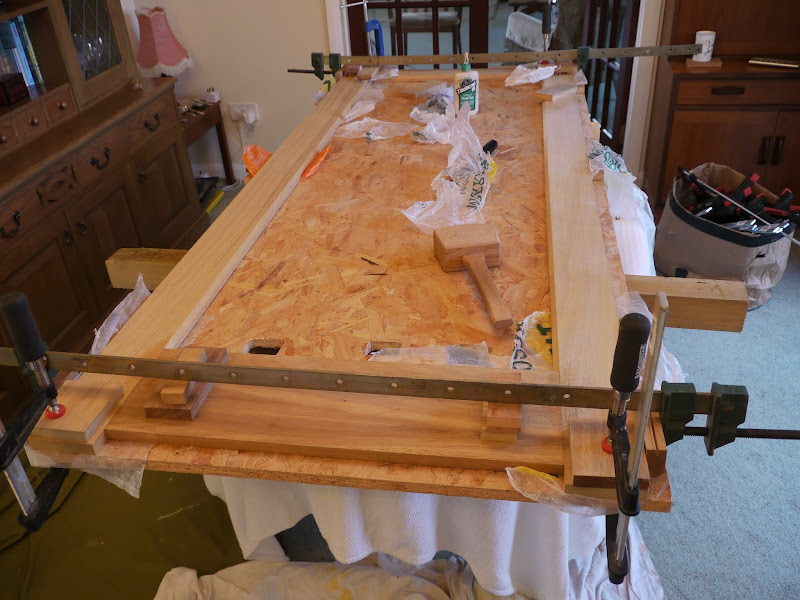
Then lift the first layer up and turn it over - it should simply drop back into the jig precisely - after all we have made it accurately haven’t we? Weather starts getting cold now so I’m able to get away with continuing the glue ups in the dining room. Here’s the next layer going on.

P1030677.JPG


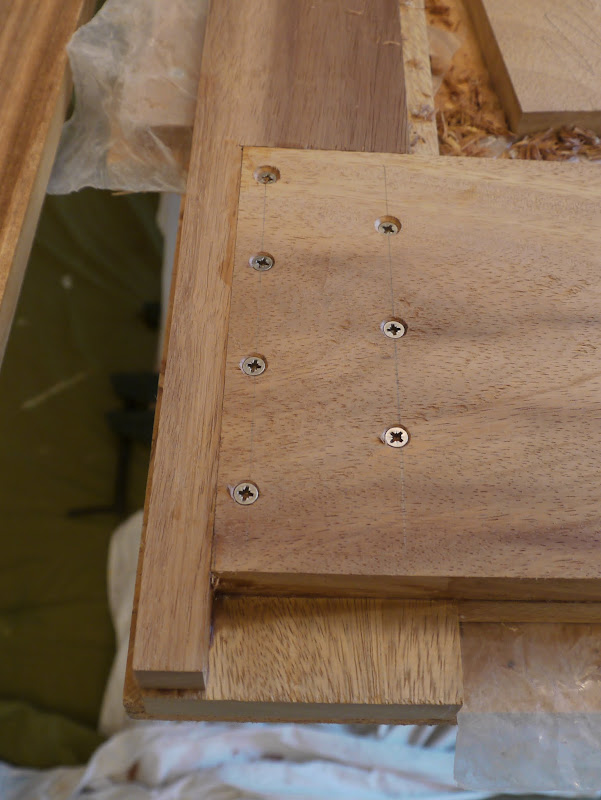
These doors are clearly going to be heavy, and they’ll have to carry 25kgs of sealed unit. I decided that rather than rely 100% on the glue (TB3) I would drive 30mm stainless steel screws through layer 2 down into layer 1 to strengthen the corners. The screw heads will be hidden by the 3rd layer and they’ll never be seen again - or will they - watch this space. But I digress - here’s what I mean.

P1030678.JPG


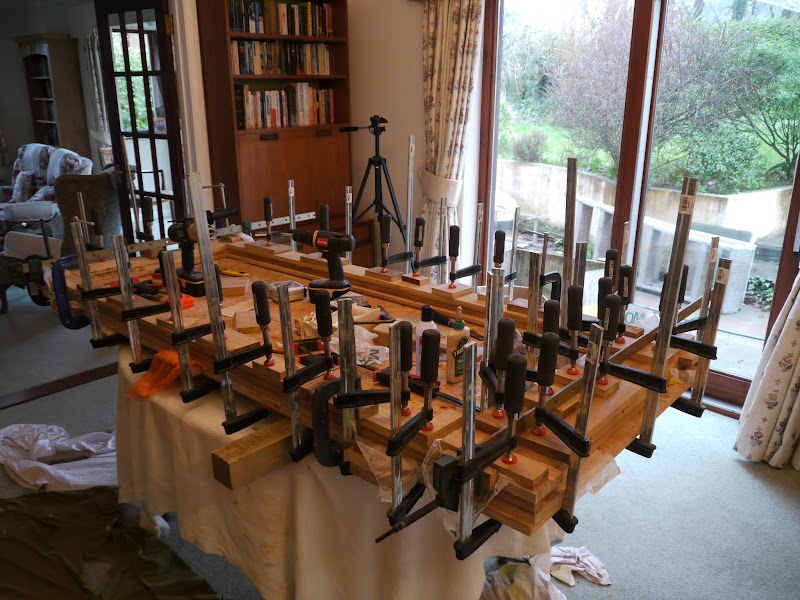
Now for layer 3. I’ve cornered the market in Axminster F clamps. I now have about 30, and if I had more I’d have used them.

P1030679.JPG


One door down, only 5 more to go! The frames had been stained and treated with Sikkens Filter 7 ready for storage, and now it’s time to assemble them. These have to be square to within +/ – 5mm across the diagonals - I managed +/- 1.5 mm which I’m well pleased with and once assembled attach a diagonal brace from corner to corner to hold everything square. Time to install them in position.

P1030781.JPG


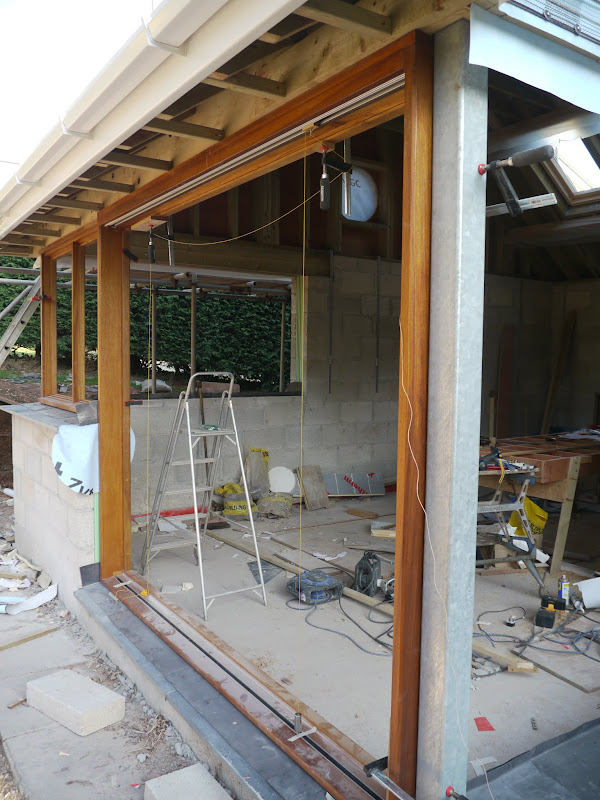
The frames are suspended from the flitch beam with a piece of stainless steel threaded rod at each end and in the middle which goes right through the beam. This enables me to fine tune the fitting with a spanner from the top. Packing pieces are put between the frame and the beam where necessary so that it is held tight to the beam. Then the intermediate positions are attached with stainless steel coach screws. The side is attached to the galvanised steel post with 5 hefty self tapppers.
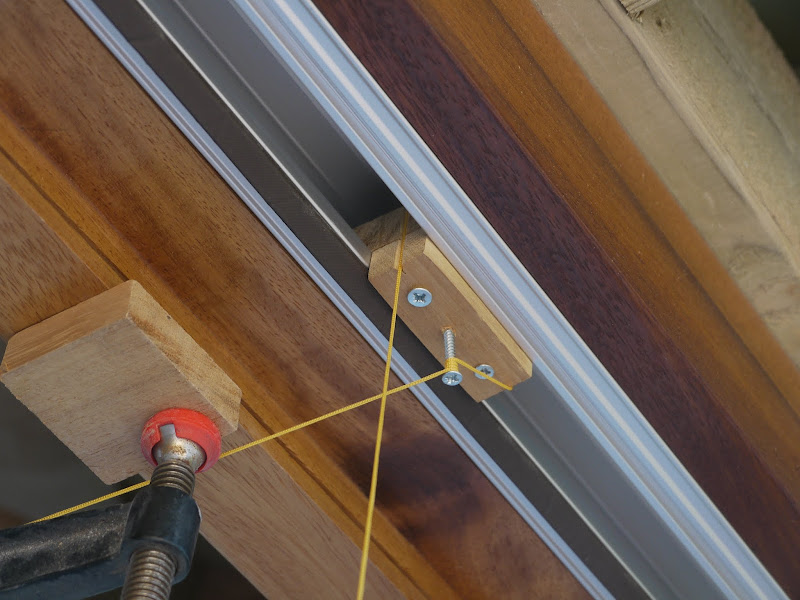
The frame has to be precisely vertical if the doors are to slide nicely. I decided that a plumb line would be more accurate than a spirit level, so made a little “carrier” that sits in the top channel ....

P1030783.JPG


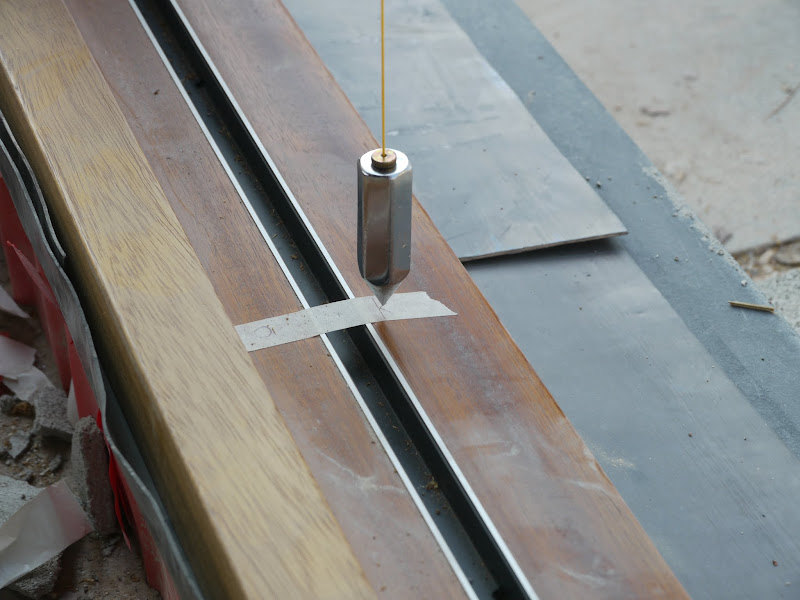
.... and the plumb bob is aligned with a line drawn on a piece of tape that is 18.5mm from the centre of the bottom channel. This ensures that the doors will hang vertically
.
P1030786.JPG


Next the doors are hung. I left these unfinished as I thought that they may need a little “fettling” to make them fit. Having made each one 1mm over width I took a final measurement from the installed frame and them trimmed each one to size using the TS55 and a guide rail. The finish from the 48 tooth blade is so smooth that it is ready for sanding. I’ve no photos of the installation of the doors as both SWMBO and I were needed to fit each one, but here they are, fitted but unfinished.

DSC01988.JPG


The sliding action is just beautiful, and having taken a lot of time to ensure accuracy they fitted without any adjustments being required. Time to take them down again for finishing.

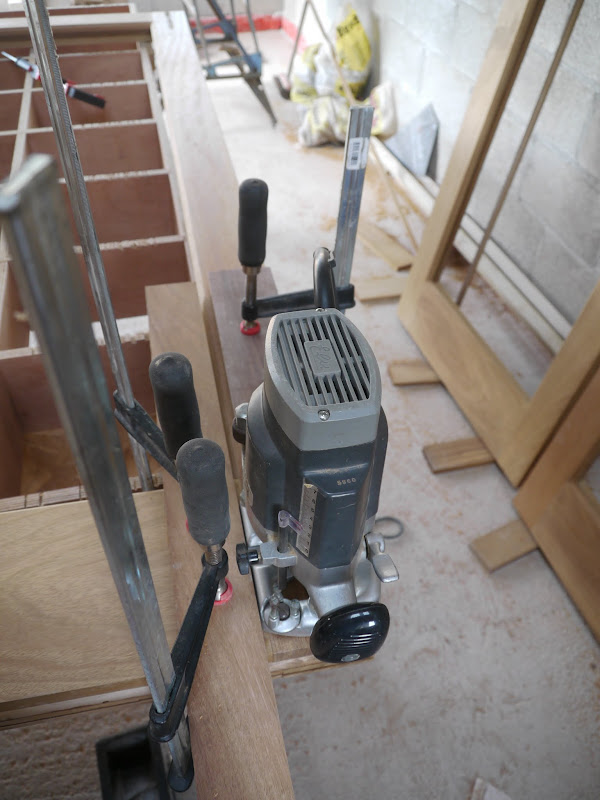
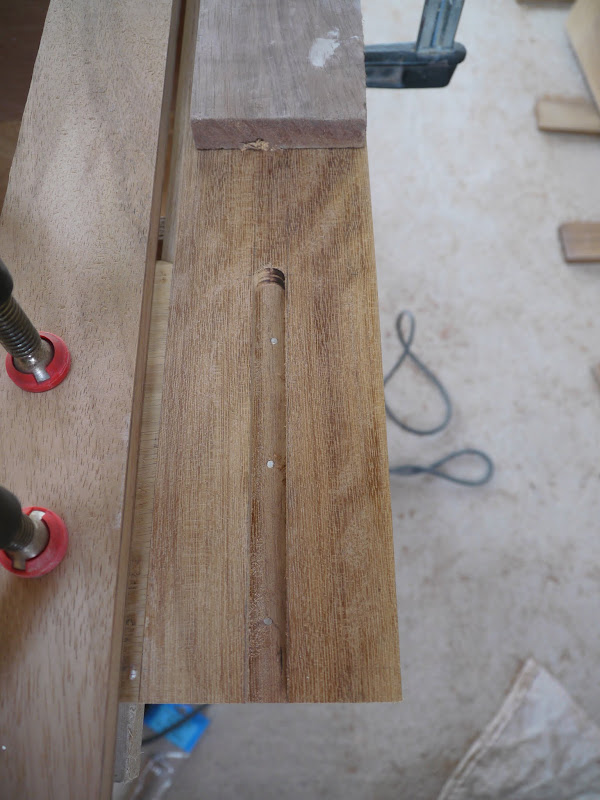
The doors are held closed with a recessed bolt. The slot for them was cut using a router up against a straight edge.

P1030795.JPG


And “bingo” - we’ve found those hidden screws again!

P1030796.JPG


Fortunately, although I hadn’t anticipated this at the time I made the doors, I did spot the problem before I cut the recesses and used an old cutter, and increased the depth of cut with 2mm increments and it barely noticed it, although it’s taken the edge off the cutter!

I had originally planned to glaze the doors before fitting, but I felt that the weight would make them too unwieldy at 45kgs per door, so elected to rehang them unglazed and then glaze them in situ. Two of these were invaluable.

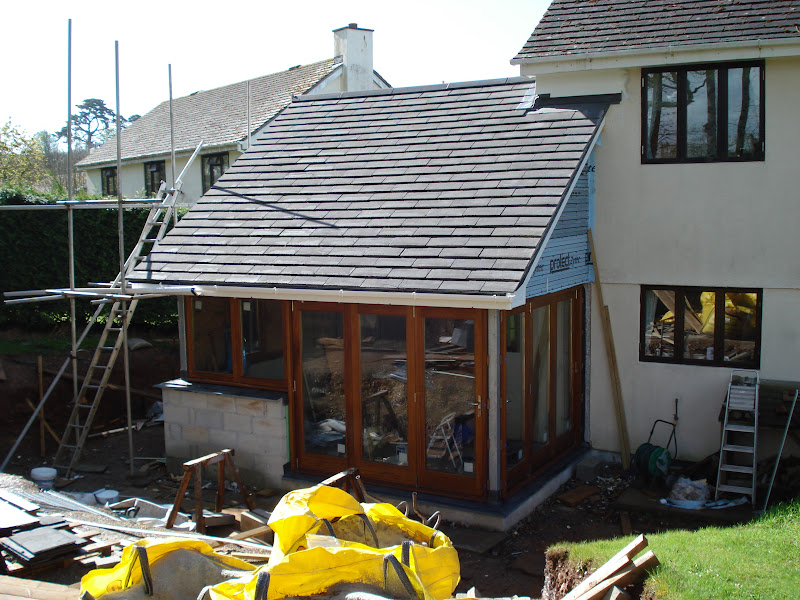
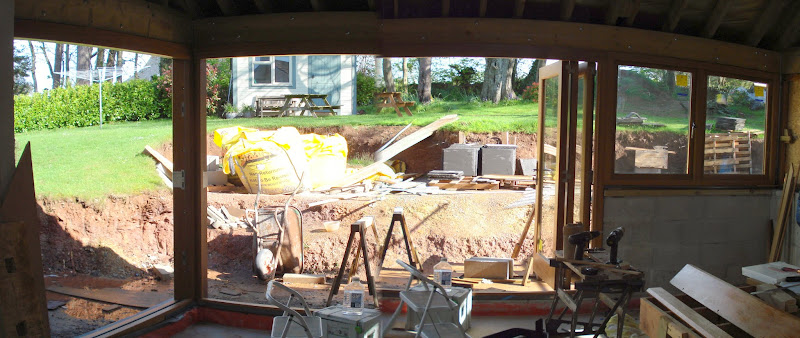
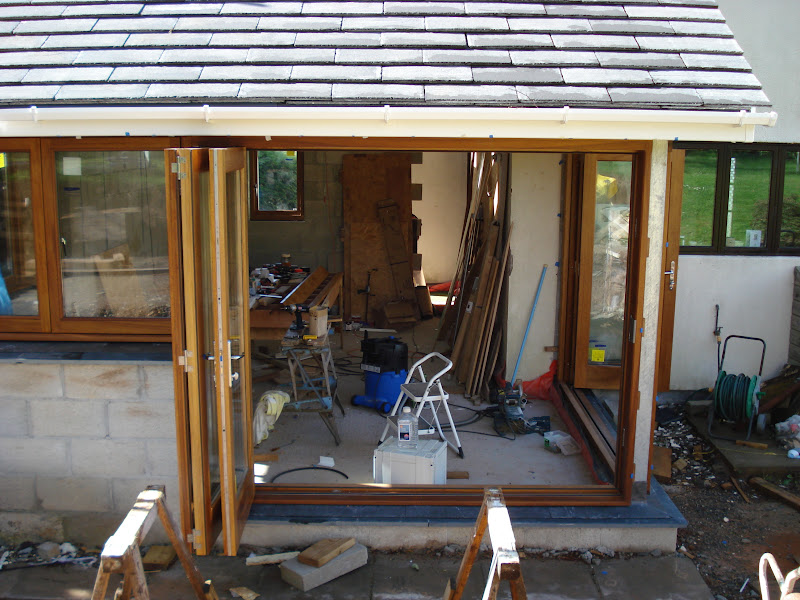
Here’s the end result, with only the posts waiting to be clad in wood.

DSC02119.JPG


panoramic.jpg


DSC02125.JPG


The sliding gear is Centor E3 top hung, which came in at about £500 per set of doors. Glazing was £550 in total for Planitherm Total+ with Argon fill. Iroko was about £1200 as far as I can tell as it was part of a larger order to include the windows - tho’ that’s another story. Locks/handles etc came to £260. Add in sundries like Sikkens, glue etc and the final bill was i.r.o. of £3200 for 2 sets of bifold doors, fully fitted, so a saving of £6,300 plus fitting. I’ve not included the purchase of a TS55 or a Domino in the costs - but these are toys that will serve me for many years.

Why did I choose to laminate? Several reasons really. I don’t have a spindle or a morticer. Also iroko is a b***** for movement and I felt that laminations would be more stable in the long term. Obviously if you had a spindle you’d probably use it! What I set out to achieve was a major cost saving and a better end result than I saw locally. Also I like a challenge - and it was a very time consuming project - but also very satisfying. Do not under estimate the time you’ll need, or the space that is needed to assemble and store all the components - although not everyone will be making two sets of doors simultaneously.

Anyway - if you’ve got this far - thanks for reading, and I hope it’ll be of some help to anyone else tempted to have a go. Finally a huge thank you to Keith Smith (Woodsmith) who provide lots of advice as well as a copy of his magazine article on laminating doors, and to jonnyd whose post on foldy slidy WIP provided some much needed inspiration. Thanks Jon - you’ll have noticed where I pinched some of your ideas.
 
Thanks Paul. And just to prove that these are "foldy slidy byoots" rather than "sticky binding b******s" here's a quick video of them in action! :D

When the building work is finished a kitchen will need to go in that space so rest assured I'll be back for more advice!
 
Wow, they work really well, Roger 8) And I'm sure the laminated construction you used for the doors will help to ensure that they continue to do so.

Cheers :wink:

Paul
 
Amazing work Roger and a tremendous cost saving too! For my internal doors I am hoping that solid oak will be ok in terms of movement, laminating seems to make the job more tricky to me. I have a morticer so can make decent M&Ts, I have already practiced this on a 30m long fence with 12 posts, so I know it works well! But your doors are magic, I am really impressed. Some very good tips there for me, especially for squaring up the frame, I realise that this is very important to get the doors to work and fit. I'm not going to underestimate the time it will take, my biggest problem with my hobby is finding time, with work and family taking most of my time. Anyhow, great WIP and will be utlising some of your advice in here... cheers Steve
 
They turned out very well.

One thing I noticed in the video is that you don't have the magnetic door stops, these are good as they will hold the first door back in the open position when the pair are locked and also stop the handles hitting the middle door, worth fitting.

Also does the E3 have lockable flush bolts?

J
 
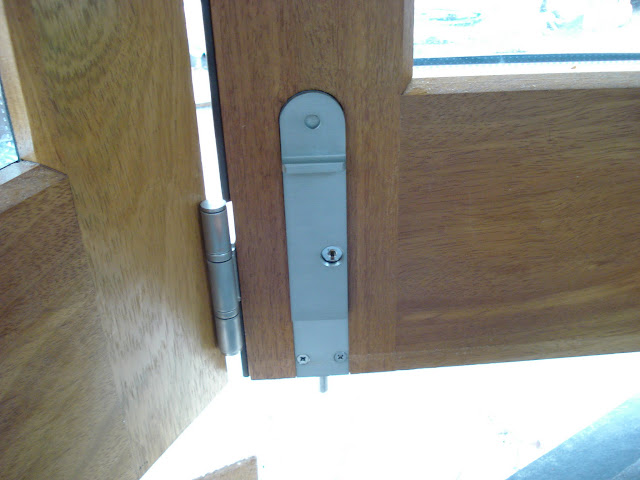
Jason - presumably by lockable flush bolts, you mean these?

DSC02130.JPG


I think they are common to the whole Centor range. I will be getting the magnetic catches. At the moment I just have a foamy pad that came with the glazing stuck to a door where the handle would otherwise make contact to protect the wood. Those magnetic catches would seem to be a more permanent answer. Presumably I just need one between the end door and the centre door. Do you put then top and bottom or is one sufficient?
 
Hello Roger, stumbled on your bifold door project by accident! I have been working on 3 panel bifold windows, and your results are impressive. I'm using the lamination approach as well, and I've tried to go without the Centor hardware partly due to availability out in California, partly for the challenge to design something with simple track, trolley, and hinge parts. Centor will be the back up plan. My question for you- the multipoint lock that you've used- can you share what you went with?
Pete
 
elise111":37n98bct said:
Hello Roger, stumbled on your bifold door project by accident! I have been working on 3 panel bifold windows, and your results are impressive. I'm using the lamination approach as well, and I've tried to go without the Centor hardware partly due to availability out in California, partly for the challenge to design something with simple track, trolley, and hinge parts. Centor will be the back up plan. My question for you- the multipoint lock that you've used- can you share what you went with?
Pete

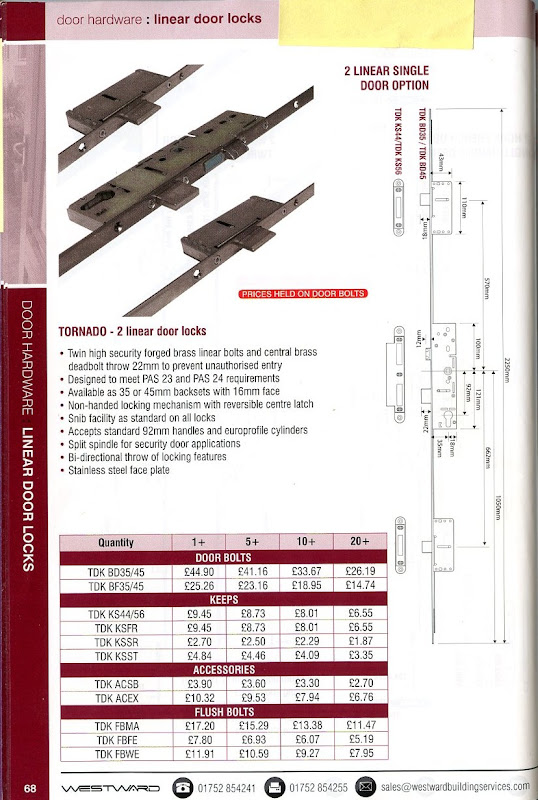
Hi Pete. I used a 3 point Tornado multi lock. It comes with either a 35mm or 45mm backset - I went for the 45mm so that the handle and lock would sit in the middle of the door stile. The outfit I bought from doesn't have a fully functioning website but here's the relevant page of their brochure.

Multipoint%2520door%2520lock.jpg


Some tried to put me off fitting a multipoint lock saying that they were problematical in timber doors, but I haven't found it to be. It sits in a standard 16mm "Eurogroove" - it's worth investing in the specific router cutter to do this accurately.

Looking forward to seeing photos of your own installation as without photos it never happened! can you send us some of your southern California weather at the same time? :D
 
Lons":2n561o1y said:
Brilliant job =D>
Out of interest, how many hours did you spend on it? Bob

Too many! It was very time consuming, and storage of the components during manufacture was a major headache, although I was making 2 sets of 3 doors simultaneously which doesn't help. After machining all the wood (a significant task in itself) it probably took me about a week to make the frames, then about 3 days to laminate up each door (and there are 6 of them), plus time on fitting locks, hardware etc, plus general finishing with 3 coats of Sikkens. I'm guessing at around 10 weeks of steady part time work - plus fitting which took longer than I anticipated as well. But I think the end result was worth it and now over 12 months after they were fitted they work just as well as on the day the installation was complete. No regrets!
 
Great job and very nicely detailed WIP . One hell of a cost saving as well !
 
RogerM":lncdnz6t said:
Lons":lncdnz6t said:
Brilliant job =D>
Out of interest, how many hours did you spend on it? Bob

Too many! It was very time consuming, and storage of the components during manufacture was a major headache, although I was making 2 sets of 3 doors simultaneously which doesn't help. After machining all the wood (a significant task in itself) it probably took me about a week to make the frames, then about 3 days to laminate up each door (and there are 6 of them), plus time on fitting locks, hardware etc, plus general finishing with 3 coats of Sikkens. I'm guessing at around 10 weeks of steady part time work - plus fitting which took longer than I anticipated as well. But I think the end result was worth it and now over 12 months after they were fitted they work just as well as on the day the installation was complete. No regrets!

Very satisfying worth Roger. If I'd made and fitted those in my house, there is no way I'd ever move out (except in a box :( ).

I guess it's possible to see where the original £9500 quote comes from though. Whatcha gonna do with the cash you saved. Must be worth more than a domino and a track saw :wink:

Bob
 
After much delay, here are some pictures of my bifold windows. With Roger's help I was able to locate nice multi-point locks and handles from the UK. I went with the hook type multipoint lock since these seemed to have the longest 'reach'. This was my splurge, as the parts weren't expensive, but the shipping made it pricey. For cost reasons, I didn't go with the Centor bifold hardware. It looks like beautiful hardware, but the engineer in me wanted to try to modify conventional bits and see how it might work. I made 2 sets of these windows for my workshop, so 2x$750 for Centor hardware was starting to add up. I went with medium duty bifold track overhead and modified one of the hinges with a through bolt. This allowed the 'active' window top hinge to hang from the trolley that rides in the track. Hardware in my case cost $60 for the 6 stainless non mortice hinges, and $50 for the track and trolley, so $110 for each set of bifold windows. The action of the system surprised me- smoother than I anticipated. I used flush bolts to secure the windows when in place. Weatherstrip (yes even in Southern California) was Aquamac AQ48 from the UK and QWS21 (I think this is the US version of the AQ21).

I went with clear, vertical grain douglas fir because this is popular regionally, and I really like the aged color of it. My ceiling in the workshop is the same material. I used 3 layer construction to get strong joints, in my case the inner and outer layers are 3/4in, and the middle layer was 1/2in, giving a total frame thickness of 2in. The glass is 1/4in laminated glass. It doesn't freeze here, so I went with this instead of dual pane glass in case there would be any flex in the frames. In the end, the frames are so stout, I don't think flex is an issue. The glass is sandwiched between silicon gaskets, each side is compressed to 1/8in thickness- another reason I opted for the thick laminated glass due to the force of compression during assembly. I've painted the outsides white for lower maintenance and to match other trim. The sills are angled downward 10 degrees, and the bottom of the windows have a matching slope.

I have other pictures if anyone is interested, I just can't seem to reduce their size enough to post. It still amazes me that window building doesn't seem to be popular in the US. I appreciate the insights from this website and the generosity of folks to share their experiences.

Pete
IMG_0009s.jpg
IMG_0010s.jpg
IMG_0011s.jpg
 

Attachments

  • IMG_0009s.jpg
    IMG_0009s.jpg
    248 KB
  • IMG_0010s.jpg
    IMG_0010s.jpg
    236.3 KB
  • IMG_0011s.jpg
    IMG_0011s.jpg
    225.9 KB
Nice job Pete. I think the Centor running gear would have been completely OTT in this situation. I don't know how heavy each of those single glazed windows will be, but it will only be a fraction of the 45kgs/100lbs that a double glazed door will be. Looks good, and satisfying to engineer your own track as well.
 
Back
Top