edge planing two boards at once

UKworkshop.co.uk

Help Support UKworkshop.co.uk:

This site may earn a commission from merchant affiliate links, including eBay, Amazon, and others.

adrian

Established Member
Joined
2 Dec 2007
Messages
195
Reaction score
0
A while back I asked for advice on edge jointing of boards. Some people alleged that I was closed minded because I refused to attempt the method of clamping two boards together and planing them simultaneously. At the time, it didn't make seem reasonable to do that because I didn't know the order of the boards. But that project is done.

I have now begun a project where this technique seems reasonable to try. So I have clamped a pair of boards into the vise and taken some strokes. But I find that tear out is a troublesome problem. The grain seems to run in different directions down the boards. Now if I switch the board direction it will either change the show face or screw up the alignment of the planing directions for the board face.

Is this the typical situation? Or do I have bad luck?

I have three plane blades that are not cambered. One is the clifton blade that wouldn't stay cambered. Another one is a wooden plane with a 50 degree bed angle that I rarely use because I find it too hard to adjust. And the last is a bevel up blade that was supposed to be for low angle use. The 50 degree plane still gives serious tear out. So it appears I have to either back bevel the clifton or get a new high angle straight blade to use for this kind of work. Any thoughts on the necessary cutting angle here? (The wood is canary wood.)
 
Does the tearout really matter? The boards are going to be joined together, yes? So the tearout won't be seen.

If it really bothers you, try a back bevel on your blade. See herefor a thread I did on getting a repeatable back bevel on a blade. Or try honing your BU blade at, say, 50degrees. Remember to take light cuts and keep the blade sharp.

HTH

Cheers

Karl
 
Karl":3vhwoxdi said:
Does the tearout really matter? The boards are going to be joined together, yes? So the tearout won't be seen.

The tear out crosses the show edge of the board, so it will appear as a globs of glue in the glue line. If I run my finger down the show edge it feels rough rather than smooth. I expect that the resulting glue line would have a rough appearance rather than disappearing into invisibility. I agree that tear out that stayed inside wouldn't matter, though I suppose if there was too much of it I'd start to wonder about weakening the joint.
 
Gotcha.

In that case a high EP on your plane is what you need.

Cheers

Karl
 
If stock is narrow then it's a useful ploy to plane two pieces together, most of the time I don't bother and just plane them individually. Then check with a square, take off a couple of 'stop' shavings in the middle and then bang 'em together.
Folks seem to make very heavy weather sometimes of a basic technique that's relatively simple. One essential is that the wood is dead vertical in the vice and the other is to use a plane that's long enough for the job - Rob
 
The stock in question is about 20 mm thick, not particularly thin. The length is 1.7 m. My longest plane is a #7. When I did my last project I did a bunch of 1.2 m long pieces and getting the edge square took about 90% of the time. It would seem reasonably close but then when I put the boards together there'd be a slight angle, and it wasn't always easy to figure out which part of the edge had the angle. I figured with the longer stock this problem would only be worse, so I'd give "match planing" a try.
 
adrian":39kz5bu8 said:
The stock in question is about 20 mm thick, not particularly thin. The length is 1.7 m. My longest plane is a #7. When I did my last project I did a bunch of 1.2 m long pieces and getting the edge square took about 90% of the time. It would seem reasonably close but then when I put the boards together there'd be a slight angle, and it wasn't always easy to figure out which part of the edge had the angle. I figured with the longer stock this problem would only be worse, so I'd give "match planing" a try.
With stuff that long I'd be planing it individually with the No7. Putting two 1.7m long pieces in the vice and holding them steady each time, and in line at each end would be a bit tricky, 'specially if the boards were quite wide (and thus heavy)
If you did decide to plane them as a pair, then cramping them together at each end before they go into the vice would seem a better way of ensuring that the edges were in line and didn't move - Rob
 
woodbloke":1nrpli8d said:
With stuff that long I'd be planing it individually with the No7. Putting two 1.7m long pieces in the vice and holding them steady each time, and in line at each end would be a bit tricky, 'specially if the boards were quite wide (and thus heavy)
If you did decide to plane them as a pair, then cramping them together at each end before they go into the vice would seem a better way of ensuring that the edges were in line and didn't move - Rob

Board width is about 20 cm, and it's a moderately heavy wood, similar to oak in density, I believe.

I'm not sure what you mean by "holding them steady each time". I positioned them in the vise at the left side and got them reasonably well aligned. Then I tightened it a bit and went over to the right side, lined up the edges, and clamped them down to my bench apron. Then I tightened the vise more. The edges weren't straight to begin with, so I didn't agonize over matching them up perfectly.

One observation is that since the last time I did some edge planing I have lined my outer vise jaw with leather, and it makes an enormous difference in the holding power of the vise. Stuff just doesn't slip the way it often did before. With the above described setup I planed the edges straight in their length (I think) without any difficulties, except for the aforementioned tear out. I didn't notice any tendency of the work to slip or to become misaligned.

Now if I took the work out of the vise and then decided it needed additional touching up I'd be in trouble. As far as I can tell this would be true no matter what the size of the workpieces. It seems like one of the limitations of this match planing approach. There's no testing the work: you have to get it right the first time. (I mean, you can obviously try a second time, but it's more like starting again rather than refining what you did before.)
 
You don't say what timber it is that you are planing. This may have a bearing on the tear out some are more prone than others.
Sapele can have quite wild grain and half a board will tear out one way and the other half the other direction.

When laying out boards for a job( a table top say) attention is often paid to alternating each to minimise the affect of cupping, though as much attention should be focused on the way the angle of the surface grain meets the edge, especially when taking the time to edge plane them by hand.
Hope you find a way around the problem.
 
JoinerySolutions":1sznoumz said:
You don't say what timber it is that you are planing. This may have a bearing on the tear out some are more prone than others.
Sapele can have quite wild grain and half a board will tear out one way and the other half the other direction.
I did, actually, but I'll say it again: canarywood. It is generally well behaved, but one of the boards has some tiny knots with swirling grain in the vicinity.


When laying out boards for a job( a table top say) attention is often paid to alternating each to minimise the affect of cupping, though as much attention should be focused on the way the angle of the surface grain meets the edge, especially when taking the time to edge plane them by hand.
Hope you find a way around the problem.

I have read that alternating the direction of growth rings is a pointless thing to do. The top is held flat to the apron so you don't have to worry about the top cupping. I remember reading the advice to lay out the boards for the best appearance, along with the claim that the inside of the tree usually looks better than the outside. I any case, I arranged the boards for the best look in such a way that I can plane the resulting panel face once it's glued.) It seems like there are too many constraints to meet them all.
 
adrian":3bnoog06 said:
woodbloke":3bnoog06 said:
With stuff that long I'd be planing it individually with the No7. Putting two 1.7m long pieces in the vice and holding them steady each time, and in line at each end would be a bit tricky, 'specially if the boards were quite wide (and thus heavy)
If you did decide to plane them as a pair, then cramping them together at each end before they go into the vice would seem a better way of ensuring that the edges were in line and didn't move - Rob

Board width is about 20 cm, and it's a moderately heavy wood, similar to oak in density, I believe.

I'm not sure what you mean by "holding them steady each time"
Once you think you've got each pair planed, you'll need to test one against the other, on top. There should be a very small gap in the middle (old timers will say it's the thickness of a fag paper) so each board should be slightly concave.
However...if they're convex, you gota plane them again,which means cramping together and setting up in the vice for a second try - Rob
 
Well, I applied a 25 degree back bevel to my Clifton blade as suggested in Charlesworth's DVD. After doing so the plane makes the "whistling" noise he talks about, and seemed to take a reasonable shaving. But when I tried to plane my pair of edges I had trouble. The plane has produced a kind of scalloped surface with lines every 5 mm or so. If I run my fingers along it the surface feels noticeably bumpy. I haven't managed to get down to a full width shaving yet, but I can't seem to cut the bumps off.

I'm not sure what is going on.
 
Hi,

20mm boards are wide enough to plane on there own, 40mm is quite wide. The only thing I can think about the bumps is the blade isn't sitting on the frog properly and vibrating.

Pete
 
I agree, planing them individually is certainly possible. I'm attempting this approach because it sounded like an interesting and potentially time saving method. As I noted earlier, I spent the vast majority of the time tweaking the edge to try to get it square enough when I plane boards individually. And once I get the edge square I find it's gone convex...and then once I fix that I lose the square.... If I didn't have to do that I'd be about ten times faster at doing these edge joints. And I also note that when I posted a 18 months ago about planing boards individually someone suggested I should try this technique and then complained that I was asking for advice and ignoring it when I didn't do what he said. The work was the same thickness than as now.

But if I can't get this approach to work then I'll give up and do them one at a time.

I'll check the seating of the blade. The plane was working fine before I applied the back bevel. I didn't notice chatter. Nothing should have changed except the blade's edge.
 
Hi,

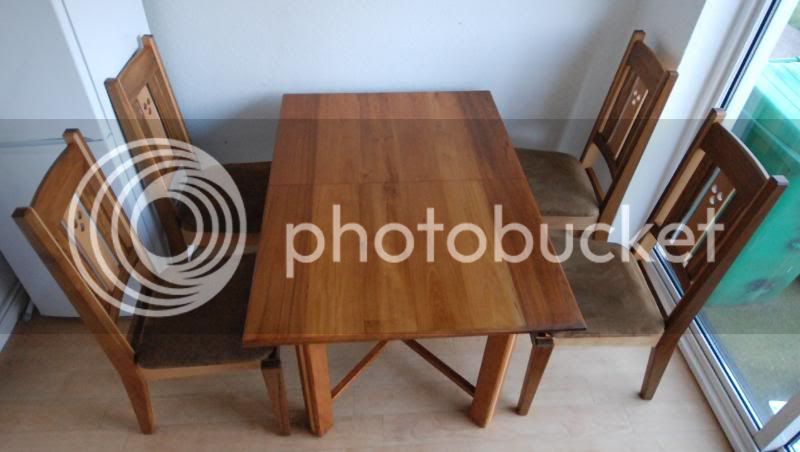
I did loads of edge planing for this table
DSC_0079-1.jpg

I did it all with a Rocord No8 with a cambered blade, which I find is the only way I can plane a nice square edge. I managed to stack the boards on edge on my bench while I plaining the next one. They where all individually.

Pete
 
Table and chairs look nice. I think you posted a picture of the table in the thread I started 18 months ago where I was planing a single edge at a time. Basically here is the inspiration for trying to do two boards at a time lifted from the old discussion:

Paul Chapman":3d2dpbvj said:
I think the major problem, Adrian, is that you are grappling with several problems at once. One of the issues I have with the David Charlesworth method of planing the edge of boards is that the method becomes increasingly difficult the longer the boards are. If you add to that the problems you've been having with too short straight edge, then it's no wonder you're struggling a bit.

In your position I would seriously try the method where you plane two boards together - not necessarily on the boards you are dealing with at the moment, because you have already said that you don't want to do those that way, but on some practice pieces. I'm sure that will give you some extra confidence and help you to improve your technique.

The advantage of planing boards together is that you can forget about getting the edges at 90 degrees (that will take care of itself) and just concentrate on planing the boards straight in the length. I would suggest getting some boards about 3/4" thick and give it a go (any old stuff would do). I'm sure your technique will benefit.

I was taught to joint boards like that at school in the 1950s and never looked back Smile

I can do it the Charlesworth way as well but it's not my preferred technique.

My boards are longer, so based on the above, even better candidates for the match plane technique. I can give up and go back to doing a board at a time with a cambered blade, but I did want to give this method a fair effort first, because it does seem like it would save effort if it worked. I know I can do a single edge at a time. But I also expect (perhaps a bit pessimistically) that it'll take an hour or two per joint.
 
If you're struggling both with planing the boards individually and when clamped together, another option is to make up a very long shooting board from two pieces of MDF and shoot the edges. I've not used this technique myself but I know that some have successfully used it. If you planed the edges, say 1/16" - 1/8" oversize, then clamped them to the shooting board, it should be fairly straight forward. The boards should end up nice and straight and if the edges aren't exactly at right angles, you could flip over every other board so that the angles cancelled out.

Hope this helps.

Cheers :wink:

Paul
 
Well, I'm not desperate enough at this point to break out the mdf. Before I learned the Charlesworth method for jointing I struggled to make boards straight. I couldn't do it. Finally I gave up and used a router, a straight bit with a bearing, and the edge of a plywood sheet. I tried MDF because it is said to be so very straight, but the result was poor. I had better luck with plywood, I think because the edge of the plywood held up better, so it stayed straighter rather than wearing rapidly.

Now that I've watched Charlesworth's DVDs I've been reasonably successful at jointing 4 ft long boards. I won't claim I've been fast, but I think the joints came out looking good in the end. The main problem of one board at a time is getting square and figuring out where the deviations from square are. (Sometimes I think I wasn't sure which of the two boards to blame, let alone which part of the edge.) Side view of that project:
qt_side.jpg


In any case, for the current project I only have three boards so if it's slow it doesn't matter much. But I thought I'd take the opportunity to try a new method.
 

Latest posts

Back
Top