Early Sash Window / Shutters RESEARCH

UKworkshop.co.uk

Help Support UKworkshop.co.uk:

This site may earn a commission from merchant affiliate links, including eBay, Amazon, and others.
It was the building act which required brick reveals to be build - the act is on the dates on the previous English heritage book picture .

I think modern paints play a large part in rotting windows . Lead paint and modern alternatives such as linseed paint do not hold water in and generally do not rot the timber.
 
rhrwilliams":360i6rgr said:
It was the building act which required brick reveals to be build - the act is on the dates on the previous English heritage book picture .

I think modern paints play a large part in rotting windows . Lead paint and modern alternatives such as linseed paint do not hold water in and generally do not rot the timber.

Ah, That makes sense re the building act, I was sort of assuming that related to the date on the picture. Was that just for box sashes?

You may well be right re the modern paints, however I remember when I were a lad, everyone would be out painting their windows every few years. Nowadays it seems they only do it when the paint is flaking off and the wood can be seen. It's a bit late by then. Everyone I have painted windows for are very surprised when I tell them the paintwork should be carefully checked at least once a year and redone every 3 years, unless it's one of the extended life types.
 
rhrwilliams":2plxv1gw said:
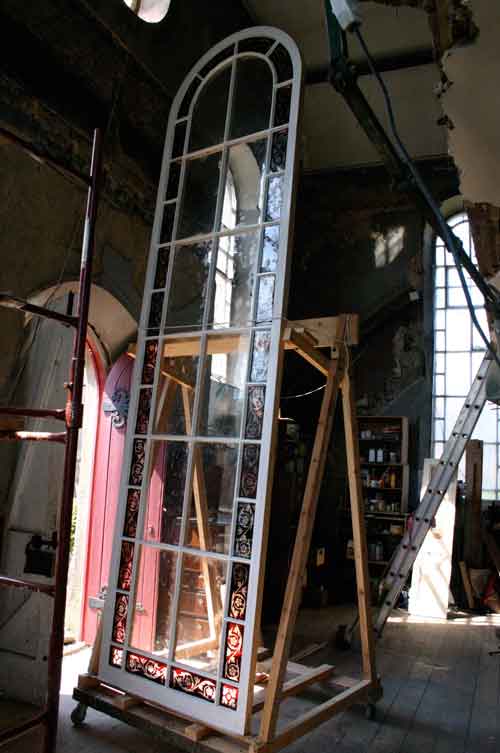
That's a serious window !!! Very impressive . Is it a 90% remake ? The top arched glazing bar looks old ?
99%? Ten replicas of the originals - all redwood except the oak curved glazing bars still in good nick so they got re-used, along with all the old glass. Getting the curved bars in was a struggle as non of them were geometrically perfect, but if I'd steamed some new ones myself they probably wouldn't have been much better.
Re paint - linseed oil paint is the only way. I was dreading having to use modern paints, having seen so much failure. Holkham Hall paint - since I discovered it I've used nothing else and am not likely too - on external work at least - modern paints are fine inside.
 
Jacob":1k6dup2h said:
rhrwilliams":1k6dup2h said:
That's a serious window !!! Very impressive . Is it a 90% remake ? The top arched glazing bar looks old ?
99%? Ten replicas of the originals - all redwood except the oak curved glazing bars still in good nick so they got re-used, along with all the old glass. Getting the curved bars in was a struggle as non of them were geometrically perfect, but if I'd steamed some new ones myself they probably wouldn't have been much better.
Re paint - linseed oil paint is the only way. I was dreading having to use modern paints, having seen so much failure. Holkham Hall paint - since I discovered it I've used nothing else and am not likely too - on external work at least - modern paints are fine inside.

Thanks for the tip re Holkham Hall, I'll look out for that. It does say it needs to go on the wood for best effect, so not sure how it would work on top of more modern paints. A couple of years ago I was doing a semi refurb on older sashes and an "experienced" painter from London (in his sixties) noted I was stripping back to bare wood. He said "no-one does that these days!!"
 
RossJarvis":t0ke0a9l said:
Jacob":t0ke0a9l said:
rhrwilliams":t0ke0a9l said:
That's a serious window !!! Very impressive . Is it a 90% remake ? The top arched glazing bar looks old ?
99%? Ten replicas of the originals - all redwood except the oak curved glazing bars still in good nick so they got re-used, along with all the old glass. Getting the curved bars in was a struggle as non of them were geometrically perfect, but if I'd steamed some new ones myself they probably wouldn't have been much better.

Re paint - linseed oil paint is the only way. I was dreading having to use modern paints, having seen so much failure. Holkham Hall paint - since I discovered it I've used nothing else and am not likely too - on external work at least - modern paints are fine inside.

Thanks for the tip re Holkham Hall, I'll look out for that. It does say it needs to go on the wood for best effect, so not sure how it would work on top of more modern paints. A couple of years ago I was doing a semi refurb on older sashes and an "experienced" painter from London (in his sixties) noted I was stripping back to bare wood. He said "no-one does that these days!!"
It seems to stick very well to modern paint. I guess the makers don't want to make any dubious promises as there are so many variables, but I've used it successfully. Raw linseed oil as a primer seems to penetrate every nook and cranny including cracks in modern paint.

Another window pic here, sorry it's a trip down memory lane! I made up a sort of launching pad for painting as it was difficult to do horizontally.

bigwinX.jpg
 
Jacob":tbtdrscs said:
It seems to stick very well to modern paint. I guess the makers don't want to make any dubious promises as there are so many variables, but I've used it successfully. Raw linseed oil as a primer seems to penetrate every nook and cranny including cracks in modern paint.

Another window pic here, sorry it's a trip down memory lane! I made up a sort of launching pad for painting as it was difficult to do horizontally.

bigwinX.jpg

Hmm, cutting in round the glass for 10 of those would fill me with the fear big time, congratulations on your patience:)
 
RossJarvis":3oypnwq7 said:
....
Hmm, cutting in round the glass for 10 of those would fill me with the fear big time, congratulations on your patience:)
Used a lot of old thin glass 3mm ish which is easier to cut. But like so many craft things - once you get your hand in it goes OK after the first few blunders.
 
Done lots of Linseed over the last 5 years, all of which is still stuck on and in good nick. I use https://oricalcum.uk and the chap who owns the company is very approachable and thoroughly knowledgable. Ive painted over old paint on a few surfaces but I must admit most paint is burnt off on jobs I have been on.

Medal for patients of a saint clearly goes to Jacob for painting 75 miles of glazing bars !

A very interesting response from another joiner in Rye about sashes on other forum....http://www.woodworkuk.co.uk/forum/viewt ... =4&t=13200
I post on both as I like the other forum too and there are lots of chaps on there who have been of great assistance on there....a couple of chaps have even lent me spindle moulder tooling !

This mirrors Andy what was in the sash development book you referenced which refers to iron "hold fasts" and also what I said about the 1720's house having an iron Lug. It occurs to me the lug must have been loose not because it was supposed to be that way but because it probably came loose in the brickwork.
 
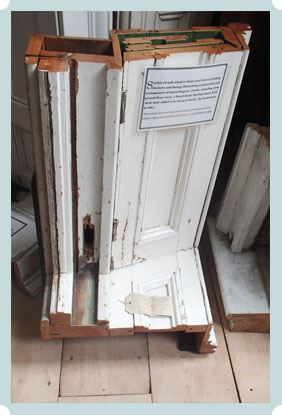
If you work in building conservation you'll know this already, but for the rest of us there's another resource worth mentioning, the Brooking Collection. It's a collection of bits of old buildings, rescued from demolition, to illustrate the details of historic building techniques. I've not visited it, but the website confirms that they have exhibits like this to show how sash windows and shutters were constructed.

wp38ed4fb8_05_06.jpg


More here

www.thebrookingcollection.org
 
Yes its run by a lovely and eccentric chap called Charles Brooking. Its basically his house with a very large collection of sheds outside with the stuff in - very worth a visit. He has lots of cool bits.

That is excellent thought the section of the sash and panelling.....I may make another visit to look again....
 
rhrwilliams":1rmzk7uq said:
Yes its run by a lovely and eccentric chap called Charles Brooking. Its basically his house with a very large collection of sheds outside with the stuff in - very worth a visit. He has lots of cool bits.

That is excellent thought the section of the sash and panelling.....I may make another visit to look again....
I've sent Brooking some window bits - zinc patent glazing from a Paxton designed station.
There's a little detail with the shutters which is useful - the bottom edge of the shutters is set slightly higher than the cill over which it rests when all opened out across the windows. Otherwise the slightest settlement in the leaves will cause it to catch, and with three leaves there's a lot of possible wear on the hinges. But when folded back into the reveal the little gap has a moulding to close it. Won't make much sense until you see what I mean - don't think I've got any photos.
 
Apologies for my ignorance: I thought it was a blocked up window D'oh!

Fascinating thread, I had no idea that sash windows were originally set in between brickwork not behind. Im keeping my eye out now to see if there are any examples locally.
 
Its not ignorance as there are many examples where windows have been blocked in much like this - its only because I've seen the inside layout I know it was a relief / architectural feature.
 
Thanks Jacob again - I was going to go to one of the houses in spittalfields at some point and photograph the windows and shutters from inside and out to get some details. There are a couple that are sort of open to the public. SPAB also have their HQ there and I'm sure they will let me into perv on windows.
 
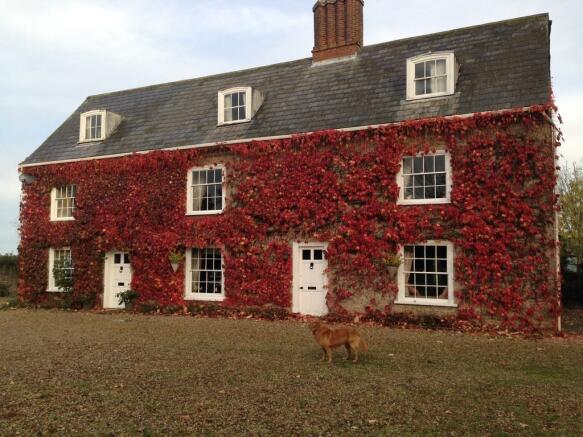
Going back to the original post, this is where I lived in my teens. Near derelict when we moved in, a bit less so when I left to be an adult.

6335_100063001644_IMG_00_0005_max_656x437.jpg


It's in rural mid Suffolk, so gives some idea of vernacular non-urban architecture.

The house is late 1500s timber/lath and plaster, with the brick front and slate roof as a Georgian addition. You can see the sash style from the picture, no recessing into the brickwork.

Internally, all the front ground floor windows had panelled shutters, two hinged panels per side. From memory the front wall was around a foot thick (timber/plaster inner, brick skin). The shutters were angled inside, so the window opening splayed internally to accommodate them flush to the internal wall.

I know several other houses with similar windows and shutters, so the combination was not uncommon.

Hope this helps.
 
profchris":2mf1ganp said:
Going back to the original post, this is where I lived in my teens. Near derelict when we moved in, a bit less so when I left to be an adult.

6335_100063001644_IMG_00_0005_max_656x437.jpg


It's in rural mid Suffolk, so gives some idea of vernacular non-urban architecture.

The house is late 1500s timber/lath and plaster, with the brick front and slate roof as a Georgian addition. You can see the sash style from the picture, no recessing into the brickwork.

Internally, all the front ground floor windows had panelled shutters, two hinged panels per side. From memory the front wall was around a foot thick (timber/plaster inner, brick skin). The shutters were angled inside, so the window opening splayed internally to accommodate them flush to the internal wall.

I know several other houses with similar windows and shutters, so the combination was not uncommon.

Hope this helps.
That sort of alteration went on all over the country - tidy Georgian facades on older vernacular or medieval buildings. Every village around here has them but in stone - with little old mullioned windows around the back, sometimes still in use, sometimes filled in. There was some sort of building boom, and the price of glass fell with new technology making larger panes viable. As a result the backs of many houses are quite fascinating - with traces of alterations going back a long way, sometimes to Roman foundations.
I'm still surprised by the sash boxes exposed - you just don't see that oop north, except as obvious retro fits.
 
rhrwilliams":wen8m2og said:
...
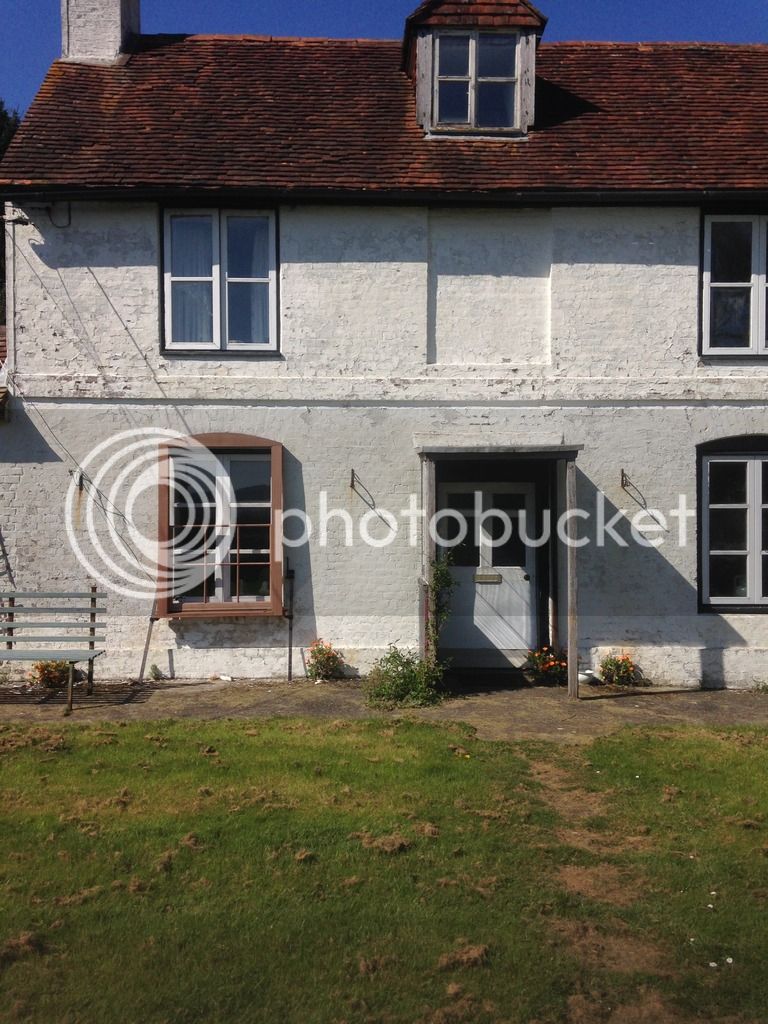
I have a potential window replacement project on a farmhouse in East Sussex. The building was built between 1720 and 1750.

windows.jpg


Had the property been further north (Pennines) I would not have been surprised to see window openings of those proportions have small 'secure' opening top light in lower windows and larger opening top light in first floor windows. But I've never seen them with an arched brick lintel. The canal side (1750's?) property of the same era being an example.
 

Attachments

  • windows.jpg
    windows.jpg
    502.3 KB
Hi everyone

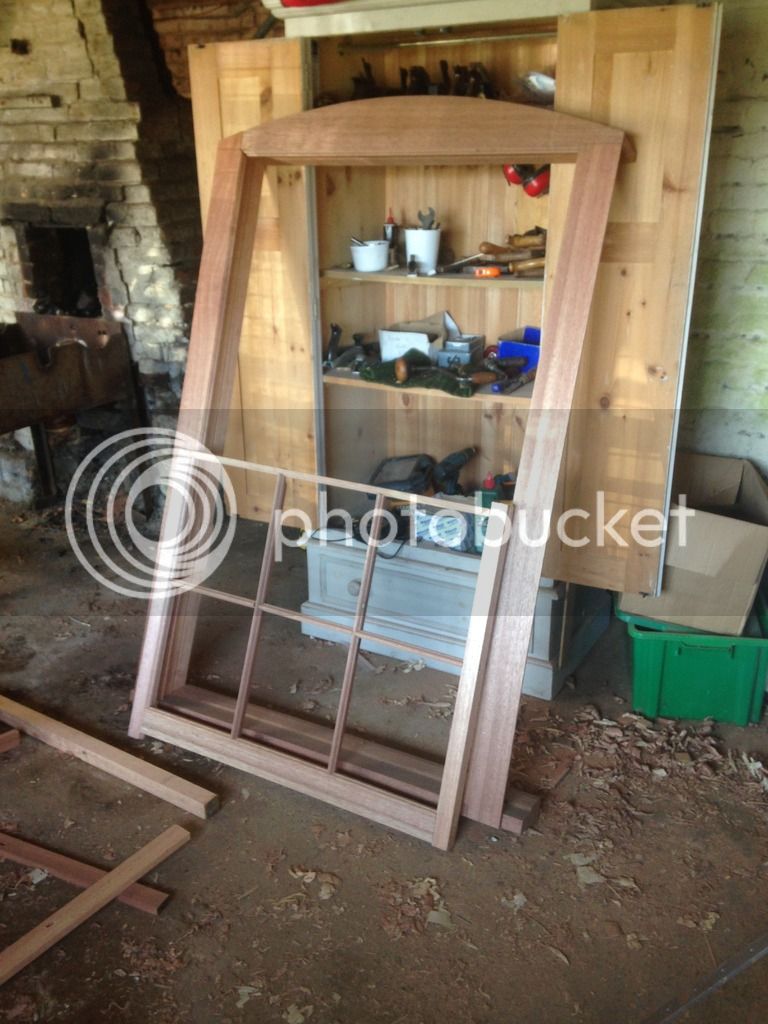
I and my partner have decided sash windows would look very nice, so I am going to make some sashes. As such I decided (as I have never made a box before ) I would make a test one up to see what it looks like and hopefully get the cock ups out the way now. I used scrap wood from a skip..... will make the real ones from redwood. You will see from pics in the background I also have a forge so I am going to have a go at making the ironmongery too.

From making them up , I have some questions from the experts if anyone can help me please.

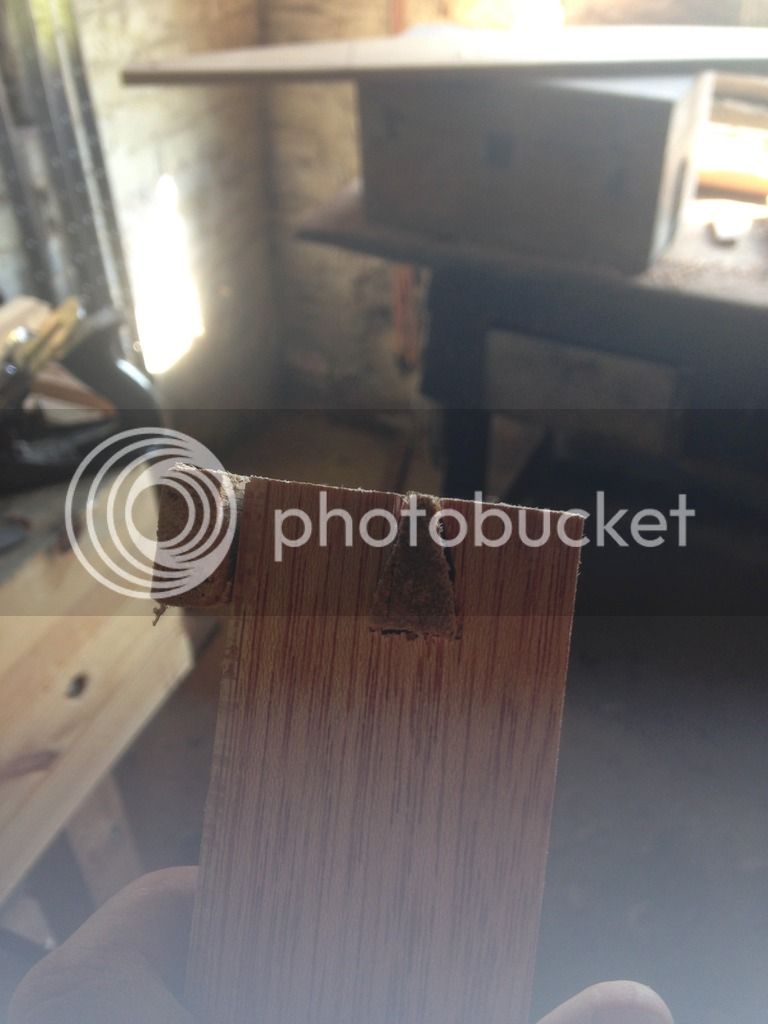
1) At the meeting rail I did a dovetail type joint (taken from Cassells joinery book). I made a bit of a hash of this , is there an easier joint that can be used ?

2) I scribed everything on the spindle moulder and hoped it all fitted together later - it did mostly but was not micro mm perfect. Do most people do this on spindle or scribe by hand ? The profile I used was a complicated one and I think an Ovolo or something may be easier to scribe by hand. I can see that doing it by hand has some advantages.

3) What tolerance do you allow between sash / box frame for sliding and between sash / staff beads ? I left 1.5mm but this feels tight still.

4) I had real trouble squaring the box frame up - does it hold together square when you glue linings on, or do you rely on wedging it square in the opening ? Also do you make up the box frame on the bench or glue and pin the linings on when its in the opening ?

5) What stock thickness is generally used ? I used 22mm for box frame, 15mm for external linings and 18mm internal linings. I was thinking 15mm may be too thin for external linings.

6) If I want to draft proof sashes, so I need to alter construction at all at this stage ?

If anyone has the time to help me I would be very grateful and appreciate not all questions may be able to be answered.

Richard

Box and Sash


Cock up of meeting rail


In place
 
The dovetail can be omitted and be replaced with a mortise and tenon if you put a joggle on the stiles.
The sash stiles and head and sill are normally assembled before a squaring lath is fastened to the inside face to keep the frame square while the outer faces are cut and fitted. The lath can then be removed and the assembly will remain square.
Material thickness varies from one area to another, as do some design features. In my area of the country the windows in workers houses have Pully stiles 25mm thick with the inner and outer facings 18mm thick. The lights are generally 38mm thick. In better quality housing and public buildings the materials are slightly heavier and the lights are 44mm or thicker.
A 2mm gap before painting should be about right, this is critical with the outer sash but the inner can be easily adjusted with the position of the staff bead. Reading the books mentioned earlier will give you all you need. Best of luck with the project.
 

Latest posts

Back
Top