siggy_7
Full time tool collector, part time woodworker
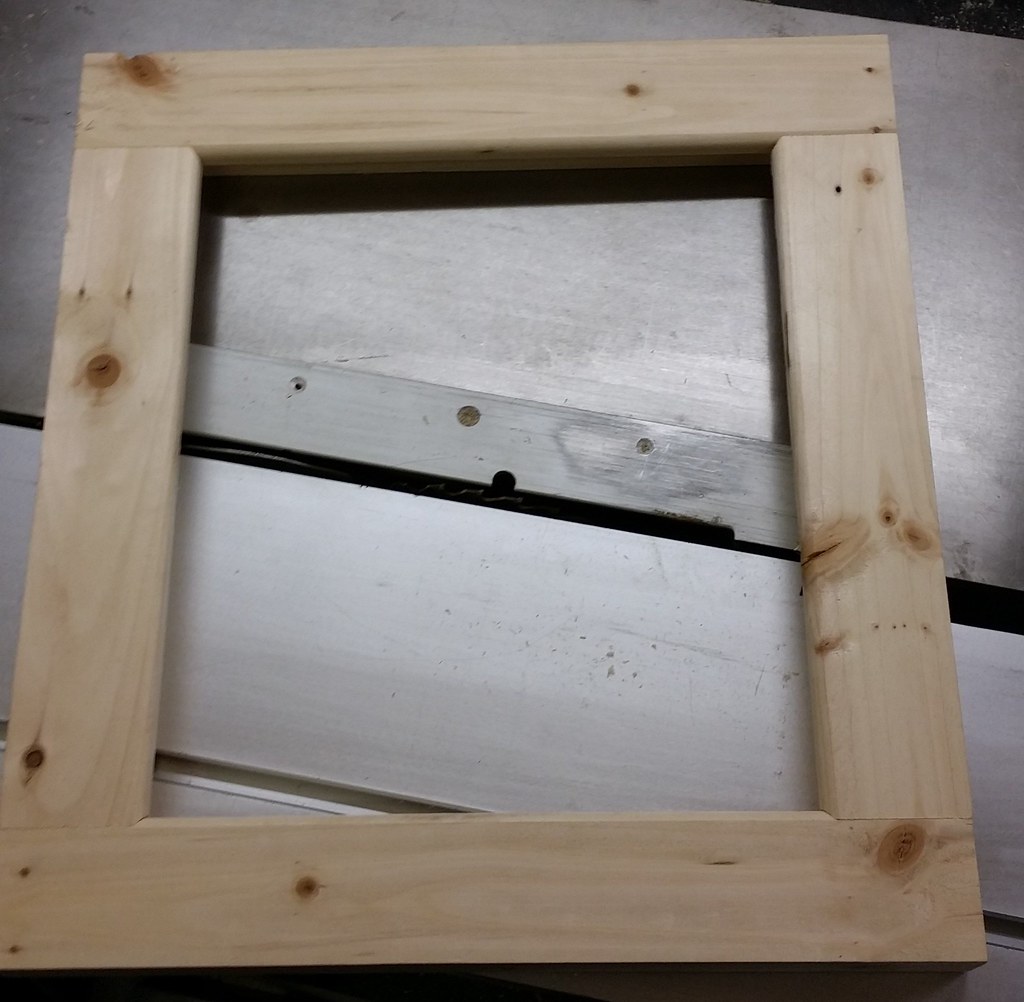
I'm building up to making a pair of glazed doors for my garage. Material will be cedar, each door will be about 1.1m wide and 2.2m tall. The joints for such a door around the glazing at the top looked rather more complicated than anything I have attempted before, so I thought I'd give myself a trial run yesterday.
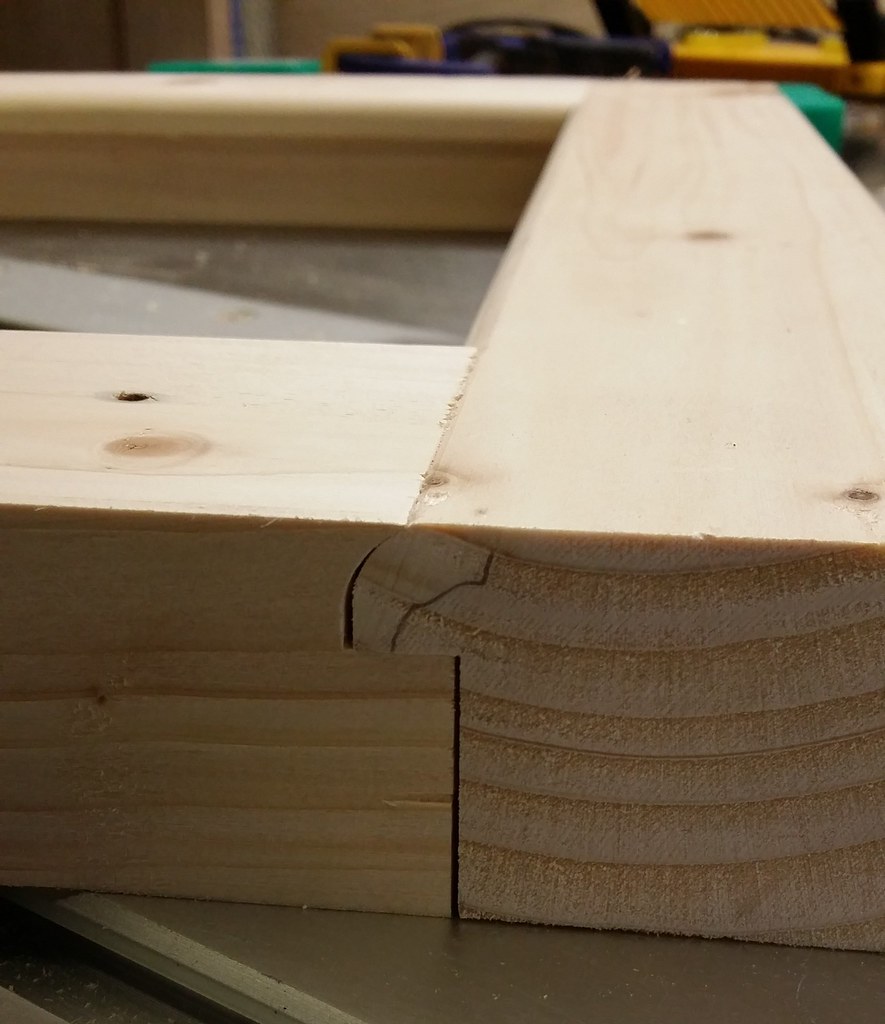
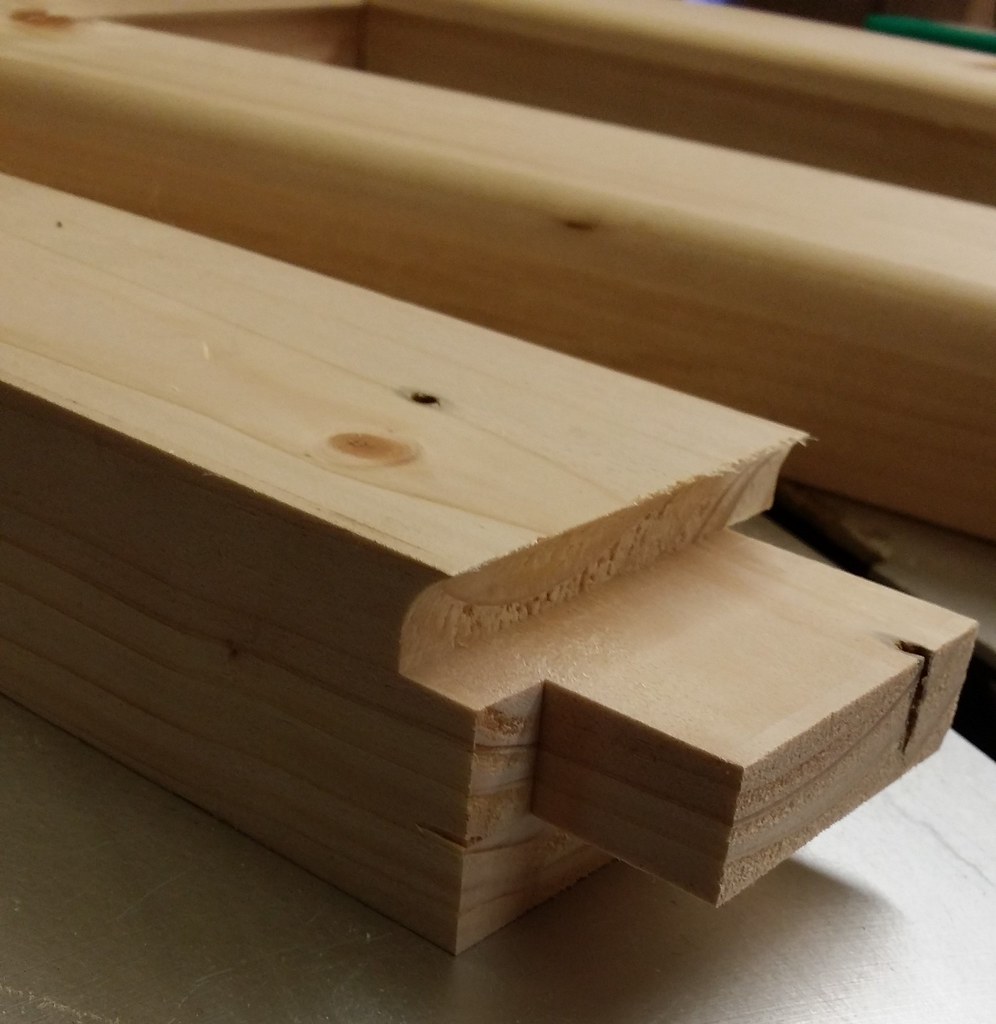
The results are a real disaster (so plenty of lessons learned and the right call for a practice!). No harm done. I now realise that my key mistake was not understanding the relationship between the coped scribe and the dimensions of the mortice and tenon - I hadn't lined up the height of the cope cutter to match the cheek of the tenon, so the mortice and tenon geometry was consequently all over the place. I also processed things in the wrong order, learned that lesson for next time.
The sequence I have arrived at for test number 2 is the following:
1. Start with representative thickness wood - my first test stock was 32mm which is too thin. I'm expecting to get about 42-44mm from the cedar I have for the doors when I plane it
2. First step is to cut the mortice and tenon to join the rails and stiles - have some questions on this
3. Then cut the cope in the rails, coping cutter height to just touch the cheek of the tenon. Some questions about fence position which I'll come back to
4. Cut the matching profile to the cope on all rails and stiles
5. Set the height of the glazing rebate to the top of the tenon cheek, then cut the glazing rebate on all parts.
My questions, which the articles I have read don't cover, are:
1. The coping of the rail affects how far the tenon will pass into the stile. I therefore need to cut the mortice deeper than the tenon made in point 2 above by the extra depth that this cut will provide?
2. The cutting of the glazing rebate on the rail will also slice off a bit of the tenon on the rail. I therefore need to cut the mortice narrower than the tenon made in point 2 on the glazing end by the width of the glazing rebate?
3. What determines the fence position setting for the coping cut? (This would appear to be related to the mortice and tenon geometry choices in question 1)
Any pointers on the above or other advice on making this joint gratefully received.


