Beaded Face Frames

UKworkshop.co.uk

Help Support UKworkshop.co.uk:

This site may earn a commission from merchant affiliate links, including eBay, Amazon, and others.

BradNaylor

Established Member
Joined
17 Oct 2007
Messages
2,311
Reaction score
2
Location
Turning MDF into gold in a northern town
I owe a great debt to JonnyD for pointing me in the direction of using a router table for cutting the mitres on a beaded face frame in his recent thread. Previously I have used the table saw with questionable results and a hend-held router and shop-made jig which was OK but fiddly.

This method works like a dream and I can heartily recommend it. Thanks Jonny!

The job I am starting is a desk between two bookcases. Everything is painted MDF apart from the desk top which is solid oak. This is the drawing supplied by the client.
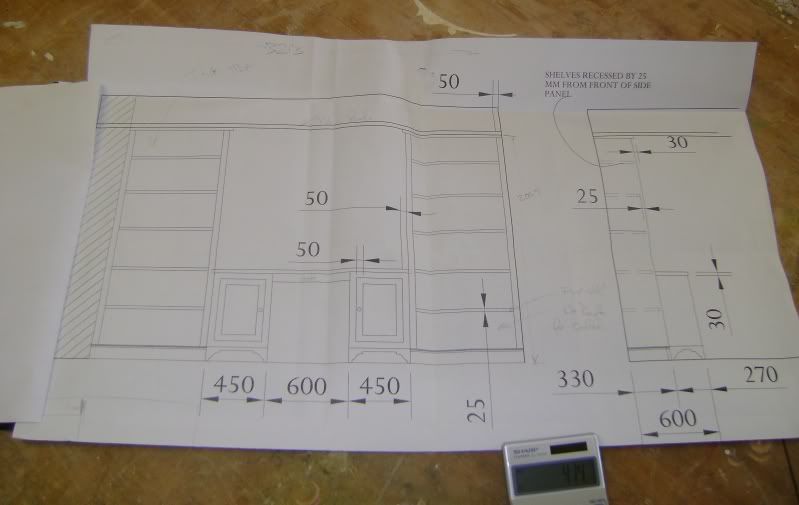
HarrisDesk.jpg


Firtst step is making the face frames for the desk pedestals and the bookcases.

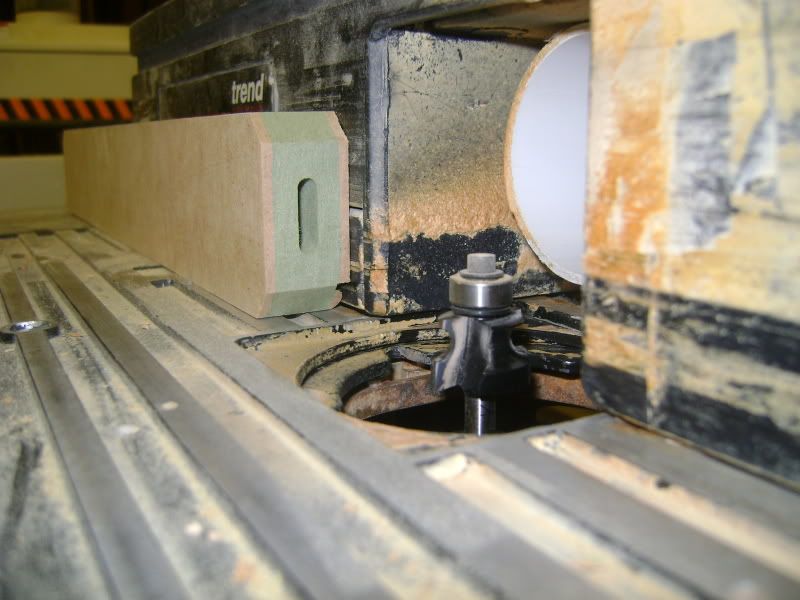
I started by fixing a false bed to a router table with two parallel trenches (dadoes) cut into it to guide a sliding fence across the cutter at exactly 90 degrees. The photos are taken from the back of the router table for clarity.
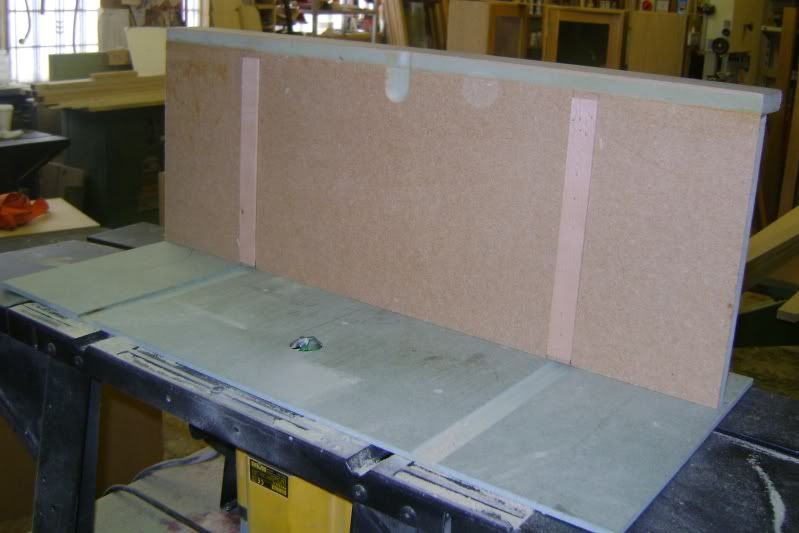
HarrisDesk003.jpg


The cutter is a flat bottomed 45 degree one from Trend's cheapo 'Trade' range. It is the only one with this profile I can find. The marking lines on the outside edge of the workpiece are lined up with the reference lines on the fence and the cut made in 3 passes.
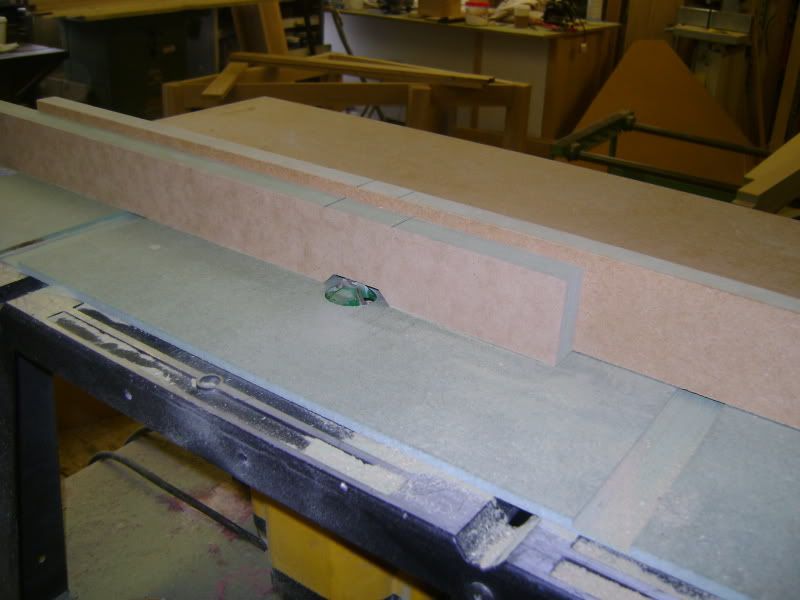
HarrisDesk002.jpg


I then cut Domino slots in the ends of the rails using the minimum width setting for a very tight fit
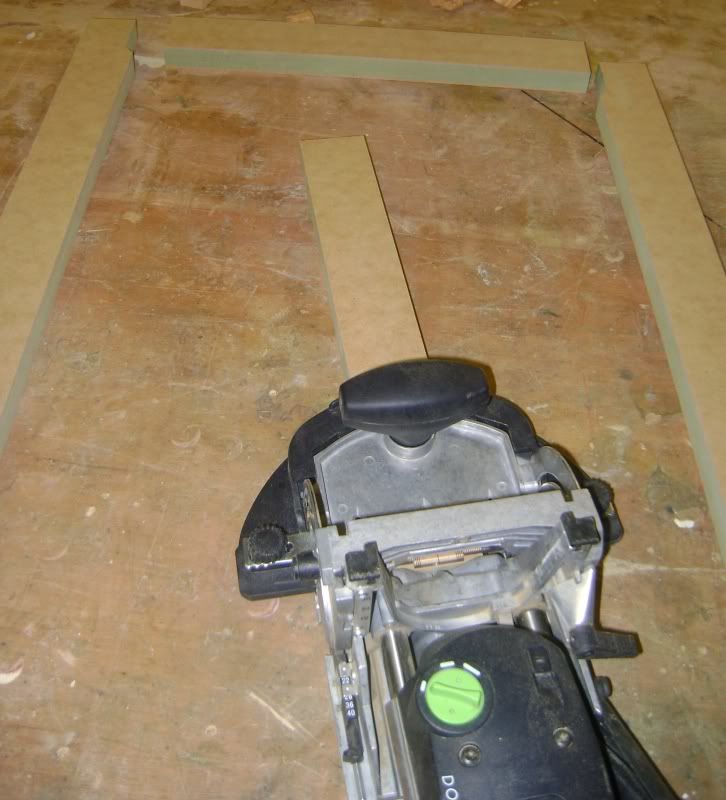
HarrisDesk006.jpg


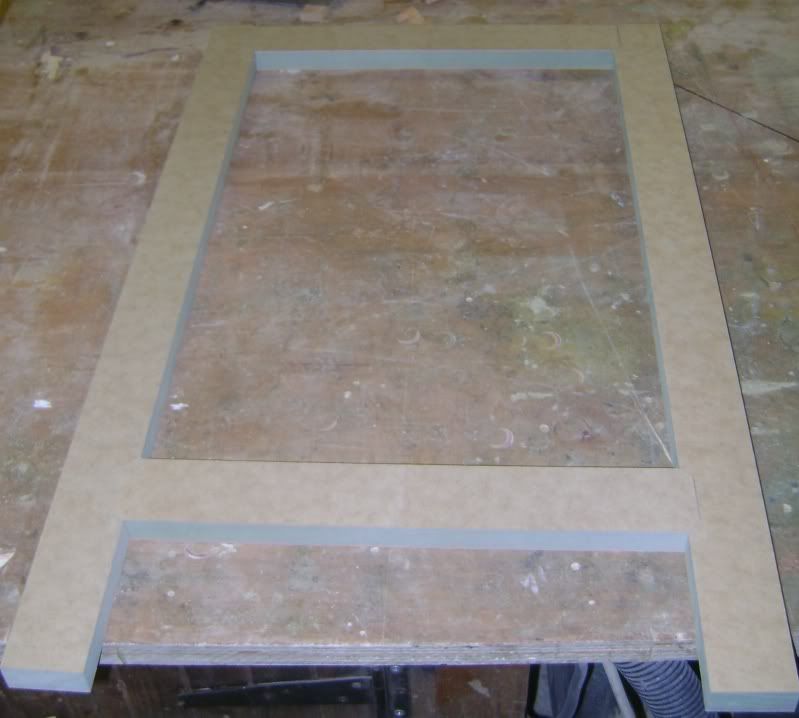
The ends of the rails are then mitred to fit the recesses machined in the stiles.
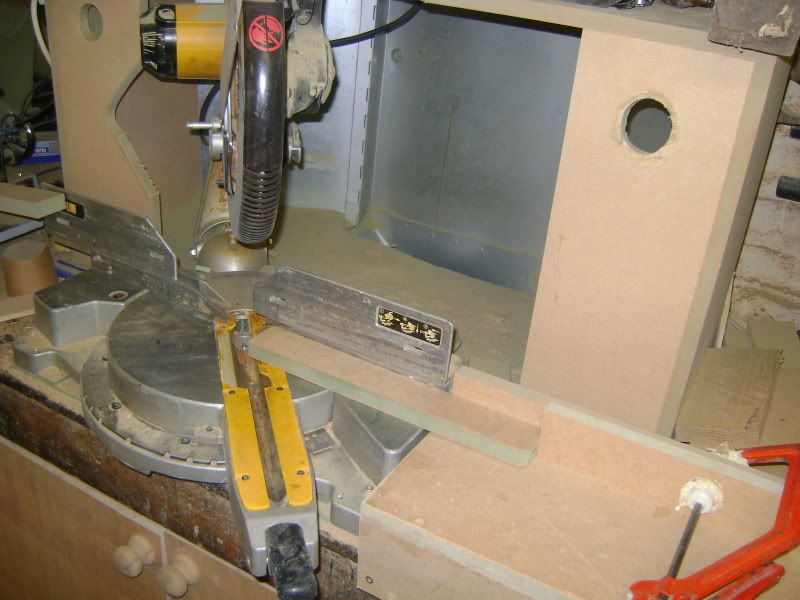
HarrisDesk007.jpg


The fit is absolutely perfect!

HarrisDesk009.jpg


Using a slightly wider setting and increasing the depth of cut I make the Domino slots in the stiles. It would be better to do this before routing the recesses but I didn't think! :oops:
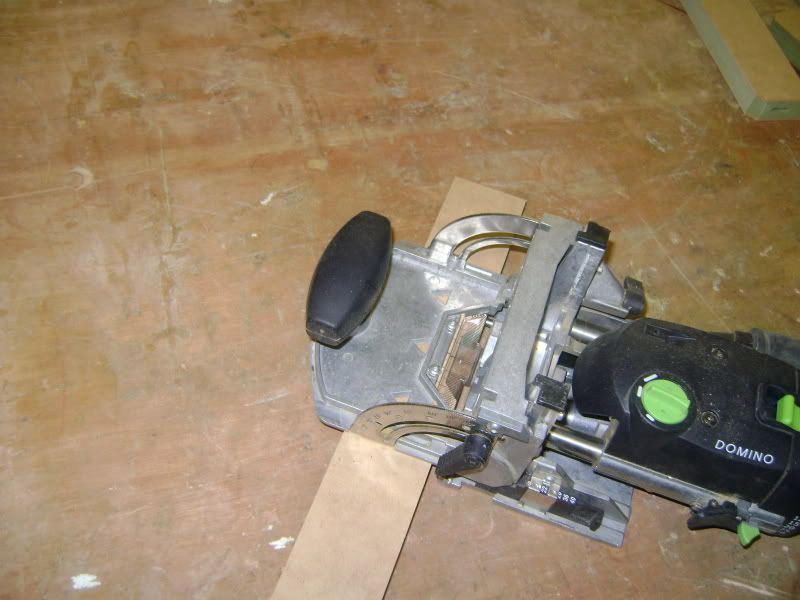
HarrisDesk010.jpg


I then marked the edges that required a bead routing on them
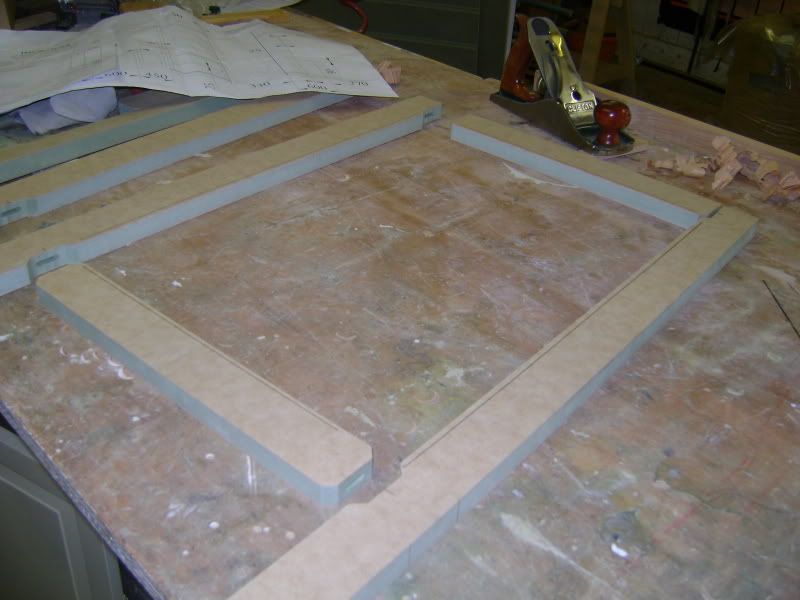
HarrisDesk015.jpg


And machined away.

HarrisDesk016.jpg


Two router tables makes a job like this a lot easier and quicker. Setting up takes a lot longer than the machining and it is great to be able simply to swap between one work-station and the other.
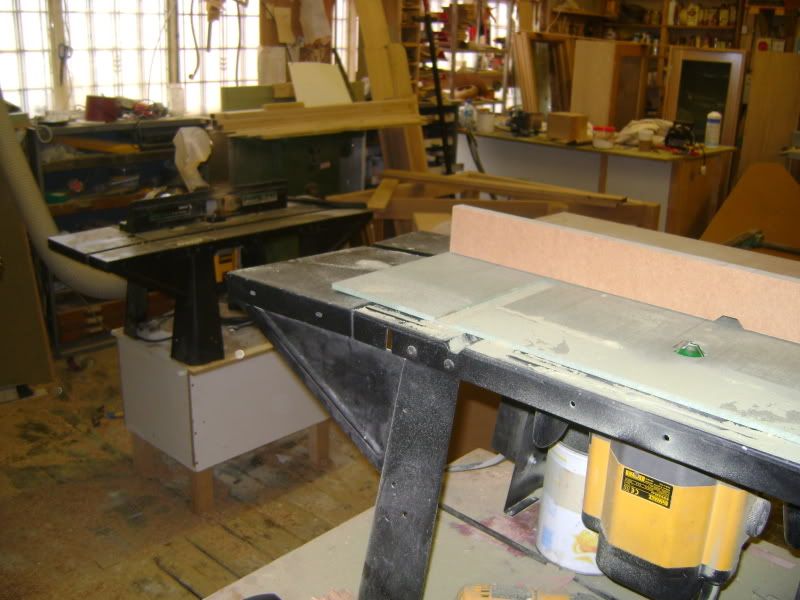
HarrisDesk019.jpg


A little assembly...

HarrisDesk021.jpg


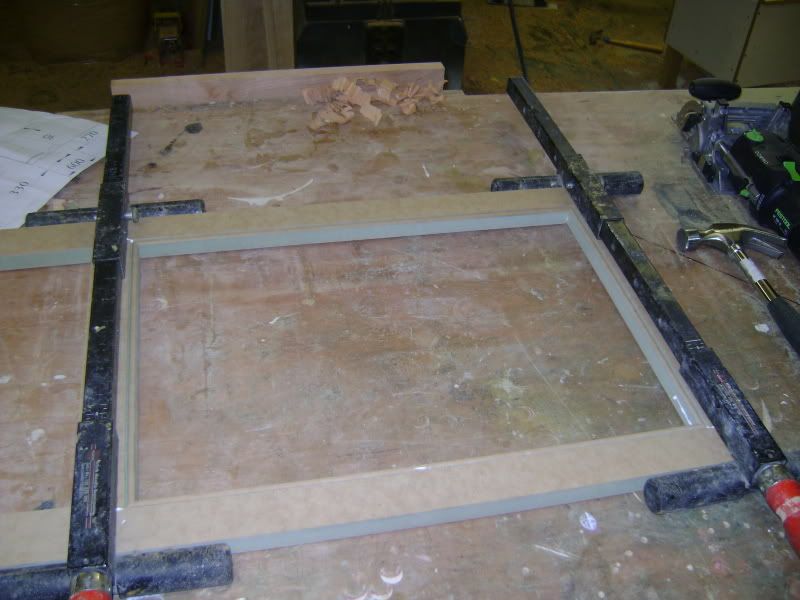
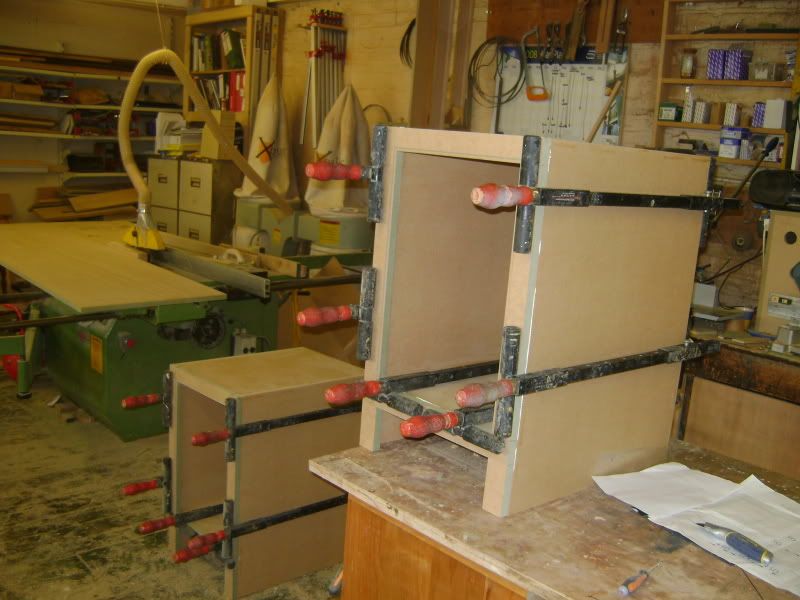
And in the space of a couple of hours four face frames are in clamps.
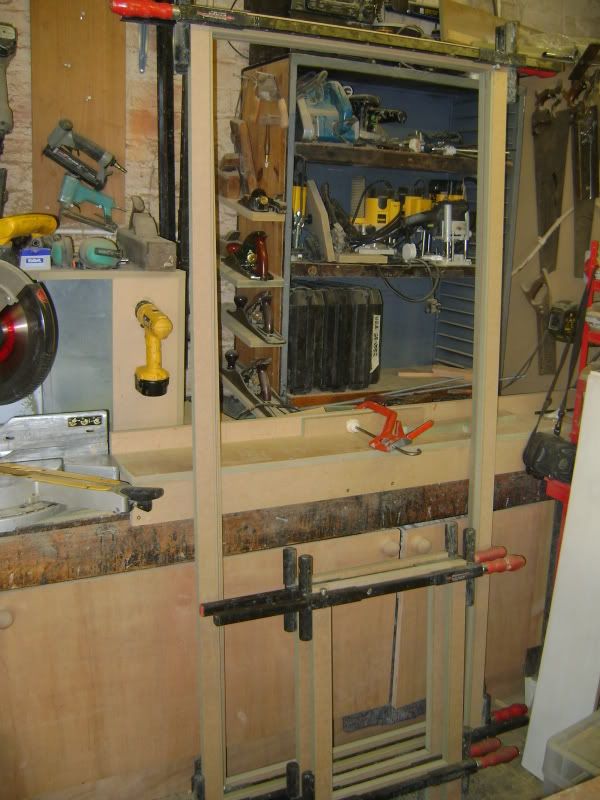
HarrisDesk025.jpg


While the glue sets I knock up the desk pedestals with Dominos and then fix the frames in place
HarrisDesk027.jpg


The combination of the router table method and the Domino has cut the time taken to do this process in half for me. I am leaving that table set up ready for any future jobs.

Hope this is of interest and some help.

Cheers
Brad
 
Nice work as always Alchy

Tell me though, with those pedestal carcasses, how do you make sure you get a good paint coverage on the inside when they are all enclosed like that, or is there a separate back panel that I can't see?

Cheers

Mark
 
The Alchemist":16d6jdng said:
The cutter is a flat bottomed 45 degree one from Trend's cheapo 'Trade' range. It is the only one with this profile I can find. The marking lines on the outside edge of the workpiece are lined up with the reference lines on the fence and the cut made in 3 passes.
Brad

Dan,

You can get them here:

http://www.wealdentool.com/acatalog/Onl ... ve_80.html
 
TrimTheKing":14ypcchl said:
Nice work as always Alchy

Tell me though, with those pedestal carcasses, how do you make sure you get a good paint coverage on the inside when they are all enclosed like that, or is there a separate back panel that I can't see?

Cheers

Mark

The backs are painted seperately and only fixed on at the end. This enables a good finish on the inside of the cabinet.

Bigger carcasses such as kitchen cabinets or the bookcases I am making for this client, I will dry fit together with Dominos and then break down for finishing. Not only does this make for a better finish but it takes up a lot less space in the workshop.

Cheers
Brad
 
Looking good Duncan.

I have made frames like this for a few years now and once set up it is quite straightforward. I am doing quite a bit of this type of work now and like you I am going to dedicate a router table to making frames and leave it set up. Glad you found my post usefull.

Jon
 
Blimey! There's a coincidence, I've just completed such a dedicated router table for general box making and for easy setting of mitre lock cutters and am preparing to try it out over the next few days. I THINK that I've worked out a method for easing the setting up of these type of cutters. (Says he bravely!)

Roy.
 
I don't think I could or should get away with it, due to the HSE. Exposed cutters and all that business.
Be careful if you do it this way.

Also doing overhead in a jig gives me the opportunity to do up to 12 pieces of framework at a time.
 
Doctor":2owcio63 said:
I don't think I could or should get away with it, due to the HSE. Exposed cutters and all that business.

I've wondered in the past how router tables are seen in a commercial environment, from a safety perspective. I use mine regularly in a hobby environment, but it always strikes me that the upturned exposed cutter would be an issue if you applied PUWER rules.

Ed
 
Doctor":10sczhlz said:
I don't think I could or should get away with it, due to the HSE. Exposed cutters and all that business.
Be careful if you do it this way.

Also doing overhead in a jig gives me the opportunity to do up to 12 pieces of framework at a time.

Fair points.

Fortunately as I don't employ anyone I can 'get away with it'!

I played around with machining several pieces at once and got up to 6 clamped to the fence - it worked a treat and is what I would do on a kitchen where there were lots of the same pieces to do.

Of course, with the work clamped to the fence your fingers are well away from the cutter anyway so the safety issue is covered.

From what I understand so long as you've done a 'risk assessment' and have it on file you can do pretty well what you like!

Box ticking and pineapple covering.

:lol:

Brad
 
The Alchemist":1jorwd5i said:
From what I understand so long as you've done a 'risk assessment' and have it on file you can do pretty well what you like!

Not these days, risk assessments cover things where there is a potential risk like what type of ladder should be used, in the case of machinery, if my guys got hurt on an exposed cutter then it would be my safety negligence.
Possible prison sentence and a visit from Mr Big in the showers every night :shock:
 
forgive the probable gross ignorance but how is a router table any less safe than a spindle moulder?

Miles
 
on a spindle I would always use a power feed where possible, if it has to be done manually gaurds are in place.
Dan is doing the cut by sliding the work over an exposed cutter with no guards.
I think it would be a simple process to put some sort of flip down guard on.
 
the point is though that you can't use a power feed when using the table in this manner.
I'm not a huge fan of H&S but for me because I have employee's I have to follow it (quite rightly) and this would be an unacceptable method.
 
Doctor":1v9leupm said:
the point is though that you can't use a power feed when using the table in this manner.


Bob,

Doo!
I was thinking about running the cock bead with the power feed, I agree about the lack of safety with scribe on a router
 
Funny I am just about to make beaded face frames for my kitchen.

I was going to make the beading seperately, do you think this method is easier/quicker/better?

mike
 
mikepooley":3d6hgonf said:
Funny I am just about to make beaded face frames for my kitchen.

I was going to make the beading seperately, do you think this method is easier/quicker/better?

mike

Doing them this way is undoubtedly quicker once you have got everything set up, certainly for a big job such as a kitchen where most of the stiles will be the same length. The most time consuming part of applying a seperate bead is filling and sanding all the brad holes!

Both methods are pretty easy.

Better? I don't know. There is a cerain macho pride amongst cabinetmakers that looks down on fixing a seperate bead as being cheating and a bit beneath them.

Bit silly really, but hey!

Brad
 
I must admit I prefer to mould out of a solid piece of wood the main reasons is that it is quicker once set up. If you are using butt hinges its stronger and If you are doing a solid wood frame there is no problem with colour and grain matching and hundreds of brad holes to fill.

Jon
 
Thanks
I might give it a try then.

the router set up worries me a bit - but i'll give it some thought and see if i can come up with a better way for me. :oops:

mike
 

Latest posts

Back
Top