Art desk - WIP

UKworkshop.co.uk

Help Support UKworkshop.co.uk:

This site may earn a commission from merchant affiliate links, including eBay, Amazon, and others.

NickM

Established Member
Joined
6 Mar 2019
Messages
374
Reaction score
135
Location
Hampshire
I'm thinking about moving on from workbench, stool, assorted dovetail boxes to something a bit more ambitious - an art desk/painting table for my daughter.

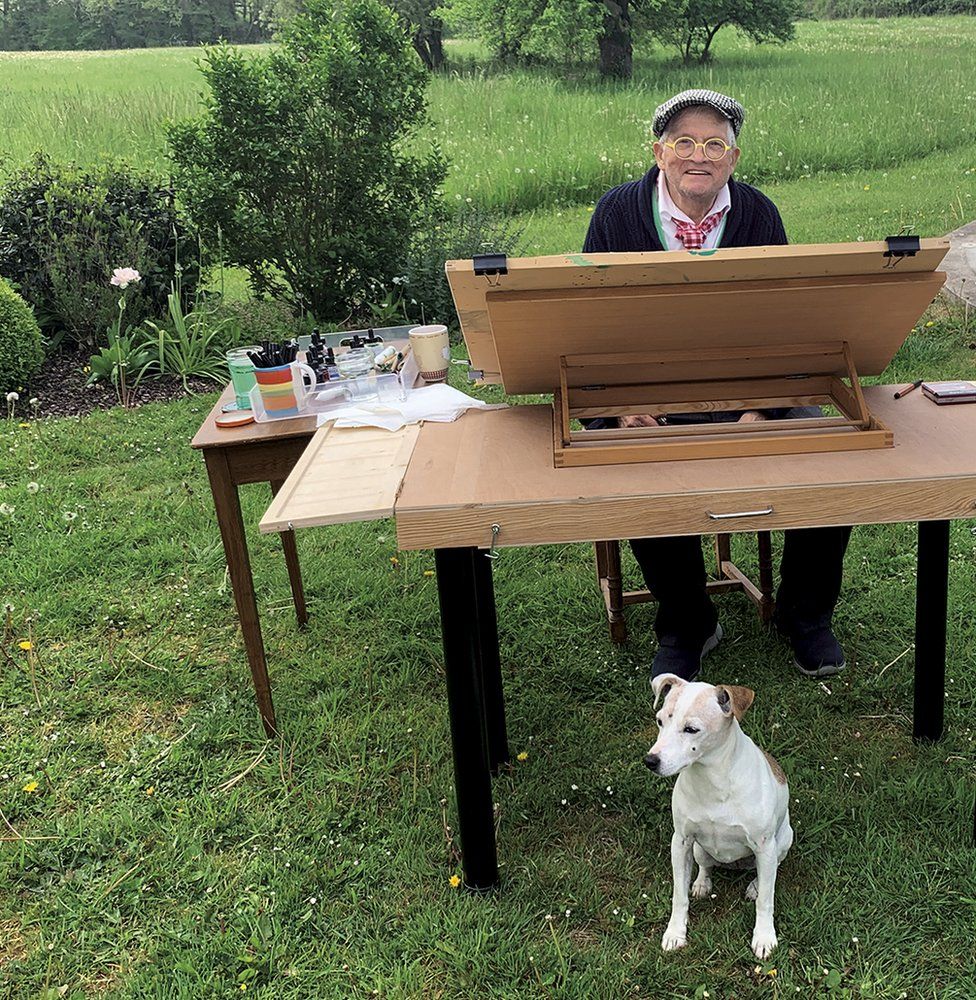
She's 12 and quite into her painting at the moment and I think she's rather good. I had intended to make some kind of box for her to store her paints etc. in, but on a recent trip to Hobbycraft, she took a bit of a shine to an art desk. It was a bit like an architect's desk with a top which could be lifted up to slope. The problem was that the thing was pretty ghastly so I wondered if I could make something with similar functionality but out of solid wood (oak in this case because that's what I have).

Here is my first drawing:
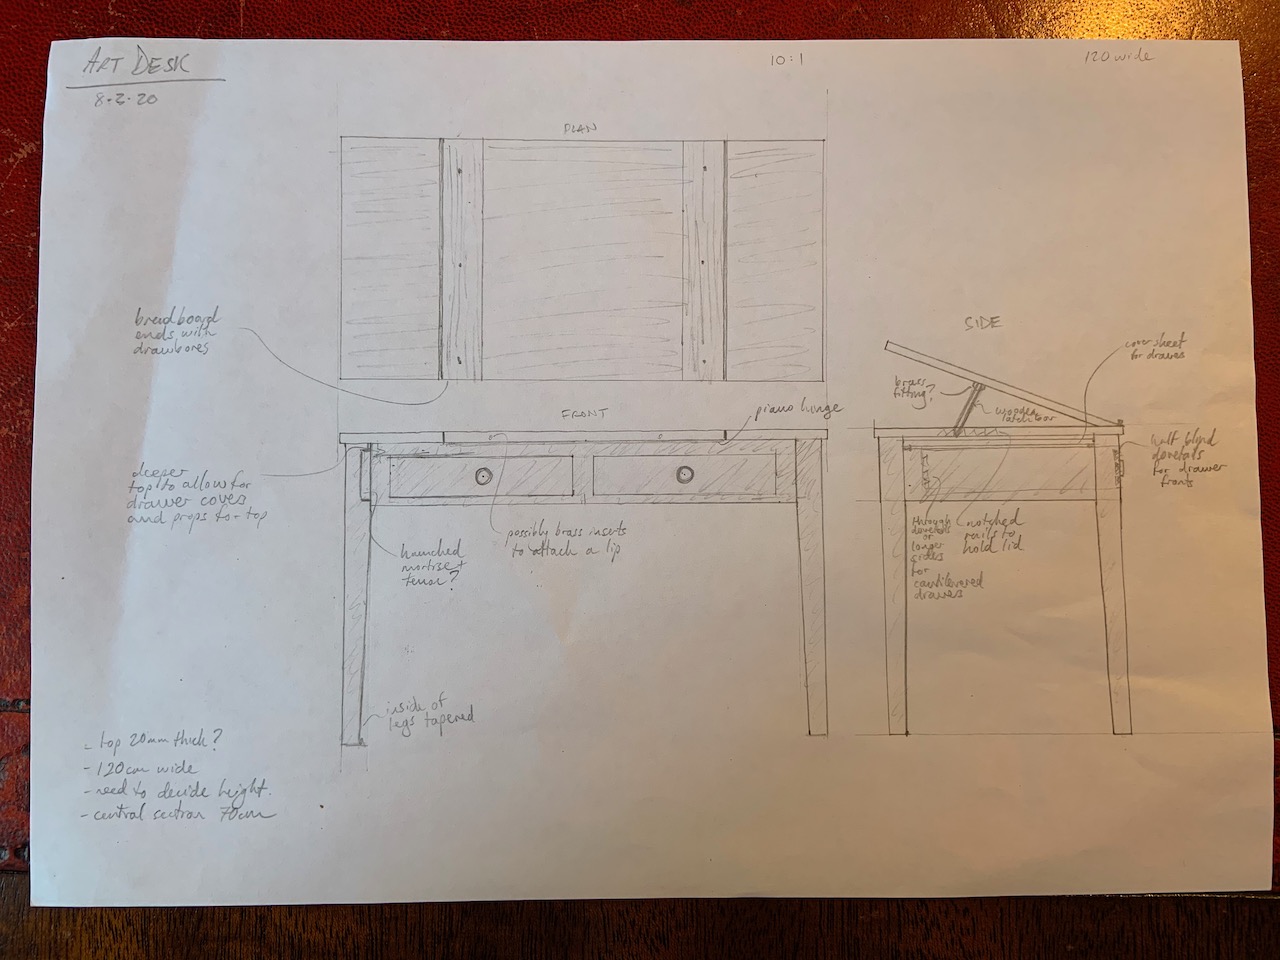
IMG_7311.jpeg


My first question relates to the top. The plan is that the central part will lift up with the two sides remaining flat for water, paints, palette etc. to sit on. As it will be effectively unsupported (only attached to the undercarriage at the front edge with some sort of hinge), I think breadboard ends are a sensible way to go. My question is whether the side pieces will be OK as they are or whether there is a risk of them cupping?

I have other questions, but I'll break this up into separate posts.

Thanks
 

Attachments

  • IMG_7311.jpeg
    IMG_7311.jpeg
    243.3 KB
That looks really nice. It should be an excellent project.

If the grain of the little side pieces is running right/ left across your drawing then yes, they'll need support. The choice of whether to put something underneath or to have a breadboard end -type arrangement is entirely aesthetic.
 
MikeG.":1a1l2fx3 said:
If the grain of the little side pieces is running right/ left across your drawing then yes, they'll need support. The choice of whether to put something underneath or to have a breadboard end -type arrangement is entirely aesthetic.

Thanks Mike. I will greatly appreciate your advice on this.

It's almost certainly too ambitious for me but I'm hoping if I take it slowly I won't get too frustrated and, as they say, nothing ventured nothing gained!

I was indeed thinking of running the grain from right to left. The plan was to make a single panel which I would then cut into 3 pieces, adding the breadboard ends to the centre piece. That way I will have some continuity of grain across the whole top, broken only by the breadboard ends.

Aesthetically, I think the side tables will be too narrow for breadboard ends (they will be around 250/300mm). What kind of support would I be looking at underneath? I'd intended to use buttons on three sides, but I suppose I could come up with a way of adding buttons on the side in the middle of the table. Would that be enough?

In fact, that's going to interact with my second question because I'm thinking that I might be better off with a three drawer design and perhaps I could have drawer dividers running front to back which could be used to attach buttons to hold the side tables down.

I'll put another post up on that later on if I get a chance.

Thanks again
 
NickM":3bp07kps said:
......It's almost certainly too ambitious for me

No, you'll be fine. Drawing it has focused you mind on the issues. That's half the battle. And you've got access to plenty of idle woodworkers sitting around with not a lot to do other than offer their advice.

Aesthetically, I think the side tables will be too narrow for breadboard ends (they will be around 250/300mm). What kind of support would I be looking at underneath?........

As they're being held nicely only a few inches away, I reckon a piece of 20x20 underneath would be more than enough.
 
MikeG.":3hrwer3t said:
As they're being held nicely only a few inches away, I reckon a piece of 20x20 underneath would be more than enough.

I'm trying to picture this Mike. Would the 20x20 strip be only under the "unsupported" side of the end tables (e.g under the right hand side of the left table), with buttons on the other three sides? Would that be screwed (not glued) to the top from underneath with elongated holes to allow for movement of the top?

This drawing (3 drawer version) is not finished or fully thought through, but I've shown the 20x20 strip and button arrangement for the left side table. If you click on the photo you should get a bigger, clearer version.

IMG_7313.jpeg


(I realised that moving to a 3-drawer version does not provide another place to put buttons for the side tables unless either (a) the side two outer drawers were very narrow which I don't think would look good, or (b) the side tables are wider, which would leave the centre part of the top too narrow. What it would do, is give me somewhere solid to attach the rails for supporting the top when it's raised, but I'll get to that in another post.)
 

Attachments

  • IMG_7313.jpeg
    IMG_7313.jpeg
    254.2 KB
NickM":18xw7mk6 said:
......I'm trying to picture this Mike. Would the 20x20 strip be only under the "unsupported" side of the end tables (e.g under the right hand side of the left table), with buttons on the other three sides? Would that be screwed (not glued) to the top from underneath with elongated holes to allow for movement of the top?........

That would be fine.
 
Here's my next question. Sorry it's a bit rambling, but hopefully it explains the issue. Grateful for any views or other ideas.

Background

The "mechanism" for holding up the centre panel is going to be a bit like a deckchair! There would be some notched rails running front to back attached to the upper edge of the inside of the drawer dividers. The centre panel will have a folding arms joined by a cross piece the ends of which will engage in the notches.

This mechanism will of course take up some depth (though I haven't worked out how much yet). Added to that, I would also like to have a thin panel (I'm thinking a piece of 1/4" ply for ease and stability) so that the contents of the middle drawer will not be seen when the top is in its raised position.

Options/questions

Option 1 would be to make the top piece of the front apron (marked as "X" on the picture below) tall enough to accommodate all of the above.

The advantages would be: (a) easier to do some of the joinery to accommodate, in particular, the thin panel covering the middle drawer; and (b) easier to make all of the drawers the same size. The main disadvantage is that the boards I have in stock are quite narrow so I think I would struggle to have aprons which are more than 130mm tall unless I join some boards which might look odd on the aprons? At 130, I wonder if I might be left with drawers that are too shallow (I'm more worried about the aesthetic really)? The other disadvantages are that this option affects the depth of all three drawers, and that the apron above the drawer would be taller than the apron below which might look wrong.

Option 2 would be to have full depth outer drawers but with the middle drawer having the same size front, but with shallower sides to accommodate all the gubbins above. It solves the disadvantages of Option 1, but has a couple of problems. Firstly, would it be a problem to have a drawer front which is taller than the sides (I can see a small lip wouldn't have any impact, but what about 10/15/20 mm)? Secondly, I can see some issues in how to attach the thin "vanity" panel so there isn't a gap when looking through the drawer opening at the front but perhaps that can be solved by having a piece which extends down from the inside (a bit like a drawer slip).


Once I have made some decisions on some of these overall design issues, I'm going to have LOTS of questions about the joinery...

IMG_7314.jpeg
 

Attachments

  • IMG_7314.jpeg
    IMG_7314.jpeg
    172 KB
+1 for MikeG's comments. But I would also consider making the side flats with grain running front to back. This would match with the breadboard ends of the centre, and then the sides would not need further support. You could edge-strip the end grain on the front and back.

Deckchair mechanism would be good.

One further thing though, is to consult with your daughter about the desk height and angles of the painting board that she wants, and any other features she would like built in, for example lips/trays/recesses for brushes/pencils. And measure carefully for comfortable working sizes allowing a bit for growth. I made a big video production desk for my (adult) son who has back/neck issues. We measured carefully and it has worked very well for him for several years. For a period he also worked for a local university using similar computers and monitors. The heights of the desk and monitor were only about 1 cm different from his home office, but the setup at the uni caused him considerable back pain.
 
Oh - and if you have room, you could ask her if this is what she would like, or would she prefer a conventional desk plus a regular artist's easel? The advantage of the latter is that is is portable, so she could take it on trips (when we are allowed to).

Be warned though, once you involve her in the planning she will expect it quickly!
 
MikeG.":1mbwu5bh said:
NickM":1mbwu5bh said:
......It's almost certainly too ambitious for me

No, you'll be fine. Drawing it has focused you mind on the issues. That's half the battle. And you've got access to plenty of idle woodworkers sitting around with not a lot to do other than offer their advice.
Lots of excellent advice here and yes, once you've started to really think about the project, you're a goodly way along the build. It won't be too difficult either if you stop and consider the pros and cons of each stage - Rob
 
Thanks for the thoughts so far. I thought I would start some of the work as I think that will help me visualise things as I go forward. I thought I would start with some of the simpler joinery - the legs and side aprons.

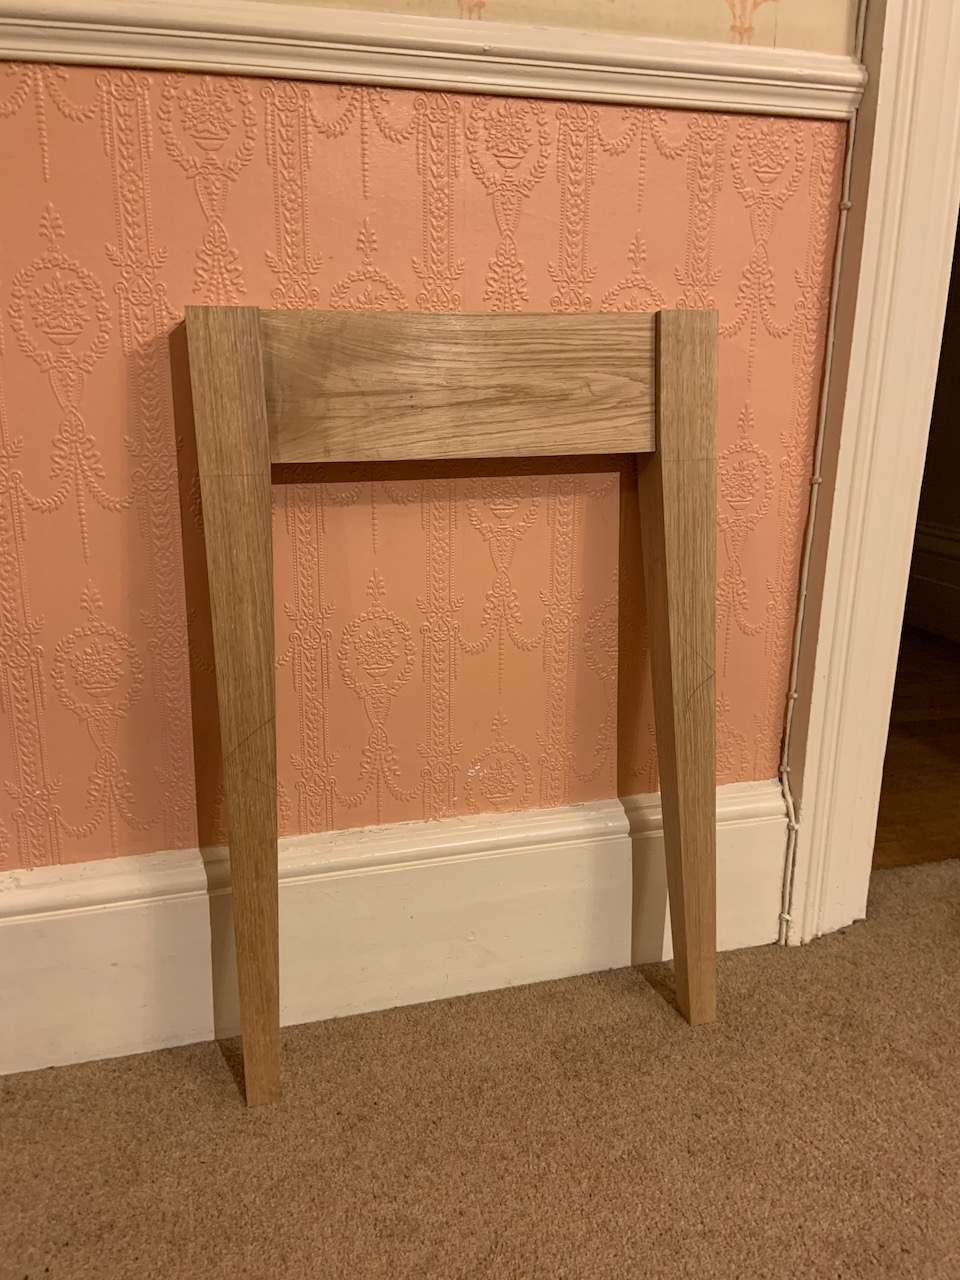
I made the tapered legs with a tapering jig I cobbled together for my the table saw and cleaned them up with a hand plane. I had to remake one because the oak had a very nasty split. I could see it was there but thought I would avoid it with the taper, but sadly not.

IMG_7324.jpeg


IMG_7325.jpeg


I then planed the side aprons and started mortising the legs.

IMG_7327.jpeg


IMG_7329.jpeg


This is one side done (unless I decide to change it... See next post!)

IMG_7333.jpeg
 

Attachments

  • IMG_7324.jpeg
    IMG_7324.jpeg
    310.1 KB
  • IMG_7325.jpeg
    IMG_7325.jpeg
    360.4 KB
  • IMG_7327.jpeg
    IMG_7327.jpeg
    352.9 KB
  • IMG_7329.jpeg
    IMG_7329.jpeg
    255.6 KB
  • IMG_7333.jpeg
    IMG_7333.jpeg
    309.9 KB
I've been having second (and third) thoughts about the size of the top.

Second thought was that I had designed the top to be too deep so I decided to shorten the side aprons accordingly.

I'm now worried I've overdone it, but in the course of mulling that over I decided to get a second opinion from my wise wife. Her answer was that it would be fine because I should have the top overlapping more than I had originally planned. I'd planned minimal overlap of only 5-10mm, whereas she thinks it should be more like 50mm for a more elegant look and to get me back to a deeper table top.

I agree with her that it would look better, but I then realised that if I have too much overlap at the front I will lose a bit of useful drawer space and much more importantly I will have a problem with the front edge of the tilting top fouling the drawers when it's tilted - i.e. you wouldn't be able to open the drawers if the top is raised, which is clearly a non-starter.

Should I:

1. go back to having minimal (10mm max) overlap all round, remaking the side aprons if I want a deeper top (no big deal);

2. have a minimal (10mm max) overlap at the front, but a larger (50mm) overlap at the sides and back; or

3. have a larger (50mm) overlap all round and try to find hinges which will bring the pivot point forward (see sketch below)? This is my preferred option, but I'm worried whether it would put too much leverage on the hinge where it attaches to the apron.

IMG_7334.jpeg


All thoughts welcome.
 

Attachments

  • IMG_7334.jpeg
    IMG_7334.jpeg
    188.4 KB
Just to add to the options... how about leaving 75 mm or so of horizontal tabletop at the front. This would stay flat, fixed to the apron. You could then use piano hinge along the back edge of the flat bit. Ordinary hinge, stronger construction, even overhang all round.

This would slightly reduce the size of the sloping top - but the flat space in front might be useful, to rest a hand or a pencil.

You'd need to decide what to do to support the artwork in progress. To cope with floppy paper or stiff boards you might need clips at the top, a lip sticking up along the front edge of the flap, holes for removable pegs or adjustable wires as on a piano. Or something else you have planned already!
 
Thanks Andy. That's another good option to consider.

To support the work, my plan was to put a couple of brass threaded inserts in the front edge so that a lip could be attached with some brass thumb screws. When not in use, the lip could be removed and stored under the tilting section, or in one of the drawers.

If I adopted your idea, I could use the same arrangement, but with the inserts in the top of the table rather than the front edge.
 
I'd go with AndyT. In my experience, piano hinges are the easiest to do well, especially for the inexperienced. Also the flat could be useful, even scalloped for pencils etc. But consult the user! She may prefer a slope all the way down, but you could still do a pivot (flap hinge) at the fixed edge, without the cantilever that you sketched.

I'm with your wife on the overlap. Useful things they are, for accessories such as a pencil sharpener that really works, maybe a small vice for craft work, a movable lamp with a clamp ...
 
Thanks. I'm definitely coming round to Andy's idea as well. I think it's a neat way of having a larger overlap which will certainly look much better.

I'll now complete making the other side and if that goes well I will do the rear apron as well. That will use the same M&T joints.

When I get to that point I will be back with more questions about the front apron construction, drawer runners etc...
 
If you can, try to consider an option where the table top can be propped up near to vertically (like an easel). There will be times when she wishes to reach the top (back) without leaning over wet paint. This could be very simple, such as some hinged stop sticks.
 
The usual way to fix paper to board is drawing board clips, a quick web search will find many.
www.amazon.co.uk/Helix-Drawing-Board-Cl ... B006K0OGMW
With your design this will be easy as you have 3 edges they will slide over.

This is probably blindingly obvious, but have you checked standard art paper sizes? It would be hugely frustrating if your top was 20mm smaller than one of the sizes, c.20mm bigger is ideal as the clips will reach. Making to this quality means it will last so think A level ....
 

Latest posts

Back
Top