4 drawer unit - WIP - COMPLETED!

UKworkshop.co.uk

Help Support UKworkshop.co.uk:

This site may earn a commission from merchant affiliate links, including eBay, Amazon, and others.

Lee J

Established Member
Joined
20 Nov 2008
Messages
551
Reaction score
1
'er indoors pointed to a space in her 'walk in wardrobe' and said...
"A 4 drawer unit would just finish this room off nicely"
so off I marched to retrieve my trusty tape measure.

I'm going to use this project to learn a few new skills. I could just cut pieces, screw and glue it together, paint it and job done but there's so much more potential with an iten like this to use and learn new techniques. I will use 'mortice and tenons' for construction of the frame, dovetails to create the drawers and I'll actually make a solid wood top by glueing up some lengths of timber and hand planing smooth. I am going to take a careful approach and try to creat a piece of furniture that is of a reasonable standard. Please dont expect a piece of fine craftsmanship here though.

As I always declare at the start of a WIP some of my methods are probably not correct and you may cringe sometimes and shake your head as I'm doing something but as long as I get to where I need to be - I'm happy.

First off I got meself a potta and sat and drew a very rough sketch on the back of a phone bill.

sketch.jpg


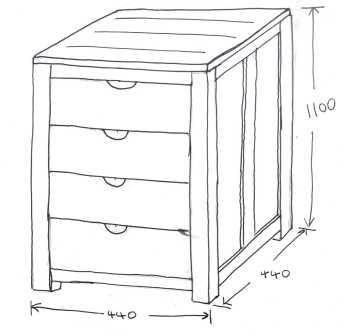
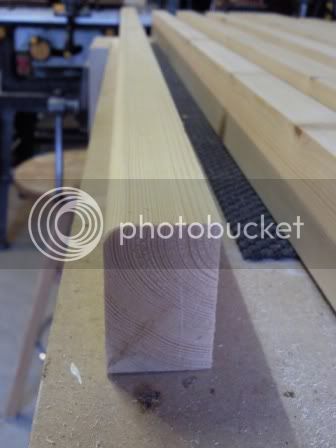
The frame will be made from redwood pine, 28mm x 44mm.
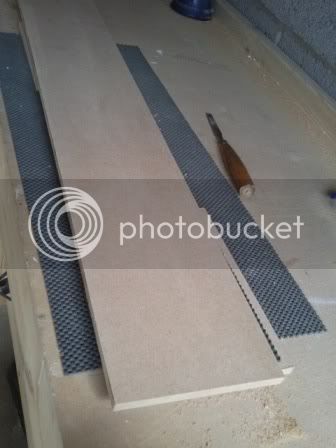
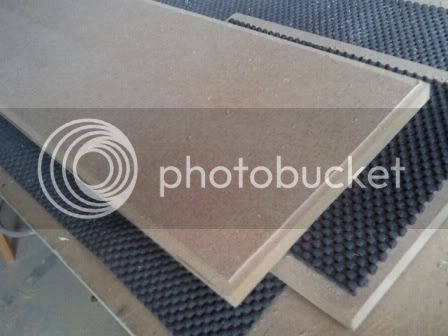
The side panels will be MDF painted white and will sit in a recess.
The drawer cases will be MDF and the fronts will probably be MDF painted white (unless I get any other ideas).
The top will be solid pine.

Frame

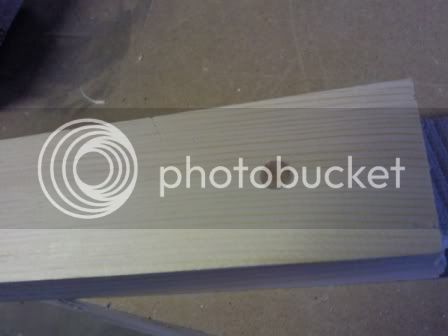
So I purchased some nice smooth straight redwood pine and made a rough cut list as follows...

A Legs/posts/uprights : 28 x 44 x 1100 (WxDxH) QTY : 4
B Horizontal braces : 28 x 44 x 392 QTY : 8
C Upright side panel pieces : 28 x 44 x 1005 QTY : 3

NOTE : For B and C I have add 20mm to each end to allow for tenons. So the actual visable length of B is 352 and C is 965.

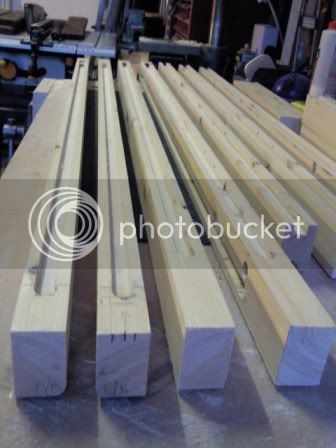
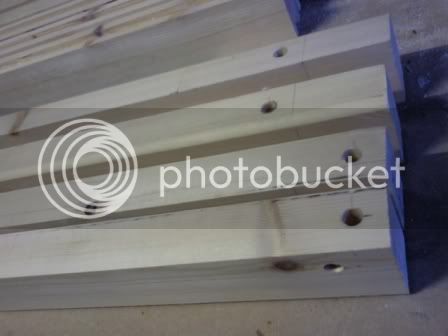
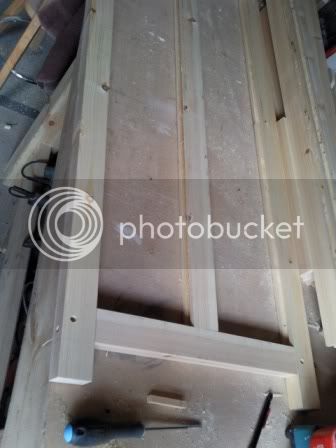
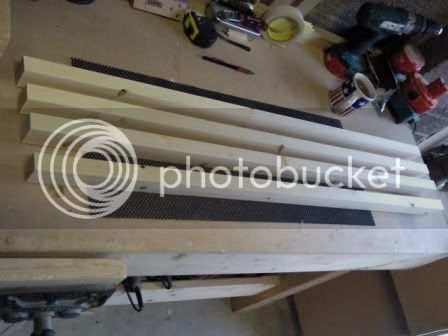
I set up my saw and cut the 4 pieces labelled A... Look! there's me potta tea!

Photo0194.jpg


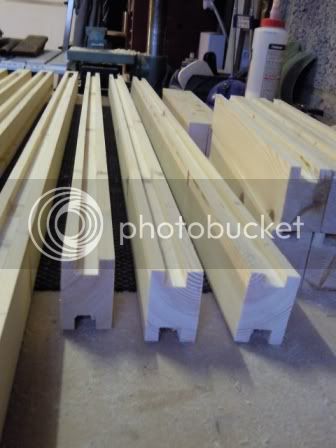
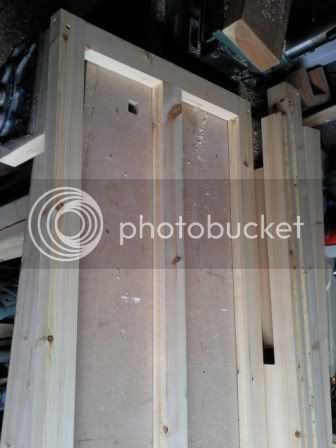
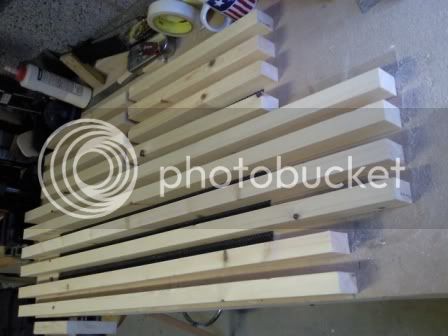
Then I cut the 8 pieces labelled B and the 3 labelled C (only 2 C's in the picture though!)

Photo0197.jpg


To be continued...
 
How are you cutting the dovetails for the drawer-boxes? Dovetailing by hand in MDF is an exercise in frustration because its so crumbly and dusty, unless you use a powered router and jig, even then it's not a great idea.

I'd recommend using at least pine, but preferably an inexpensive hardwood for the drawers so that they will last a bit longer. MDF is not a great choice for drawers, they can easily be damaged - especially friction fit ones.
 
I was gonna use my new dovetail jig on the MDF cases but now you've got me thinking. Pine draw cases would wear longer as I'm thinking of using hardwood runners for the drawers to slide along.

I might even go for somthing like this...

drawer-idea.jpg
 
Plan looks sound. I usually add hardwood strips to the bottom of drawer sides and make the runners from hardwood as well. If it's a solid pine top you're contemplating, it'll need to be fixed to the frame to allow for movement...'buttons' are the usual way in a groove along the inside of the top rails. BB is right about mdf and drawers, much better to go for decent pine throughout - Rob
 
Not wanting to be controversial but I once heard that drawer runner (bottoms) should be softwood to avoid wear I suppose on the hardwood frame?
 
woodbloke":47akybly said:
If it's a solid pine top you're contemplating, it'll need to be fixed to the frame to allow for movement...'buttons' are the usual way in a groove along the inside of the top rails.

Hey woodbloke can you alaborate a little on this method of fixing the solid pine top? I have not heard of 'buttons' before

cheers
 
ahhh! got ya.

I take it there is no glue anywhere then?

thanks mailee, will work on that
 
Lee,

In case you don’t already know…

To make buttons, you could rebate a piece of 50mm x 25 mm along its length and chop your buttons off the length, but it's not a good idea.

So:

Find a close-grained hardwood board (say 24” x 9”). Square it up, and work a rebate across the end-grain, to form the tongue of your buttons.

Cross-cut this rebate from the board, so you have about 2” length, rebated across the grain.

Chop this piece along the grain, into your individual buttons, each about 1.25 wide. Repeat as necessary for the number of buttons you need.

Work a tapered chamfer along the three edges of the button, where it will show under the top.

Wood will move whatever we do, and cutting buttons the first way makes it easier for the tongue to split away under pressure. You could probably break it away with your thumb and fingers, if you want to prove the pudding.

(The second way can also split, but not often!)

Arrange the slots in the rails so that there is the slightest gap under the button, where it meets the table rail. (The slot should be a smidgeon lower than the thickness of the button. )

I never use any glue whatsoever on a button, and I make the screw-hole slightly over size to boot.
Hope you can decipher this and that it helps.

John :)
 
...Or, if you have a bandsaw, Steve Maskery's come up with an excellent jig for producing buttons on a single machine. :wink:
 
Agreed Olly,

Much quicker, and you could then cut your buttons from the end of a longer piece of 50mm x 25mm. Three cuts for 'long -grain' buttons.
The way I sometimes cut tenons.

I still like to see that tapered chamfer though. :lol:


John :wink:
 
cheers fellas, some button cutting practice this afternoon i think.
 
tell ya what i do find tricky because i dont really know the 'best' way of doing it - cutting tenons. I've just had a practice at some methods -

1. set up the router table - nice clean cut but split out the edge when it exited the other side

2. bandsaw - bit wavy at times but wih practice...

3. by hand - not too bad at all but time consuming and i have about 20 to cut lol

how does you guys cut yours?
 
Lee,

I always cut mortices first. Then size the tenon from that and mark the rails to be tenoned.

My preferred methood for machine tenons is the bandsaw:
In case you never did that before:

Assuming tenon shoulders are the same width, set the bandsaw fence to the right postion using a piece of scrap, same size as your stock. Clamp a block on the fence, behind the blade to stop the workpiece when cheeks are cut to the right depth. Then make test cuts adjusting the fence, until your tenon is in the centre.

Cut both sides. Then use the mitre guide to cut off the cheeks square. Keep the bandsaw guard as low as you can for all cuts.

Trial and error really. Once you have it right, cut all tenon cheeks in one go. Then cut all shoulders in one go.

Hope you can follow.

John :)
 
I do mine on the router table, making one cut from each face to centralise the tenon (assuming both faces are parallel). You can buy large tenon cutters - they're excellent; they'll take bigger cuts and will also leave less breakout on the back edge. But, you should be able to prevent this by having a piece of scrap supporting your work piece. :wink:

Banadsaws can also work well though, I don't find them accurate for cutting tenon shoulders. You could remove most of the waste on the saw and then finish on the router table... :)
 
OPJ - I've done some practice and it seems the method of cutting most of the waste on the bandsaw and trimming up on the router table gives the ebst results. I'm gonna use that method in the future but for this project I have decided to screw the frame together and plug the holes using a contrasting colour plug. Sort of to make a feature out of it.

Anyway, I cracked on last night...

the front uprights of the frame will have a rounded over edge so I figured this was the best time to do this. I set the router table up, tested a piece of scrap and when I was happy I rounded over the outside edges, look at the round over on that...

Photo0d1.jpg


In order to take the MDF side panels I opted to rout a slot in each piece. The router was set up to rout a slot 10mm deep using a 12mm cutter. I pre-drilled a 12mm hole at one end to start the rout.

The 4 uprights/legs had their slots cut first...

Photo0d3.jpg


...then the centre pieces, which needed slots on both edges...

Photo0d2.jpg


...then the braces for top and bottom...

Photo0209.jpg


Next up was to pre drill the screw holes. I marked out where I wanted the screws and drilled 4mm holes (to take the screw shafts) then I drilled a 8mm counter sink hole to take the screw head and a 8mm plug. I drilled all the required holes needed. Didnt take a photo though but I will for next time.

Next up sand down each piece and cut some side panels.
 
yeah I know it's taking forever to get on with this project - the missus keeps reminding me! What with all the other jobs I have on I can only do this job a bit at time. Anyway, cleared a few jobs out this weekend so made some progress.

I opted for screwing this frame together and then hiding the screw heads/holes with dowel made from a contrasting timber. So I drilled the nessesary holes starting with a 4mm hole and then countersinking with an 8mm hole which will take the contrasting plug.

Photo0443.jpg


I did a test run for the plugs and this is how it looked...

Photo0444.jpg


and closer up...

Photo0445.jpg


I decided I'd do a dry fit of the frames at this stage just to make sure it all went together nice and squarely, which I'm pleased to say it does...

Photo0447.jpg


Photo0446.jpg


Now the frames are made up I can take an exact measurment for the side panels which will slot snuggly into the slots I routed earlier, in fact, too snuggly. I'll have to rebate the edges by 1mm I reckon.

Here's a side panel freshly cut from a big sheet of MDF...

Photo0506.jpg


I set the router up using the fence and I took 1mm depth off all the way around. This will help when I come to assemble it....

Photo0505.jpg


Once I'd cut all 6 panels (2x left side, 2x right side, 2x back) I cleaned the shop up and tried to make it as clean as I could because these panels are to be painted white.

Thats my job for an evening this week.
 

Latest posts

Back
Top