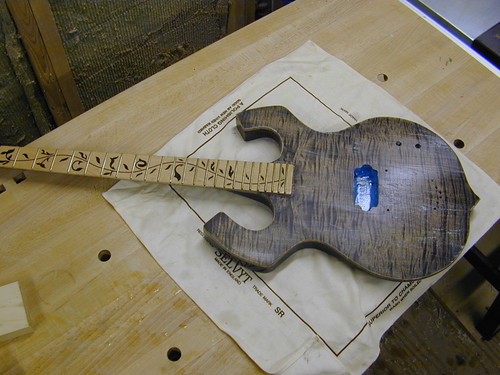
Yew & Flame Maple Guitar [Completed]

UKworkshop.co.uk

Help Support UKworkshop.co.uk:

This site may earn a commission from merchant affiliate links, including eBay, Amazon, and others.
Nice looking work so far, glad to see the spray cans are working out well. Is the workshop heated-ish or a chilly outbuilding?
 
Philly":1tnssl5j said:
Oh yes, going to be pretty special.
Great work,
Philly :D

I hope so - I'm nervous about the clear-coats, it'll be make or break when I come to that.

Ironballs":1tnssl5j said:
Nice looking work so far, glad to see the spray cans are working out well. Is the workshop heated-ish or a chilly outbuilding?

The workshop isn't heated, but is insulated and it is staying surprisingly moderate even with the cold weather, I don't have many draughts and its in the open of a south facing garden, so it gets the sun most of the day and tends to stay relatively warm.
 
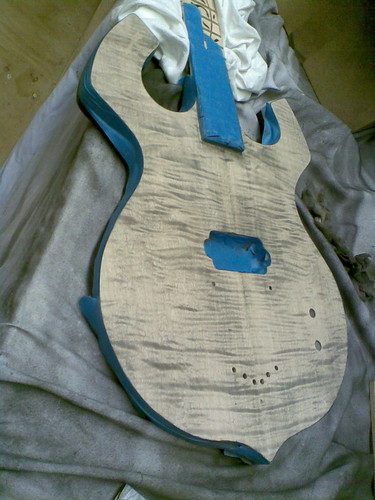
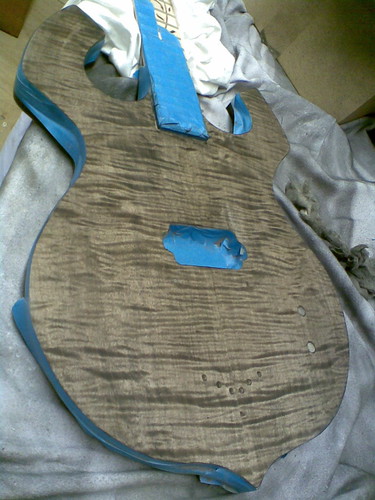
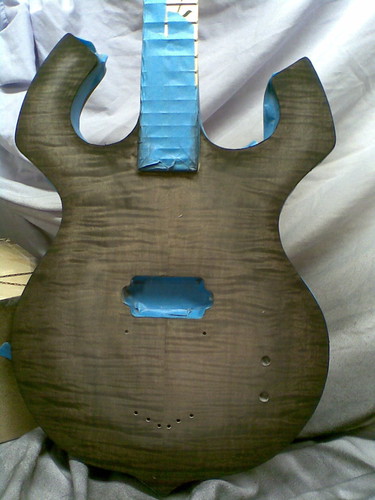
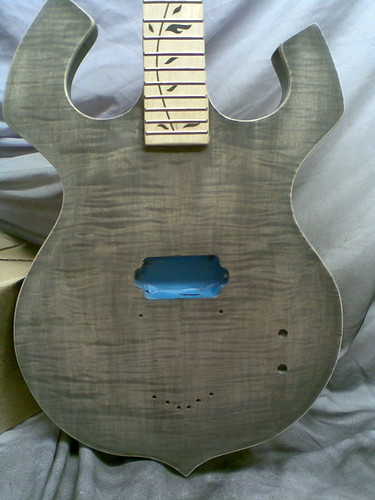
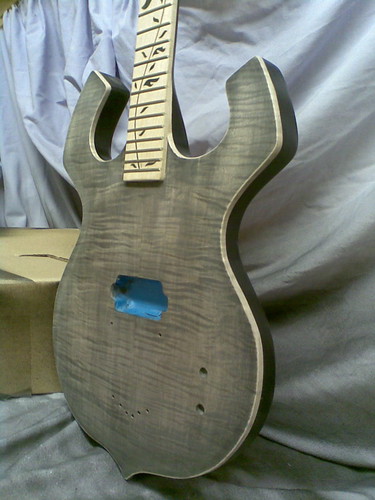
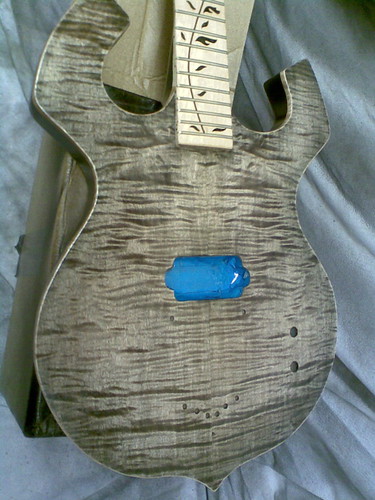
After staining the guitar yesterday, it was time to sand it back to emphasise the flaming figure. It was also the secound round of staining. I've started building up the layers of stain to form a slight 'burst'. Also this second round of staining has introduced a different mix, this one with red pigment to give it more of a warm colour - it doesn't show up too well in these photos though.


Stain sanded back; you can see how the flame has really popped.
3041891050_fd8475e4be.jpg


A much thinner black stain goes on top
3041049587_5383b75a94.jpg


A warmer red tint is added, along with building up the layers for the bust - this is shot when it was still wet, the affect is a lot more subtle than it appears here
3041050459_388c013e78.jpg


All that is left to do now is wait till it's dry, and give it a very light sanding to bring a little more of the brighter maple out and emphasise the graduated burst.

After that, it's the clear coating.
 
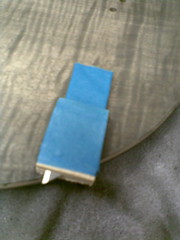
The natural binding was cleaned and sanded, and the first coat of the clear lacquer was applied, I have a few very small chips on the black side where I took the tape off to repair, otherwise it's come out really nice.

After a single coat of clear, it really brings out the colour and figure. I can't wait to see what this looks like when it's finished and glossed up with the gold-hardware.

Pics:

A little scraping tool I made to clean up the natural bound edge:
3046545234_fdc48e18b4_m.jpg


Natural binding scraped and sanded, it's came out better than I expected, a nice crisp edge
3045711475_f733bd6fac.jpg


Another shot from the side:
3046543644_b7406047b2.jpg


And here's a shot of the first coat of 'clear'. It really brings it all out and brightens it up, I'm very happy with it so far.
3045710971_1d014bf3a9.jpg
 
Ok,

The finish process is almost finished. Just an application of swirl remover to go, and then it's adding the hardware and soldering the electronics. I've gone for all gold - hardware, including a gold covered humbucker and gold pickup ring, very bling ;-)

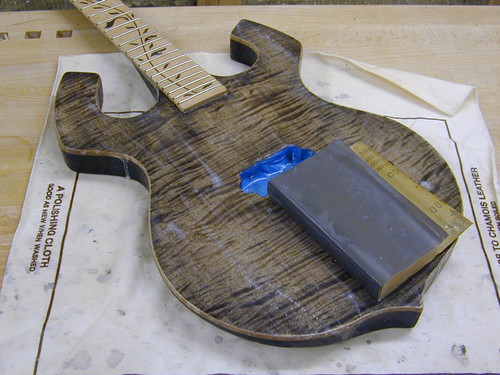
Here's some shots of the final pass of wet-sanding:

3116654882_c5f51c543c.jpg


3116655172_9c65e5e9ab.jpg


I'll most probably start the hardware installation tomorrow evening, but won't be complete until the end of the week as I'm still waiting for parts to arrive.

Info on the finish:
I used behlen jet colour nitro gloss black for the solid colour, liberon pigment stains for the top, and finally about 2 cans of behlens aerosol nitrocellulose. I've gone for a relatively thin finish as this is not a gigging guitar.

I let the nitro cure for about 3 weeks before wet sanding. I started at 600grit and worked my through to 1500. I'll be using some polishing compounds for the final buff.
 
Behlen now has 'Musical Instrument Lacquer' in aerosol can form and a great DVD on doing a spray can sunburst on an acoustic guitar. However they have not yet got the sunburst tints in stock.

I'm just figuring out how to use their spray cans so I can do a video. Unlike other cans I have used, the coating is very thick from the can and you need quite a distance from object to nozzle to control the spray or very quick motion to lay down a thin layer. Probably be better on a larger object than my little ukulele...
 
I cant speak for the new product Pete, but these cans are pretty easy to use. I shoot from about 12 inches away and I get a fairly nice medium dry to light wet coating. After about 10mins, I can go over again with another light coat. I did this two to three times each night. I didn't both sanding between each major coat as it was going on quite smoothly.

I do however have a few spot repairs to do on the back-side where I've sanded through a few spots. I've made the finish purposely thin, but in hindsight, should probably have put a few more coats on to accommodate the wet-sanding.

For my next guitar, I'll be using Rustins Plastic Coating, as the wet-sanding and polishing process is greatly reduced as is the curing time, I'm not overly joyed with the nitro in terms of ease of use.[/i]
 
I've used french polish, acid-cat, pre-cat, conform lacquers (American melamines) and have settled on cellulose for one good reason - ease of application and you can repair it. You won't be able to do that with Rustins...
 
From all the feedback I've got, Rustins is much easier to apply than nitro, granted it won't be as easy to repair, but then it's a hell of a lot more durable in the first place.

Either way, I'm pretty new to finishing, and I guess it's one of those things where everyone has a particular favourite method depending on their tastes/skill etc..

I've just found nitro a little too delicate to use, but that's not to say it's been terrible or anything. I think the results have been good on this guitar, it's just the curing time is a real pain, something I won't have to worry about with the Rustins.
 
Here we have the completed guitar.

n743999409_1068416_328.jpg


Today was a long one, I installed all the hardware, soldered and installed the electrics and the most tedious of all; made a new nut (which was actually quite satisfying).

For those interested, the hardware is as follows:

Tuners = Gold mini Wilkinsons
Pickup = 'Tonerider' covered generator
Bridge = Gotoh tune-o-matic
Nut = handmade bone
Frets = Jumbo (24)
Controls = 1 Vol, 1 Tone

It sounds a fair bit different to the walnut explorer, this is a lot more woody/middly, with more resonance and sustain, whereas the explorer is darker and more 'gutteral' sounding (hence why I use it for metal), this one seems to play really well for blues and more cleaner sounds. It sounds great with my carlos santana patch in 'amplitube' uber-sustain.

The action is a little high at the moment, and the intonation needs tweaking, but other than that, it plays pretty nicely, I'm chuffed as monkey's with the outcome of the nut. It's the first I've made from hand, and have to say following the 'stew mac' article it was a piece of cake.

A little tip for anyone who doesn't want to spend a fortune on nut files; buy a set of 'solder-tip' cleaners. They are thin round files, and the gauges match perfectly to strings, for about £3.00 I was able to get a set, and they file the string slots in a bone nut in a matter of seconds/minutes, very accurate to use, and a hellava lot cheaper than specialist nut files.

So, this one is done, the next one is on it's way :)
 
Looks fantastic, Colin! You must be very pleased? =D>

So are you happy withthe Tonerider? Been looking at getting some for my Strat.
Cheers
Philly :D
 
That is fantastic! You must need a massive skills range to make something like that. Well done mate. :ho2 =D> :deer
 
Agreed, it looks lovely. Quite and exercise in woodworking skills, making something like that.
 
Thanks for all the kind comments, it's nice to be able to share my efforts with everyone. Although despite the positive comments, there are many things (as is usual I suppose) that I feel I could have done better, but that's why we do this - to improve each time?

Philly - I've only played it for a short while, but I have to say, for £24 for the pickup I'm really impressed, it's not as expressive as the seymour duncans I have in the explorer, but it is brighter and has a nice sound. It has more 'mids' than the SD's, which I think is what makes it nicer for blues/rock as opposed to metal where a scooped mid is more appropriate.

For the money, I would say they are worth checking out - if you've not already done so, have a look at their website, they have sound samples of all their pickups. I didn't listen to the single coils (which I assume you have in your strat?).

Phil - I am proud, this guitar has been 'on and off' for the best of three years, so it's nice to finally see it finished. It confirmed a number of ideas that I had; some work, some don't and it was a good excercise in testing out a sprayed finished, so all in all it was a great exercise.

Am I going to start another one? Absolutely! :) It's already under way. I'll be starting a new thread for it very soon. This next one will be a 'neck-through' in sycamore and mahogany with an ebony fingerboard.
 
TrimTheKing":2d95sfps said:
If I can be a ******* for a minute and admit to knowing nothing about the makeup of a gee-tar, what is a 'nut'?

You beat me to it - I was just about to ask the same question :lol:

Looks good BB

Cheers, Ed
 
Back
Top