Workshop Design - well it's a build really.

UKworkshop.co.uk

Help Support UKworkshop.co.uk:

This site may earn a commission from merchant affiliate links, including eBay, Amazon, and others.
Dibs-h":a606swqt said:
It will be 3 walls - the outer walls - the shortest wall nearest to the house & existing garage probably won't as the garage wall will butt upto it but still be separate.
I understand you'll lap the DPM with the DPC, but I assume that would be the DPC on the internal wall, and that blockwork (with DPC extended inisde) is the outside wall isn't it?

Triggaaar":a606swqt said:
It may not meet it in terms of insulation value (I haven't done the calcs) but there should be no problem with full fill insulation and then the Tyvek - i.e. no space between the Tyvek and Kingspan.
No space between the Tyvek & Kingspan won't affect the insulation calc. I've done it with space for vetilation reasons before, not sure why my arch specified it this time as I also have a breathable felt (similar to Tyvek). It would be handy if I didn't have to worry about the gap.

He's suggested that he will accept a "whole building calc" as opposed to treating each element separately.
That's cool. 100mm is a decent amount, but since it's not continuos (it's only between rafters) it's not perfect. My spec is 75mm between 400mm rafters, with 40mm underneath (&15mm SoundBloc platerboard) to give U value 0.2. But then we are using it as sleeping accommodation, so if they're happy with your as a hobby room, great.

I've gone over Tyvek and Kingspan's technical literature that many times - I haven't seen any mention of having to leave a gap between Kingpsan and Tyvek.
Thanks, hopefully I won't have to worry either.
 
I see what you mean about the thermal bridging by the timber. I'm probably about 1 week away ordering the insulation so may try to find time to do the calc and see what the U-value is.

BCO should be visiting Mon\Tues so will discuss the "method" with him.

Update: Might have one this evening, hopefully not one of how slow A&E is. :shock:
 
Update - have one!

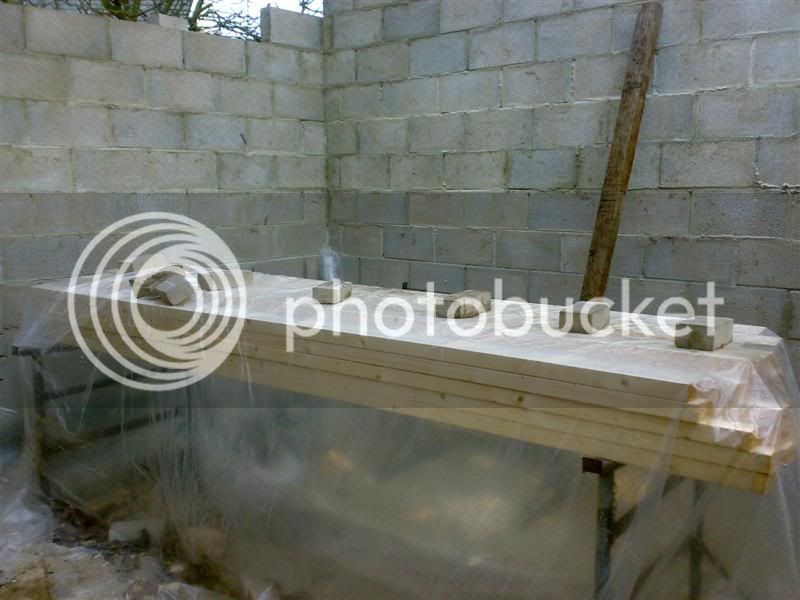
Went and collected the timber for the purlins, pole plates and ridge plate this morning. The longest pieces being 6m long and with an estate reasoned that <1m would be sticking out each end. Guess what almost 2m sticking out the back - bloody modern estates and roof bars - the CofG isn't over the middle of the car. Thankfully the sawmill is < 1mile, so drove home slowly.

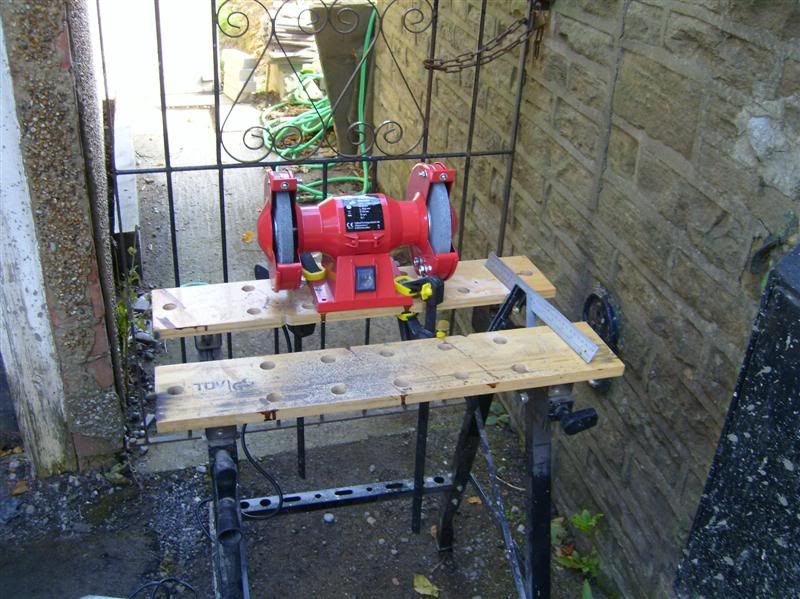
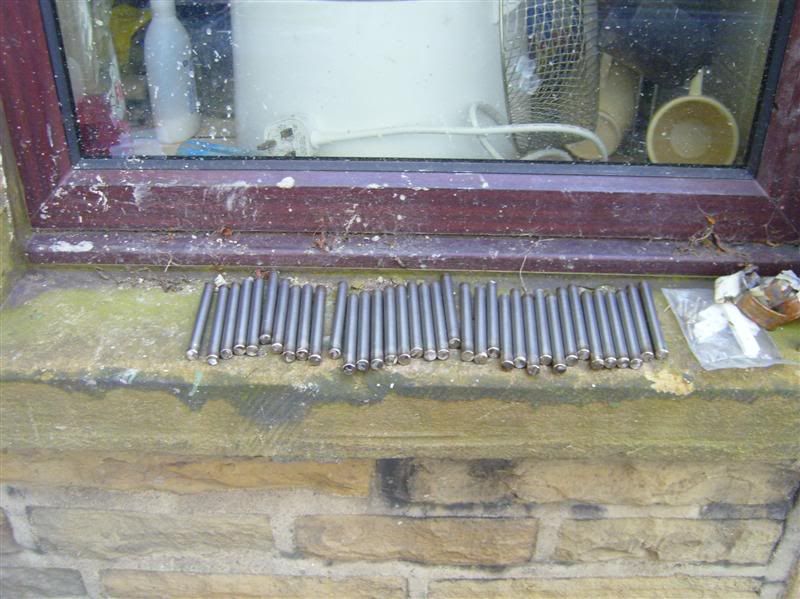
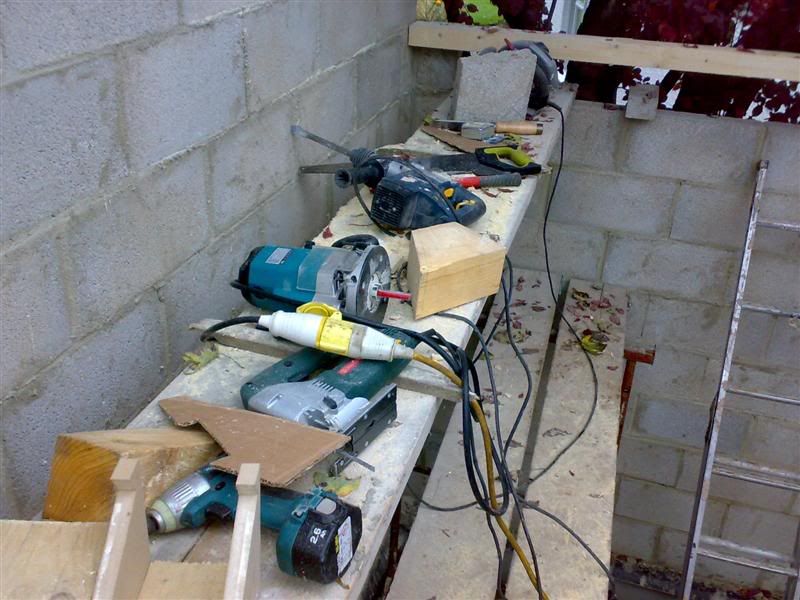
Got the "temp" metal shop going

temp_metalshop.jpg


(the grinder - not bad for a tenner from Makro) and tidied up the S\S pins I chopped up yesterday evening.

ss_metalpins.jpg


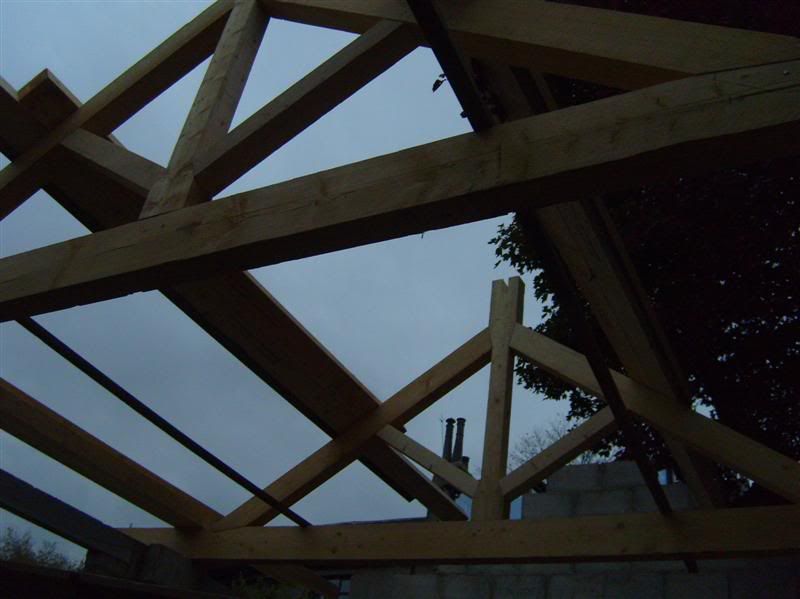
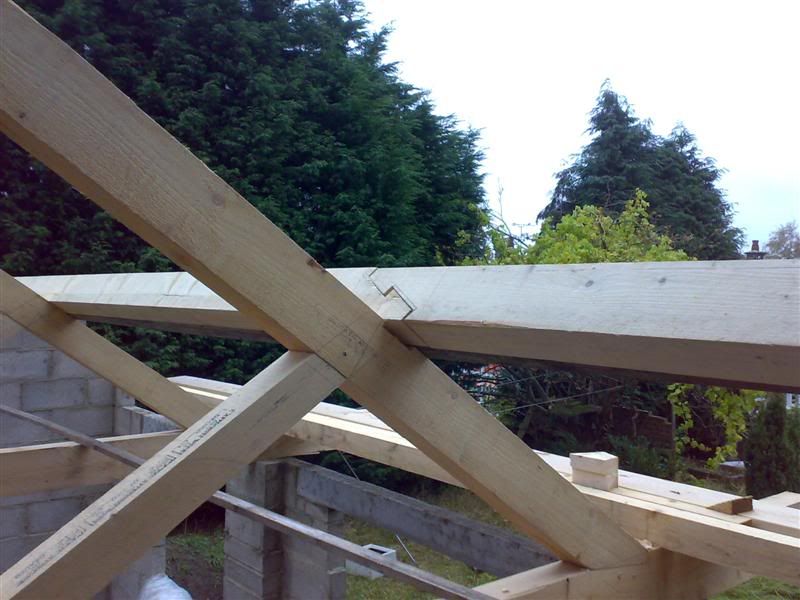
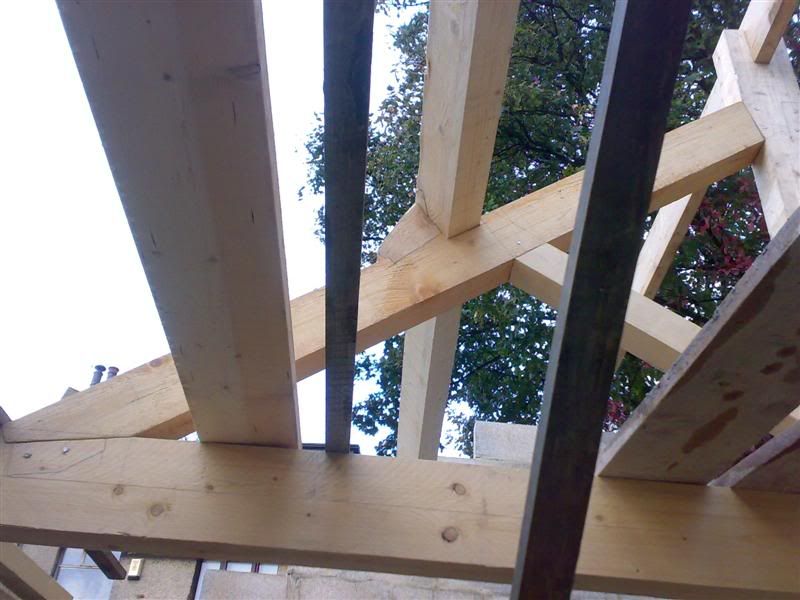
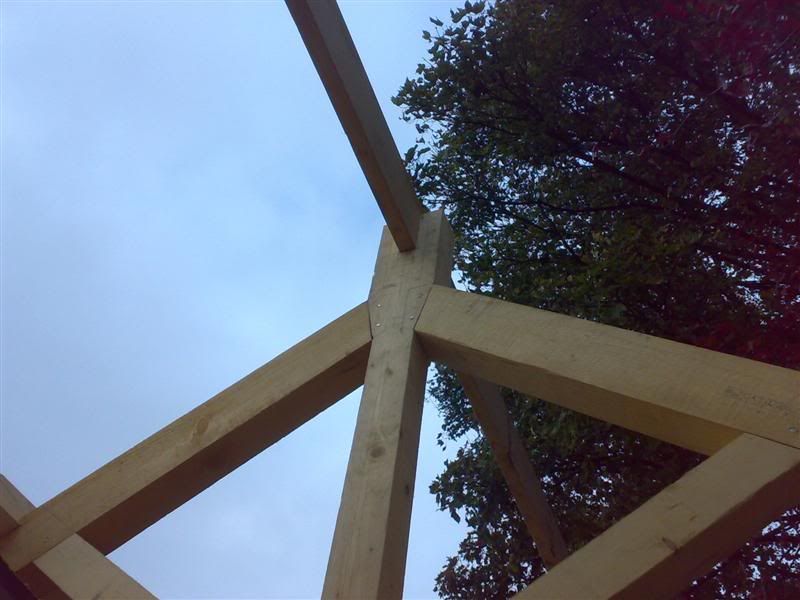
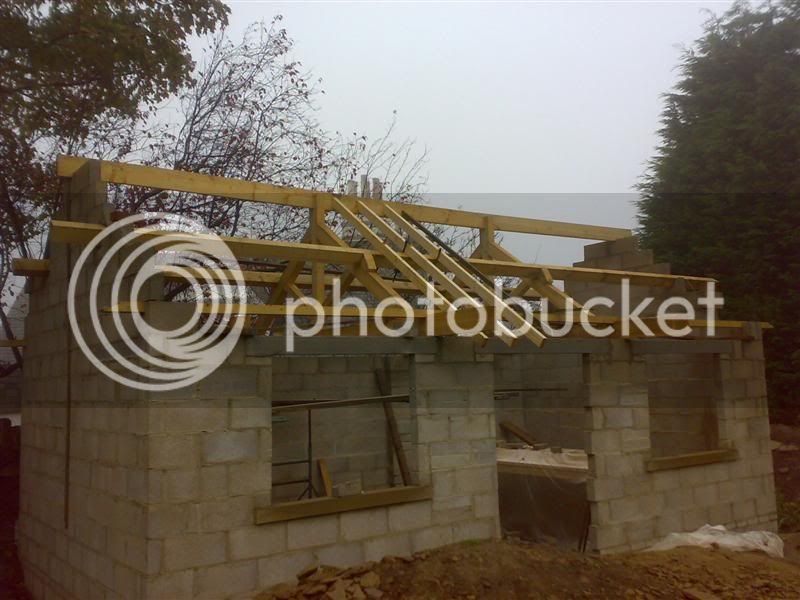
Then got started around midday. Moved the tie beams into place - one end 1st then the other, moved the "staging" into place, placed principal rafters, struts and king post onto the staging - got on and 2 mins later had an assembled truss. Got the ratchet straps out and cramped it to the max- both in the middle and the ends. Drilled 10mm holes thru the joints and hammered the S\S pins thru.

Took a few work in progress piccies - but all washed out - bright sunshine for a change. So you'll have to do with a "here's one I made earlier" (or later actually)

trusses2.jpg


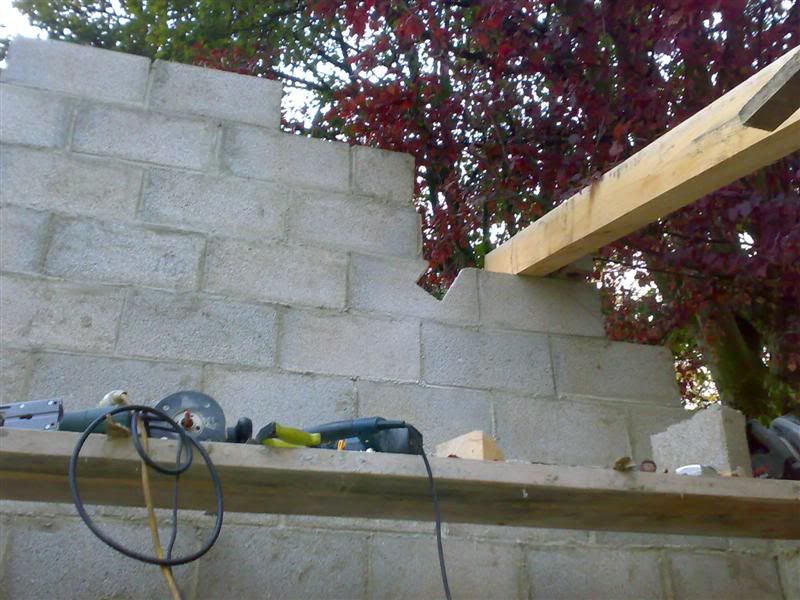
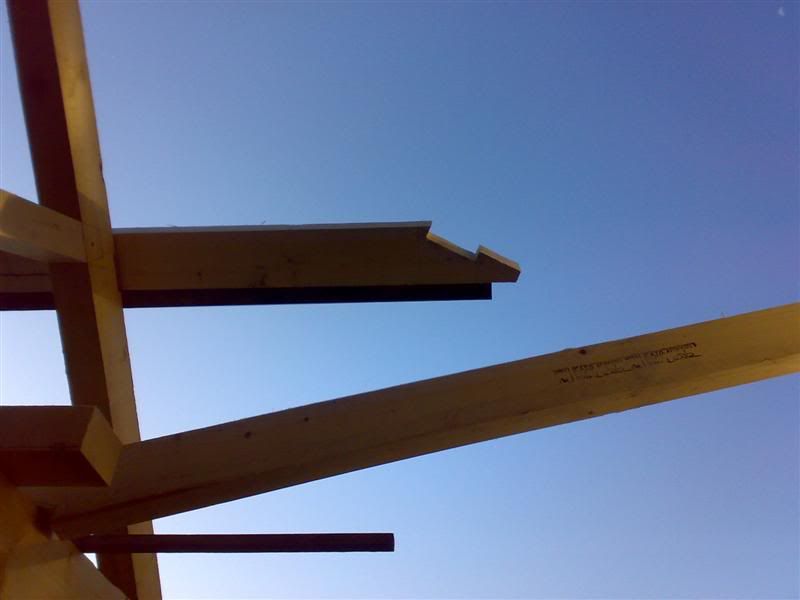
I used some length of 2"x1" (roofing laths lying about) as bracing and then got the purlins sat on top (the bracing stopping them sliding down) and the pole plates sat on top of the tie beam,

trusses_1.jpg


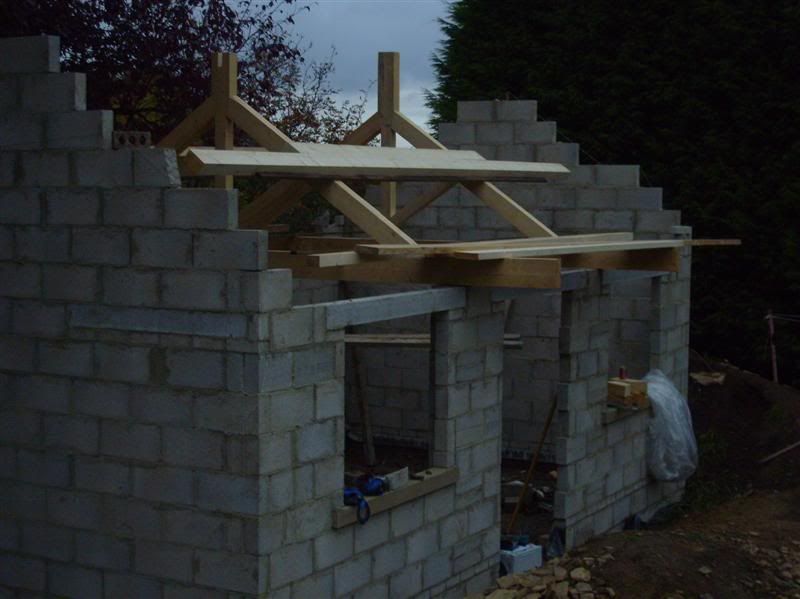
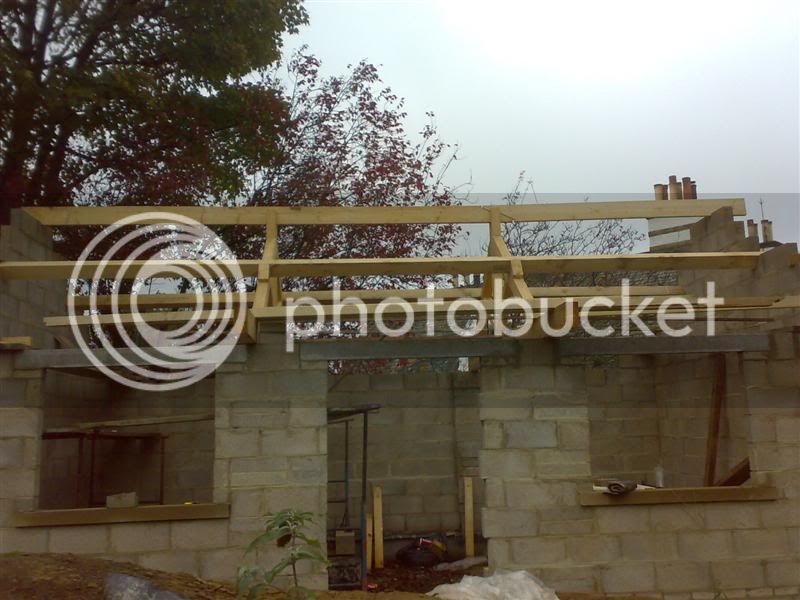
The tie beams need trimming down - the ends overhanging that wall. Threw the 8"x2" pieces for the ridge onto the end of the tie beams, reasoning that it was better off the ground than on it. Wrapped up around 6pm - not bad progress for 5 or so hrs.

I started slotting one of the kingposts - but wasn't sure whether I had accounted for the counter battons and whether the ridge needed to be flush or protrude slightly (from the top of the common rafters) for the dry ridge kit - so thought sod - I'll trim to final height & slot in situ.

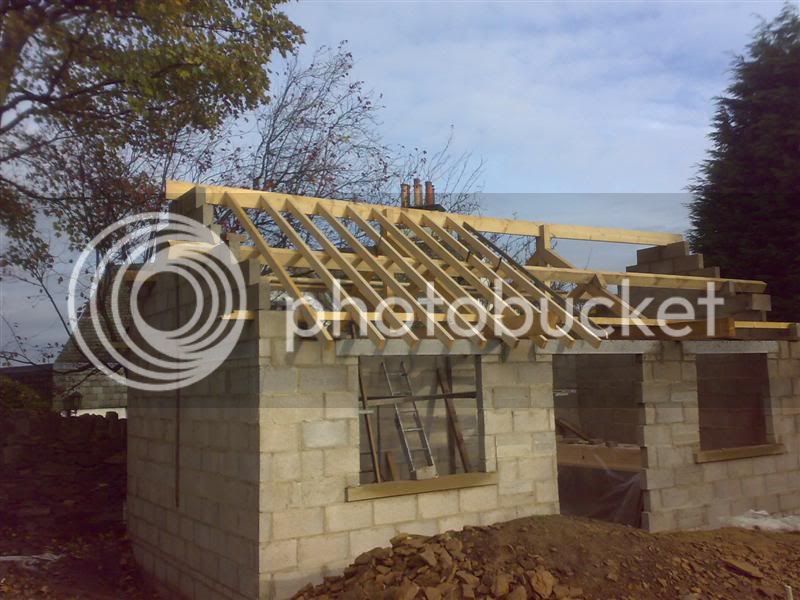
Assuming Sunday doesn't pee it down - will hopefully have the purlins scarfed, and cogged into the prinicpal rafters, as well as the pole plates scarfed and cogged into the tie beam.

Getting stuff into place was far easier than I thought - even on my own. For those that offered to help with the lift (had it been too much today - I would have defintely asked for help & postponed it till tomorrow) - I really do appreciate the offers - you know who you are!
 
Looking great.

Dibs-h":24sq7va3 said:
I'm probably about 1 week away ordering the insulation so may try to find time to do the calc and see what the U-value is.
Are you buying new (expensive) or have you thought about seconds & co? They do all of Kingspan's seconds, and if you are not too particular about exactly what you need (and read your post you obviously don't need to be) you can save a fair bit. I bought 83m of 70mm, 32m of 22mm, 34m of 50mm and a couple of metres of 150mm for £530 delivered, which is a lot less than at my merchant.

PS, looking at that last pic, my guess would be that shoving the insulation under your rafters would be your best bet. A lot easier and quicker, and also giving a much better U value. You lose headroom, but up there I don't suppose that's a problem.
 
Triggaaar":1xjico2p said:
Looking great.

Dibs-h":1xjico2p said:
I'm probably about 1 week away ordering the insulation so may try to find time to do the calc and see what the U-value is.
Are you buying new (expensive) or have you thought about seconds & co? They do all of Kingspan's seconds, and if you are not too particular about exactly what you need (and read your post you obviously don't need to be) you can save a fair bit. I bought 83m of 70mm, 32m of 22mm, 34m of 50mm and a couple of metres of 150mm for £530 delivered, which is a lot less than at my merchant.

PS, looking at that last pic, my guess would be that shoving the insulation under your rafters would be your best bet. A lot easier and quicker, and also giving a much better U value. You lose headroom, but up there I don't suppose that's a problem.

I got in touch with a chap based out of Wales - he's doing 50mm Celotex for £13 per sheet - plus £30 delivery. Seconds & Co can't even come close to that price - so will be using that chap. Unless Seconds & Co have a pallet of something useable on Ebay - in which may get some. I may well put 50mm or so under the rafters. Depending on what the BCO has to say on Monday\Tuesday

Plus I need to stick a whole load of 50mm in the house roof and some of the floors - so will be buying loads.

Just picked up a pair of Nbr 3 tressles - so that will allow me to have 2 lots of staging in the workshop - making fitting of the purlins much easier. :D

Fingers crossed the weather is ok tomorrow and I don't sleep in! :oops:
 
Update : had a bit of a lie in and then had to go get a load of TRV's for the CH system - the existing ones are old and knackered. So by the time I was done it had gone 1pm. Decided to tidy up the inside of the shop - I'd almost tripped up a few times before and nearly flattened my face.

That took longer than I thought! By the time I'd got the other tressles and the scaffolding boards in place - it had gone 3pm.

Just managed to "cut" a hole in 1 gable for a purlin end and managed to do 1 scarf joint - that took a lot longer than I thought it would!! Also managed to cog 1 principal rafter.

Mind you it did take a while to set out properly - as with all things, the 1st one takes the bloody longest! Hopefully get some of the others finished during the week.. I want to be cutting and fitting the common rafters next weekend.

Sorry - didn't get any piccies of today's activities- too busy paying attention to foot placement and trying to not crack my head on 6"x4"'s all over the place
 
Update - This week has gone so fast! Managed to cut all the holes (4) in the gables for the purlins - took about 10 mins each with a 6kg breaker (drill out the outline and then switch to hammer only. The 2kg Dewalt had packed up.

Here's one I made earlier,

gable1_hole2.jpg


Here's the 1st scarf joint (by hand)

scarf_1.jpg


and assembled and approx insitu - I've started to cog the rafter but only half way.

scarf1.jpg


which fits reasonably well. The 2nd one was done with a noddy jig\template screwed to the side and having removed most of the material used a kitchen fitters bit in the router. The 2nd one which I don't have a picture of - the alignment is slightly off. Probably due to assuming the timber was 150mm tall and it turned out about 5mm less.

Having said that the timbers are overlong anyway so - may well cut them off and redo them. Probably by hand as the hand one seemed to be better fitting.

Here's a shot of my temp workbench. :shock:

temp_workbench.jpg


I had the BCO come round this morning - the levels of insulation being used are sufficient and the cert will be to a dwelling level, so don't envidage any issues in a future change of use (highly unlikely for us tho).

He was very suprised at the timber work!
 
Usual Monday update:

Didn't get as much done over the weekend. 2 errors - spent almost 90 mins scarfing the 4"x3" pole plates - only to realise 1.5 joints in, that when I cogged the tie beams and the scarfed joints - it would destroy the scarf joints. That was Sat - then on Sun at 10:30 decided as it was a nice day (albeit cold) could do with a proper coffee - so nipped into the local Costa. Big bloody mistake. Bradford was having it's City Run (half marathon or something) and every which way I tried to get back home (around 2 miles) - kept coming across road closed signs. In the bloody end - went 15 miles right round the edge of the city to get home.

Anyway rant over - back to the build. Progress so far - finished doing all the cogging on the purlins and cut and fitted the cleats. Did cut them so the the grain runs down to the lowered shoulder. Also banged in the opposing wedges into the scarf joints.

cleats_1.jpg


Once the purlins were fitted - I did temporarily put a rafter into place\angle to get an idea of where the ridge should go and thankfully I hadn't cut too much timber from one of the Kingposts. So slotted both Kingposts - probably in a how "definitely not to do it" method. Stood on a platform of two scaffolding boards - 10' up in the air with a jigsaw from both sides! Followed up by a bit of paring away with a large chisel.

KP_slot_1.jpg


The 8"x2" moved freely in both slots but as both kingposts aren't absolutely in alignment - when the ridge is dropped into place in both slots - it clamps up nicely.

ridge_1.jpg


Did go and get the 4"x2" lengths for the rafters - covered them up thinking there is no point getting them soaking wet thru before they are fitted.

rafters_ready.jpg


Hopefully might just get the the ridge scarfed this evening. Then onto cogging the pole plates and fitting them. I think if all goes well - may just (aim to) get the rafters on and Tyvek'd by this coming weekend.
 
Update: Didn't get the ridge scarfed last night. Got the gables "notched" for the ends of the ridge tho. The end where my "temporary workbench" is was a doddle - just stood up on the workbench. The other end wasn't so easy! 8"x2" sat on the outer wall, scaffolding boards going from a tie beam to the 8"x2" - defintely a case of how not to do it!

Thankfully the blocks only required notching by 30mm - I'll obviously have to fit an extra block at the top. I was pleasantly suprised - the ridge was absolutely level along it's length, and latterally was only out by 1" at one end. Which I thought sod it - I'll live with that, not getting the sledge hammer out and trying to move the trusses by mm's. Knowing my luck all come down like a house of cards!

I managed to get the scarf joint all marked out on both pieces for the ridge - so may get it cut tonight. Found the site lamps (from a previous project) so getting dark shouldn't be an issue! :wink:

Will post up some piccies tomorrow of the progress.

Picked up some materials for the roof - 2 rolls of Visqueen 1200 DPM 200sqm (£40), 17 ridge tiles (£10) and 2 rolls of Marley Dry Ridge Kit (£50). In case you are wondering off the Bay!
 
Dibs

Are you intending to use the visqueen as an underlay below the tiles/slates :shock:
Or as temporary sheeting?
If the former, then I would say a definate no no.
Breathable roofing underlay (Tyvek etc) is the thing to go for.
 
trousers":25tsu8mz said:
Are you intending to use the visqueen as an underlay below the tiles/slates :shock:
Or as temporary sheeting?
If the former, then I would say a definate no no.
Breathable roofing underlay (Tyvek etc) is the thing to go for.
I can answer this one
Dibs-h":25tsu8mz said:
The rafters (4"x2") will have 100mm kingspan between the rafters - Tyvek on top, counter battoned, then tiling laths and then tiles. Dry ridge system, with eaves vents.

I need to find learn more about VCLs and when you do and don't need a gap between the insulation and brethable felt.
 
Triggaaar":1m9t31jr said:
trousers":1m9t31jr said:
Are you intending to use the visqueen as an underlay below the tiles/slates :shock:
Or as temporary sheeting?
If the former, then I would say a definate no no.
Breathable roofing underlay (Tyvek etc) is the thing to go for.
I can answer this one
Dibs-h":1m9t31jr said:
The rafters (4"x2") will have 100mm kingspan between the rafters - Tyvek on top, counter battoned, then tiling laths and then tiles. Dry ridge system, with eaves vents.

I need to find learn more about VCLs and when you do and don't need a gap between the insulation and brethable felt.

Spot on Trig. Tyvek Supro Plus to be specific.

Normally I would have used Tyvek's SD2 VCL on the inside - but as I'm using ply on the inside of the rafters (theiving scumbag control layer) the same affect should be acheived.

The Visqueen is for the floor - lap & tape up to the DPC in the walls and then lay the insulation and flooring.
 
Update - got the ridge scarfed and in (temporarily) yesterday - Tues evening raining cats and dogs sprang to mind.

ridge.jpg


Just need to lift it back up and fit the wedges to tighten it up.

Also managed to cut the ends of the pole plates so will hopefully have them laid out this evening and the tie beams marked for cogging.
 
Update: Some progress. Got the pole plates cogged into the tie beam eventually. Spent most of Sat faffing about with them. I wanted them sat over the stud wall to serve as the header, also for the birdsmouth in the rafter to not exceed 1/3 of it's depth and the angle of the rafter to be 35degrees. This only left the depth of the cogging as the variable.

Also "cut" the holes in the gables for the pole plates to poke thru. There is enough extra length to serve as the foot of the gable ladder.

Also wedged up the scarf for the ridge. Do need to pin\screw all the scarfs tho.

Below is yesterday evenings effort,

rafters.jpg


I used a lenth of 2"x1" as a rod for the rafters and do a final check at each rafter location, prior to cutting the birdsmouth. This means doing each one seperately - but it only take about a min or so, so I'm not fussed.

The clamps are just to stop them sliding off - in case it's windy today. They haven't been nailed\screwed yet - probably skew screw them. Hopefully get a load more done this evening.

I need to get all the rafters done by Sat which should be doable and get it Tyveked. I'm off work all next week to try and get the tiling done.
 
The timberwork is so impressive, i can't find words!
Is it usual to build like that in the UK, btw?

Great work!
 
Henning":feuqvm3d said:
The timberwork is so impressive, i can't find words!
Is it usual to build like that in the UK, btw?

Great work!

I'm glad you like it.

A rafter and Purlin roof is very common, although more and more constructions are using pre-fabbed trusses.

Truss, purlin and rafter roof is far less common but not rare. I would say it's commonplace for conservation work or in oak framed buildings (new or old). But I dare say those who know more about such types of roof - might be able to comment (MikeG & EddieJ spring to mind)

I had to use 2 large trusses to make the building design work - i.e. vaulted ('ish) roof and no internal walls. At which point I thought it would be good to do it the traditional way, after all the whole purpose of the shed is woodwork.
 

Latest posts

Back
Top