Workbench build

UKworkshop.co.uk

Help Support UKworkshop.co.uk:

This site may earn a commission from merchant affiliate links, including eBay, Amazon, and others.
memzey":hv34aznx said:
Yes I sense the saw guard gestapo readying their plans! To be fair this saw is a fairly rare 1963 model and does not support a riving knife (it uses a splitter). It may look pretty now but it was a mess when I bought it 18 months ago. I did a full restoration job on it which I chronicled on this thread on the Canadian site https://forum.canadianwoodworking.com/f ... estoration
I do have the crown guard for it and I will fix it on once I've got an appropriate piece of metal for the splitter. In the meantime I just use it very cautiously with a little sprinkling of terror every time I push its green button.

Memzey

I have the same saw, well, the AGS10, with a fixed (but adjustable) splitter. You probably know the dimensions of the splitter, but if you need pictures, tracing, or any measurements of mine, just let me know. The steel is not critical, but I even have an old 10" saw blade with ruined teeth that would probably do fine.

Ola has also very kindly sent me details of his modification to make a moving riving knife. I haven't plucked up courage to start it yet, though!

Keith
 
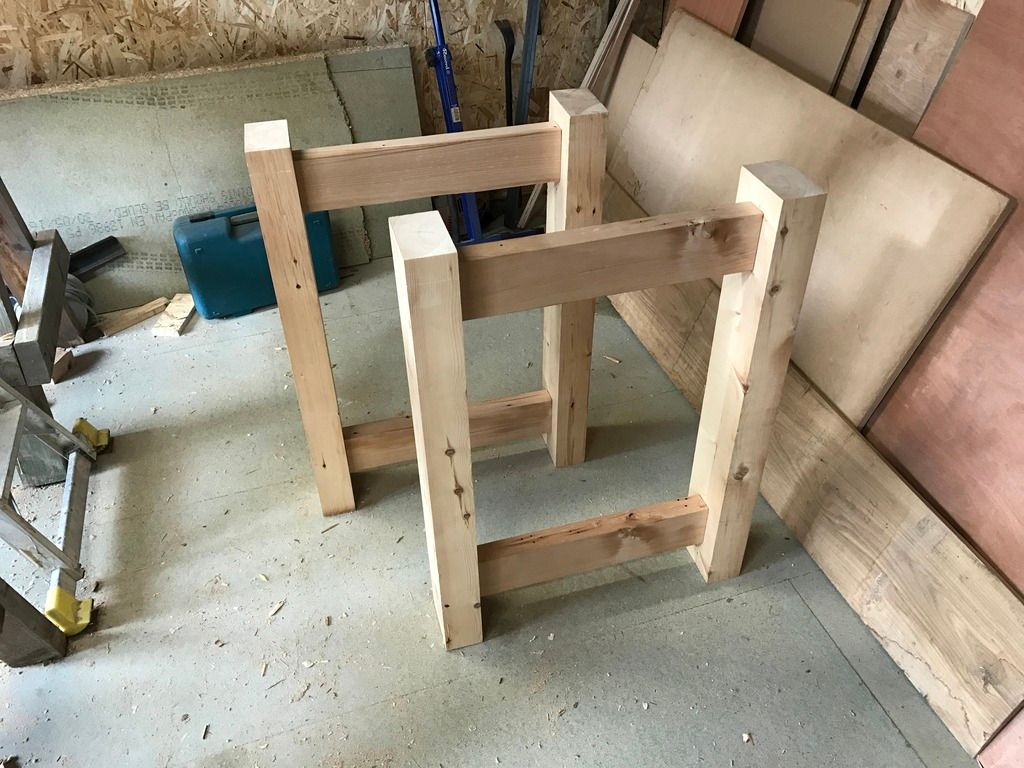
Well I managed to get 45 minutes in the shed today before departing on another Christmas present drop off tour but I'm not sure how much time I'm going to have later on. During my brief blitz I did a dry fit of the A frames to make sure they were ok:

One of the tenons is a bit on the skinny side so I'll have to address that at some point. I also marked the tenons on the long stretchers and their corresponding mortices in the legs. I did set the morticer up for the operation but didn't get enough time to cut them. Once they are done I'll just need to do the mortices in the top and the tenons and in the legs for the core assembly to be complete. Then it'll be down to things like fitting the vices and the bottom shelf etc. before I'll call it a bench :). Not sure when I'll get the time for that though but hopefully over the next few days we'll see it coming together!
 
Merry Christmas everyone!

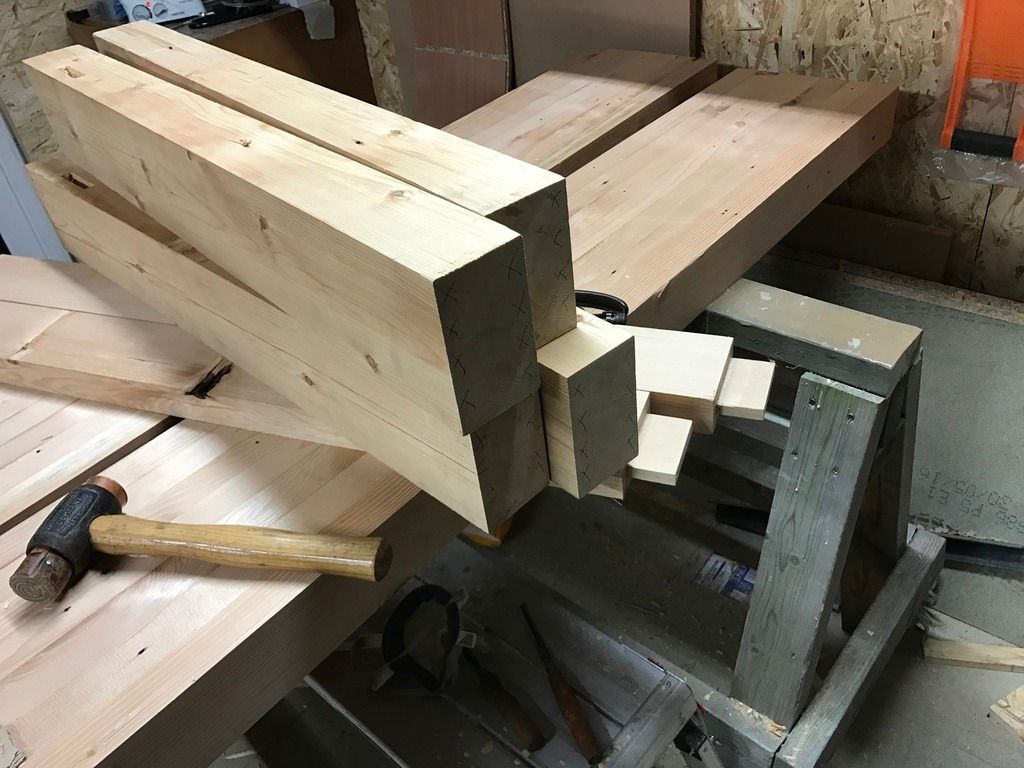
Some small progress to report; I fixed the loose tenon by gluing on strips of veneer I cut on the bandsaw. I then cut the tenons on the long stretchers and cut their corresponding mortices in the legs, using the same technique as previously described. The last thing I did was mark out the tenons on the top of the legs:

These are beefy affairs at 1 1/4" wide by 1 1/2" deep. I'll be chopping these mortices by hand so plenty of opportunity for things to get amusing shall we say!
 
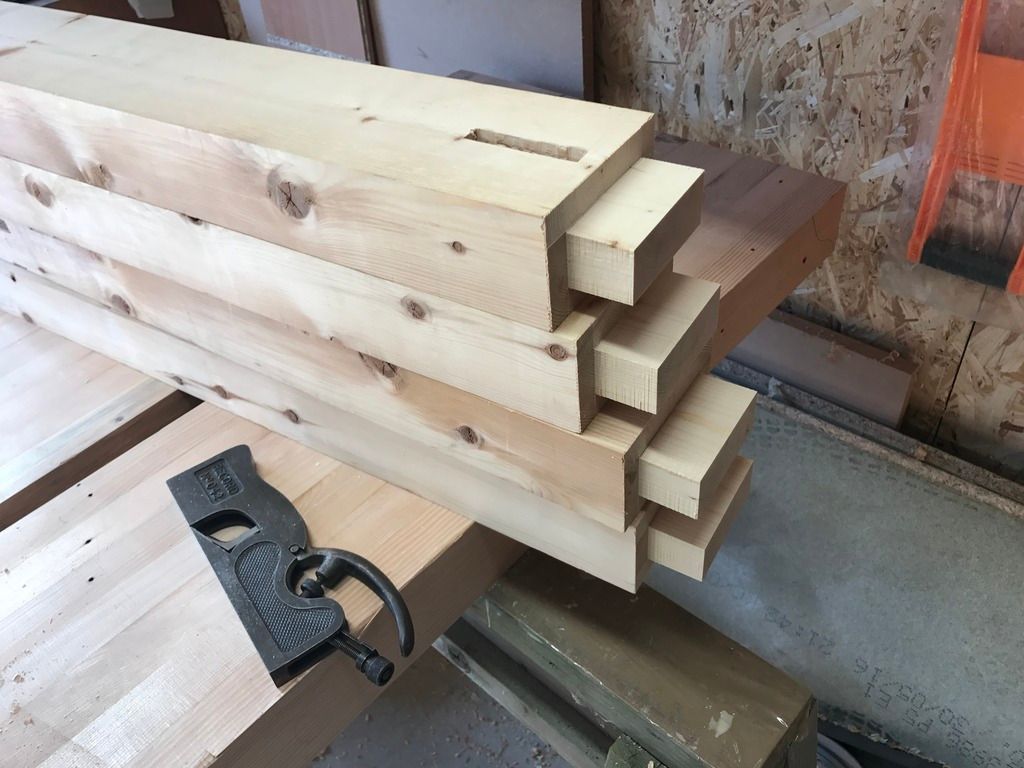
Some more progress! This morning I started in earnest meaning to get as much done today as possible. So far I have managed to trim the fixed, skinny tenon with my shoulder plane and cut the tenons in the top of the legs:

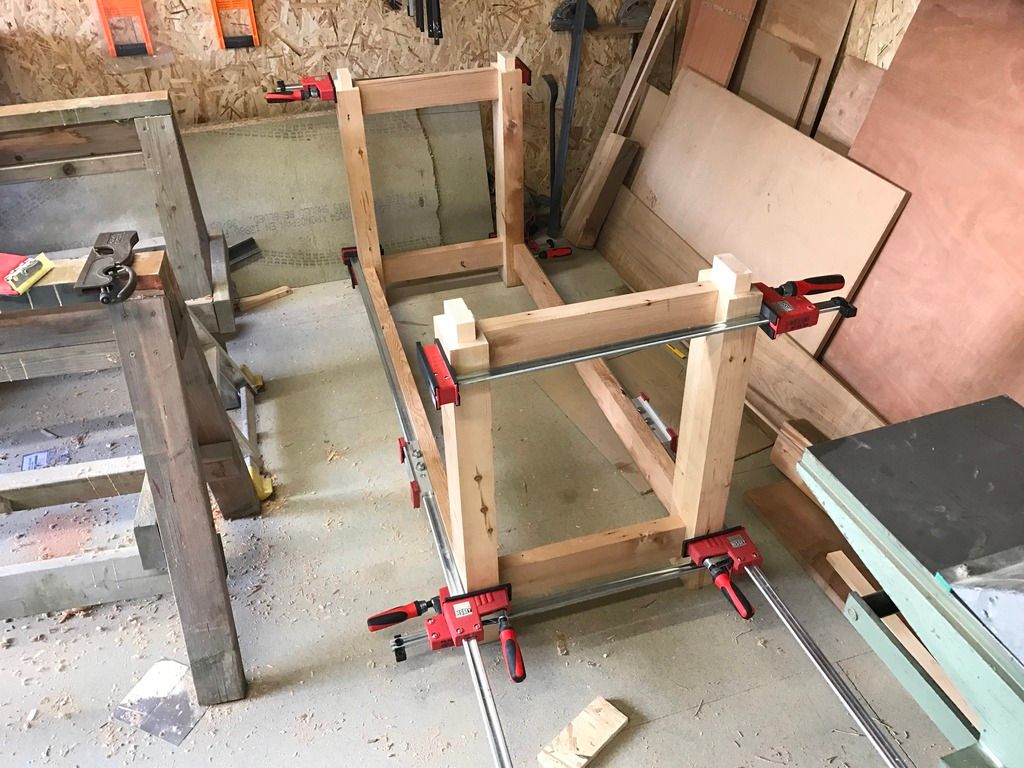
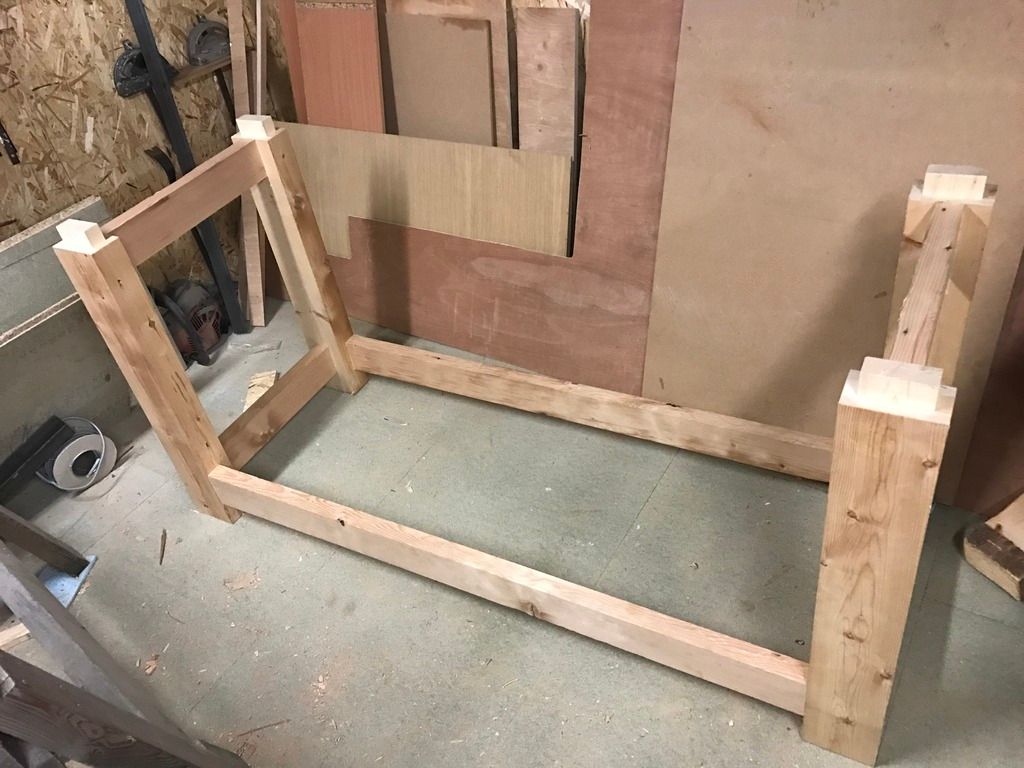
This meant that for the first time I could perform a dry fit of the complete base as it will stand:

The base assembly came together quite nicely I must say, with surprisingly tight shoulder lines and squareness. I know there is a disaster somewhere round the corner though. Next tasks are to glue up the base and then place it upside down on the tops in order to mark out the mortices. Then I'll be bashing these away while the glue in the base cures. These mortices strike me as the most likely cause of upcoming disaster but I wouldn't be surprised if I invented some completely random way to balls things up. It's quite exciting in a funny, weird, masochist sort of way!
 
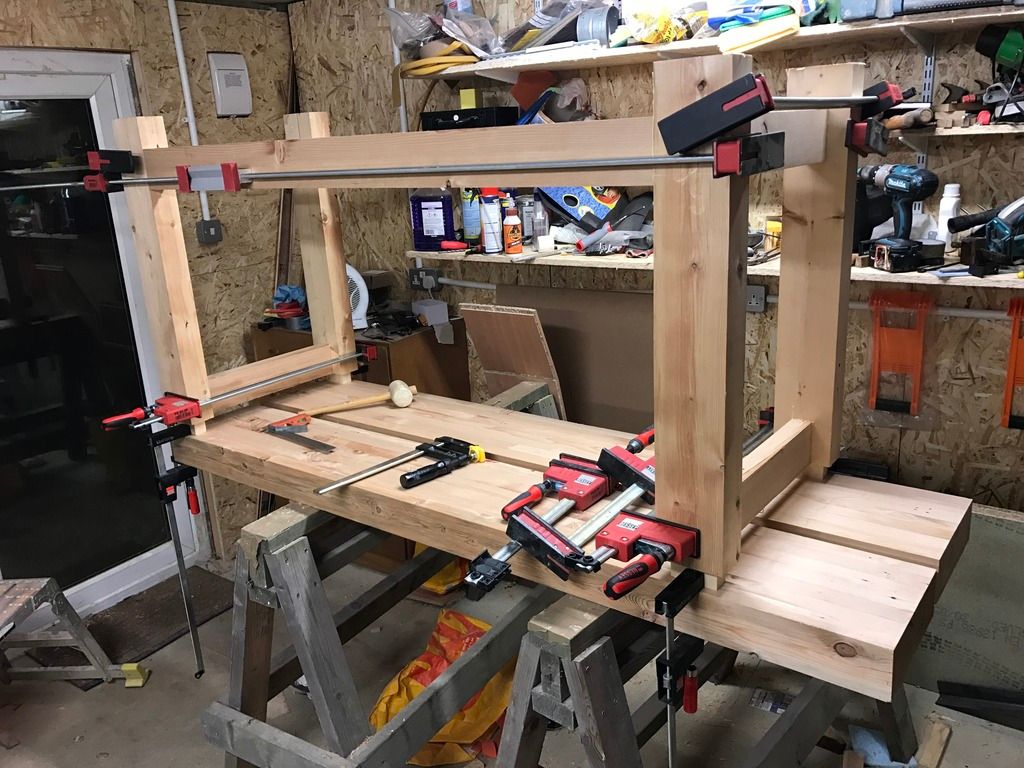
After the last hour or so of fiddling to get the frame, legs and top in alignment I totally appreciate the benefit of those brackets! Having said that I was aware of that option but decided to go the mortice and tenon route as I think it will be more satisfying to accomplish. Here's where I am at the moment:

All aligned and ready for me to mark and chop the mortices. Let's have a sweep; how long do we think they will take to chop? They are 1 1/4" thick, 3 1/2" long by 1 1/2" deep. I will faithfully time each one. For my guess I'm going with flipping aaaaages :)
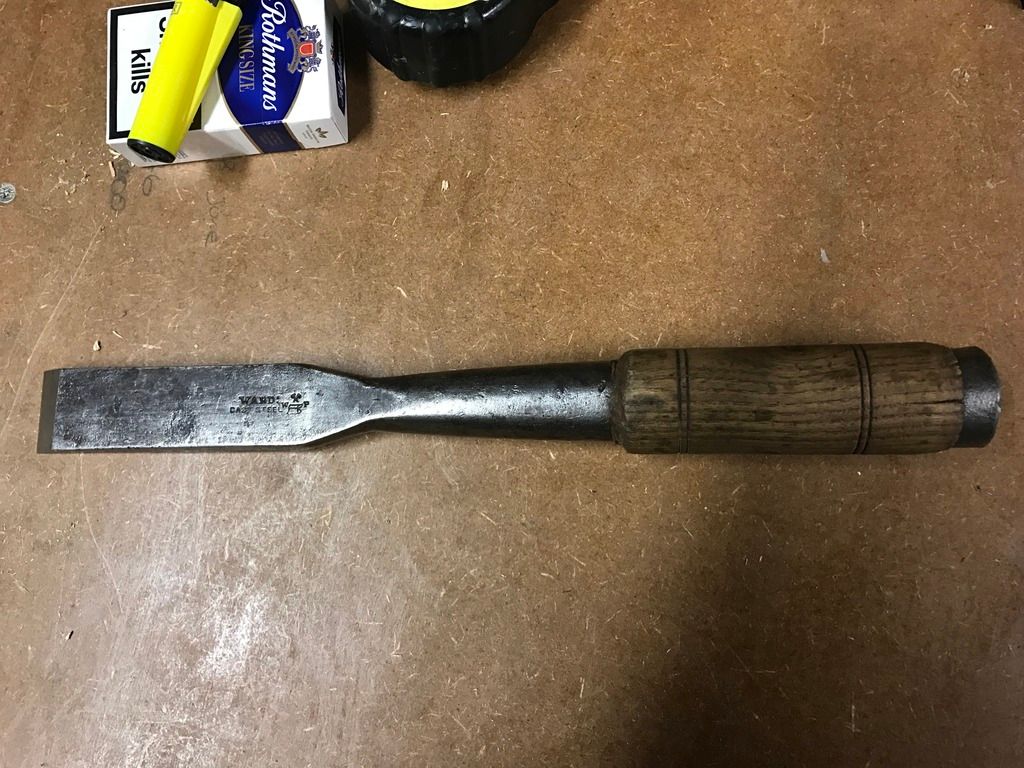
I don't have a 1 1/4" OBM chisel for this job but I do have this bad boy, sharp and full of malicious intent:

Let the carnage commence!
 
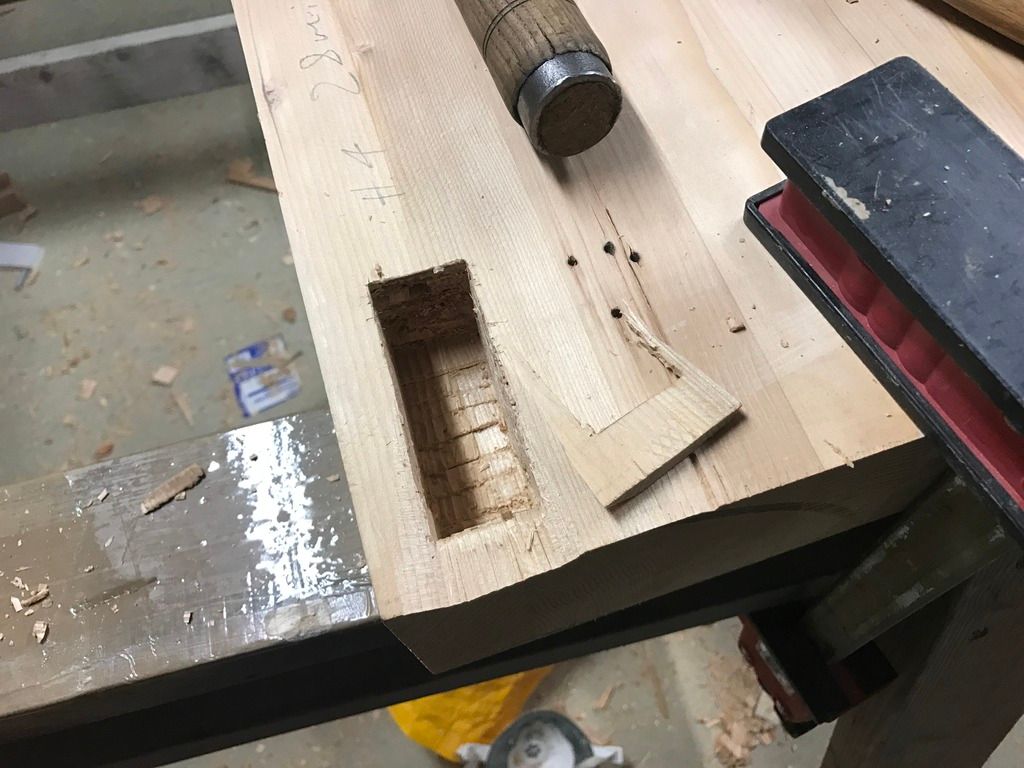
Very close Mr. T - all four together took an hour and forty minutes. A very tiring hour and forty minutes I might add.
Not to disappoint the foretold disaster did make its appearance:

Poo. I shall have to glue the chip out back into place. It's at the end near the face vice so an area of the bench I'll be spending a fair amount of time at. Next on the task list: chopping the housings for the vices. Hope that goes better but it's proving to be fun either way!
 
I know that the placement of the rear jaw in a vice is a bit like marmite; some go for a proud jaw and vomit at the thought of anything else, while others like a flush jaw and don't get why anyone would want that jaw sticking out - duh. I don't like marmite but I do see both sides of the vice argument. I am accustomed to a flush vice however so have gone with that for this bench. This means that I have to create a housing for the rear jaw in the face of the bench. There are a number of ways to do this but here is my way:
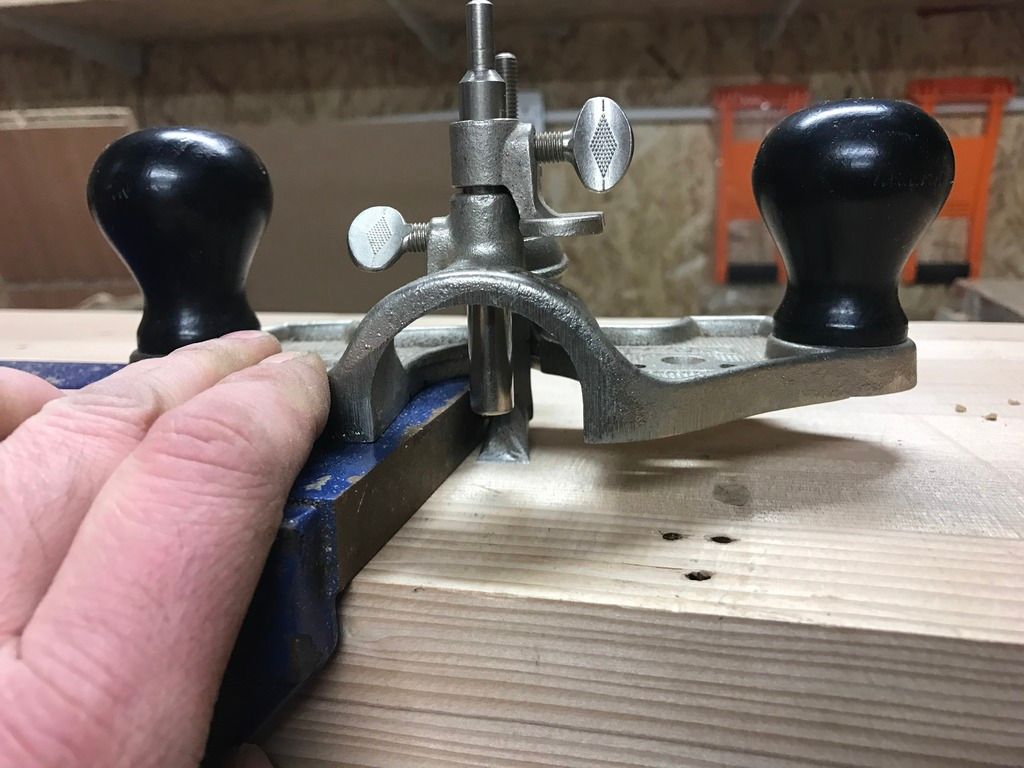
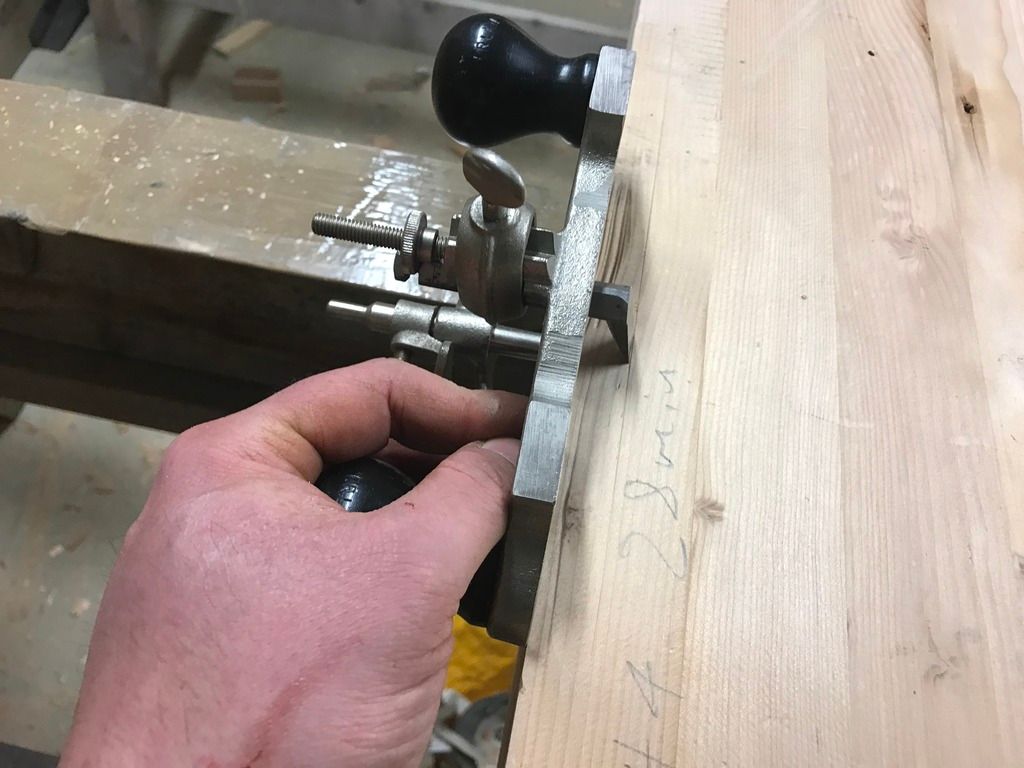
The first thing I needed to do was accurately mark out the depth of the jaw. Rather than use a gauge I set the depth on my router plane like so:

Then I marked the underside of the bench top by referencing against the face:

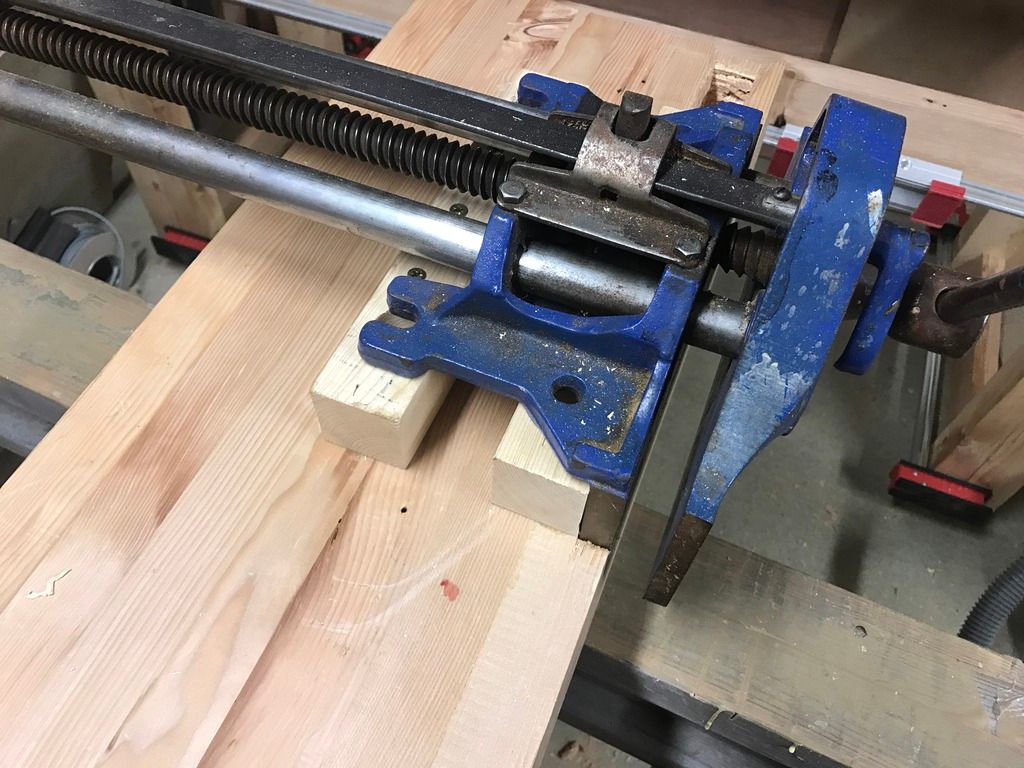
Once I'd fixed the spacer blocks in place I then marked around the rear jaw with a knife and chopped most of the waste away with the same bad boy chisel as above. When I got near to my line I pulled out the router plane again (already set to perfect depth) and skimmed the last 1/16th or so. This left me with the jaw just how I wanted it:

Having done that I took the cramps off my base assembly and stood it upright again - ready for a test fitting tomorrow once the glue has properly cured.

Not sure when I'll be able to pick up the remaining tasks as I have a busy couple of days ahead - super frustrating as I feel really close to having this finished. Fingers crossed it won't be too long and thanks for reading this!
 
If your jaw is flush with the bench you can always pack the workpiece off it needed - if you have the jaw proud, there is no way of putting the workpiece dead on the front of the bench to use any form of holdfast, cramp or deadman easily.
 
What about the pieces of wood for the faces of the vice, don't you need to set the vice deeper to allow for that?
 
Hey Adam. I'm going to have a wooden jaw on the moving jaw of the vice covered in leather. I might cover the fixed metal jaw with leather as well but I'll see how it goes first.
 
Just caught up with your progress over Christmas, looking very good and speed of work super impressive!

Terry.
 
Thanks Terry! I got an hour in the shop last night and test fitted the base to the tops. I'd cut the tenons on the legs a little fat after the skinny tenon I ended up with on the short stretcher and brought them back to size using my shoulder and rebate planes. I've got all apart from one just right. Only need to finish that one off to have something to work on that at least looks like a bench. I'm not going to glue these in and will also use coach screws to fix the top in place. Then we'll be down to fixing the vices in place, making wooden jaws for them and drilling dog holes before applying a finish. So near and yet so far away!
 
Cheers Mark. I'm sure yours is well on the way too. Here's where I am at the moment:

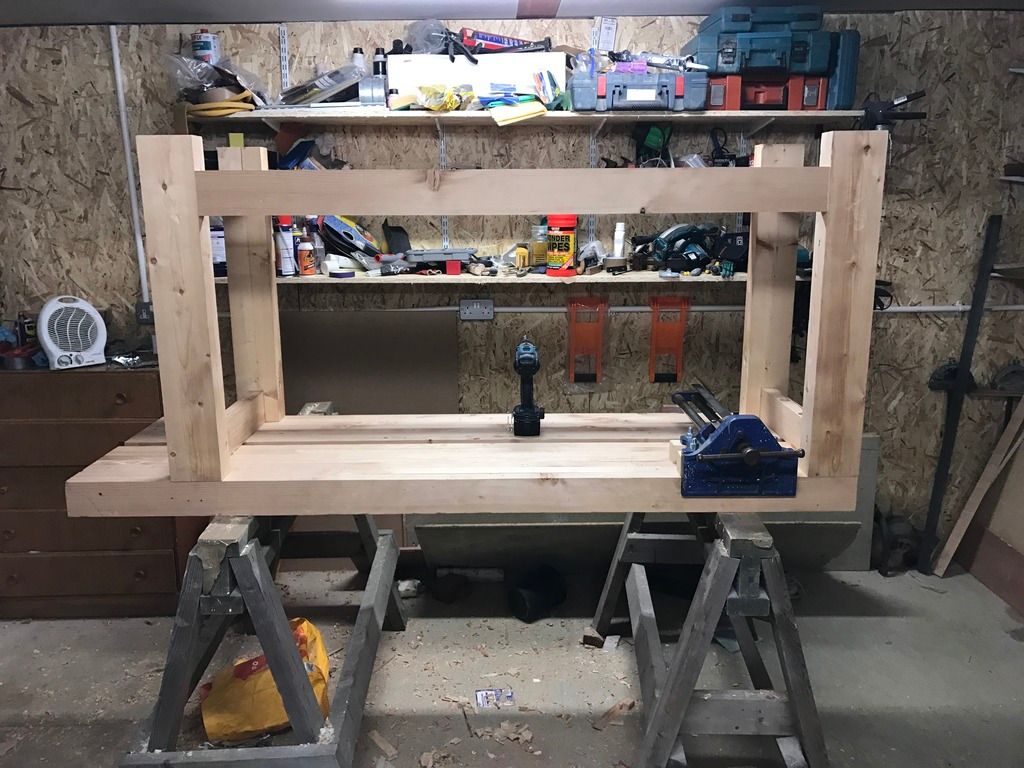
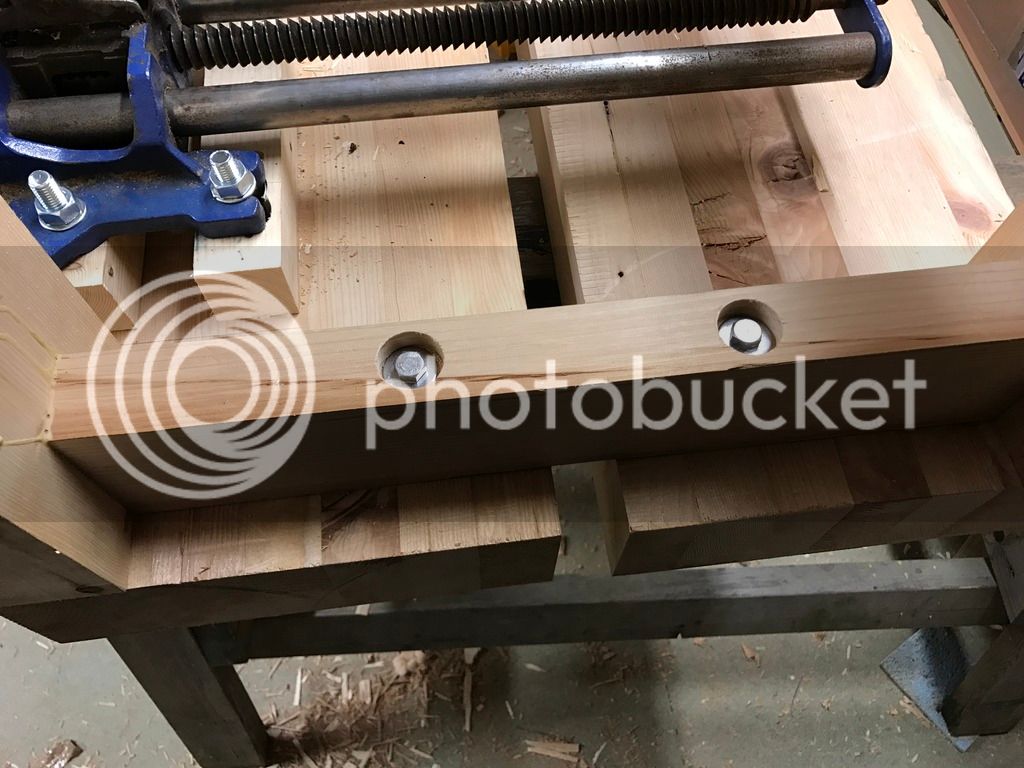
The base is fixed to the tops and the face vice is installed (I will line the fixed jaw with leather I have decided). Here is a picture of how I've fixed the parts together:

The mortice and tenons are there to align the tops with the base and help prevent wracking. The coach screws keep the tops firmly down on the base, although given their weight that may have been overkill. The screws are M8. I deeply counterbored the 10mm clearance holes in the stretchers so that any movement in the tops would be accommodated towards the centre. This should mean that even if there is some movement, the edges of the tops should remain flush with the legs and the long stretchers. Just need to add the leather, fix the end vice and bore some dog/hold fast holes before I'm applying finish. Then I'll call it done!
 
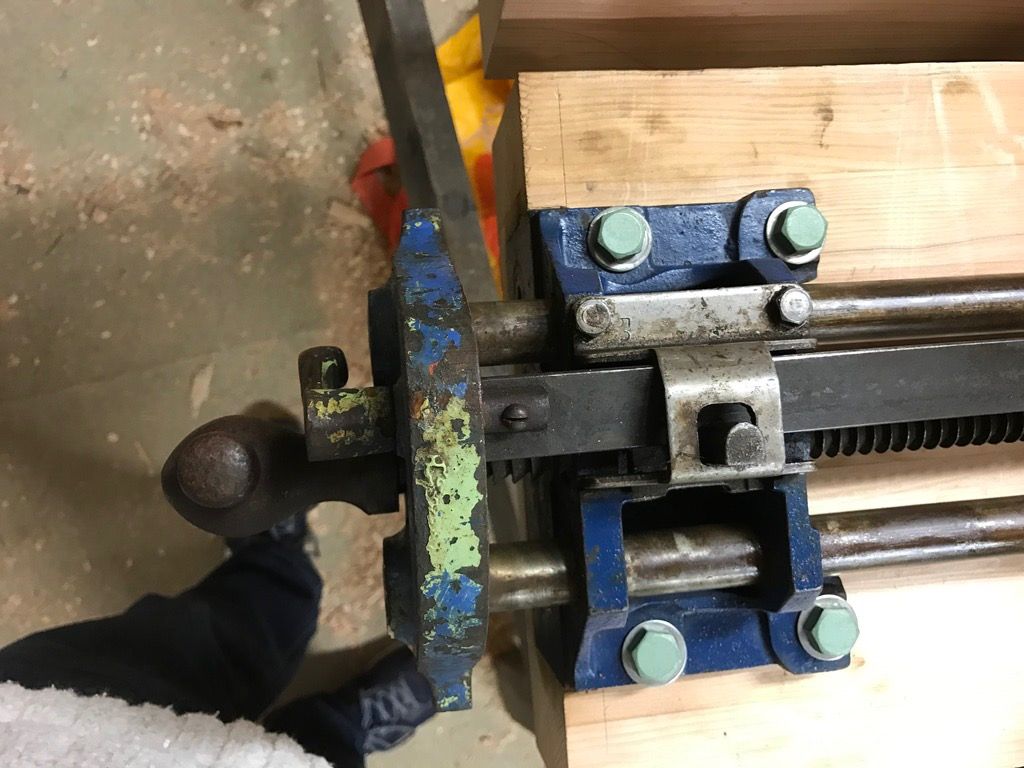
Wangled another hour in the shop and managed to get a bit more done! I finished chopping the housing for the end vice and fitted that with M10 coach screws. This one is a vintage little Record 52 and seems so diddy and easy to move around in comparison to the massive 53 I have on the face:

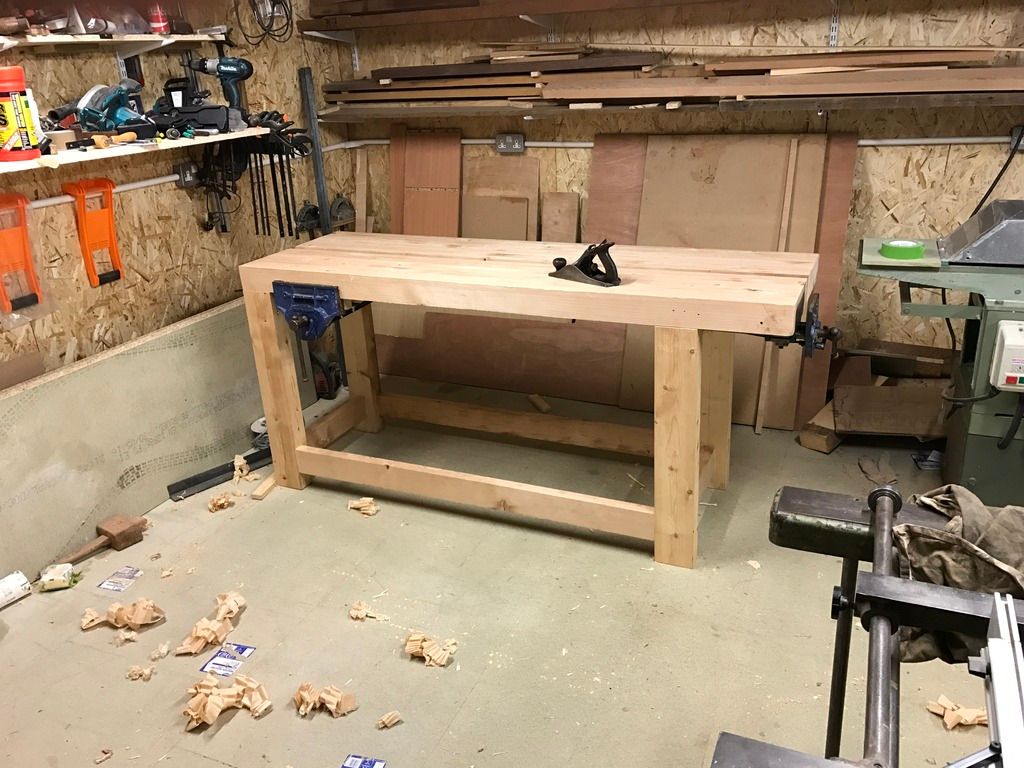
After that I chamfered the bottoms of the legs to help prevent damage when I inevitably drag it around. Then, with everything crossed for good luck, I flipped it off my trestles and stood it up for the first time. Not as easy as it sounds because this is now seriously heavy:

It's starting to look like a bench! I had a little play with it, trying to induce wracking and to test its stability and it feels rock solid. What I'd like to do tomorrow is drill for the dog holes and apply the wooden jaws to the vices. If I get enough time I might even put the shelf in or apply some finish but I doubt I'll get that far. Feels like the final stretch now and I hope I get it all done.
 
Don't forget if you have a morticer, chop saw, drill stand or anything else you ever wish to bolt down you can kill two birds with one stone if you position your dog holes right. I have dog holes on mine that are positioned to bolt my drill stand down so it will swing out over something held in the vice.
 

Latest posts

Back
Top