CroppyBoy1798
Established Member
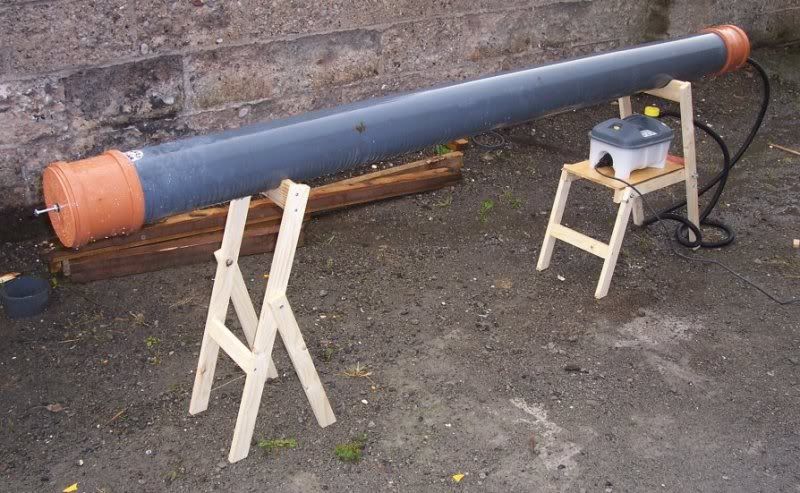
Here's a little project that I've been working on lately, with the help of a neighbour whom supplied me with a number of the raw materials (pipe, fittings etc) I was able to put this together!
Its a canon that fires offcuts and waste timber! Ah no, its a steamer for softening up wood prior to bending/forming it.
Its 8ft long, figured it'd be better to have it too long than too short! The pipe is 160mm diameter. The steam comes from an Earlex 5 litre wallpaper steamer which runs for about 70mins when full.
It all folds away and disconnects for easy storage. There is a vent on the top to allow the steam to escape (wouldnt want any pressure related explosions! ) and a drain hole at the bottom to let the condensed water run out. I still have to put a few threaded rods through it so as to give the timber something to sit up on and allow the steam to get at all sides.
It seems pretty effective from the quick tests I did, especially on some pieces of oak, about 20mm square and 2ft long, after about 10 mins in the steamer it was easy enough to bend to a right angle by hand!
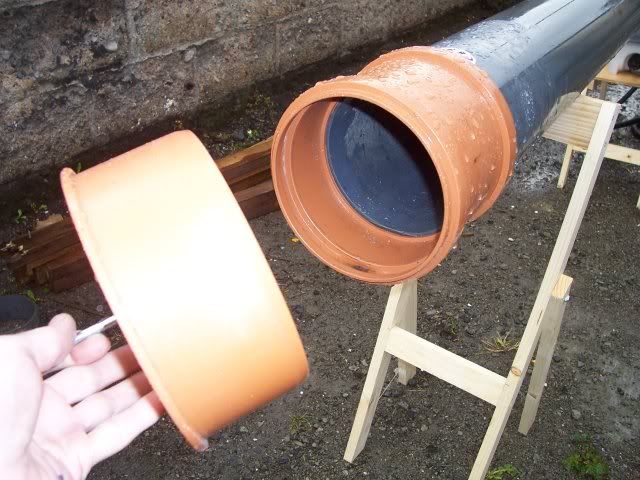
The rubber was removed from the coupled at this end so the end cap could be easily taken off to allow access. Although the rubber is gone the cap still has a fairly snug fit.
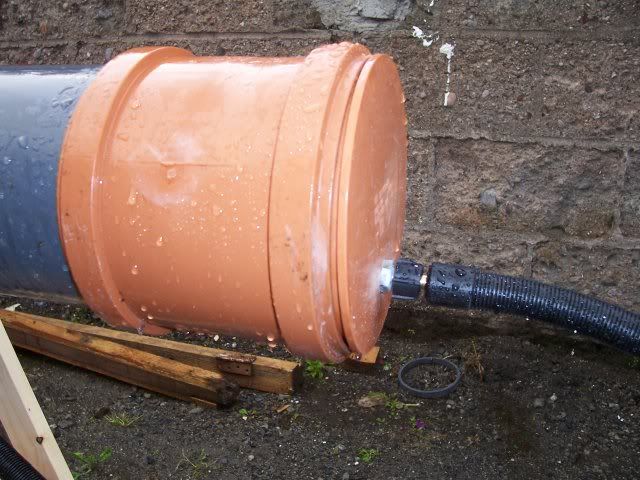
A 3/8" fitting fixed to the rear cap allowed the hose from the steamer to be connected easily.
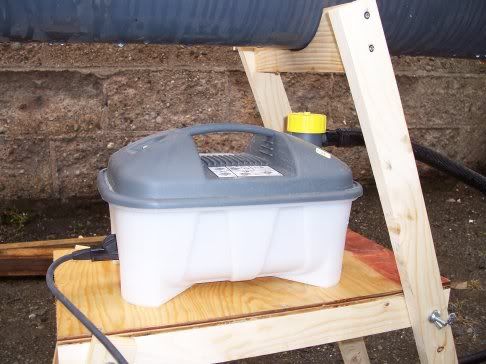
The steam source! I had considered making a fire box and burning offcuts etc to boil water but I figured it'd be a bit messy, smokey and smelly! A gas cylinder, ring and kettle were also an option, but I think the electric way (although not cheap I suppose) was the cleanest and easiest route.
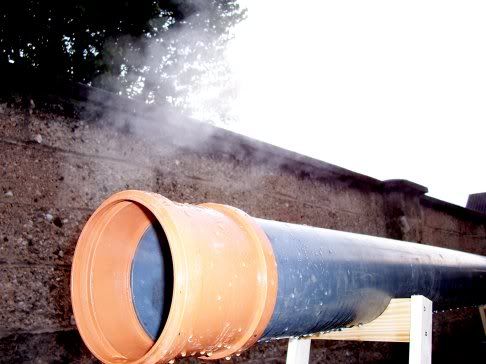
She's cooking! [/img]
Its a canon that fires offcuts and waste timber!
Its 8ft long, figured it'd be better to have it too long than too short! The pipe is 160mm diameter. The steam comes from an Earlex 5 litre wallpaper steamer which runs for about 70mins when full.
It all folds away and disconnects for easy storage. There is a vent on the top to allow the steam to escape (wouldnt want any pressure related explosions!
It seems pretty effective from the quick tests I did, especially on some pieces of oak, about 20mm square and 2ft long, after about 10 mins in the steamer it was easy enough to bend to a right angle by hand!


The rubber was removed from the coupled at this end so the end cap could be easily taken off to allow access. Although the rubber is gone the cap still has a fairly snug fit.

A 3/8" fitting fixed to the rear cap allowed the hose from the steamer to be connected easily.

The steam source! I had considered making a fire box and burning offcuts etc to boil water but I figured it'd be a bit messy, smokey and smelly! A gas cylinder, ring and kettle were also an option, but I think the electric way (although not cheap I suppose) was the cleanest and easiest route.

She's cooking!


