Thinking out loud - a new project

UKworkshop.co.uk

Help Support UKworkshop.co.uk:

This site may earn a commission from merchant affiliate links, including eBay, Amazon, and others.
Aled Dafis":1oolo4k4 said:
I've had a bit of a play with SolidWorks tonight and following a few frustrations, came up with this.
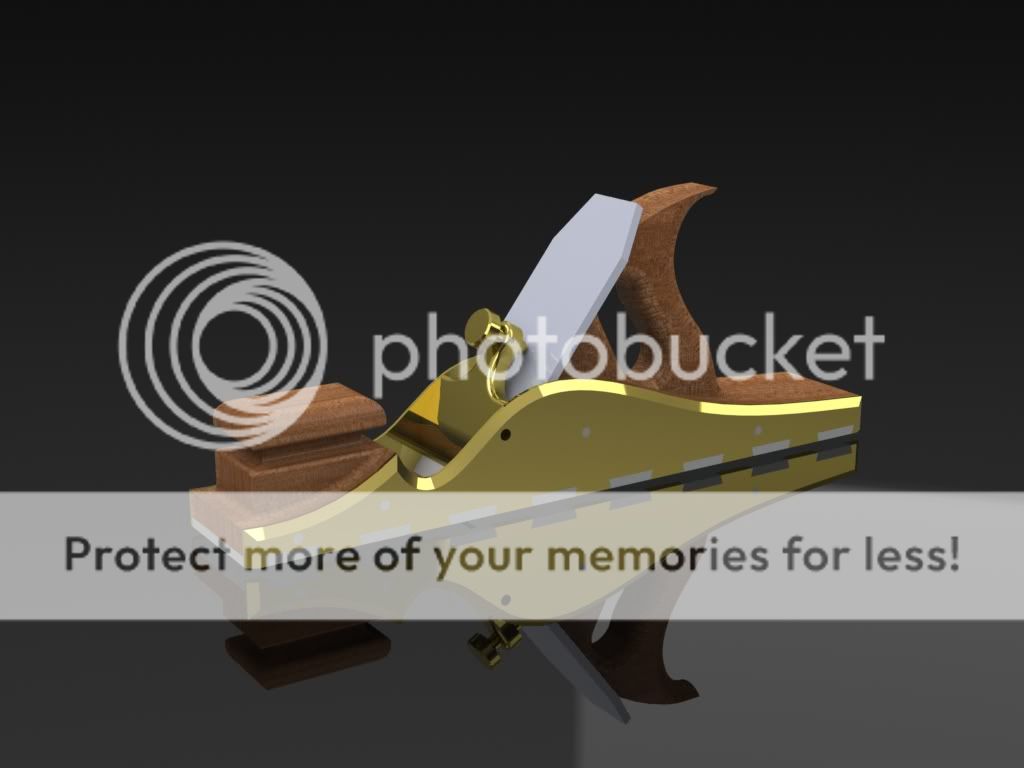
Panelplane3-2.jpg

:D

Cheers
Aled

WOW!!

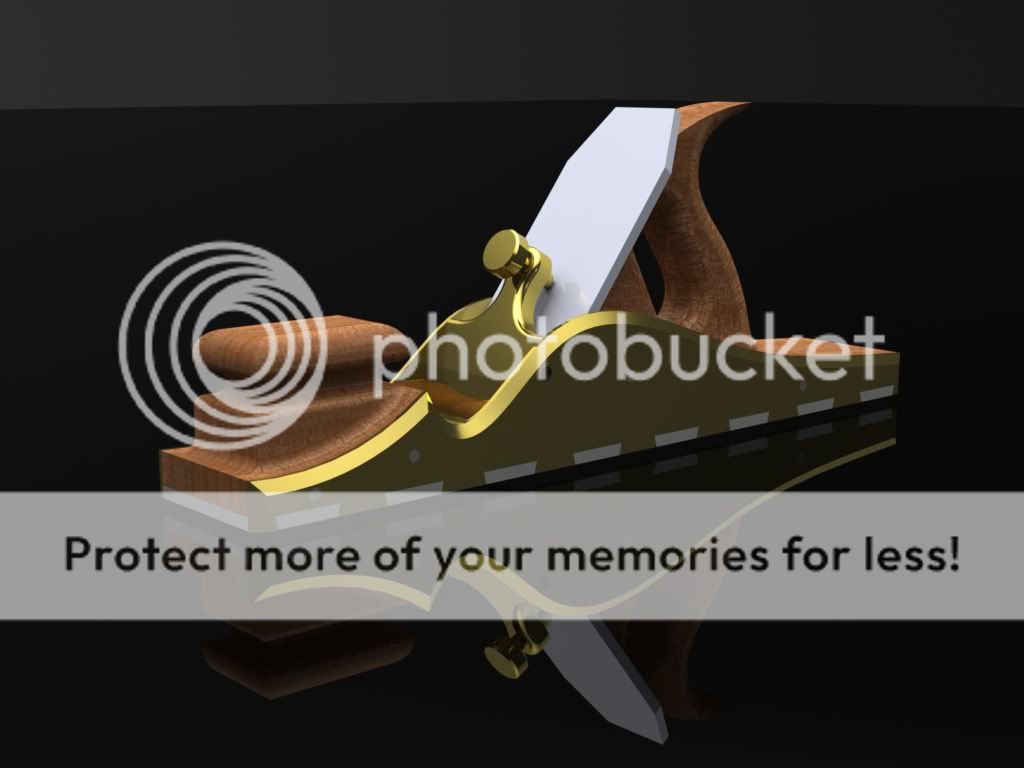
I don't like the ''saw'' handle, but that's just my taste.
Looks great mate.

Ali
 
Thanks for the comments guys.

What do you suggest I do with the front bun Jimi? I know it needs something but not quite sure what at the mo.

By the way, the pic opens up bigger if you click on it, took me a while to figure why it was always the same size regardless of which version i imported.

Cheers
Aled
 
Aled Dafis":8cd3af9z said:
Thanks for the comments guys.

What do you suggest I do with the front bun Jimi? I know it needs something but not quite sure what at the mo.

By the way, the pic opens up bigger if you click on it, took me a while to figure why it was always the same size regardless of which version i imported.

Cheers
Aled

Hi Aled

I would go for a curved transition between the layers...a continuous wave with the same curve in arcs as the curve out arcs to give a more even undulation rather than a near rebate.

Does that make sense?

Jim
 
I'd tilt the handle to lean a bit more forward. A visualisation of this would be to draw a line from the mouth to the middle of your palm holding the handle. The tilt angle of the handle would be at least 90 deg from your first line, so you have a handle which directs the force towards the mouth or a bit behind the mouth. If the handle is too vertical you tend to put too much weight on the front bun when planing, a too horizontal angle will make the plane hard to push as too much force is applied downwards.

I would not be surprised if someone had measured hundreds of planes and built a formula out of it. I made up this theory some years ago when I started building an infill plane and after measuring all the planes I had in my hands I noted that the angle on all old planes ended up giving the "point of impact" not right at the mouth but a tad behind it, from exactly at the mouth on small planes to about 1½" behind the mouth on a #8.

In any case you should probalbly avoid a too high angle on a traditional plane. And another thing would be to avoid the too pronounced curve just aft to the bun. It will weaken the sides quite a bit, not to talk about the sharp corner aft of the bun just where your palm should rest.

Pekka
 
I've revised the front bun a little, but don't really want to go as far as a smooth curve. The rear tote has also been massaged a little in line with pekka's recomendations, it's not perfect by any means, but that's down to my limitations in using the software.

panelplanerevisedbun.jpg


Panelplanesideview.jpg


I'm really enjoying this process, thanks guys.

Aled
 
Ooooo! That looks like a ROLLS ROYCE!!!

Bravo! Perhaps a little lower on the front tote still...try it...save that one and see what a lower front looks like

Jim
 
Aled,

This process is saving you hours of work, stick with it.

I reckon the tote needs a little more meat at the bottom and more room for the little finger. These planes are used with the front hand over the body because they are used on a lower bench and so need a much flatter tote than a modern plane (ask Mr Hamlin) - hence the suggestion.

The bun is sweet but a fraction too crisp at the finger tips, I think you need a slightly smoother transition on the underside - not so much that it looks worn out before you begin, but a little more than you have just now.
 
Ah, ProDesktop... Not even the nerds in my DT class had anything positive to say about that program. I was just happy that the school let us each take the disc home to install it on our PCs... :oops:

I'm surprised to hear that schools are still using it when Google Sketchup has been free to download for several years, now (that's what we used at college - thankfully!).

Apologies for going off-topic... Great looking plane, Aled! :)
 
Thanks Matthew, the crispness is what I'm after, but I will try your suggestion, hey it doesn't cost anything, and with this system the wood can be put back on! Maybe I should push the handle back by say 10mm to ensure that I have more room for my fingers, and also so that I have some meat in front just in case I decide to add an adjuster and need to cut a groove to house it.

Olly, I've had a little play with Sketchup, but couldn't get my head around it, it just felt more of a sketching program than a fully blown CAD tool, which is exactly what it is, just not for me I don't think. I should try again sometime. It's definitely something we should look into at school.

Cheers

Aled (who has to go to work now as opposed to playing with Solidworks)
 
Thanks for that link Jimi, it's a beautifull plane, I'll have another play with Sketchup over the next week if I get a chance, and see how I get on.

Cheers
Aled
 
I usually buy the brass from an ebay seller called Ringwood Precision Engineering
http://stores.ebay.co.uk/Ringwood-Precision-Engineering?_trksid=p4340.l2563

I've been buying the O1 tool steel for the irons from J+L Industrial in the past, but have just found Cromwell's which are quite a bit cheaper, I'll be trying them this time.
http://www.cromwell.co.uk

I do find the OI a little hard when peining the rivets, so I was thinking of trying some mild steel for the sole this time, if it's good enough for Karl Holtey, then it's good enough for me! This will probably come from my local fabrication shop down the road.

I tend to cheat when roughing out plane shapes, I send CAD drawings off to be water jet cut, it saves hours of tedious sawing and filing, and the finished result is accurate to within a tolerance of +-0.25mm.Water jet cutting is an amazing process that leaves a fairly good surface finish on the cut edges and introduces no heat/stress into the metal in the same way as laser cutting does. The costs are usually quite reasonable, especially when you factor in the hours of sawing/filing you save, leaving you more time to work on the finer aspects of plane making.

Cheers

Aled
 
I would be very interested if you could post some details of the water jet cutting costs etc.

That's the bit I hate doing....but I guess it makes the difference between "handmade" and "assembled".....which is my opinion of most of the bespoke makers these days. It would be romantically foolish to the extreme to think that Karl et al cut each one out with a hacksaw, filed it down and banged it together like their ancestors....but it is kinda cheating isn't it! :mrgreen:

I used to think that castings were cheating until I got my Ebay Three..... #-o

Short of actually casting the bodies myself...I would much rather whittle some 01 steel than go that route again!

On the subject of water jets....we had a water leak at work the other day....a huge old water main pipe started meltdown...tiny pinhole leak with powerful tiny jets....

I put my finger on one and it actually hurt! The plumber said that I was lucky I didn't reach the one around the back as I would have probably lost a finger! Amazing stuff water isn't it!?

Jim
 
Jimi

Waterjet cutting costs vary greatly, it's just a case of producing a CAD drawing and emailing a .DXF file to a few companies to get quotes. If you're after Brass and/or O1 parts cut, many suppliers will ask you to provide the materials as free issue to them because very few actually keep brass/O1 in stock, and it would cost them an arm and a leg to buy in a sheet of say 5mm brass just to cut a couple of relatively small plane parts.

I'm not even going to start on the "hand made" vs. "assembled" debate, it's been done to death, all the threads have been just a torrent of differing views and has never actually come to any useful conclusions. That's enough of that. Period :!: :!:

Hmm yes, waterjets are truly remarkable machines, the water is actually pressurised up to 90,000psi :shock: :shock: and picks up an abrasive media that cuts the steel, stone, glass, marble, granite, Titanium, etc. etc. Softer materials such as foam and rubber are cut just using the water alone.

Cheers
Aled
 
On Highway schemes we switched to water jet cutting to break out Reinforced Concrete - considered safer than Jack Hammers as no danger of White Finger. Still very dangerous for the operators though?

Rod
 
Hi,

The filling in Crunchy bars is cut with a high presure jet of cooking oil.

We have a water jet machine at work some one cut a 6mm slice of a block paver for his drive! they also cut MD and birch ply with it :shock:

Pete
 
jimi43":23t4ysk7 said:
I love that design Aled...one of my old favourites!

I look forward to seeing WIP...you never know...I might be following along with you by then!

Jim
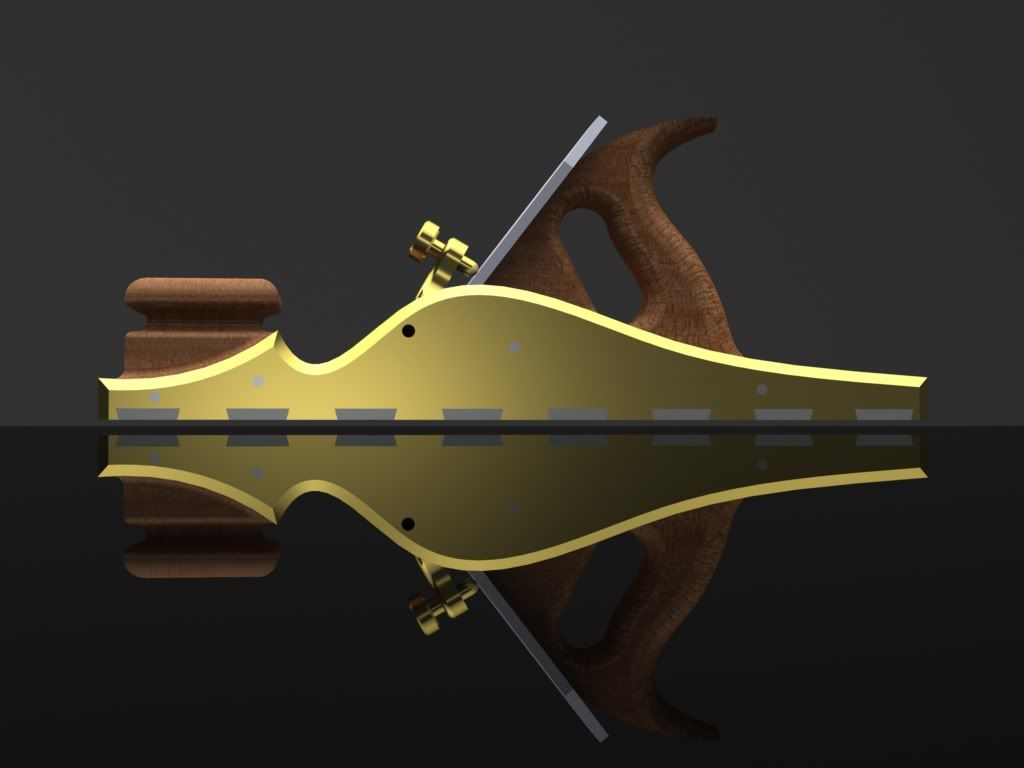
That's a given, you old plane-maker you!

:wink:
John
 

Latest posts

Back
Top