The Mask Cabinet...WIP

UKworkshop.co.uk

Help Support UKworkshop.co.uk:

This site may earn a commission from merchant affiliate links, including eBay, Amazon, and others.

woodbloke

Established Member
Joined
13 Apr 2006
Messages
11,770
Reaction score
1
Location
Salisbury, UK
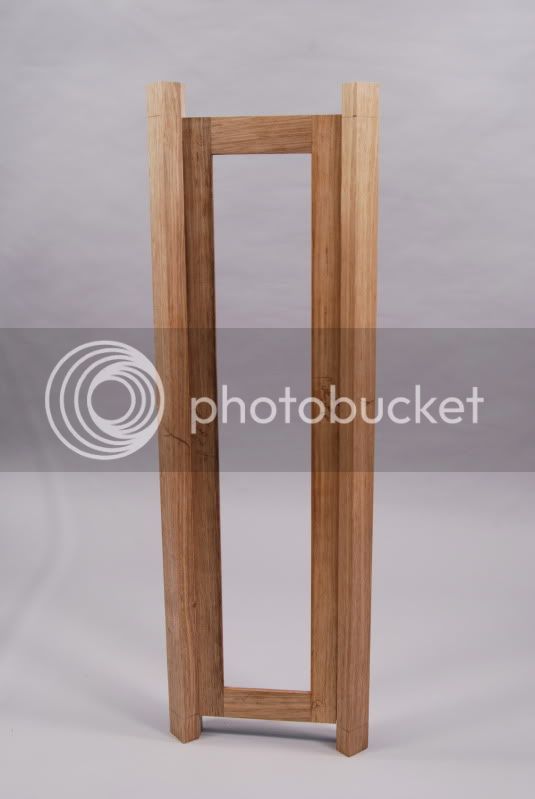
Following one from Dougless's walnut box on the General Woodwork forum, I've just been waiting for the wood to finish it's second conditioning in the 'shop before I start construction, having been machined oversize a couple of months ago. Once it's ready, it'll be skimmed through the p/t to final dimensions and then hand planed. The timber is English Walnut from one of several boards I got just before Christmas last year, but as is usual when I don't know what I'm doing :roll: (which happens fairly frequently) I've made a mock up of one side:
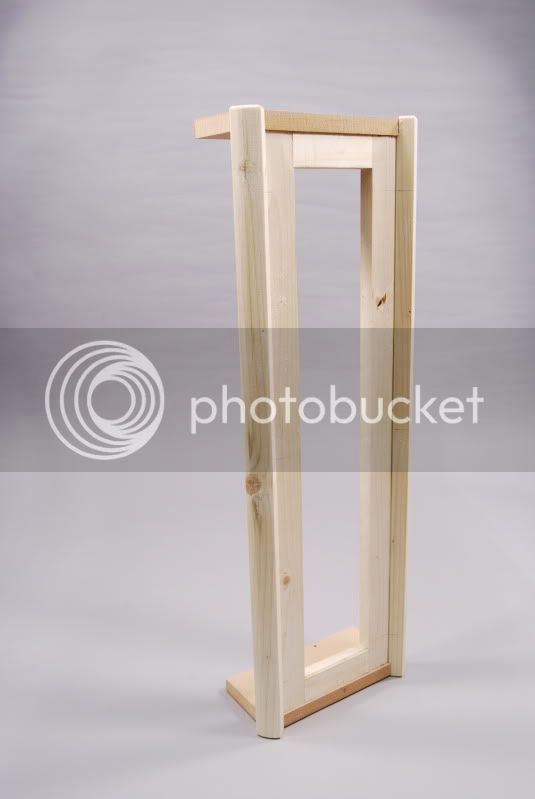
DSC_0002-8.jpg


...showing the corner styles that are set in at 45deg to both the back panel and side panels. The side panels and door will of course be glazed but the back panel:
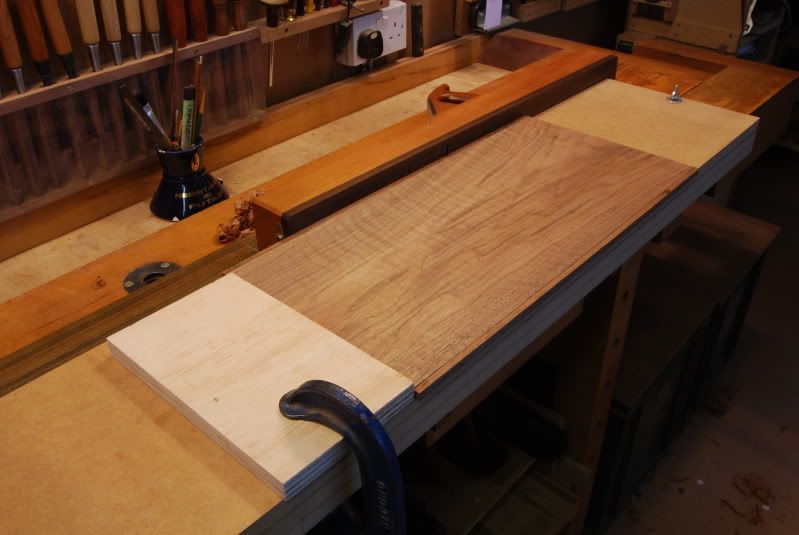
DSC_0001-7.jpg


...was part of a set of doors that I made for a very large cabinet in the late 70's, so it ought to be well seasoned by now. Shown in the pic being shot in to size having been hand planed down to 9mm. Once the other timber is fit to use, the back panel will be be made first and then everything else made to fit round it. Top and bottom will be 2mm Walnut veneers over lipped ply. Comments thus far, good, bad or indifferent welcome - Rob
 
wallace":2gy90vjp said:
When you say mask cabinet does that mean 'dust masks' or 'decorative masks'?
The latter, all will be revealed. if you've ever been to Venice you'll know what sort I mean :wink: - Rob
 
I'm intrigued. The mock-up is one half, there's an acute angle in the base of the mock-up, and the title is going to draw out the dark side (Mark just got there first).
I've seen your work, I have a bit of it... bound to be good. We shall have to wait and see.

(It's theatrical masks, or those worn by audience who wished to remain anonymous... close?)
 
condeesteso":vhpqnck8 said:
I'm intrigued. The mock-up is one half, there's an acute angle in the base of the mock-up, and the title is going to draw out the dark side (Mark just got there first).
I've seen your work, I have a bit of it... bound to be good. We shall have to wait and see.

(It's theatrical masks, or those worn by audience who wished to remain anonymous... close?)

Yep...those are the ones, not as Mark posted :lol: The mock up is actually one of the sides, with the two styles at each side set at 45deg to both the back panel and side - Rob
 
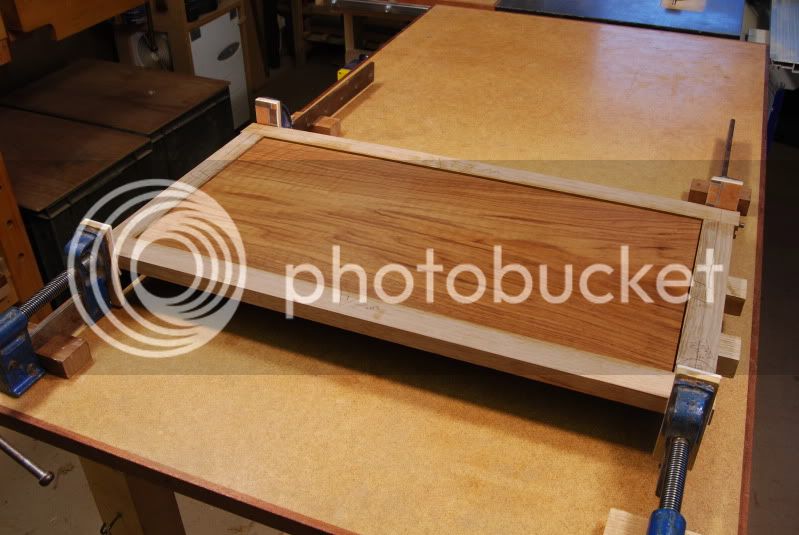
A little more work has been done on this project. Firstly, rear panel has been assembled:

DSC_0004-12.jpg


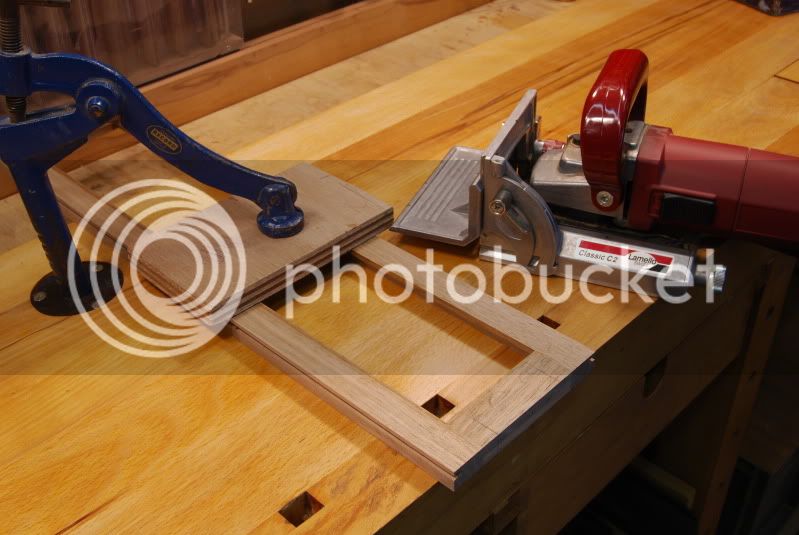
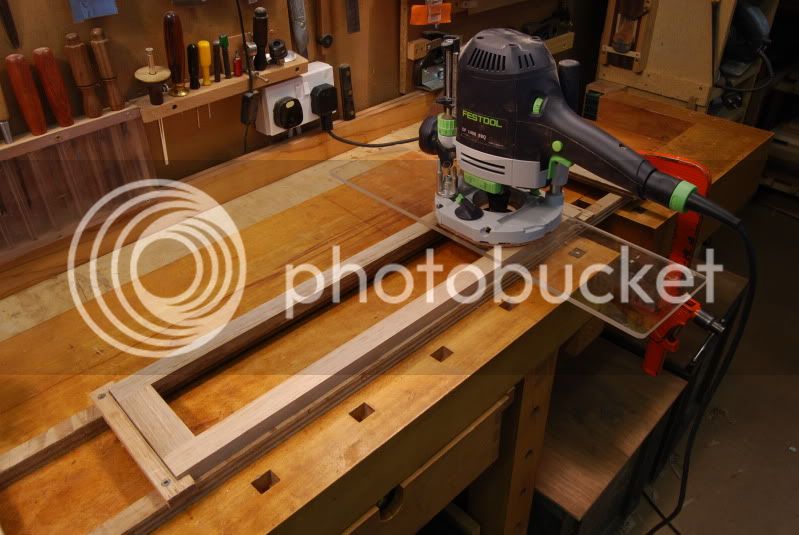
...with the panel having been polished and sitting around a mm below the surface of the frame which has yet to be finished. The two side frames have been Domino'd together and one is shown being routed out:

DSC_0003-6.jpg


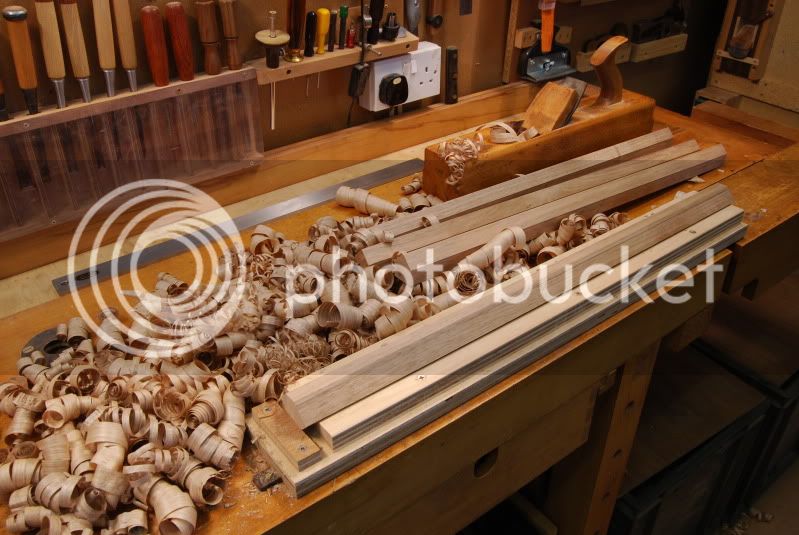
...to receive the glass, when it's fitted. The corner styles have been hand planed with a woody:

DSC_0005-10.jpg


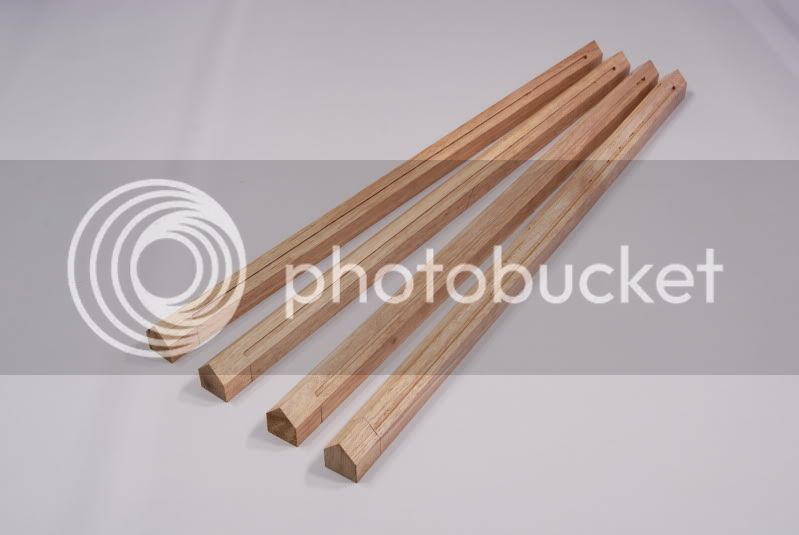
...in cradle on the bench, down to within a mm of the line and then finished of with my low angle jack. Once these were completed, a stopped 4mm groove was machined:

DSC_0008-4.jpg


...down the length of each one and a mating groove machined into the sides and back panel, so that when some 4mm ply tongues are inserted, a dry run of one of the sides looks like this:

DSC_0010-1.jpg


The sides and back panel will be:

DSC_0010-2.jpg


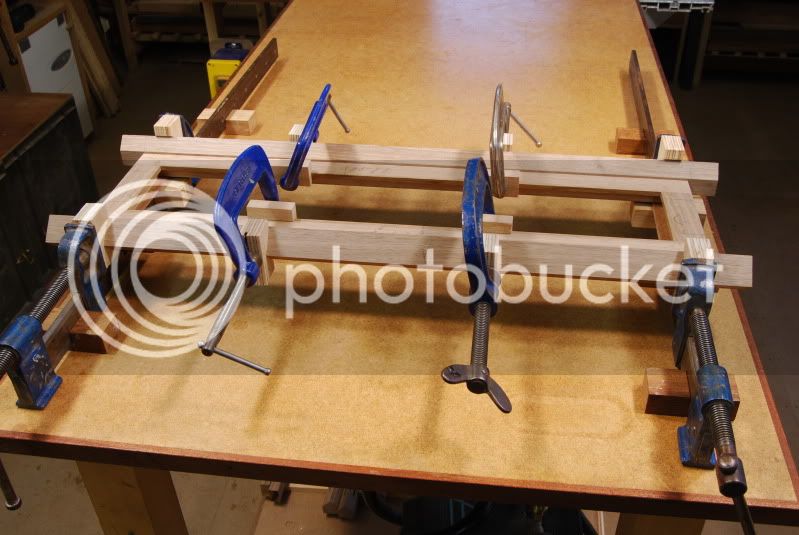
...biscuited onto the top and base. The final thing I did this afternoon was to have a dry run through:

DSC_0002-9.jpg


...for the cramping arrangements on the side panels. The side panels have then been taken apart, cleaned up and are in the process of being polished prior to gluing. Finish is a couple of very thin coats of matt Osmo-PolyX with a good application of teak wax over the top. This acts as a 'resist' so that any glue 'squeeze out' (not that there's going to be much) is simply removed the next day with a sharp chisel. Comments, as ever, much appreciated - Rob
 
Paul Chapman":dj82gdfx said:
Looking good, Rob. Is that an extra-wide base you've fitted to your router?

Cheers :wink:

Paul
it is Paul, as the base won't straddle the rails. Just a couple of dabs of d/s tape is enough to hold it in place. Note also that the bench has been trued and cleaned up (Lamello pic)...first time in 10 years :oops:... should have been done a lot sooner - Rob
 
There's an update to this project here if anyone's interested. The original posting caused so little comment that I don't think I'll bother posting projects on UKWorkshop any more. In fact, apart from RogB, DW, Mailee and a few others, there seems to be very little work of any interest posted any more. Shame :cry: ...it all seems to have got rather boring - Rob
 
Rob
Very nice. What did you use to do the stopped groove? I'm presuming the Festool. But did you use the cradle? I have some oak frame work to do to surround a recessed shelving unit a client has had put in and wasn't sure whether to bother making a jig or use the router table. I don't seem to get on too well with all that laying the strip down from one end onto the cutter business, if you know what I mean. On a router table, like. Maybe a cradle would help.

Thanks, and although I haven't posted for some time I have still been taking notice, and learning. Slowly.

Neil
 
neilyweely":2sdq8wcm said:
Rob
Very nice. What did you use to do the stopped groove? I'm presuming the Festool. But did you use the cradle? I have some oak frame work to do to surround a recessed shelving unit a client has had put in and wasn't sure whether to bother making a jig or use the router table. I don't seem to get on too well with all that laying the strip down from one end onto the cutter business, if you know what I mean. On a router table, like. Maybe a cradle would help.

Thanks, and although I haven't posted for some time I have still been taking notice, and learning. Slowly.

Neil
Neil, the stopped groove is easily done on the router table. Simply mark the 'start' and 'stop' points on an adjacent face (ie the one facing you, so you can see them) and then mark in pencil on the router table surface the 'start' and 'stop' points of the router cutter being used. In use, push the wood hard against the fence and align a 'start' line on the wood with the 'start' mark on the router table and carefully drop the job onto the cutter and move forwards until both the 'stop' points align...then switch the router off, wait til the cutter has stopped spinning and lift off. Bear in mind also that the waste won't be ejected from the goove, so shallow cuts need to be taken and cleaned out after each pass. I was only using a 4mm cutter and taking it out to 4mm depth, but if a bigger cutter was going to be used I think I'd have to carefully re-think the elfn'safty aspects - Rob
 
hI Rob
I have done that before, I think that was how is was taught to do it at college many, many years ago. We were taught to line it all up, tight to the fence, and lift the end where you are going to start the cut, pivoting the other end on the surface of the router table, so that you are lowering in a long arc onto the cutter. The arc is so long as to not be noticeable, so no probs there, and you are less likely to experience any grab/kickback because it is easier to control. I presume this is how you are doing it, not by lowering the whole thing down the fence. I have somewhat mastered this arc thing, but I still am a little nervous doing it. I like to have the wood absolutely under control when I am feeding it into the cutter. I have had some close calls on the router table, but thankfully no bad accidents yet. (I did once totally 'phase out' and found myself reaching out to grab the router bit, whilst still spinning - slowing down, with my thumb and forefinger, in order to stop it quicker!!)
Anyway, thanks for the tips; all gratefully received. Its nice to know that such good results can be achieved with techniques I already know, even if I am a little shaky with them! :?
Oh yes, whilst on the subject, I recently did a fluted face frame like this on the router table,. and found it very difficult to get good results without using a stop; a block to run into in order to give me absolutely repeatable results, so I ended up wasting several meters of English Oak. I still have the 'off cuts/wasted bits' now. They were quite thin so it was also necessary to use a feather board to stop the wood from lifting away from the cutter, giving a consistent depth of cut. I found myself throwing away at least as much as I kept because I was unhappy with the finish. Tear out, zigzag cuts and unruly lines, shallow pieces where the router bit had not achieved full cut depth and the cove cuts failing to line up perfectly at the ends or along their length all conspired to do my heed in. :roll:

I guess I could have spent more time setting up the table, but it seemed to be such an easy job I didn't take into account all the things that could, and would go wrong.

Oh well, shame I don't have any pictures as it would've made you laugh. I was cursing. Basil Fawlty branch like.

Thanks Rob

Neil
 
All looking very good keep up the wip.
I for one find this the most interesting section of the forum, you get to see how other people approach problems and sometimes a sneak look at all their kit etc. I have learnt more from people projects than all the books I have ever read. Its frustrating when you look at an old project and the photos have gone. :?
I have an on going wip which has only had a few response but if i am honest what can i expect them to say? People have a look they take away something or not and contribute if they can. After all we do the work for us and the people who recieve what we make, at the end of the day.
I know that for the first year or so of using the forum i was to nervous to post anything because everybody seemed so much more knowledgable and I didnt want to make a fool of myself, But i learnt so much from what others contributed, i guess you have to persist to help the people like me who got inspired but did not know what to say!
 
Rob - slow getting back, but I think you are right re work posted. The turners seem better at this but 'over here' it's all about sharpening etc and there was me thinking I needed a sharp edge in order to cut something.
Keep posting work here please... over time the weight of content may swing back to actual output. That way we all learn from each other. (I do feel I know just enough about sharpening to get by.)
 
condeesteso":t82prmqm said:
Rob - slow getting back, but I think you are right re work posted.
Keep posting work here please... over time the weight of content may swing back to actual output. That way we all learn from each other.

OK Douglas, I will, but it's a bit disheartening sometimes when the OP puts a lot of effort (and thought) into a project and the interest it generates in the first instance is practically zero. I don't care what people think about the stuff I do (provided justification or reasons can be given) just as long as we can have an intelligent, grown up conversation about the piece and the WIP. I agree 150% that we all learn off each other and these WIP's are the way we do it. That's also why I sometimes make the comments I do (even though other's at times don't seem to appreciate it) because this game of ours is a continual learning curve, even for those of us that have been at it for more years than we care to remember. I still make horrible mistakes but I try and rack them up so that they're not repeated...hopefully...in the next job - Rob
 
Rob

I really enjoy the WIPs but often don't feel sufficiently qualified to offer opinions other than if I like or dislike.

I really learn loads from those that post. =D>

So maybe I will just add my opinion on the aesthetics just to show I am awake and reading with interest.

I, for one, really appreciate the effort those that do post put into their WIPs so I would encourage you and others to keep them up as I am sure it's not just me.

Regards

Mick
 
Back
Top