straight from the saw?

UKworkshop.co.uk

Help Support UKworkshop.co.uk:

This site may earn a commission from merchant affiliate links, including eBay, Amazon, and others.

adrian

Established Member
Joined
2 Dec 2007
Messages
195
Reaction score
0
I'm making my first table and have reached the point where I need to crosscut the legs and apron material to length prior to cutting mortises and tenons.

I'm wondering whether you would expect to make these sorts of crosscuts right at the line and work directly from the saw, or would you rather cut outside the line and use a shooting board to establish the final length. (Note that the leg stock is 44 mm thick and quite hard.)
 
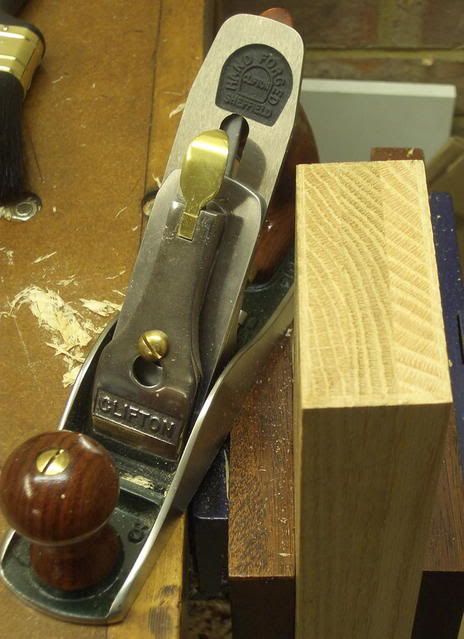
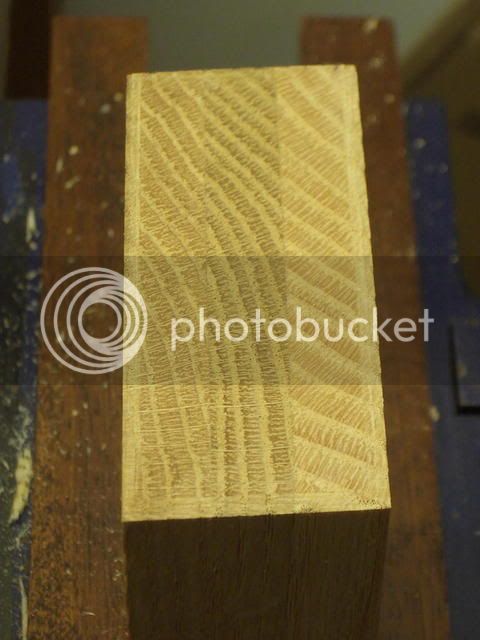
I had a similar problem, Adrian, when making a table out of oak and I had to cut the legs and rails by hand because they were at odd angles. They were too large to do on the shooting board so I knifed a line and chiseled a 'v' shape

Endgrain1.jpg


I then cut the pieces roughly and finished off by planing free-hand. The knifed and chiseled line gave me a reference to plane to

Endgrain3.jpg


Endgrain2.jpg


It worked well - but you need a very sharp plane.....

Cheers :wink:

Paul
 
For the rails, where there will be tenons on the end, it's easy - the cut end is going to be hidden inside a mortice, so straight from the saw. (What matters is the shoulders - so clamp the rails together in pairs, and knife across. Then continue the knife cuts round on each.)

For the legs, the tops will end up being hidden by the table top, so you have some margin for error. But conventional wisdom is not to cut mortices right at the end of a piece, to avoid bursting out the short grain section. So mark and cut your mortices with the wood over-length, then trim each one. No clean-up needed unless you saw very crooked.

At the foot ends, you will want to leave a bit over in the length if you are going to level the finished table, mark round each leg, then trim to length - but this is really awkward if your table is big. You definitely would not be using a shooting board if doing this.

I'm assuming hand-tool methods (as you've posted in this section) - for machine work they would all be cut to exact length with some noisy spinny thing.
 
Paul Chapman":2ok8ox01 said:
I had a similar problem, Adrian, when making a table out of oak and I had to cut the legs and rails by hand because they were at odd angles. They were too large to do on the shooting board so I knifed a line and chiseled a 'v' shape

I then cut the pieces roughly and finished off by planing free-hand. The knifed and chiseled line gave me a reference to plane to

So the deep V that you chiseled was just your planing mark. You didn't use it to set the saw blade into?

In my case, the apron stock is around 20 mm thick and 100 mm wide, so it's definitely a shootable size and seems like it would be kind of small to try to plane freehand. I did the first two cuts using the shooting board to fix my horrible sawing results. I'm trying to figure out if I should be able to saw better or if I should just plan to rely on shooting.

I tried chiseling a small V at the mark and using it to guide the saw, but my saw cut still went crooked, so I had followed the line along the top (where the V was) but at the bottom I cut past the line.

I'm not sure if the legs at 44 mm square qualify as shootable or not. (I haven't tried...)
 
AndyT":nadiumxk said:
For the rails, where there will be tenons on the end, it's easy - the cut end is going to be hidden inside a mortice, so straight from the saw. (What matters is the shoulders - so clamp the rails together in pairs, and knife across. Then continue the knife cuts round on each.)

I was planning to mark the shoulders using a marking gauge. Why would it be better to knife them in pairs instead?

Of course, to use a marking gauge I need to get the cut ends to be square so they act as good reference surfaces, even if they will be hidden inside the mortise in the end.

For the legs, the tops will end up being hidden by the table top, so you have some margin for error. But conventional wisdom is not to cut mortices right at the end of a piece, to avoid bursting out the short grain section. So mark and cut your mortices with the wood over-length, then trim each one. No clean-up needed unless you saw very crooked.

I read about this practice of leaving "horns," though it usually seems to be discussed in reference to door frames, which would be smaller pieces of stock and perhaps more prone to splitting. I did a test mortise with my mortise chisel and didn't notice the slightest tendency for the wood to split without a horn. (I stopped the mortise 20 mm from the end.) Are the horns really necessary? Is there some other advantage to them?

At the foot ends, you will want to leave a bit over in the length if you are going to level the finished table, mark round each leg, then trim to length - but this is really awkward if your table is big. You definitely would not be using a shooting board if doing this.

I'm not worried about the foot end. But the top end of the legs should be reasonably flat to avoid a gap between the table top and the leg assembly.

This is a medium sized table. With help I will be able to flip it on its side or on its top to trim the legs as needed. Now the last time I trimmed legs (on a sawbench) I did it by placing the piece on a sheet of plywood with 3 legs on the plywood and a longer leg off. I just trimmed the one longer leg to line up with the plywood. This doesn't, I suppose, produce a level table but at least one that doesn't rock. How would one go about leveling? (Of course, the floor probably isn't flat or level where the table's going to go.)
 
adrian":1csi4s95 said:
So the deep V that you chiseled was just your planing mark. You didn't use it to set the saw blade into?

In my case, the apron stock is around 20 mm thick and 100 mm wide, so it's definitely a shootable size and seems like it would be kind of small to try to plane freehand.

I was using loose tenons, so I needed the end to be very accurate, so I planed to the mark rather than sawing to the line. I would do 20mm x 100mm on the shooting board.

If you are using conventional tenons then, as Andy says, the important parts are the shoulders of the tenons. You could mark these with a knife, cut near to the line and then finish off with a chisel to the line.

Cheers :wink:

Paul
 
adrian":pwj3zfmt said:
I was planning to mark the shoulders using a marking gauge. Why would it be better to knife them in pairs instead?

Of course, to use a marking gauge I need to get the cut ends to be square so they act as good reference surfaces, even if they will be hidden inside the mortise in the end.

I think you've answered your own question! I'd use a square and a knife

a) because I don't have an accurate length to use a marking gauge
b) marking in pairs ensures both pieces are the same size
c) a knife mark is a good guide for a chiselled cut to guide a saw to cut the shoulders


I read about this practice of leaving "horns," though it usually seems to be discussed in reference to door frames, which would be smaller pieces of stock and perhaps more prone to splitting. I did a test mortise with my mortise chisel and didn't notice the slightest tendency for the wood to split without a horn. (I stopped the mortise 20 mm from the end.) Are the horns really necessary? Is there some other advantage to them?

I guess it depends on the wood, and the violence of your mortising technique! If cutting to length is ok, go for it.


I'm not worried about the foot end. But the top end of the legs should be reasonably flat to avoid a gap between the table top and the leg assembly.

This is a medium sized table. With help I will be able to flip it on its side or on its top to trim the legs as needed. Now the last time I trimmed legs (on a sawbench) I did it by placing the piece on a sheet of plywood with 3 legs on the plywood and a longer leg off. I just trimmed the one longer leg to line up with the plywood. This doesn't, I suppose, produce a level table but at least one that doesn't rock. How would one go about leveling? (Of course, the floor probably isn't flat or level where the table's going to go.)

This needs a diagram.
You finish the table, then put it on a large level surface. You pack up all the legs so that the top is level. Then you mark round each leg on all four sides, using something as simple as a pencil resting horizontally on a scrap of wood, or a complicated adjustable scribe.

Then saw each leg to the line as accurately as you can - Paul's v-cut, saw, plane method would be good here.

Edit: - a couple of good descriptions of what I mean -

http://cornishworkshop.blogspot.com/2006/04/jake-peg.html

http://blog.lostartpress.com/2008/02/10/This+Years+Model+The+2008+Sawbench.aspx
 
Ok. I'm convinced. I'll knife in pairs rather than trying to cut to length with precision.

Regarding the shoulders, I had reasonable success in a previous project where I marked the shoulders, then cut a V with a chisel, and then placed the saw in the V. I think I had to do some chisel clean up and I ended up undercutting some.

I was thinking I might try a method I saw C. Schwarz post in which he uses a flush cutting saw against a guide block. But I'm reasonably sure I can get a satisfactory result on the shoulders one way or another. (A key point: there's really only one shoulder that will be visible in the end.)

I'm more worried about cutting the tenons so they fit the mortises and chopping the mortises so they're square to the face. (My test mortise came out decidedly sloped...about 2mm of slope from top to bottom in a 30 mm deep mortise.)

AndyT":2tyskct4 said:
This needs a diagram.
You finish the table, then put it on a large level surface. You pack up all the legs so that the top is level. Then you mark round each leg on all four sides, using something as simple as a pencil resting horizontally on a scrap of wood, or a complicated adjustable scribe.

Then saw each leg to the line as accurately as you can - Paul's v-cut, saw, plane method would be good here.

I got it without visual aid. I was thinking I'd cut the legs close to final length and then just perform slight adjustments at the end (like trimming one leg). Is this the wrong approach? The legs are all straight, so I don't have the complications from both of the links you added of angled legs that need to be cut off parallel to the floor.

Right now the legs are probably 100-150 mm too long (and doubtless they're all different lengths). Would you suggest leaving them like that until the end? I'm planning to taper them on two sides, so the feet will probably be 25 mm square. (I'll find out for sure when I mark the taper however it looks good....)
 
Right now the legs are probably 100-150 mm too long (and doubtless they're all different lengths). Would you suggest leaving them like that until the end? I'm planning to taper them on two sides, so the feet will probably be 25 mm square. (I'll find out for sure when I mark the taper however it looks good....)

Ah - if you're going to taper them, then you will need to cut them all to length before assembly, otherwise your tapers will finish in different places. Also, I'd say that the bigger your table is, the more likely you are to get enough flexibility in the whole thing for minor differences not to matter. (Which is the same thing as saying that it would adapt to a less than flat floor, and not wobble.

So clamp your legs up together, square across, and mark the top, the mortice, and the bottom on all four together.
 
So I've got the apron stock cut and shoulder lines marked. And I've got the leg material marked and now I need to cut it to length.

This is 44 mm thick square stock. How would you recommend cutting it?

I've been doing practice cuts. I tried chiseling a V all the way around (though not nearly as deep as the one in the picture above). I can lay the saw into the V (I'm using a Gramercy Carcase saw). But if I try to follow the V around the four sides I seem to get into trouble where the saw is in the line along the particular V I'm in, but veers to the side on one of the other faces.

I tried with just one V and cutting straight down and I ended up off by 1mm at the bottom. (The cut drifted.) Another strange thing was that it looked like the cut was curved inside, as if the saw plate warped a bit. (The face where I started the cut in the V was nice and straight.)

Any suggestions for methods to do this task?

Does this task call for a mitre box? (I have this but it's kind of slow and the cuts seem to come out a bit crooked, though not so bad as the results described above.)
 
You can certainly use a mitre box, but the real trick is to allow the saw to make the cut as you guide it. Just be sure to use sharp saws and not force the blade through the cut.

If you find your cuts still drift off perpendicular, you can try adopting the technique used for cutting tenon cheeks from tip to shoulder. With the tenon held upright in the vise, cut diagonally from one opposing side toward the shoulder nearest you [/] and then the other [\]. You'll then find you've two squarely cut guidelines to aid the remainder of the saw cut, before trimming to fit with chisel or shoulder plane.

I hope this helps. :)
 
If its not too late to put in my pennyworth on leaving horns on your mortised legs I should pass on my recent experience.
I cut my oak legs to length before haunched mortising them and then split the short grain in final fitting the apron tenons.
Won't do that again!
I fixed the apron and legs, complete with split short grain, with draw bored pegs and glue and so far all seems solid. Time will tell I suppose.
Simon
 
Saint Simon":pu01d3im said:
If its not too late to put in my pennyworth on leaving horns on your mortised legs I should pass on my recent experience.
I cut my oak legs to length before haunched mortising them and then split the short grain in final fitting the apron tenons.
Won't do that again!

I hadn't given a thought to the problem of fitting and the stresses the joint would get at that point. I have the legs marked with plenty of extra in most cases so I can leave it on until after I cut and fit the joints. It also just occurred to me that leaving that extra bit on would protect the end from getting damaged while I'm planing the taper onto the legs.

Why did you use a haunch? I don't understand the point of the haunch (except with a door where it fills the groove for the panel)


GazPal":pu01d3im said:
You can certainly use a mitre box, but the real trick is to allow the saw to make the cut as you guide it. Just be sure to use sharp saws and not force the blade through the cut.

If you find your cuts still drift off perpendicular, you can try adopting the technique used for cutting tenon cheeks from tip to shoulder. With the tenon held upright in the vise, cut diagonally from one opposing side toward the shoulder nearest you [/] and then the other [\]. You'll then find you've two squarely cut guidelines to aid the remainder of the saw cut, before trimming to fit with chisel or shoulder plane.

The saw is sharp. (It's very close to new.) I tried to avoid forcing the saw, and I looked at the image of the wood reflected in the saw plate to help keep the saw vertical. But for some reason it nevertheless drifted to the left about one saw kerf. And in the back where I wasn't watching I think it drifted farther.

I tried the tenon approach described above. But maybe not correctly for this setting. I cut diagonally down one corner, then tried to extend to the next corner, next corner, and the last corner. When I did this, the cuts made on the later corners allowed the saw teeth to damage the previously cut line, so the result was very bad. I got the idea that it wasn't OK to let the teeth come out where the show lines are, which is why I tried cutting straight down instead. When cutting a tenon you don't have to cut all the way around (and you don't care how the cut looks). I noticed that if I chiseled the V all the way around it created a weak edge that was very easy to tear wood fibers out from (kind of like planing off the edge of end grain.) Now one thing I don't believe I tried was sawing on one corner and then just trying to go all the way down from there.

I did give the mitre saw a try. I screwed it down to my bench to get the most stability. (I've never done that before.) And I got a fairly good result with the mitre saw. It was a bit crooked, about 6 thou. With this saw I was a little uncertain about positioning the cut in the right place. I used a chiseled V to do that, but I could see getting into trouble with the blade twisted slightly if I don't get everything aligned before clamping it down.
 
I used a haunched mortice because my bible, The Wood Joiner's Handbook, says that it increases the strength of the joint albeit without much explanation. Now you have questioned why, I must admit that how it does this is not clear to me.
It would be interesting to hear other people's experience and opinions on this.
Simon
 
Legs should (in a perfect world) be cut to length when the carcass assembly has been completed and glued. It's much easier then to ensure that the completed frame is true and level. If the legs are cut to length separately prior to gluing, the tiniest error will cause the table to wobble...not good :evil: - Rob
 
woodbloke":3vbrau1o said:
Legs should (in a perfect world) be cut to length when the carcass assembly has been completed and glued. It's much easier then to ensure that the completed frame is true and level. If the legs are cut to length separately prior to gluing, the tiniest error will cause the table to wobble...not good :evil: - Rob

As noted earlier, if I don't cut them to length then I'll find it tricky to mark the taper consistently on the legs. I suppose I could cut them uniformly overlong and mark the taper with the expectation of cutting off a cm at the end.
 
I typicaly mark out tapers and joint location before cutting and think you'd be better served by this and by making a pattern template and possibly a story rod/stick with relevant dimensions laid out for the sake of setting out working profiles and dimensions.

Mark out all legs in unison and mark mortises on each leg using the same gauge at the same time in order to avoid discrepancies. Use pencil and then confirm each mark using an adequate marking knife. You can then cut to the waste side of the lines, but not directly on them and this helps avoid cutting into areas.

Accurately cutting squarely to a pair of lines does and always will take practise. If you're having problems cutting accurately, try breathing normally and relaxing as you make the cut. Beginners/novices often inadvertantly hold their breath and the resulting self imposed tension can lead to poor performance.

Haunched mortises provide more glue and contact area within the joint.

Excluding the use of shoulder planes for trimming-in tenons, you can also trim-in and improve fit by using a fine toothed tenon saw while the joint is dry fitted together.
 
GazPal":2znct1g8 said:
I typicaly mark out tapers and joint location before cutting and think you'd be better served by this and by making a pattern template and possibly a story rod/stick with relevant dimensions laid out for the sake of setting out working profiles and dimensions.

So if I'm tapering two sides of each leg (the inside surfaces) then my plan was to set a marking gauge and mark one taper on the end grain of the bottom of the leg. Then I could connect the line to the start of the taper. When I go to cut the second taper I can repeat the process. This seems like it would be simple and accurate.

Are you suggesting that instead I should make a wedge shaped template and use it to transfer a mark to the side of the leg?


Mark out all legs in unison and mark mortises on each leg using the same gauge at the same time in order to avoid discrepancies. Use pencil and then confirm each mark using an adequate marking knife. You can then cut to the waste side of the lines, but not directly on them and this helps avoid cutting into areas.

I'm not sure what you're saying here. Are you saying to mark the legs and cut them too long (on the waste side) and then...? Or by "cut to the waste side" do you mean simply that the saw blade should be on the waste side so that I haven't cut away material on the keeper side of the line?

Note that by chiseling a V at the knife line I automatically get the saw blade to start in exactly the right place.

Accurately cutting squarely to a pair of lines does and always will take practise. If you're having problems cutting accurately, try breathing normally and relaxing as you make the cut. Beginners/novices often inadvertantly hold their breath and the resulting self imposed tension can lead to poor performance.

I suppose the basic point of my question is whether people expect to be able to cut a 44 mm leg off square and I just need to practice more....or whether people doing this task would make use of tricks, or methods that I am not using to get the job done. My last project involved four 700 mm long dovetail joints in 30 mm stock and it came out OK, so while I wouldn't say I'm an experienced sawyer, I wouldn't say I'm complete neophyte either.

Haunched mortises provide more glue and contact area within the joint.

In the typical picture I see of a haunched joint, the haunch is small and adds a pretty small amount of extra area. For a table where the tenons are wide this small extra area would surely be of little consequence.

Excluding the use of shoulder planes for trimming-in tenons, you can also trim-in and improve fit by using a fine toothed tenon saw while the joint is dry fitted together.

I don't understand what you're talking about here. Can you elaborate?
 
All I can suggest is you sit back, study your drawings and move ahead with whichever plan of attack you wish to use.

If cabinetry were as simple as you seem to imply, you'd not be having the problems you're suffering in terms of marking out and cutting to lines. Working to patterns is the norm in cases where shaping is concerned and helps one gauge to and work within extremely fine tolerances.

Haunched mortise' help provide greater gluing area and more resistance against longitudinal and lateral twist. It's how they work and the reason behind their use. They're typically used when forming stopped mortise' and NOT as often when working with through mortise and tenon joints. A haunch is generally made in proportion with the size of the joint and not as miniscule as you seem to imply.

Elaboration? If a dry fitted joint has a shoulder or two in need of refinement prior to glue-up, a common practice is to use a finely set tenon saw to re-cut the shouders whilst the joint is fitted together. This eases and improves fit.
 
GazPal":rn25xsog said:
All I can suggest is you sit back, study your drawings and move ahead with whichever plan of attack you wish to use.

If cabinetry were as simple as you seem to imply, you'd not be having the problems you're suffering in terms of marking out and cutting to lines. Working to patterns is the norm in cases where shaping is concerned and helps one gauge to and work within extremely fine tolerances.

Hmmm. Did I say cabinetry was simple? I didn't realize I was having "problems" in terms of marking. I thought my marking strategy was OK, though it does mean having the legs cut to length first. Note that I marked all the legs to length at once so a story stick would be kind of redundant.

Working to a pattern in this case seems more complicated and probably a bit less accurate. The problem is that I can only apply the pattern on one side when I do the second taper, because the other side is already tapered and is no longer flat. I would basically have to use the pattern to establish the taper on the end and then transfer the mark to the end, and then around to the other side. I suppose it would be fine because accuracy isn't crucial for a taper....but it's more difficult to do

Cutting to the line is definitely giving me some difficulty. And I'm going to have to practice it by some method or other until I think I'm reliable enough to work on the real legs.

Haunched mortise' help provide greater gluing area and more resistance against longitudinal and lateral twist. It's how they work and the reason behind their use. They're typically used when forming stopped mortise' and NOT as often when working with through mortise and tenon joints. A haunch is generally made in proportion with the size of the joint and not as miniscule as you seem to imply.

Here is a picture (if you scroll down) of a haunched mortise and tenon joint as I always see this joint depicted. This appears to increase gluing area by about 8%. If I did it on my project and made the haunch 1/4 the length of the tenon as specified on that site then I'd increase glue area by 6% (and it is only so large because the haunch ends up being 20 mm tall).

Elaboration? If a dry fitted joint has a shoulder or two in need of refinement prior to glue-up, a common practice is to use a finely set tenon saw to re-cut the shouders whilst the joint is fitted together. This eases and improves fit.

Why would you use a tenon (rip) saw for this instead of a crosscut saw?
How do you keep the saw teeth from tearing up the adjacent leg?
 
Back
Top