Stanley 4 1/2 Plane

UKworkshop.co.uk

Help Support UKworkshop.co.uk:

This site may earn a commission from merchant affiliate links, including eBay, Amazon, and others.
Gary M":11ty25d4 said:
I think we all would have more than three if we could get them for the same prices you guys across the pond can get them for. what you pay in dollars we pay in pounds and with an exchange rate of two dollars for one pound, thats a big difference my friend!! :shock:
By the way old stanleys do me fine until i can justify spending the money on anything else. Is there really that much difference ? be honest, or is it just a name thing ?

The pound goes for $2.24, according to Holtey's site. Canadian price for the LAJ is $235, which would translate into £105. But we have to add federal and provincial sales tax to our retail price, bringing it up to $268 or so, translating into £120. I don't know what the VAT adds to the price in that case, given a lower expected volume in the UK £160 is not cheap but not way out of range IMO. Much better than just about anything I purchased in the UK when I was there in '98, basically the only thing reasonably priced was the beer :shock: :D

I've had a couple Stanleys, currently own a #8, and I also have a Record #4 spruced up with a Veritas replacement iron and a Clifton two-piece cap iron (which in the end makes that plane fairly expensive). They work well, but when faced with difficult wood they just don't work as well, and as Bean said, tolerances are much tighter on the Veritas (and LN, I heard that Clifton were a bit looser, but not much experience with those) planes. Even at £160 I believe that you will not get more bang for your pound.

Eventually I upgraded my Stanley #8 with a LN replacement blade and their improved cap iron. It works very well, but that cost me an extra $85. Still, compared to a LN #8 it remains very inexpensive. I love that LN plane, but the price... I have a friend who owns one, I'll have to do a comparative test one of these days...

In the end, you'll be able to do a lot of work with old Stanleys, if kept in tune and with a sharp iron. but when the going gets tough you'll be happy you have a premium plane (Veritas, LN, Clifton) in your possession. Once you try one there's no turning back, so beware :twisted:

DC
 
dchenard":23nweifp said:
Eventually I upgraded my Stanley #8 with a LN replacement blade and their improved cap iron. It works very well, but that cost me an extra $85. Still, compared to a LN #8 it remains very inexpensive. I love that LN plane, but the price... I have a friend who owns one, I'll have to do a comparative test one of these days...
DC
I have an LN #8 and what I like most and least about it is the weight. The weight really helps you power through just about anything. But wielding the thing for long can really wear you out. I wanna get a #7 or a #6 for those cases where I need a jointer but don't need the length of the #8. I have also considered the LV LAJ, but just can't decide. :(
 
I have also considered the LV LAJ, but just can't decide.

Jessem I have one and its really is worth it, I tend to use it for far more than jointing. You won't regret buying one
 
Right - my Stanley #4 has showed up in the post.
It is 'new, unused' but there are several things I could do with a word of advice about.

The sole and sides are rough and there is a definite burr at the angle where the sides meet the sole. Presumably I hone that off and polish the sole up a bit?

I'm surprised that the metalwork is not oiled or protected in some way. There is a little bit of rust on the sole, but I think that will come off with no problem.

The blade has the first angle ground in but not the honed edge. I just hone that on?

The iron is far too far forward in the mouth - is that controlled by the screw under the adjustment knob? I presume that moves the whole iron back and forward. How far back do I need to take it?

There is what looks like resin on the sole, so that will need a clean. Apart from that it is surprisingly heavy (you see how new I am to this). I am planning to get some wooden handles asap, as well.
 
Given the advice on this thread and elsewhere in the forum, I have placed an order for a Veritas LAJ plane which should arrive tomorrow.

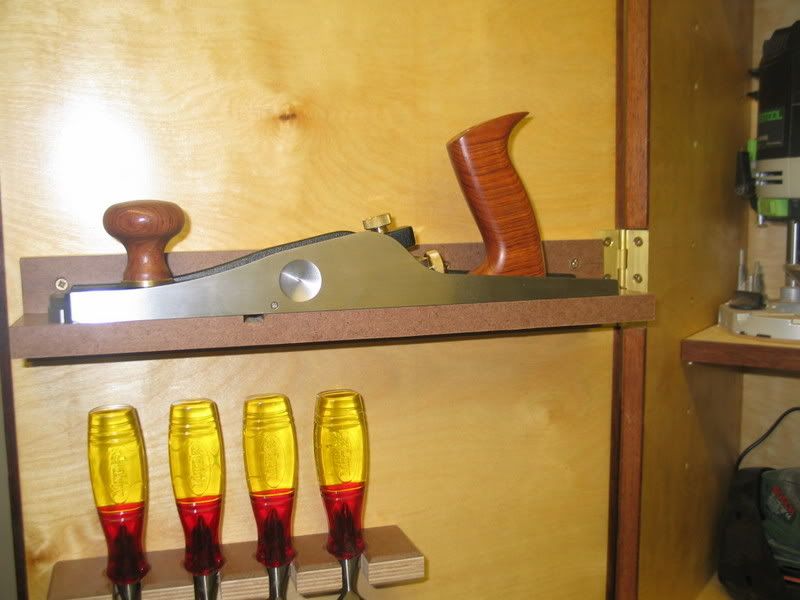
Just off to build a box to contain my irrational excitement and a tool holder for the door of my tool cabinet. Well, I will need a safe place to store it.

Regards

TheDudetser
 
tiler99":fx5jbqns said:
Dont forget the cushion for it to sit on and the perspex case to stop the dust :wink:

It will have a built in cushion but I think the perspex case may be a bit OTT :lol:
 
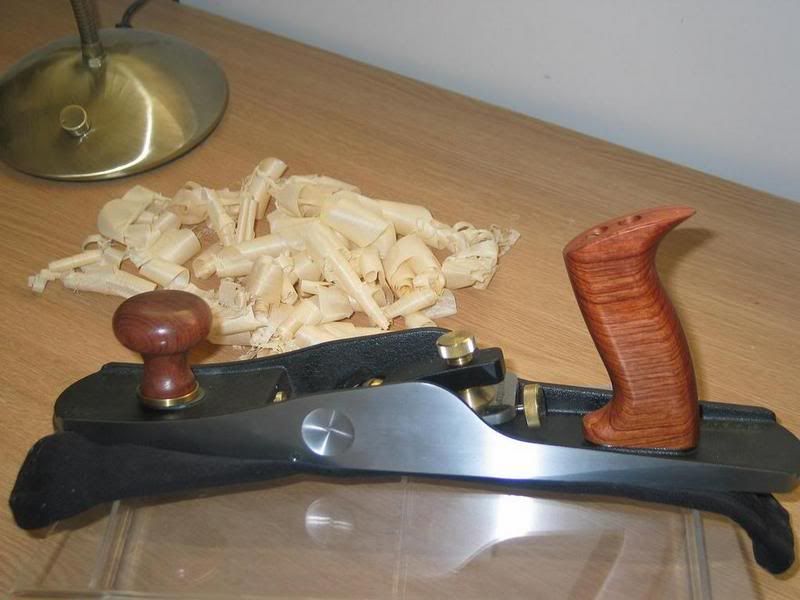
As you can see I didn't go for the Veritas sock....

Pic0005.jpg


Ordered from DM-Tools yesterday, arrived at 10.45 today.

After a few minutes of setting up, I produced the shavings in the picture :lol:.

Turner Prize winner I think :wink:.

Regards

TheDudester
 
Paul Chapman":3r2p7d9w said:
Smudger":3r2p7d9w said:
Right - my Stanley #4 has showed up in the post.
It is 'new, unused' but there are several things I could do with a word of advice about.

Hi Smudger,

This link has loads of information which will probably answer most of your questions http://www.amgron.clara.net/planingpoin ... eindex.htm

Cheers :wink:

Paul


Thanks, Paul, a helpful reply. Have done a preliminary clean up and sharpen, now playing around with settings.
 
Smudger":2kezkyi3 said:
Have done a preliminary clean up and sharpen, now playing around with settings.

Just one point, Smudger. When sharpening the blade did you flatten and polish the back (the flat, non-bevel side)? This is important as a really sharp edge depends on both the bevel and the flat side being polished. If you haven't, it's quite easy. You need to keep the flat side of the blade (just the last half-inch or so) flat on your sharpening stone and rub it until all the manufacturer's grinding marks are removed and you have a nice, flat, polished surface. If the blade is in poor condition you might have to start with a coarse stone and work through to a fine one, but with some blades you can do it all on a fine stone. It only needs doing once. Just make sure that the sharpening stones you are using are flat!

Also, you might need to work a bit on the end of the cap iron where it meets the blade if that is not a good fit. If there are any gaps, shavings can get caught.

Cheers :wink:

Paul
 
Thanks for responding, Paul. I am making progress here, but it is quite a learning curve! I've just been signed off sick for 2 weeks so may have some time to play, but can't consult my Guru at work...

Yes I did that, but it may need some more work.

On the #4 I am having trouble getting the blade to set back into the mouth, it wants to project too far forward. That will just be a case of adjusting the frog, I guess? Loosen the two screws holding it to the body and adjust with the fixed screw at the back?

The cap iron is a mess - it is deformed sightly at one end and doesn't seem to touch the iron evenly along its length. Is that critical? Can I get a replacement iron and cap iron?

I was getting shavings yesterday, but not yet consistently, and I think I am using far too much force, so I may have to adjust my ideas of what constitutes sharp.

Thanks again for your forbearance.
 
Smudger":plv96r5c said:
On the #4 I am having trouble getting the blade to set back into the mouth, it wants to project too far forward. That will just be a case of adjusting the frog, I guess? Loosen the two screws holding it to the body and adjust with the fixed screw at the back?

The cap iron is a mess - it is deformed sightly at one end and doesn't seem to touch the iron evenly along its length. Is that critical? Can I get a replacement iron and cap iron?

It's always difficult answering these questions because I'm never sure whether I'm understanding what you are saying, or you are doing something wrong, or what :? Anyway, I'll try.

Set the cap iron so that it's about 1/16" (or a little more) back from the edge of the blade. Lay the blade into the plane so that it's lying flat against the frog. The circular bit on the end of the lateral adjusting lever should engage with the slot in the blade (that's how you get the lateral adjustment when you move the lever). The end of the 'Y' lever should engage with the slot in the cap iron (that's how the blade moves up and down when you turn the adjusting knob). Fit the lever cap. The lever on this should snap smartly into position - tight enough to hold everything in place but not so tight that you can't adjust the blade.

Now turn the adjusting knob so that the blade projects from the sole of the plane and adjust the lateral adjusting lever so that the blade projects evenly along its width.

If the frog needs moving back you will know because the blade will be too close to the front of the mouth of the plane. Aim for a gap of about 1/16" - 1/8" from the blade to the front of the mouth to start with.

Adjust the blade so that it takes light shavings.

Hope that is all clear :?

As regards your cap iron, it doesn't need to contact the blade all along its length. The design of it is such that it will touch the blade at the top and at the bottom. What is important is that at the sharp end of the blade, the cap iron should be in contact across its width with no gaps that can trap shavings.

Hope this is of some help.

Cheers :wink:

Paul
 
Smudger, your more than welcome to come over to the sunny workshop of mine if your having problems. I can take you through the initial steps of getting the plane usable.
 
Paul,

Can I also thank you for the help you have given on this thread. I have learned a great deal in such a short space of time.

In the end I took my Stanley 4 1/2 back for a refund and have given pride of place to the Veritas LAJ.

It is one of those purchases you make and you just know you have bought something you will enjoy using every time.

Thanks

TheDudester

Pic0006.jpg
 

Latest posts

Back
Top