Seasoning Small Logs

UKworkshop.co.uk

Help Support UKworkshop.co.uk:

This site may earn a commission from merchant affiliate links, including eBay, Amazon, and others.

gbuckham

Member
Joined
17 Sep 2008
Messages
7
Reaction score
0
Location
Edinburgh, Scotland
Greetings,

As a newcomer to woodturning, I’m still very much at the learning and making mistakes stage and would welcome advice regarding the seasoning of timber.

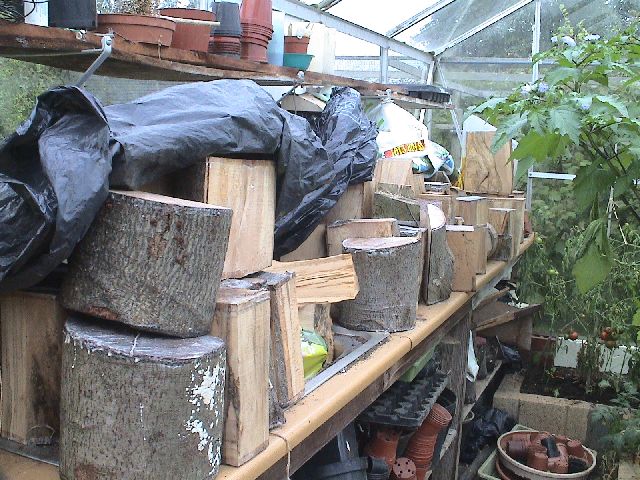
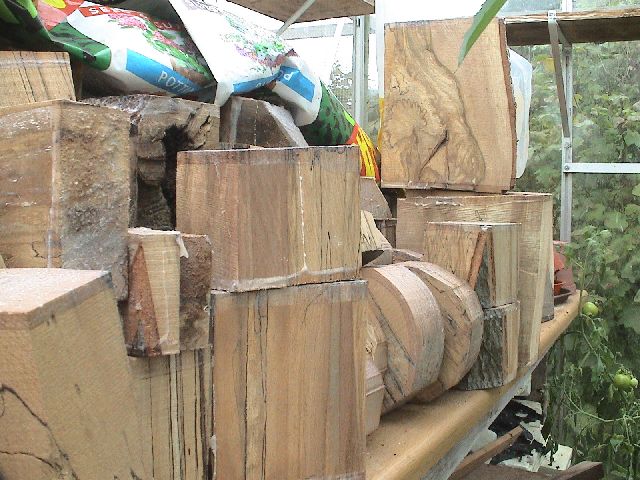
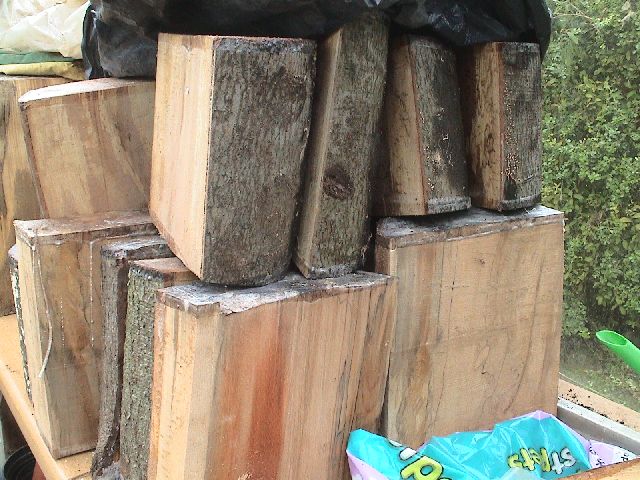
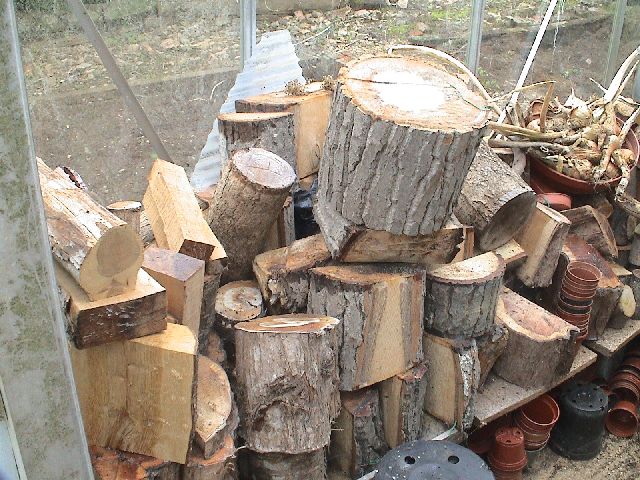
I’ve acquired about 30 logs of various wood – oak, willow, beech, holly, hazel and ash – ranging in size from about 75mm diameter to 150 mm diameter. None are any longer than about 450 mm and a mix of green and part-seasoned windfall branches. My question is how best to season them?

Most of my work involves turning long narrow objects such as wands and similar small items, so I don’t need large diameter timber.

Thanks in advance.

Gary Buckham
Edinburgh
 
Mornin' Gary.

If you are sure you will only be turning small spindles, then you must cut the logs. That way you can almost guarantee 100% use rate.

If you leave the logs larger than approx. 3" - 4" round you are almost sure of having the wood split on you as it dries out.

Also which ever method you decide to go with, seal the ends with wax/oil paint/PVA wood glue, this will help to stop the end grain drying out too quickly which is what causes the log to split. Once sealed store them in a cool shaded area to dry out. Small blanks about 1 1/2" square should be dry and ready for use in less than six months

ps - how's the old town these days, I left Edinburgh many, many moons ago, although I have been back for a visit a few times since.

pps - Sorry for not chucking a welcome your way, didn't notice you had just joined the forum. Hope you find your stay happy and educational.
 
Welcome to the forum Gary, as has been said if you know what your max size requirements are then cut some of the timber into suitable cross sectioned pieces and put aside to dry out, avoid the central core wood (most likely to split) seal the ends with wax or any old paint. Allow for some longitudinal distortion/warping, dry slowly to start with until you see what you can get away with without splitting.

Any that you don't cut up seal ends and leave as long as possible until needed to minimise end split wastage.

Experiment with the drying pieces, see which location gets best results with individual species, some I get away with by putting in a hot conservatory with plenty of air movement, others I get better results by stacking in an old greenhouse and loosely covering with plastic. (Presume it is the humidity that evens out the moisture gradient in the wood.)
 
Thanks for the replies.

One thought I had was to split a log, say, into four section and then rough out each on the lathe then allow to dry. Not sure what result would be.

Gary
 
In simple terms - cut your logs into the required blanks with a band saw and rough into the objects you want as a bodger would have done. Leave for a few weeks or whenever the roughed pieces are dry. Put back on the lathe to finish off.
Waxing or painting the ends of logs is largely a waste of time and is not something the pros tend to mess about with. In the old days they stripped the bark of logs to help with the seasoning process as you can see at Stots Park Bobbin Museum in The Lake District. Have fun with your logs.
 
Soulfly":32x1dat8 said:
...
Waxing or painting the ends of logs is largely a waste of time and is not something the pros tend to mess about with.
...

Certainly not a waste of time in my experience... presuming the goal is to work with seasoned rather than 'green' wood.

Gary, seal the ends with whatever you have to hand, it sure as **** won't do any harm :lol:

Good luck (esp with the Oak :wink: ) in future try and get the donor to cut them as long as is manageable, especially Cherry :!:
 
I must admit that i don't seem to be having much luck with drying half logs out,nor rounded blanks:roll:
I am cutting away from the pith,now,never used to,and am sealing the ends using diluted PVA.
Looking at my racks and all that i have cut most have split :(
Is it better to keep the logs in longer lengths in full log form and just cut a piece off when needed.Then part turn and then leave to dry :?:
I have now got a load of logs just stacked in the garden under a tarp,as some of you will see soon :wink: so i will see how these go.
This also brings me to the load of Yew i got from my tree surgeon friend.
All that i had off him was just left in his yard in the open for about 18 months,and all that i have turned as been fine :?
What do others think. :?:
 
Yew rarely presents any drying problems and remains relatively stable once seasoned.

The tarp isn't ideal as a free flow of air is needed... maybe a frame to support the tarp may help... at least the tarp protects a little from sun, rain and wind :wink:

Planks or logs, longer is better (imho)... most joinery shops chop around 450mm of the ends of planks as that's where most shakes appear.
 
Soulfly":3em0uj43 said:
......Waxing or painting the ends of logs is largely a waste of time and is not something the pros tend to mess about with.

Perhaps they can afford to loose about a third of the log with end splits, I can't that's for sure.

Soulfly":3em0uj43 said:
......In the old days they stripped the bark of logs to help with the seasoning process as you can see at Stots Park Bobbin Museum in The Lake District. Have fun with your logs.

In my early trials at drying logs I made the mistake of removing the bark from Green Ash and Green Cherry in an endeavor to speed up the drying.

I had spectacular results, not only did the ends split but all the logs split longitudinally as the outside surfaces dried out before the core.
Result was a whole load of narrow Ash triangular sections still being utilised some 3 years later for making handles.

IMHO there is only one way to achieve any consistent results for drying green logs in your particular setup and that is by trial and error over 2-3 years in the various areas you have available for drying, be it behind the compost heap, in the shed or a fancy drying cabinet, local weather patterns and conditions differ so greatly.

__________
__________Just a few of the logs I have in "Drying Phase"___________ click on images for larger view

_________ ___
______________Beech (all normally loosely covered with plastic
_________ ___

______________Beech__________________Poplar, Ash, Cherry, Yew, Apple
 
Soulfly":29m9t7p7 said:
In simple terms - cut your logs into the required blanks with a band saw and rough into the objects you want as a bodger would have done. Leave for a few weeks or whenever the roughed pieces are dry. Put back on the lathe to finish off.
Waxing or painting the ends of logs is largely a waste of time and is not something the pros tend to mess about with. In the old days they stripped the bark of logs to help with the seasoning process as you can see at Stots Park Bobbin Museum in The Lake District. Have fun with your logs.

every pro i know or have read books by seals the end of their logs including keith rowley, mike darlow, dave register, tony boase and countless others - the whole point is to get your wood to dry slowly so that it doesnt shake - removing the bark encourages it to dry fast which is good for firewood but not for turning.

I suspect that bobbin makers may have gone for fast drying as bobbins are small and can be made from wood between the shakes - this is not an option for vases, bowls, platters , clocks etc.

alternatively if you are turning greem you may wish to remove the bark as it contains a lot of grit and can dull your tools (ditto once the wood has seasoned - this also stops bits flying off when the lathe is in motion)

also be very careful cutting round obects with a bandsaw - it is better to either split them or rip down the grain with a chainsaw then use the bandsaw to cut a round blank from the half log.
 
big soft moose":2ob76ni2 said:
...
I suspect that bobbin makers may have gone for fast drying as bobbins are small and can be made from wood between the shakes...

Tried that fast drying bit... great if you like banana bobbins :lol:
 
Hi Gary et al
I would be itching to get some of this on the lathe and be making some natural edged, thin walled goblets and bowls, but I agee with the others, seal the ends to help prevent some cracks.

You may also want to check out "Turning Green Wood" by Michael O'Donnell. He has a book and a video which is very informative.

If you have a sharp gouge and fairly fast speed you can produce ribbons of shavings yards long. I think it's worth making shavings just to watch. :lol:

One thing that hasn't been said is if you are turning the oak and it is still wet the tannin (I think that's the right bit) will react badly with the steel on your lathe and tools and cause it to rust in double quick time. So remember to clean up carefully and lightly spray the surfaces of tools and lathe with WD40 after you've finished. (Keep WD40 away from the bearings though as it dissolves the grease - yes I've done that :oops:) This also applies to all wet turning, but oak is particularly naughty!

Enjoy Dave
 
good point - this is also true of horse chestnut and hornbeam (though no one in their right mind turns hornbeam, at least not more than once - the clue why is in the name ;) )

mind you its better than turning oak dry and getting the tannin laden dust in your eyes (as i did when i was young and foolish and didnt have an air mask) it reacts with the moisture and hurts like ****.

also going back to the original post i'd be inclined to forget the willow - ive never had good results with turning that green as it tends to twist and split as it drys
 
I came across a reference/source for comparative shrinkage some time ago...and have only just found it again!

From a book titled "Timbers for Woodwork", the author being one William Bullock (with "over 50 years experience"), written in the early 1920s, published by Evans Brothers who were publishing similar works as well as "The Woodworker" magazine (then priced at a very reasonable 6d!).

I quote......"Lengthwise this shrinkage is barely measurable, but across the grain is from 2% to 14%. Moreover the transverse shrinkage is about twice as great tangentially - along the rings of growth - as it is radially - across the rings."
Which means, as I'm sure you've already sussed, that the original location of your plank/chunk within the log is also important.

Anyhow, for simplicity, let's assume that the wood will attempt to shrink a nominal 1% in length. At the same time it will attempt to shrink between twice and fourteen times as much across the grain.......which massive variation shows just how much pressure the wood puts on itself when seaoning/drying!

That shrinkage is as a direct result of the moisture coming out of the wood, and the theory behind end painting/sealing is too slow the rate of loss. A log will naturally empty moisture out of its end, cos that's how it was designed to grow! Sealing the ends in effect forces it to try and lose moisture through the bark - across the grain - as well as along the grain.

But that's all it does. Sealing the ends will not stop shrinkage, which is why despite all the endsealing (paint/wax/PVA/whatever) the wood may yet still split. Every piece will be different!

Funny old game, woodturning I mean!
 
Personally I'd always go for waxing the ends, whether it works or not is something else. I can't see it hurts though.

If you're going to make a habit of it, get yourself a cheap/second hand deep fat frier and raid the £1 shops for cheap candles, makes waving blanks and spindles very easy. Always make sure you turn it off as soon as it's heated thoroughly.

In my experience any fault at all present in the log/blank when you start the drying process will multiply - cut out all those shakes and splits and avoid knots if at all possible..

Chris.
 

Latest posts

Back
Top