Rounding the edges of wooden toy wheels

UKworkshop.co.uk

Help Support UKworkshop.co.uk:

This site may earn a commission from merchant affiliate links, including eBay, Amazon, and others.
an obvious solution is to turn them on a lathe, but if you dont have one the other optiions are either to use a router or to use an oscilating bobbin sander - either way you will probably want to build a jig so your fingers arent close to the cutter/abrasive
 
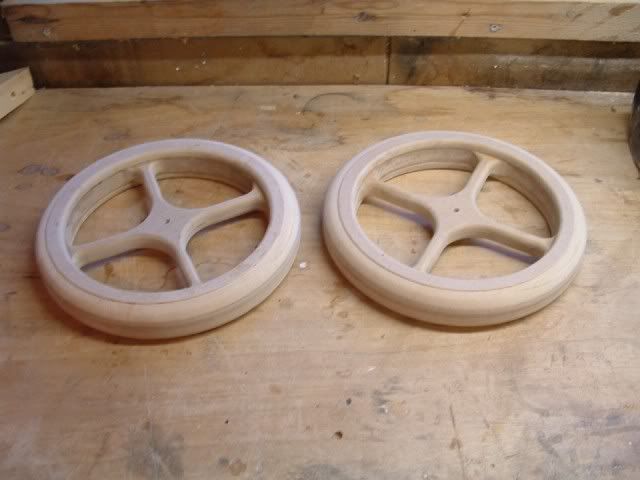
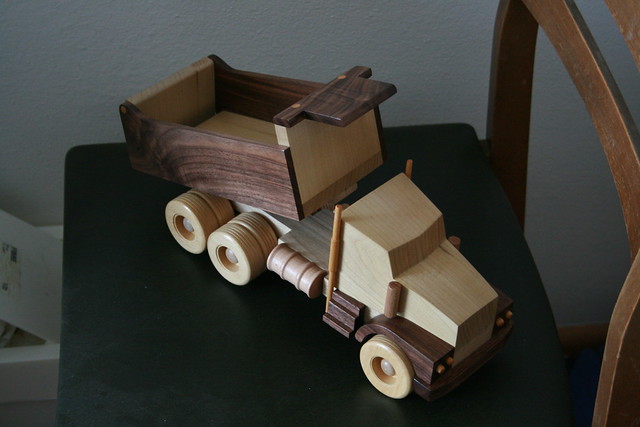
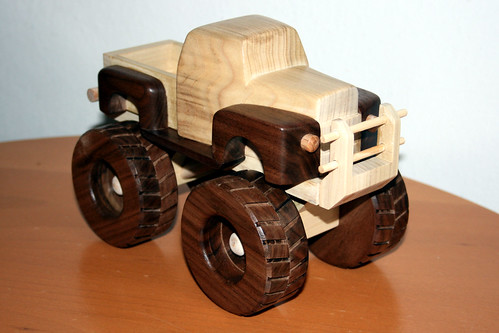
As B.S.M. said with a router or lathe. I made these using a router but they are about 10" in diameter

Bothwheelscompleted960x720.jpg
 
If you want a simple "no tool" option....you need a bolt....two big washers from B&Q a nut and a drill and some 80G to 150G sandpaper

Drill a hole in the wheel. Fit the bolt through with washers either side and a nut to hold it all together.

Clamp or get someone to hold the drill and rotate the wheel while using the 80G first and then the 150G to smooth.

Jim
 
jimi43":2dhweq8u said:
If you want a simple "no tool" option....you need a bolt....two big washers from B&Q a nut and a drill and some 80G to 150G sandpaper

Drill a hole in the wheel. Fit the bolt through with washers either side and a nut to hold it all together.

Clamp or get someone to hold the drill and rotate the wheel while using the 80G first and then the 150G to smooth.

Jim
Beat me to it Jim!

John :lol:
 
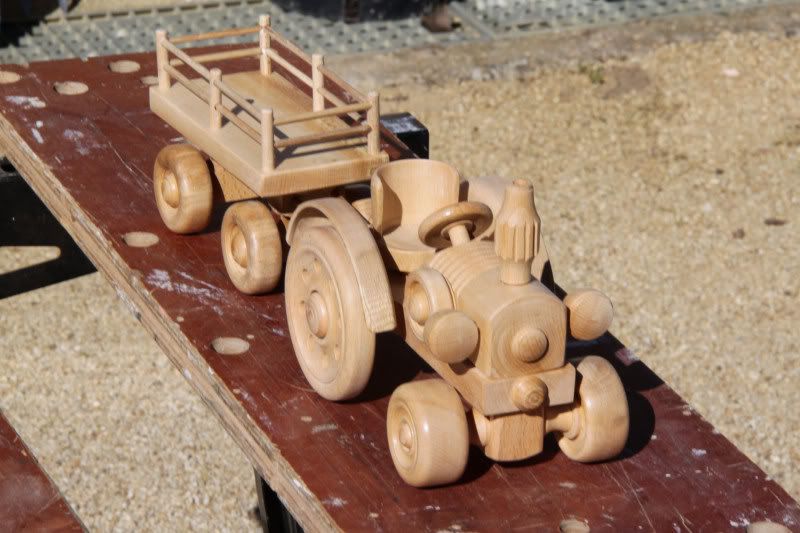
That's a very nice toy John. I have probably made well over a 100 toys over the past 10 years (donated at Christmas for children of needy families). I make everything for them except the dowels used for wheel axles. Wheels are time consuming but if you want the "right" wheels for the toy you are building, it is likely you will have to make them. I'm fortunate in that I have an elderly but still accurate RAS which has a fixture for the opposite end of the arbor to the blade for drilling operations. I have adapted the drilling fixture for mounting wheels & using my lathe tools machine the wheel faces, tire treads, etc. I also have a router mounted base plate which allows me to cut accurate wheels from approx. 1"dia. to 7-1/2". The axle hole is bored out slightly undersize then tapped for threads then mounted on the RAS for finish machining & sanding. Following the above, the axle hole is then drilled to finished size
according the the dia. of the axle to be used.
Some trucks have as many as 20 wheels so it can get a little tedious making the wheels but then you will certainly use up your hardwood cut-offs lying there uselessly in your scrap box LOL

Lee
 
A number of years ago I developed a means of producing wheels with the router when I was teaching the blind some routing techniques. Of course I required to produce jigs and templates for them to use with safety in mind. I will look for them and see if I can post details of them as a pic or PDF format
Tom
 
Thank you very much for all your suggestions for rounding the edges, i have got a lathe but how i could hold the blanks for turning i am a bit baffled would some studding put thro the axle hole in the wheel and then a washer and a nut on each end with the studding being longer at one side and then put that in the chuck, do you think that would work or better still for John to tell me how he holds them in his Lathe, his tractors and other stuff look brilliant, thanks again gang,


Brian.
 
Can you post a few photos of the wheels? Also, what chucks, centers, etc. do you have? And what is the size of the axle holes?

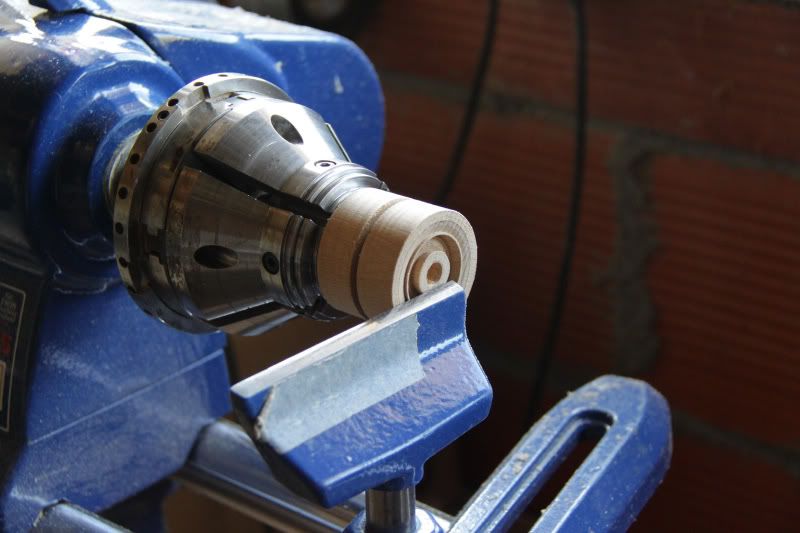
This is how I held the 8 wheels that I had to do for the 2 trailers. The wood started of about 7 inches long. I turned it to a cylinder the correct diameter for the wheels using my steb centre on the live end and a live point in the tail stock. Turned a tenon on one end to hold it in the chuck. Fitted it into the chuck and used a 10mm lip and spur drill bit in a Jacobs chuck in the tail stock and bored a hole a few inches into the cylinder. Then I changed back the the live point in the tail stock and turned the inside face, including a recessed tenon on the inside of the new wheel. That was parted off and the tail stock bought up again to hold the cylinder. That was repeated, including deepening the center hole as I went until the tail stock was not needed any more to stabilise the cylinder. That was after 4 wheels.

After that I fitted the small jaws on the chuck, turned the wheels and mounted them on the jaws and did the outer face.

It has taken nearly as long for me to trype this as it took to do 4 of those wheels! The photo is obviously when I just had 2 left to do...

BAT07.jpg
 
Of course if you have the wheel blank itself & you merely want to round over the edges you can do this in a drill press. Cut the head off a carriage bolt, run a nut up to the end of the threads, slip on a washer, then the wheel blank, another washer and lastly a nut. Chuck the assy into the drill press & proceed with 80 grit then 120, & lastly 150 grit. The nice thing about this approach is all that you need is a drill press.

Lee
 
I have been here and done both.

I started out cutting the wheels with a holesaw, then smoothing them by putting in a drill press.

I simply used a carriage bolt as others have suggested, however with the end on, then a leather washer, and then another leather washer the other side and bolts to tighten it up.

works well, sandpaper gets hot, i wrapped mine around a file.

Then, i made a jig, which was basically a sliding strip of wood in a 12" square base, with a bristol clamp which allowed the strip to slide backward and forward, and a strip on the bottom at right angles to that on the top that ran in the mitre slot on my disc sander, and then i stuck a down in the strip.

so when i put a wheel over the dowel, i could slide it up to the sander, tighten the bolt, and by rotating with hand, smooth the radius to make it almost perfect round... then you can put in drill press and get perfect. (this was my alternate to holesaw when i wanted a size my holesaws were not. also i learned after 20 times, that the measurement on hole saw is OUTSIDE, and your wheel is inside :roll:

however these two techniques do basic stuff, smoothing and rounding wheels, so after doing that for 2 years in a small workshop, wheni moved to a larger one i got a scheppach 540 lathe (basically 50cm long) and wow! what a difference.

I can take any block of wood, not just those planed for a holesaw, and i can be far more creative with inside and outside turnings, and also treads etc.

I also just love using the lathe, in the noise per cubic metre sawdust stakes, it is the most satisfying tool :)


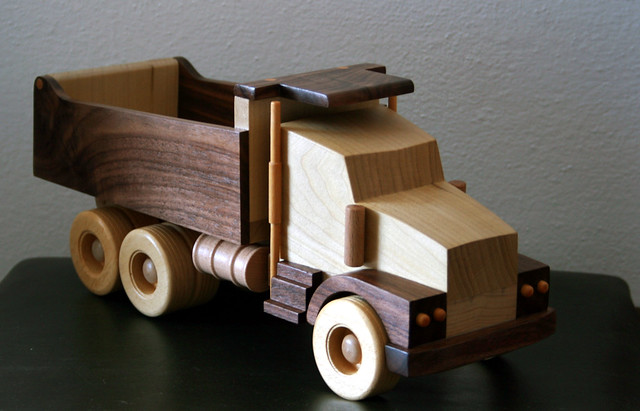
This is the kind of stuff i do now, and it's very quick, outcome is high quality, and i do make some mistakes.... i find i do get the chisel snatched in my hand, especially when doing the inside of the wheel, however i just used those for the hidden inside wheels, so you never see them :wink:

4999297574_3ec10cec35_z.jpg


and so you can see the treads

4999297578_a0f2cbf7c4_z.jpg


I also had difficulties fixing these in lathe, and i think the previous poster does a more sophisticated way, however basically i get it down to radius and then pare them all off.

then i used forstner bit to do the inside hole, which i think always makes wheels look better.
if you can't centre them, use holesaw, then forstner with a stop to hold the wood first, then they will be aligned.

then i put them on a bolt, same as drill press method, with leather washers and put in the chuck. works good.

i was thinking of getting some longer threaded rods, and a chuck at each end as i do get some wobble (run out), although doing faces might be harder.

also it helps if you drill with holesaw, using an arbour that is same size as final (or smaller) and drill the final hole to match the bolt, or get a set of bolts and nuts, as getting a larger hole to be in the middle of a finished wheel is not easy, and even a tiny error means you have a wheel that only touches the ground at one point, which looks awful....

out of interest, i also turned the fuel tanks and the exhaust stacks

and to finish off, here are some more challenging wheels to make :wink:


4998742781_0ef9e0d273.jpg
 
here is another idea :
tip a belt sander to its side, clamp it on the surface, switch it on.
Stick an axle through the weel, and holding this axle, bring the wheel to the sander..
the wheel should spin round.
you can also make a simple jig to make this easier.
 
Holy thread resurrection, Batman.
I too am struggling with this. I am self taught on the lathe. I have a Coronet Minor and a Rutland’s 100 chuck set.
I have cheated a bought some lengths of 45mm beech dowel. So far, so good. Coming to cut some blanks is where things go wrong. The mitre guide on my bandsaw is junk so a parallel disc is impossible.
Next, how to chuck it up so that one end is flat? The only obvious way is to use the back of the jaws as a datum? I used my homemade flat scraper on the end grain to face off the outward (wonky) face. Of course, the main dowel now has a wonky face which will make the next one even more awkward.
I need the wheels to some the same or at least similar. Measuring two lines, one marking where the edge rounds over and another marking where to hollow a bit. I’m keeping it simple and using a carbide round cutter for this. This part went OK but the edge caught and ripped out the end grain.
I would like to come up with a procedure where repeatability is at least possible. I want the wheels to be 15mm wide. I have dusted off the chop saw so I can make more parallel discs now. Is 15mm enough to chuck the piece and carefully round the edge? Adding a tenon would up the time each takes and would need sanding off.
This is the sort of thing I want to end up with.
3585495F-7810-4B75-B223-F1371130794B.jpeg

Any tips woul be gratefully received.
 
The easiest way to get the ends true is on the lathe. Find the centre on the dowel and press the tailstock centre in to that, then tighten the chuck jaws onto the dowel without it touching the chuck body.
Use a thin parting tool or skew to square up the tailstock end then reverse the process for the other end.

If I was doing a lot of these I'd be tempted to make a jam chuck from a piece of scrap. Turn one face and part off for as many as you need, then put on your jam chuck and do all the 2nd faces in that. If you want to do a lot fast you could even make a scraper profile in a bit of tool plate
 
Thanks @Tris
I engaged my brain and I think I can do it. I drew a line on the chop saw to give me 15mm. I’ll clamp a stop for even better repeatability I think. Then I cut a 5mm spacer and put that in the lathe chuck. That gives a solid datum to butt the blank against.
Mark the lines as before and round the end grain over with. Small rasp and sanding stick. Round cutter for the feature and drill the centre axle if the wheel needs it; some need the hole offset.
I think this might be a copy of an Australian tool?

https://www.ebay.co.uk/itm/145665752038

At that price, I might risk it to see what it’s like.
 

Latest posts

Back
Top