Rocking crib/cradle WIP - a couple of pics, more to come

UKworkshop.co.uk

Help Support UKworkshop.co.uk:

This site may earn a commission from merchant affiliate links, including eBay, Amazon, and others.

CroppyBoy1798

Established Member
Joined
7 Dec 2008
Messages
278
Reaction score
0
Location
Ireland
Hi guys!

Well, after looking at some of the current project that are running on here I almost feel ashamed to be showing my rather simple piece! :shock:


My brother is getting married on the 6th of June (D-Day! :twisted: ) coming, so I figured I would make him and his future wife something rather than buying them another kettle or toaster! But, I couldn’t decide on what to make them, but, upon hearing that there was going to be a child on the way later in the year I decided that a baby crib/cradle was the best option (kills a couple of birds with the one stone!).

With the help of ‘Trim the King’s WIP thread on his swinging crib build for his kid, and with the help of plans very generously supplied by him I decided upon a swinging crib, but, I couldn’t come up with a design I liked. I wanted something that was light, clean, maybe a tad modern and with a little celtic influence if possible. With time running out I just went with a simpler rocking crib!

I wanted to make it from two contrasting woods, the easiest to obtain locally being ash and walnut, these two woods I liked, particularly the ash due to it being an Irish timber. The walnut is ABW, was double the price of the ash, but it’s a lovely wood!

This project is the first where I have gotten ‘raw’ planks of timber from the local timber yard and planed/cut them myself, so it that regard this was a milestone project, using also some new tools and putting my new shop extension to good use.

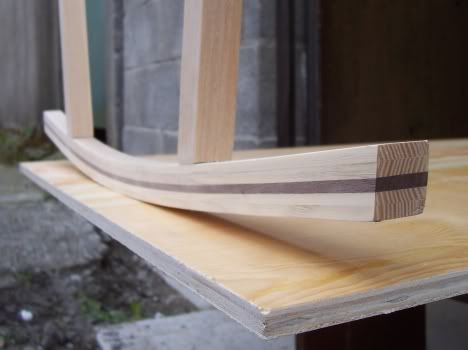
Below are a few pics to keep ye interested, I’ll add more over the coming days. So far the project has included biscuit joints, M+T joints, carving, laminating and lots of patience!! :lol:


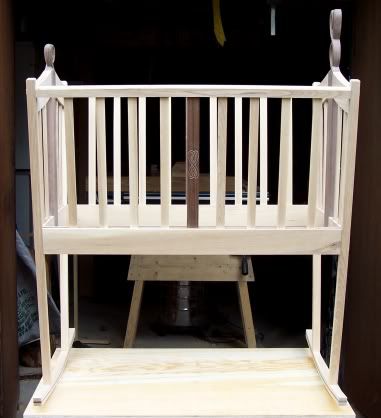
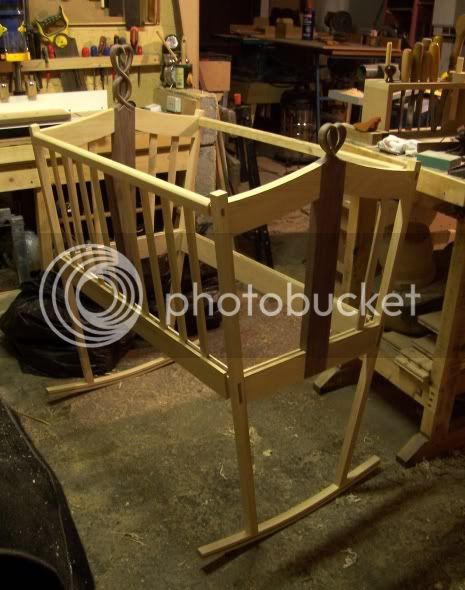
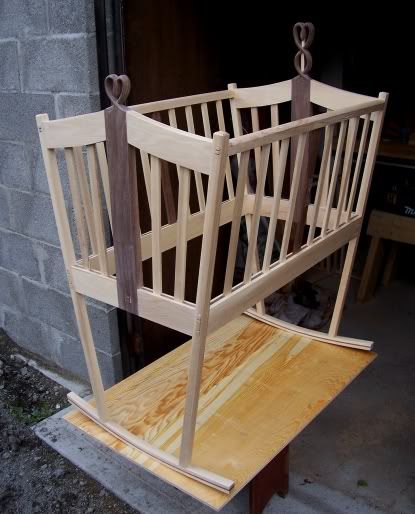
The first pic of the crib is a dry fit, in fact I haven’t even pulled the joints tight, but, its just to give an idea of what it’ll look like.
crib1.jpg


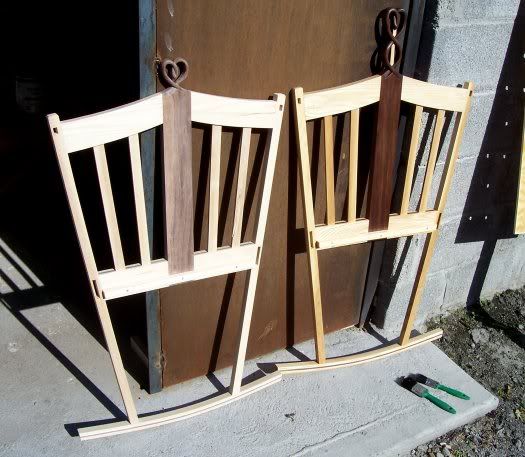
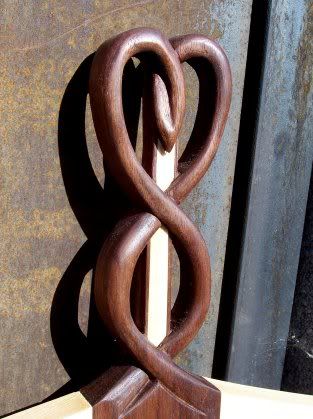
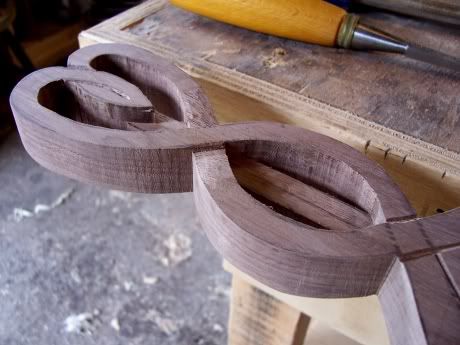
Heres the carving underway for the head end of the crib.
crib2.jpg


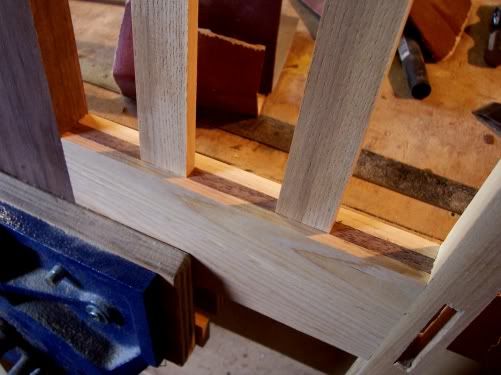
The slots for the slats were cut along the length of the rails with an 8mm bit, the slats evenly spaced and then a piece of walnut fitted into the gaps.
crib3.jpg


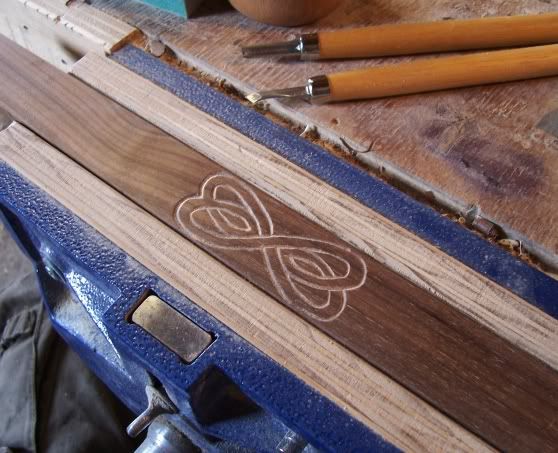
A simple ‘celtic’ carving on the centre side slat.
crib4.jpg


Let me know what y'all think, or if theres anything I sould change before its too late! :lol:
 
You call that simple??? :shock: I haven't seen many people have a go at carvings like that! It's coming along nicely, keep those photos coming. :)
 
Well it looks a bit more than simple. I think you have hit the design well. Even though it took time to feel happy will what you wanted to make. Look forward to seing the finished photos.
 
That looks really nice, clean lines, great carvings. Something I would like to be able to emulate.

Can you clarify something for me? The base looks fairly narrow, side to side, and the actual crib bit is quite high, so the centre of gravity is high. Do you think there is a risk it could topple over, especially if the child is "stood" facing and holding on to one side?

Cheers,
Colin
 
fingerless":5aatyd28 said:
That looks really nice, clean lines, great carvings. Something I would like to be able to emulate.

Can you clarify something for me? The base looks fairly narrow, side to side, and the actual crib bit is quite high, so the centre of gravity is high. Do you think there is a risk it could topple over, especially if the child is "stood" facing and holding on to one side?

Cheers,
Colin

I was thinking just that. My two would have had that over in an instant as soon as they could pull themselves up. Although looking at the height of the sides it looks like it will not be suitable for any baby once they were strong enough to pull themselves up as they may well be tall enough to topple over the side.
 
Hi again!

Many thaks for the replies guys, its appreciated! I had imagined this only being used for a newborn up for several months - a year old? (how long before they start to pull themselves up? :)

Well I got a little more done since the last post and thought I'd drag it out into the natural daylight to get some better shots of the project up to a couple of hours back. She'll all been sanded by hand thus far pre final assembly to make life easier (not because I get immense joy out of hand sanding, but because the sander is on the blink!! :roll: ), I'll give it another few rubs when she'll all put together.

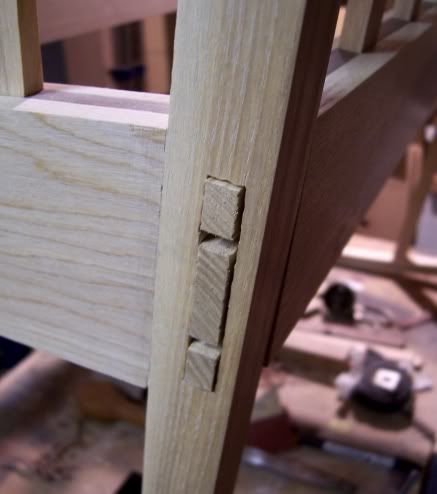
Again, in the pics its just a dry fit. One of the images shows the M+T joint (one of 8), there will be walnut wedges knocked into the slots, not for any strutural purposes, although it will make the joint tighter I suppose, but more so for the appearance.)

cribby1.jpg


cribby4.jpg


cribby3.jpg


cribby2.jpg


cribby5.jpg


Has anyone any reommendations on finishes? I'd sooner not go down the usual varnish root, but would like something that will really bring out the grain and be relatively easy to apply.
 
Thanks for the reply and nice comments Mickcheese and Tierney. Hopefully by this time next week I'll have the finished article to show you :wink: . Tis not easy trying to make this crib and having my brother whom is getting married living just a few mins away, so I'm on guard all the time trying to keep it secret :oops: . The wedding is out foreign so I'll do up a little A5 or so card/brochure for them with pics of the crib, probably be easier than bringing the crib over and back eh :lol:

Looking at the imagine here it just struck me that I should have done the wedges in the M+T joints vertical rather than horizontal! I think it would have fitted in better with the other vertical walnut pieces, damn! :roll:
 
Thats a very good point MickCheese! :wink: I'm glad I cut the slots hoizontal now! :lol:

Just fitted the base an hour or so back. I cut some softwood slats and screwed/glued them around the inside of the bottom rail to rest the base on. When she's finally clamped up and fixed for good I can fix the base propely.
 
CroppyBoy1798":uqapxbns said:
Looking at the imagine here it just struck me that I should have done the wedges in the M+T joints vertical rather than horizontal! I think it would have fitted in better with the other vertical walnut pieces, damn! :roll:

No - you would have quite possibly split the legs if the wedges were in line with the grain of the legs.
 
Thanks for the input seanybaby and Waterhead :wink: . I'll have to have a look in the local hardwares and see what finishes are availible locally, cant risk ordering online this late, hopefully someone will have some Danish oil.
 
CroppyBoy1798":3rrk1n7e said:
Hi again!

Many thaks for the replies guys, its appreciated! I had imagined this only being used for a newborn up for several months - a year old? (how long before they start to pull themselves up? :)

Mine were both pulling themselves up at about 9 months and toddling at a year.

CroppyBoy1798":3rrk1n7e said:
Has anyone any reommendations on finishes? I'd sooner not go down the usual varnish root, but would like something that will really bring out the grain and be relatively easy to apply.

The only thing I would say is something food safe. One of mine was a chewer and the cot has lots of little teeth marks on it. Even if they do not have any teeth they may suck the top rail (which should not be an issue if they are not going to be in it long enough to stand up).
 
Hi Croppy

That looks really nice to me, the contrast of timbers is lovely and that carving is excellent IMO.

I wouldn't worry about the height/centre of gravity thing. My crib looks to be bigger than that one (sleeping area wise) and she is only 5 1/2 months and she is now too big for it, and she is nowhere near ready to pull herself up on anything, so IMO it's not a consideration.

I would be tempted to test fit a bsae before you glue it up though, weight it with something babysized and test how far you can rock it before it tips. With baby in it it should only be gently rocked anyway, not like a rollercoaster. ;)

Well done and keep the pics coming.
 
Hi Trim, glad you like it thus far :wink: . I made a mistake with the finish and applied it to one of the ends of the crib without thinking :roll: . I forgot that I'd have to trim off the tenons and sand them flush with the legs thus marking the 'finish', d'oh!

Anyway, heres the difference in the two, the one on the right has one coat of Danish oil, it brough out the walnut really well! The ash, a little yellower than I imagine, but still ok.

firstcoat.jpg


carving.jpg


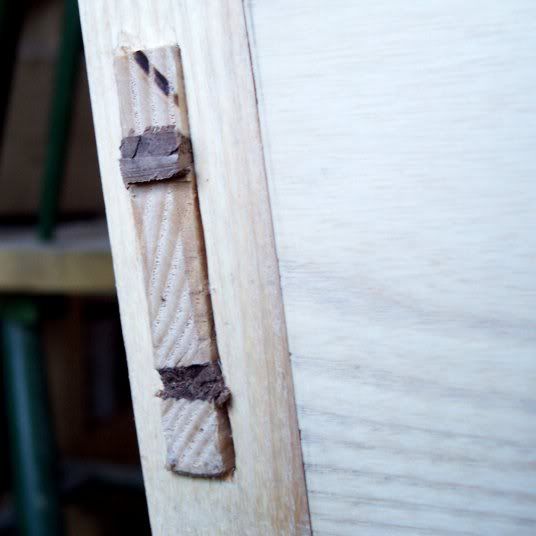
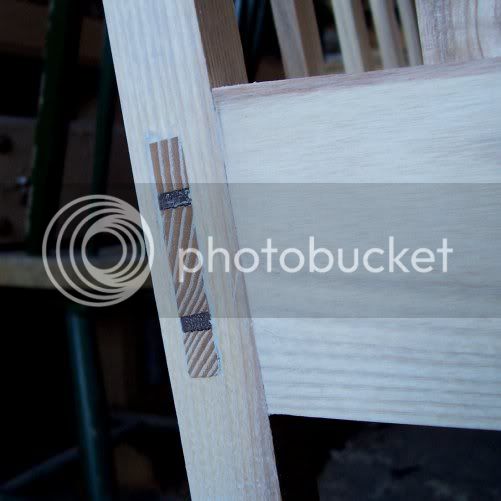
I knocked some walnut wedges into the tenons, like I mentioned in an eralier post, more for cosmetics rather than strenght. I cleaned them off then with a chisel, I was afraid to put a saw at them in case I scraped the leg! :oops:

jointbefore.jpg


jointfinal.jpg


She just needs a final sand down now and a few coats of Danish oil applied, theres a matress in the post and a baby to arrive via a stork or so I've been told) in a few months :wink:
 
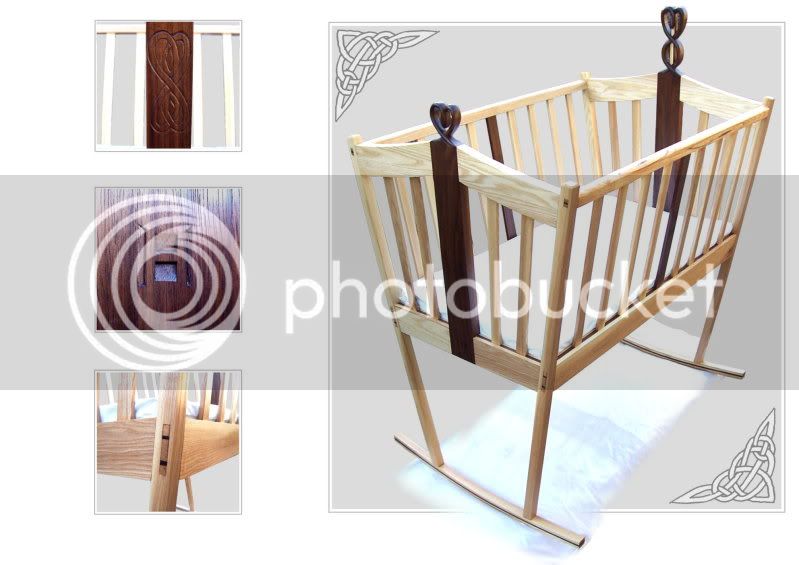
Well I finally got here finished, and just in time too. Its gotten 3 coats of Danish oil and has its matress.

cribpagejpeg.jpg


The centre picture on the left is my 'mark', an 'H' for my surname, its starting too appear on a lot of things I own and make recently! 8)

My first project where I started out with rough planks that I selected myself, so in that regard I'm very happy. Took a few weeks, but thats just a few hours a day, I'd imagine, at a push doing 9-5 I'd be able to make one in a week or so, but I'll try that someother time when another baby comes along! :lol:
Thanks for the input and comments.
 

Latest posts

Back
Top