Rare Occasions

UKworkshop.co.uk

Help Support UKworkshop.co.uk:

This site may earn a commission from merchant affiliate links, including eBay, Amazon, and others.
Thanks for all the advice . Very useful. I am managing to get my dovetails tighter but my real problem is with through mortice & tenons where I am finding it really difficult making the tenon exiting from the far side of the mortice look tight.
I know, more practise!
thanks
Simon
 
Hi, Simon

Try a wedge diagonaly, if you make the wedge fit the hole well (bevel the edges) it will expand the tennon in to the gaps.
A contrasting colour wood looks good.
Pete
 
Saint Simon":1dpvtoho said:
Thanks for all the advice . Very useful. I am managing to get my dovetails tighter but my real problem is with through mortice & tenons where I am finding it really difficult making the tenon exiting from the far side of the mortice look tight.
I know, more practise!
thanks
Simon

I like through m/t's and if they're done correctly, they look good. The trick is to make sure:

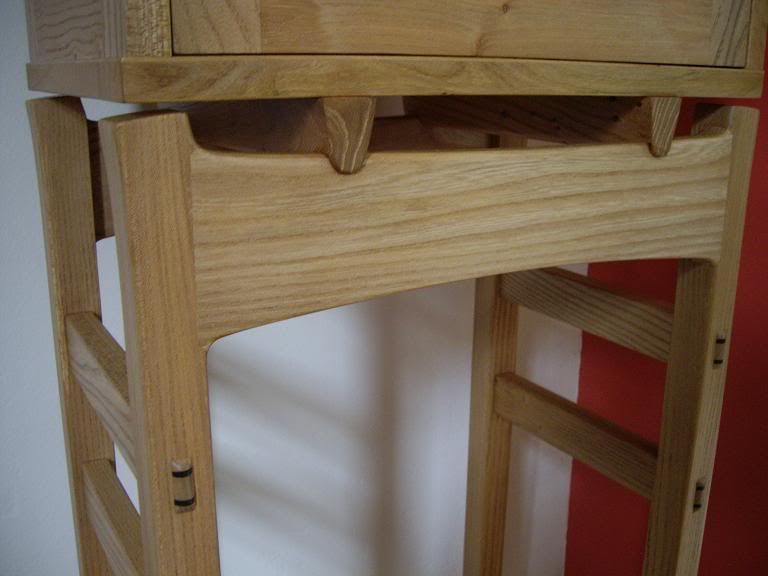
cabibet007small.jpg


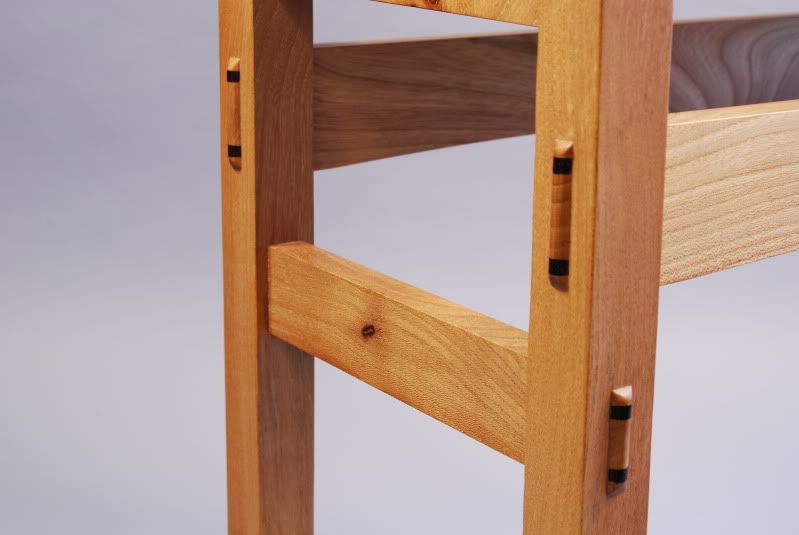
...that the 'show' side of the mortice is absolutely crisp and clean. I found that using a morticer or doing it by hand left the edges slightly ragged, which wasn't acceptable, so I changed over to a router which leaves a dead true, square and clean hole. All you then need to do is to carefully make the ends square. The tenon also needs to be a true and close fit, but that's easy to do by machining on the router table until it's a smooth push fit. The ones shown in the pic are wedged, rounded and exposed which takes a little more effort :wink: but where the joint is flush with the leg they're fairly straight forward to make - Rob
 
Very tasty. I like the raised tenons - another small difference that 'manufactured' pieces cannot easily emulate. Can be done without a router too of course... er, hand tools.
 
condeesteso":3imuf71p said:
Can be done without a router too of course... er, hand tools.


Problem there is deciding which way to position the bevel of ya pig sticker #-o no such complications with a router :lol: :lol:
 
condeesteso":1u70qy66 said:
Very tasty. I like the raised tenons - another small difference that 'manufactured' pieces cannot easily emulate. Can be done without a router too of course... er, hand tools.
Agreed, but as I said, when I did them with a pig sticker, the edges always came out slightly ragged which weren't acceptable which is why I use a router for this sort of joint...but then again, if you get an attack of the dreaded 'router wobble' :evil: :evil: :evil: - Rob
 
(trying to stay just about 'on-thread' here as it's about not having joint gaps to disguise in the first place :shock: )
If I had the nerve I might use the router more for this kind of thing, but I feel that a mistake with a router will tend to be a big one, and also set-up time is longer (fine if you are doing quite a few).
I'm aware how rarely I use pig stickers for morticing, particularly in more precise work - but I would probably scribe the final line and one a little inside of that (or just don't work right up to it), get the bulk out then a bench b/e to clean the ends and then paring chisel to clean the sides. Also absolute accuracy of mark-out both sides is imperative. I did a small table recently with legs through tenoned - a fair challenge as the mortices must be very clean edged but also the 4 have to be positioned exactly relative to each other. The final challenge is possible break-out as the tenons emerge on the face. Another thing is marking tools that make it easy to start and stop a line bang-on, and many marking and cutting gauges aren't great for that I find.
Certainly not saying this is 'the' way, just a way. Very happy to consider others.
But the point about incorporating details that manufacturing can't do (not economically anyway) is of real interest to me - worth a thread in itself I reckon.
 
condeesteso":1cjcvdbt said:
If I had the nerve I might use the router more for this kind of thing, but I feel that a mistake with a router will tend to be a big one

I agree that if you use the router freehand, with just one fence, to cut mortices it can often be disasterous. However, it's quite easy to minimise mistakes by using two fences to prevent sideways movement and stops front and back to limit distance of travel. Also, it's quite feasible to make up a jig which will take different size pieces of timber and which is virtually foolproof in cutting mortices. Frank Klausz, in his DVD about cutting mortices, shows a particularly good one that would be very easy to construct. I've used a variation of it myself and it takes all the danger out of using the router for mortice work.

Cheers :wink:

Paul
 
I've 3 benches in my 'shop that have raised and wedged mortices, primarily because they are quite roughly cut in softwood and the initial large bevel gave a good lead in to the tenons. I wonder why , on pieces of workshop equipment they are near perfect, when I know that if I took 3x longer on a piece of nice furniture they would more than likely be a mess?
 
The two-fence + stops approach sounds like we would get along (me and the jig). I think I will try it, and it's the best one I have come across. But it will be hard to pull me away from the old style - accurate marking, hand tool (and quiet) way. But I promise to try it. Done right I am sure it is excellent, but I tend to prefer spending time marking and careful cutting, then setting jigs. When I spend time doing the latter, I feel I am trying to be the machine I am not. CNC set-ups are quite good at that, and they are way more patient.
 
condeesteso":3errl0wx said:
The two-fence + stops approach sounds like we would get along (me and the jig). I think I will try it, and it's the best one I have come across.

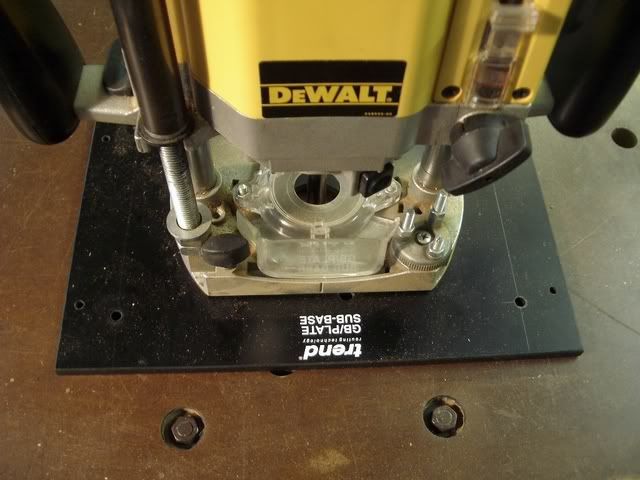
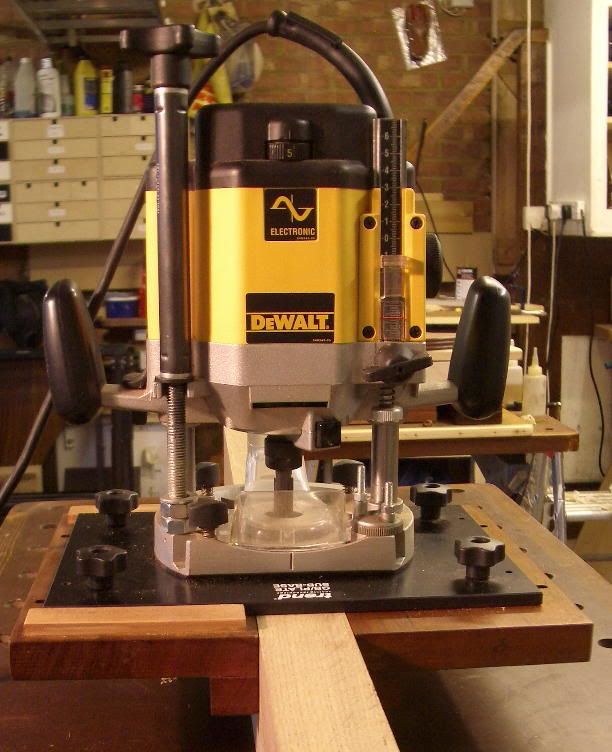
There are other things you can do to increase the stability of the router and prevent it wobbling. I nearly always use a large, square, sub-base on my DW625

Router2.jpg


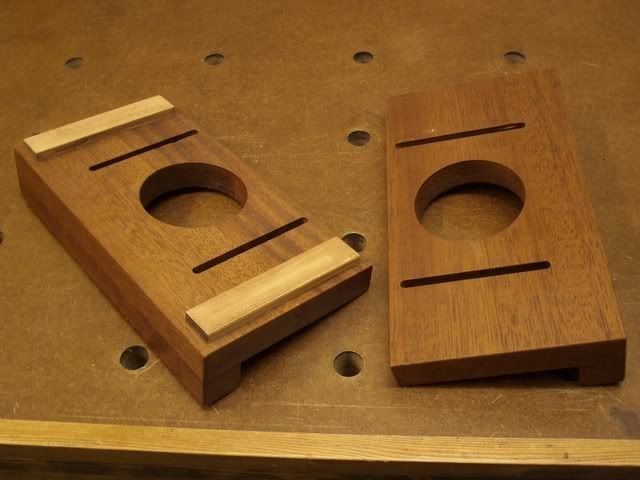
I find this increases the stabilty considerably. When using the square base, the fences don't fit so I drilled out the base and made some adjustable, wooden fences which work quite well

Router6.jpg


Router7.jpg


Cheers :wink:

Paul
 
Paul Chapman":18dih9t0 said:
Router7.jpg


Cheers :wink:

Paul
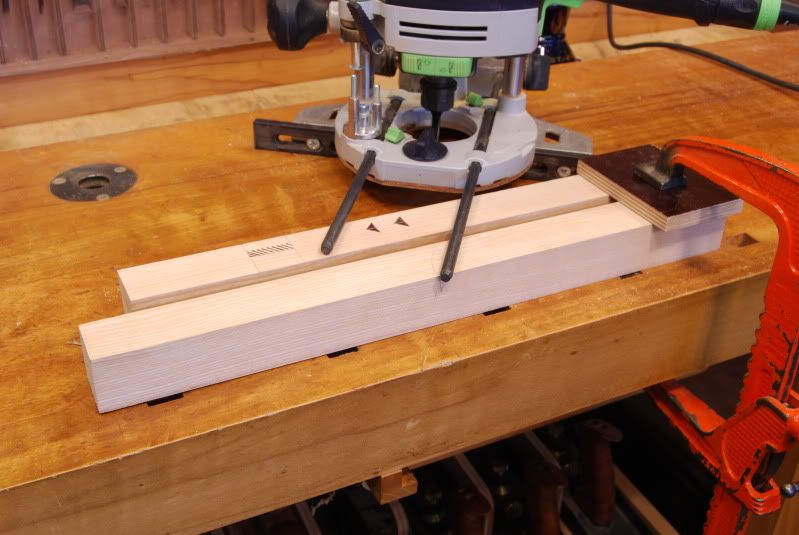
I've tried Paul's two fence method and the router will still wobble, if only by a fraction. The blocks of wood used as fences have to be really righty-tighty, hard up against the job (which then makes it difficult to push) but the router is still essentially running just on top it. What works far better is to incease the area that the router base in supported on by using:
DSC_0001-8.jpg


...an identical thickness piece of material and just one fence. You don't even have to look at what the cutter is doing because the 'start' and 'stop' points are marked by the two arrows. It does work well, 'specially if you have a few to do:

DSC_0001-9.jpg


This from another job, but you can see the consistency - Rob
 
Back
Top