You are using an out of date browser. It may not display this or other websites correctly.
You should upgrade or use an alternative browser.
You should upgrade or use an alternative browser.
Post a photo of the last thing you made
- Thread starter DTR
- Start date

Help Support UKworkshop.co.uk:
This site may earn a commission from merchant affiliate
links, including eBay, Amazon, and others.
Gary james
Member
That is absolutely stunning what a beautiful piece of wood and craftsmanshipNot quite finished yet, drawer to be fitted properly and a few more coats of finish but nearly there
Gary james
Member
I built this for my little boy a while back now. Hardly get time to build things at home.
That’s a great one I can relate to that project,I spend my life I king nerf guns up and the bullets from around the paddock and garden are there shadows behind the guns so you know there all in
His ever growing collection of nerf guns.
Made of 18mm MRMDF with some dowels and sprayed in PU paint.
View attachment 94900
MorrisWoodman12
Established Member

£13.99 (£2.80 / count)
VEVOX® FFP1 Dust Mask - Set of 5 - Valved Face Masks - Respirator - Protection e.g. for Construction, Building Work, Sanding, Woodworking, Fine Dusts, Aersoles or Particles
SLSK Ventures GmbH (UK)

£12.50 (£1.25 / count)
£14.45 (£1.44 / count)
JSP M632 FFP3moulded Disposable Dustmask (Box of 10) One Size suitable for Construction, DIY, Industrial, Sanding, dust protection 99 Percent particle filtration Conforms and Complies to EN 149
Amazon.co.uk

£17.99 (£1.80 / count)
£27.44 (£2.74 / count)
3M 8822 Disposable-fine dust mask FFP2 (10-pack)
Amazon.co.uk

£19.28 (£3.86 / count)
£19.99 (£4.00 / count)
Stealth Lite Pro FFP3 Face Masks UK Certified Dust Mask. 99.99% particle filtration, air filter reusable face mask. FFP3 Mask -7 day use per Construction, Woodworking, DIY and Welding Mask
Amazon.co.uk
Cabinetman
Established Member
Can you tell us a little bit more about the project James?
Jameshow
Established Member
It's a simple coffee table I knocked up during an afternoon and posted pics on wattapp as I went for my older chaps to see.
It's nothing special just 6x1 top and uprights and 2x2 for the legs.
I'm aiming to improve my woodworking over lockdown.
Cheers James
It's nothing special just 6x1 top and uprights and 2x2 for the legs.
I'm aiming to improve my woodworking over lockdown.
Cheers James
Phil Pascoe
Established Member
Just some little supports for the fronts of some shelves. Varying heights, the proportion changes as the length increased, but hey ho. Nothing special, really, but I'm pleased -I've never turned pommels before and I'm turning seated so 50% of the work was left handed.


Not having been in for a while I started at the beginning of this thread
Wow, just wow.
Wow, just wow.
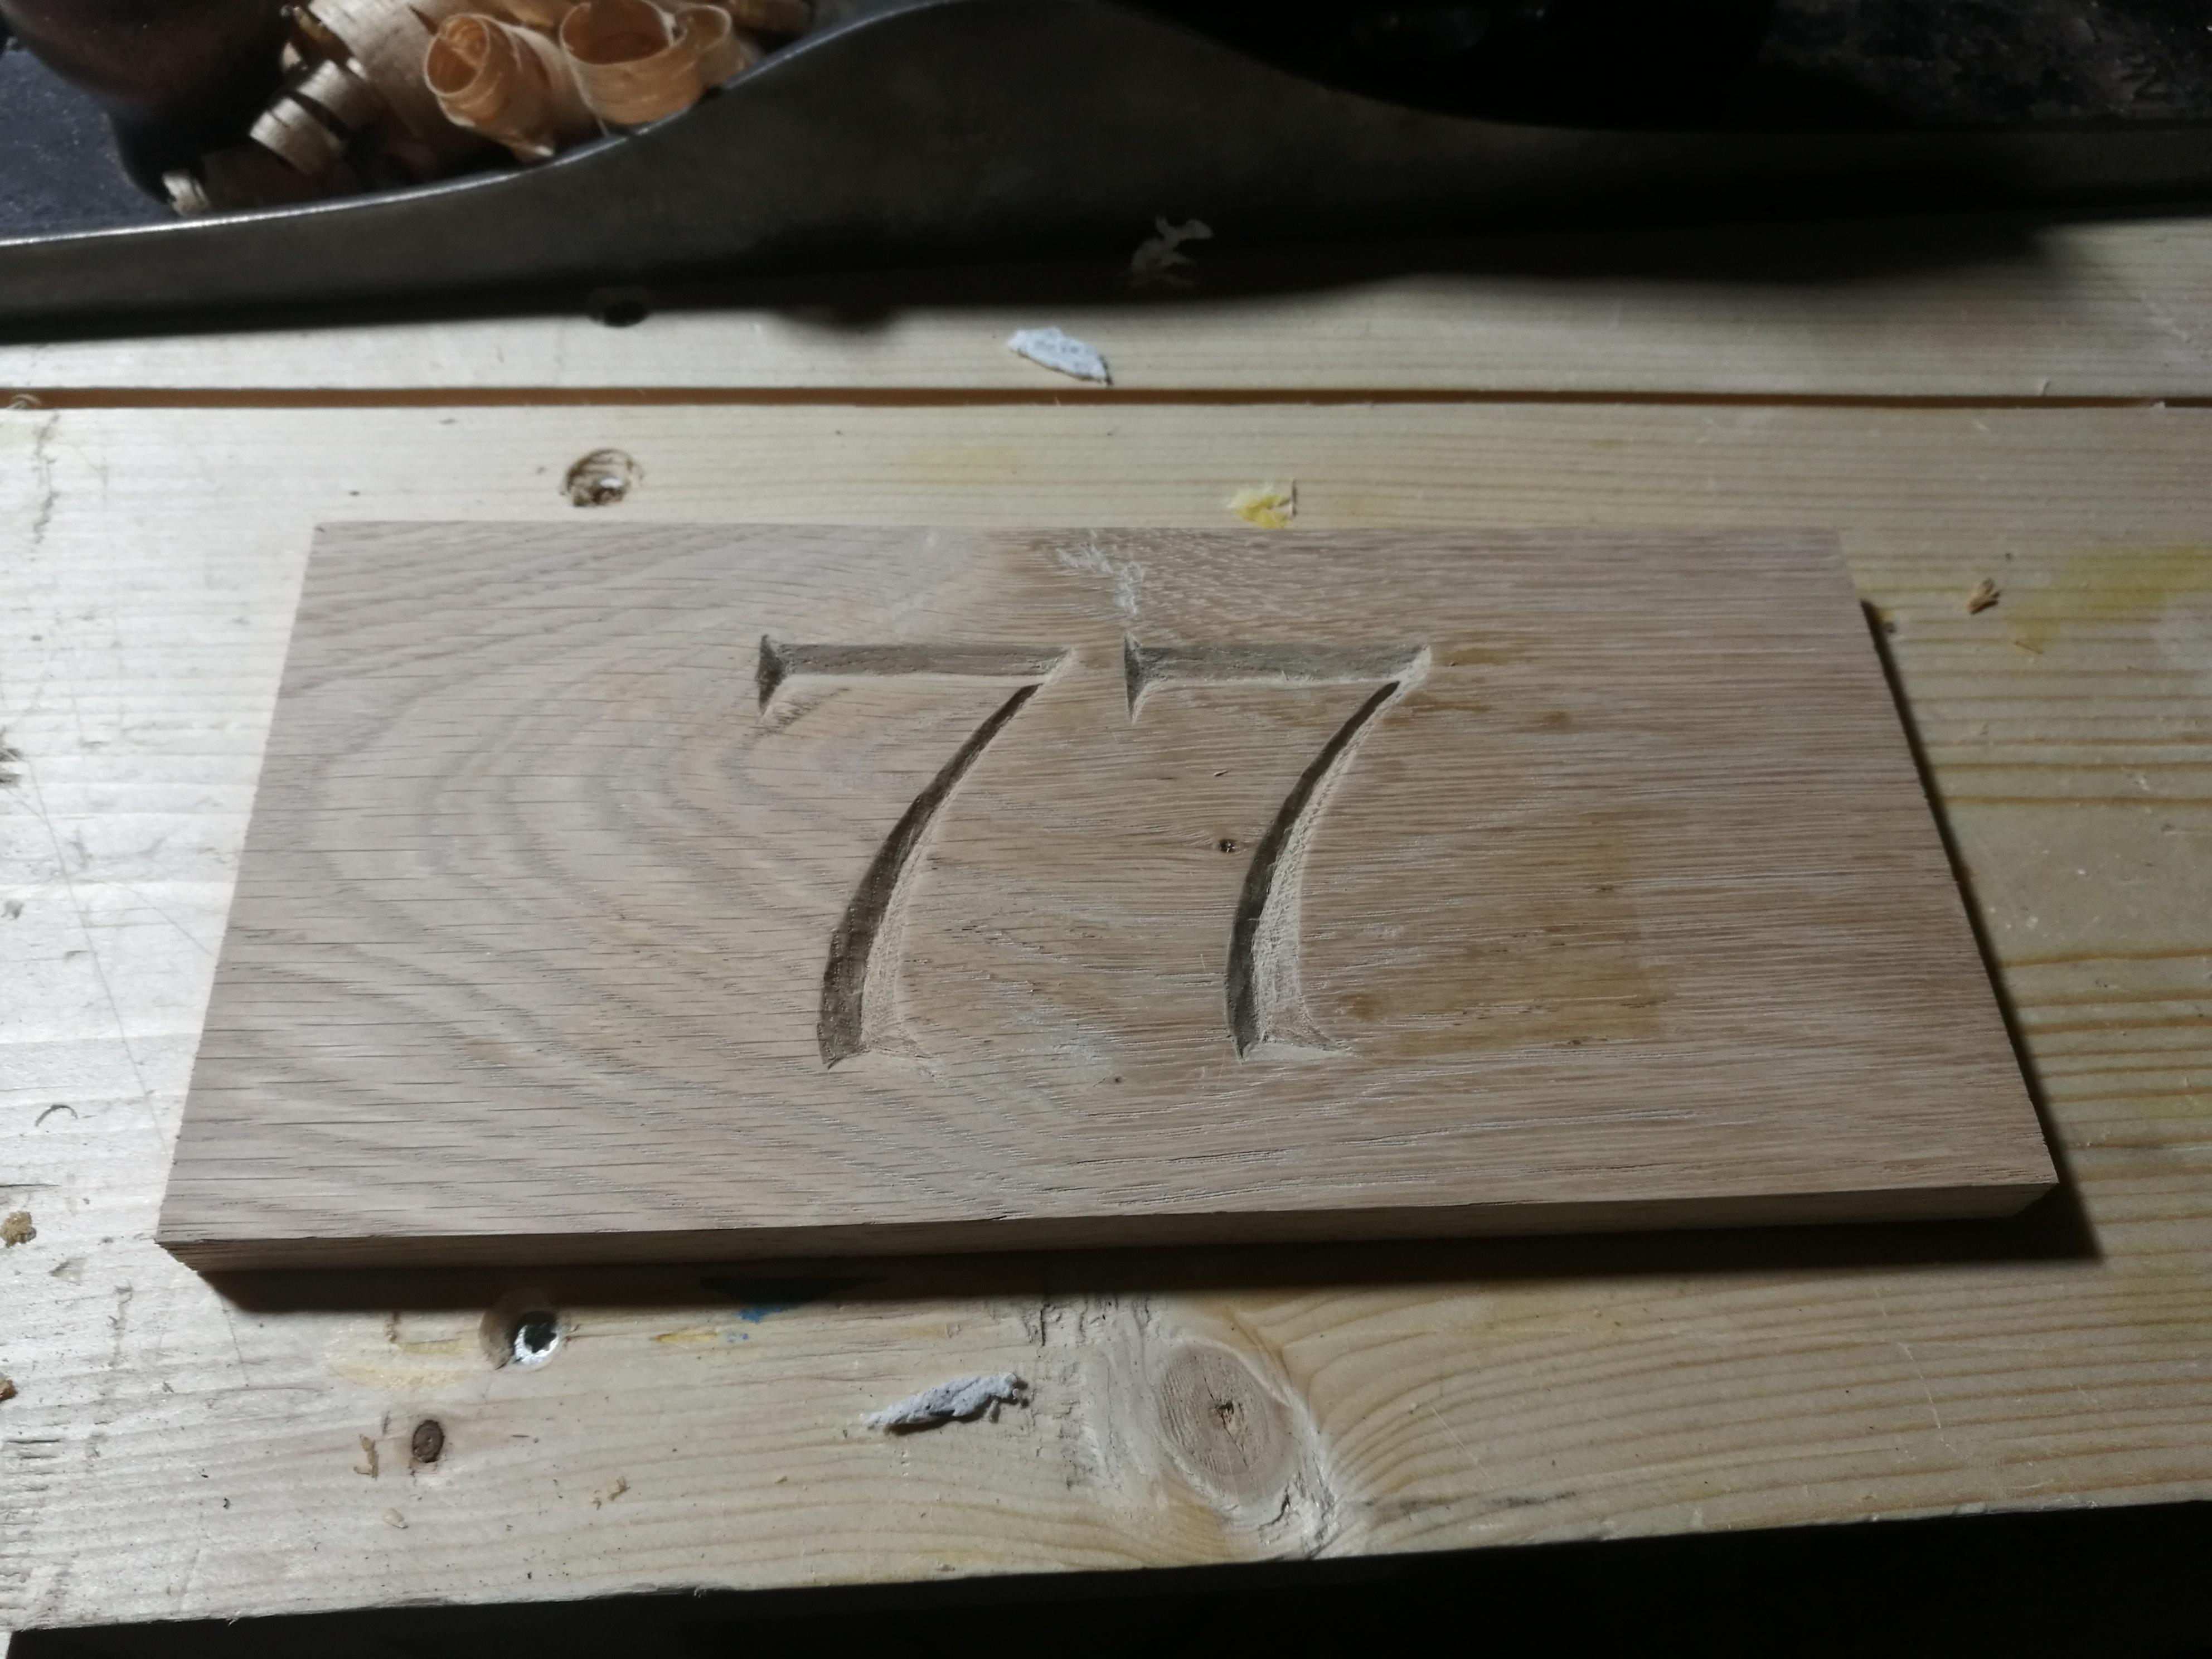
After living in this house for four years without putting a number on the front, I decided to have a go at carving.

Still needs a bit more cleanup on the tape residue and that bit of tearout at the top, but I'm fairly happy for a first go.

Still needs a bit more cleanup on the tape residue and that bit of tearout at the top, but I'm fairly happy for a first go.
Cabinetman
Established Member
Hi Phil, I had to turn pommels for the first time about a year ago, I don’t know why I didn’t look online, but I just got on with it and stumbled on the knack of it. Nicely done. Ian
Transit80
Established Member
Following a thread else where on this forum about using hardwood worktops for projects, this is the latest table I have made from leftover bits of Oak Worktop .


It's closing in on Christmas so the gifts are coming together. These are bedside appleWatch charging stations for daughters and partners. Made from offcuts of an American Cherry board I brought from Canada when I moved to the UK 17 years ago. A nice quick and simple present. They have magnets and pins to hold the two halved together. There is a bit of nano tape to hold the watch charger firmly in place. I made some before and didn't use the tape and do get the occasional time the adaptor flops out of the holder when taking the watch off. The tape should resolve that. The insides are a bit rough as I hacked the grooves out with a Dremel. A CNC router would be a wonderful thing 


Cabinetman
Established Member
Nice finish and shape,Paul, a Forster bit might have worked and then cut them in half with a really fine Japanese saw. Just wondering did you buy those pins with the magnets as sets? I can think of a few uses for them. Ian
I started with a slice of inch thick board and sawed it two along the grain and book mark the two halves. I then fitted the magnets to the two halves. I made the magnet holders out of brass (I have a small metal working lathe) and they have magnets glued into them, so sorry these are not available anywhere that I know of. Rediculously simple though. Just 12mm brass rod, 15mm long, with a 10mm counter bore to hold the magnet and a 4mm hole through for the locating rod, which is unsurprisingly 4mm brass rodNice finish and shape,Paul, a Forster bit might have worked and then cut them in half with a really fine Japanese saw. Just wondering did you buy those pins with the magnets as sets? I can think of a few uses for them. Ian
I cut the ledge for the watch and use a fostner bit to bore out the recess for the charger (28mm). The rest is then simply hacking away with a saw to rough out the back, then a good deal of sanding. They are finished with oil and wax.
Cabinetman
Established Member
Nice precise answer, thank you, I shall just have to continue using a brass screw screwed into one piece with its head cut off and separate magnets. Cheers Ian
Fidget
Trying
I've just finished this plant stand, Nearly 900mm tall and 300mm square

I got the idea from somewhere on t'internet for the black frame and somewhere else for the general shape.
It's all beech and the frame was dyed with 2 coats of Indian Ink (Hardly used any at all). The top and shelf were cut from a single 52mm board and joined using the 'Custard method' to achieve an invisible glue line (which I'm dead chuffed with). All finished with Osmo Top oil which gave me the rather matt look I was after.
Critique welcomed
 frantic clamping!

 I quite like the knots


I got the idea from somewhere on t'internet for the black frame and somewhere else for the general shape.
It's all beech and the frame was dyed with 2 coats of Indian Ink (Hardly used any at all). The top and shelf were cut from a single 52mm board and joined using the 'Custard method' to achieve an invisible glue line (which I'm dead chuffed with). All finished with Osmo Top oil which gave me the rather matt look I was after.
Critique welcomed
 frantic clamping!
 I quite like the knots

Fidget
Trying
What's the custard method not putting birds finest in the joints??!!
Cheers James
https://www.ukworkshop.co.uk/threads/how-to-edge-joint.112936/
The Master
Similar threads
- Replies
- 1K
- Views
- 108K
- Replies
- 7
- Views
- 2K
- Replies
- 44
- Views
- 5K


