Post a photo of the last thing you made

UKworkshop.co.uk

Help Support UKworkshop.co.uk:

This site may earn a commission from merchant affiliate links, including eBay, Amazon, and others.
Hi JG how on Earth do you turn an ellipse?
Part of me was hoping that you hadn't asked that :) Up to about the 1950's there were commercially made 'Ellipse Chucks' but with the advent of CNC the need dwindled. I saw a mention of one being made from wood by David Springett and due to my Ellipse 'fetish' :unsure: became so intrigued that I spent about two years working out how it was done. The first time I 'drew' an ellipse with a felt tipped pen in the toolpost I 'cheered' :) I eventually made version 3 with various improvements, the last being to make the ratio of Major to Minor Axis variable.

There are limitations when using a chuck made from wood, even though some parts were from Burbinga and Oak and there are 100 3.5mm ball bearings. The items I've made are small and the tools used are burrs in either a Dremil or Kress motor and taking very light cuts - certainly less than 1mm, sometimes as little as 0.1mm.

The Cameo and the Pill Box (images attached) are both about the same size - 50 x 58 - - the Pill Box 27mm deep. The segmented box is larger at 95 x 76 x 40 plus lid and the Ring Box shows a more extreme eccentricity at 45 x 15 x 30 high.

50 x 58 Cameo Frame.png
Pill Box Open.png
Ring Box.png
Segmented.png
 
If you can't manage to do it on a lathe then make yourself an Archimedes Trammel. I have made a few in my time currently have one in the workshop that will allow me to make a 1300mm x 1300mm elipse of any size combination down to 200mm. cant go smaller as the base of the router gets in the way
 
And now for something completely different...

Not the finest of woodworking, but what the chief bee keeper ordered. A honey tipper to allow the honey once it has been extracted into the bucket to be decanted into jars with as few air bubbles as possible.

The legs are detachable for storage with the black knobs. To increase the angle of tilt it is simply a case of moving the bar forwards which has angled slots planed in the bottom to lock with the angles slots cut in the plywood. I cut the latter with a small router, using a dovetail bit and an angled sub base so the side of the dovetail bit was vertical. I finished the whole thing in some Ronseal quick drying varnish as it is bound to get sticky and need washing.

FA871F17-5761-4906-BAD6-BE58693F4C44.jpeg

D6B41900-1B9B-4E63-BC8E-D22DBEECF620.jpeg
 
And now for something completely different...

Not the finest of woodworking, but what the chief bee keeper ordered. A honey tipper to allow the honey once it has been extracted into the bucket to be decanted into jars with as few air bubbles as possible.

The legs are detachable for storage with the black knobs. To increase the angle of tilt it is simply a case of moving the bar forwards which has angled slots planed in the bottom to lock with the angles slots cut in the plywood. I cut the latter with a small router, using a dovetail bit and an angled sub base so the side of the dovetail bit was vertical. I finished the whole thing in some Ronseal quick drying varnish as it is bound to get sticky and need washing.

View attachment 92232
View attachment 92234
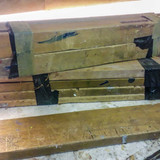
I’ll have to think about making something like this for my wife who keeps bees too.
 
Weekend WW I’m sure she will be over the moon with that, nicely executed, the way you cut the bevels is ingenious but I think in use it will not be quite as easy to use had they not been there though., perhaps a big wheeled screw at the back? I just don’t want to imagine how messy this job is going to get ha ha
 
(posted this in a thread where I asked for advice - I'm just going to copy it here and add finished pictures)


Bit hesitant to post my strictly amateur, weekend wood working efforts here, but I am actually quite proud of how things turned out.

I am NOT a carpenter (I teach CAD and CNC), and this is only my second project bigger than a trinket box or pencil case :)

(Pictures are clickable. Sorry about some of the quality - old camera phone and low light)

Started with these skip finds - about a dozen desk legs and the same amount of 4' long runners, and an old desk top.


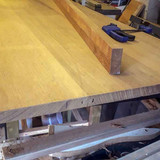
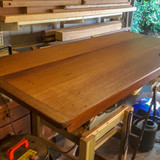
Desktop after a quick hand plane'n'sand


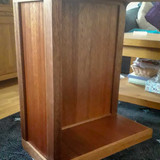
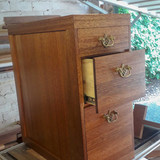
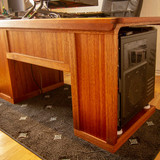
Ended up with the two pedestals

Left Right

The top being worked on


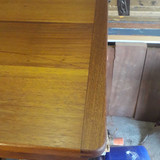
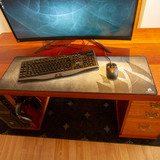
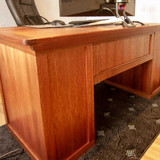
Finished :)


It's definitely not proper joinery. I didn't have a lot of timber to start with, so everything is actually 3/4" ply 'clad' in 3-4mm veneers I cut from the runners, and because the legs all had big mortises cut out of them on two sides, I resawed those into 50x15mm strips which were also glued to the ply.

I believe the body of the desk is meranti (with identification help from this forum), and I think the top is iroko - its very hard, brittle and the dust is a killer.

My first breadboard ends, my first drawers, and the first piece of large furniture that had to fit together !
 
Last edited:
Never, ever walk past a skip without looking ! - my latest find was old 1950's or 1960's firedoors -


This pic is about 1/3rd of the rails, and some of the stiles (arrowed).


I don't know what the wood is, but I probably couldn't afford to buy that quantity from a timber yard :)
(They let me have them for nothing, just to give them more skip space - I dismantled them there and gave them the glass back !)


It's not going to make a kitchen, but for my tiny, weekend projects it'll last me years !
 
Last edited:
Well done Peri. If I say "mahogany-like" timber, it doesn't for a second suggest that I think this is mahogany. It might be, or one of the many tropical hardwood mahogany alternatives. Either way, you've got some nice wood there for no money and just a little time and effort.
 
Continuing my promise to myself to post more pics here are todays efforts (let me know when you get fed up).

Today I started fitting some windows and louvers in a Dovecote, it's being converted into an office. I made the windows and louvers a few weeks ago but have been waiting for the glass. The arches are a bit of a funny shape but there are a few and all different so took an average.

Timber is Sapele with Heritage glass (still haven't worked out the best way to fit this stuff).

dovecote 2.jpg


dovecote 1.jpg
 
That’s nice work Doug, I’m sorry I can’t help you as it’s not my line of work, but I don’t think you could’ve made them any bigger to fit that iregular shaped opening. The only thing I do know from personal experience is you need to fit damp proof membranes in the right places – sorry that’s not much help is it ha ha. Ian
 
That’s nice work Doug, I’m sorry I can’t help you as it’s not my line of work, but I don’t think you could’ve made them any bigger to fit that iregular shaped opening. The only thing I do know from personal experience is you need to fit damp proof membranes in the right places – sorry that’s not much help is it ha ha. Ian

Sorry, I probably wasn't clear, it's just fitting the Heritage glass I haven't found a way I'm happy with :unsure:
 
That’s some beautifully scribed sides against the stone there matmac. What method did you use to achieve such accurate results?
Thank you, just a compass and patience. Took me longer than I wanted but I was happy how it all came out. The one piece on the right I had to add a fillet as the stone was so off plumb
 

Latest posts

Back
Top