Planing the Outside of a Case

UKworkshop.co.uk

Help Support UKworkshop.co.uk:

This site may earn a commission from merchant affiliate links, including eBay, Amazon, and others.

D_W

Established Member
Joined
24 Aug 2015
Messages
11,241
Reaction score
2,658
Location
PA, US
This is a topic that came up on another board. I don't like to make furniture, I'll admit, and I don't make it to a very high standard.

That said, I have a case to make (actually two) that will have moulding wrapped over all endgrain and doors on the front and a tongue and groove back.

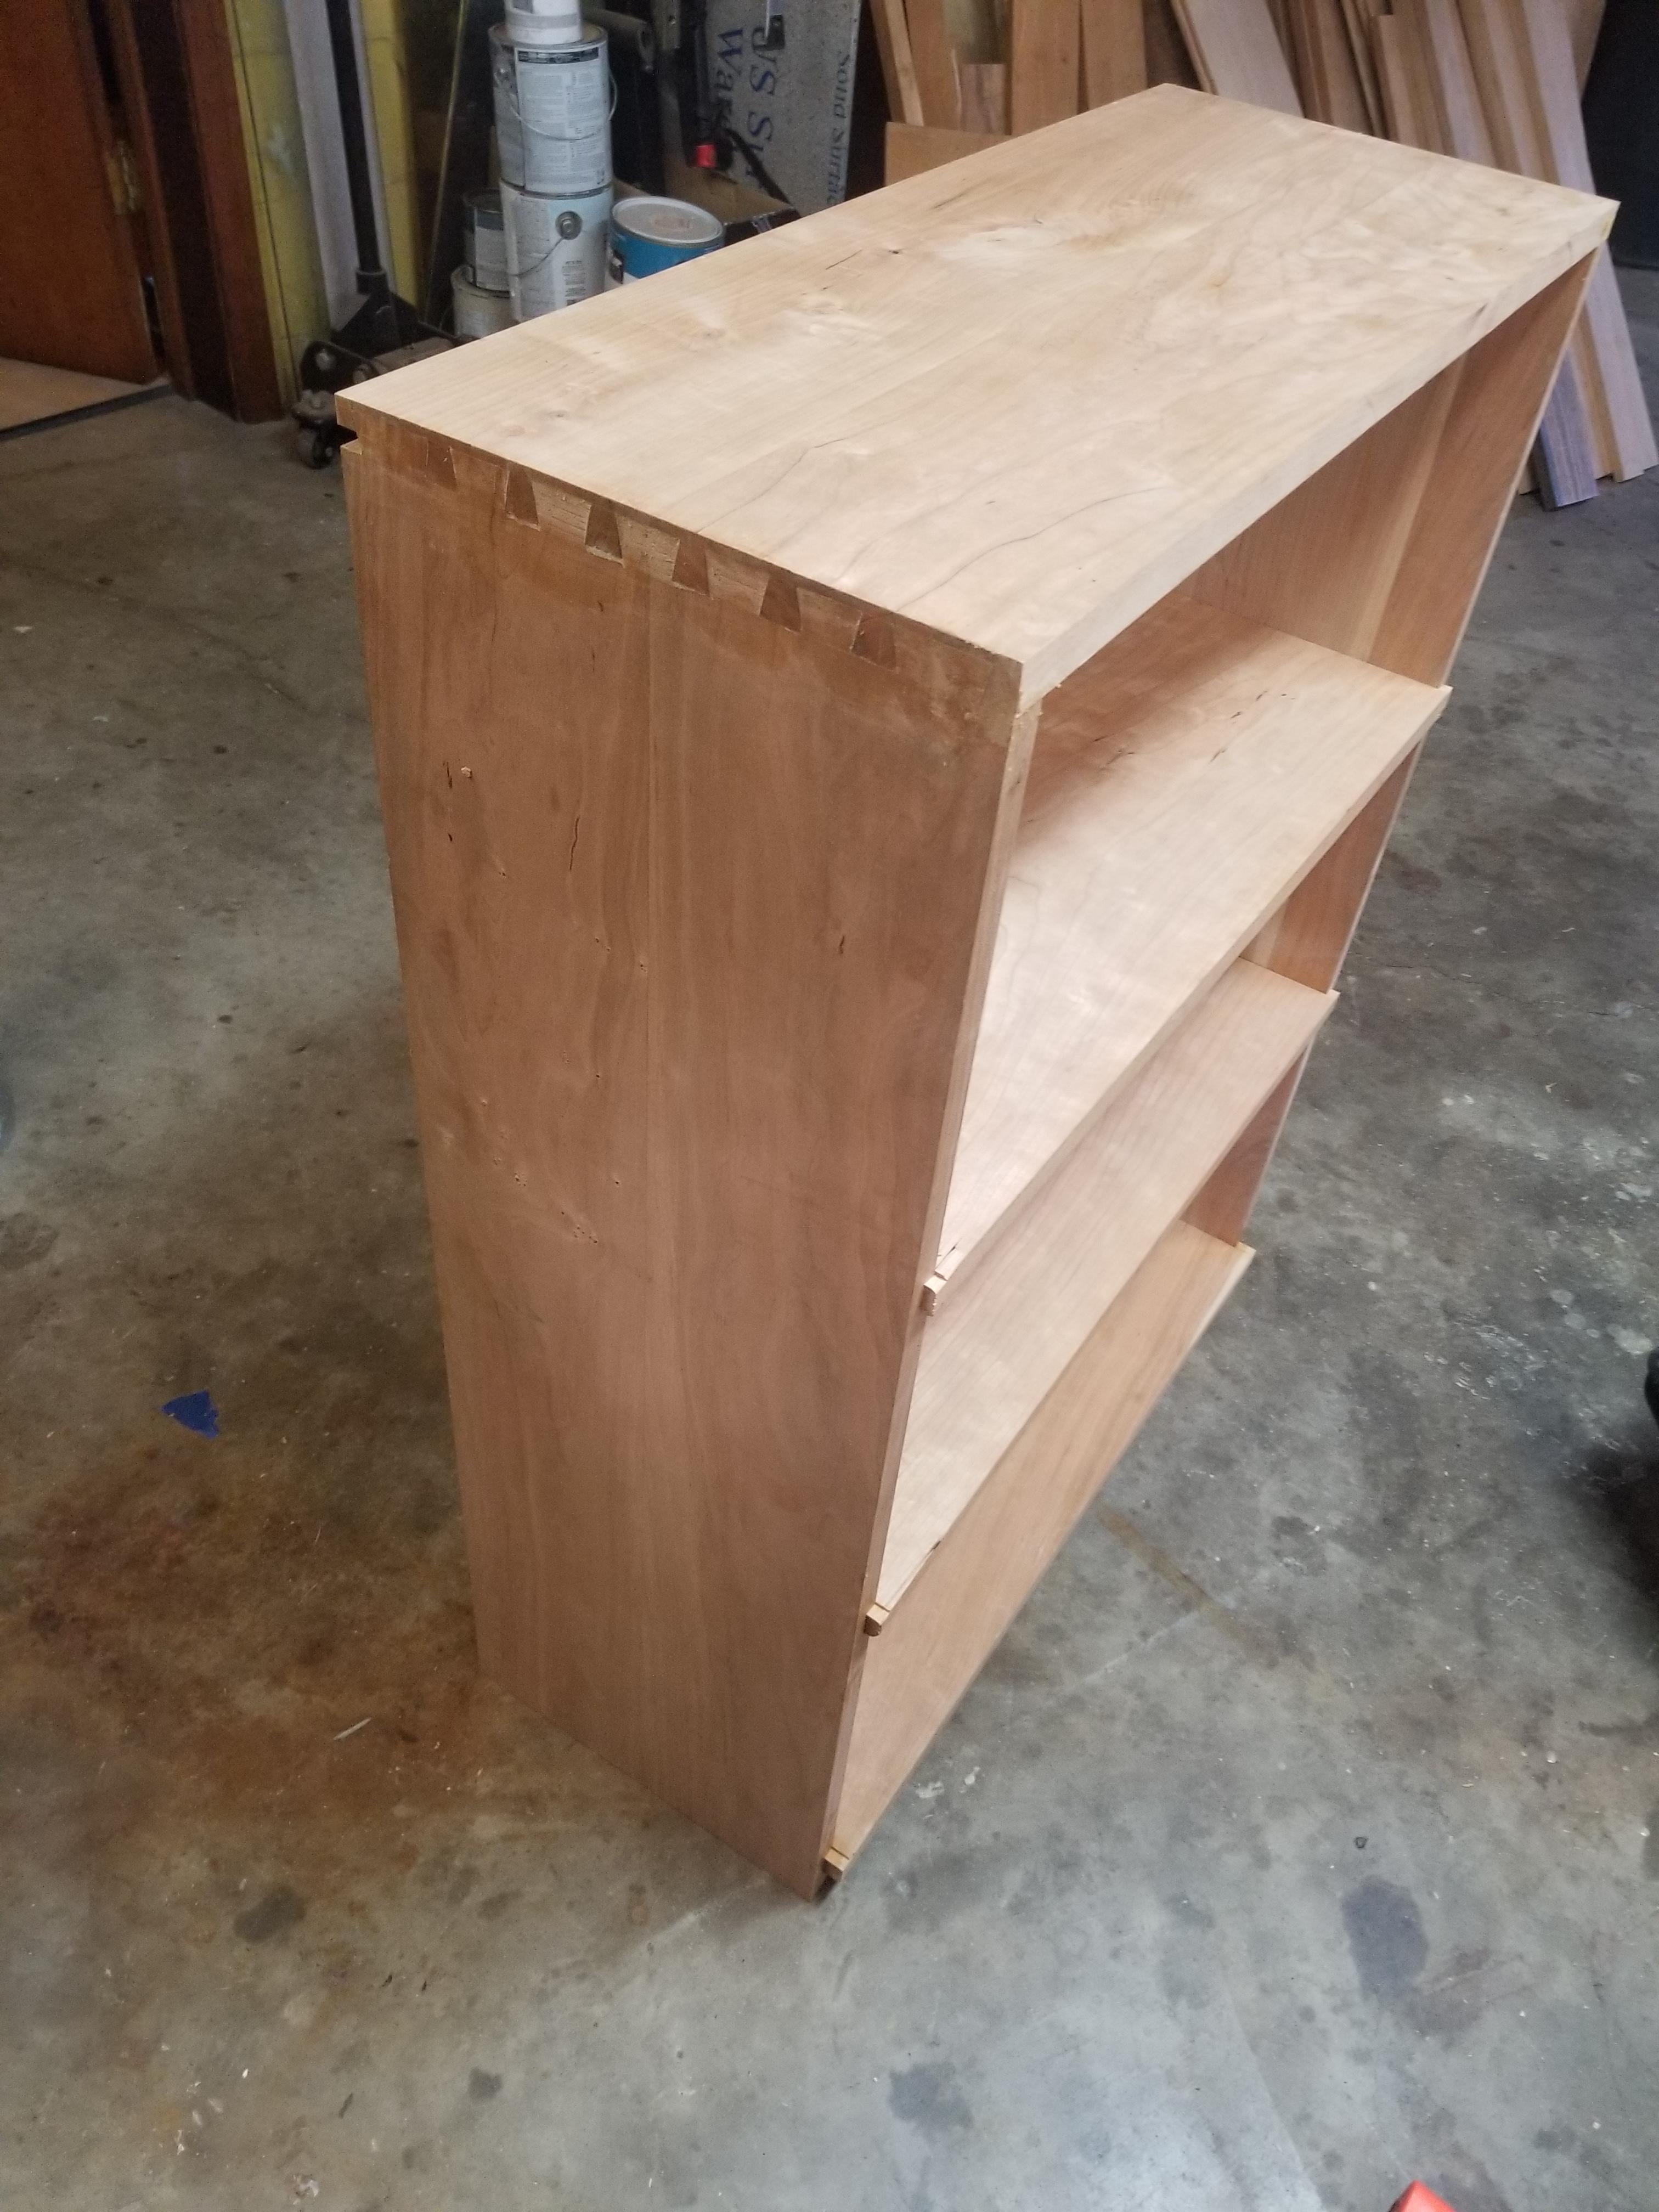
Given my lack of experience and desire for bomb proof furniture (meaning the shelves are glued or joined hard into the case sides, and the corners are generally dovetailed), I often end up with sides that bulge or bow a little bit. Would it ever be seen? I don't know, but I always end up planing the joined case.

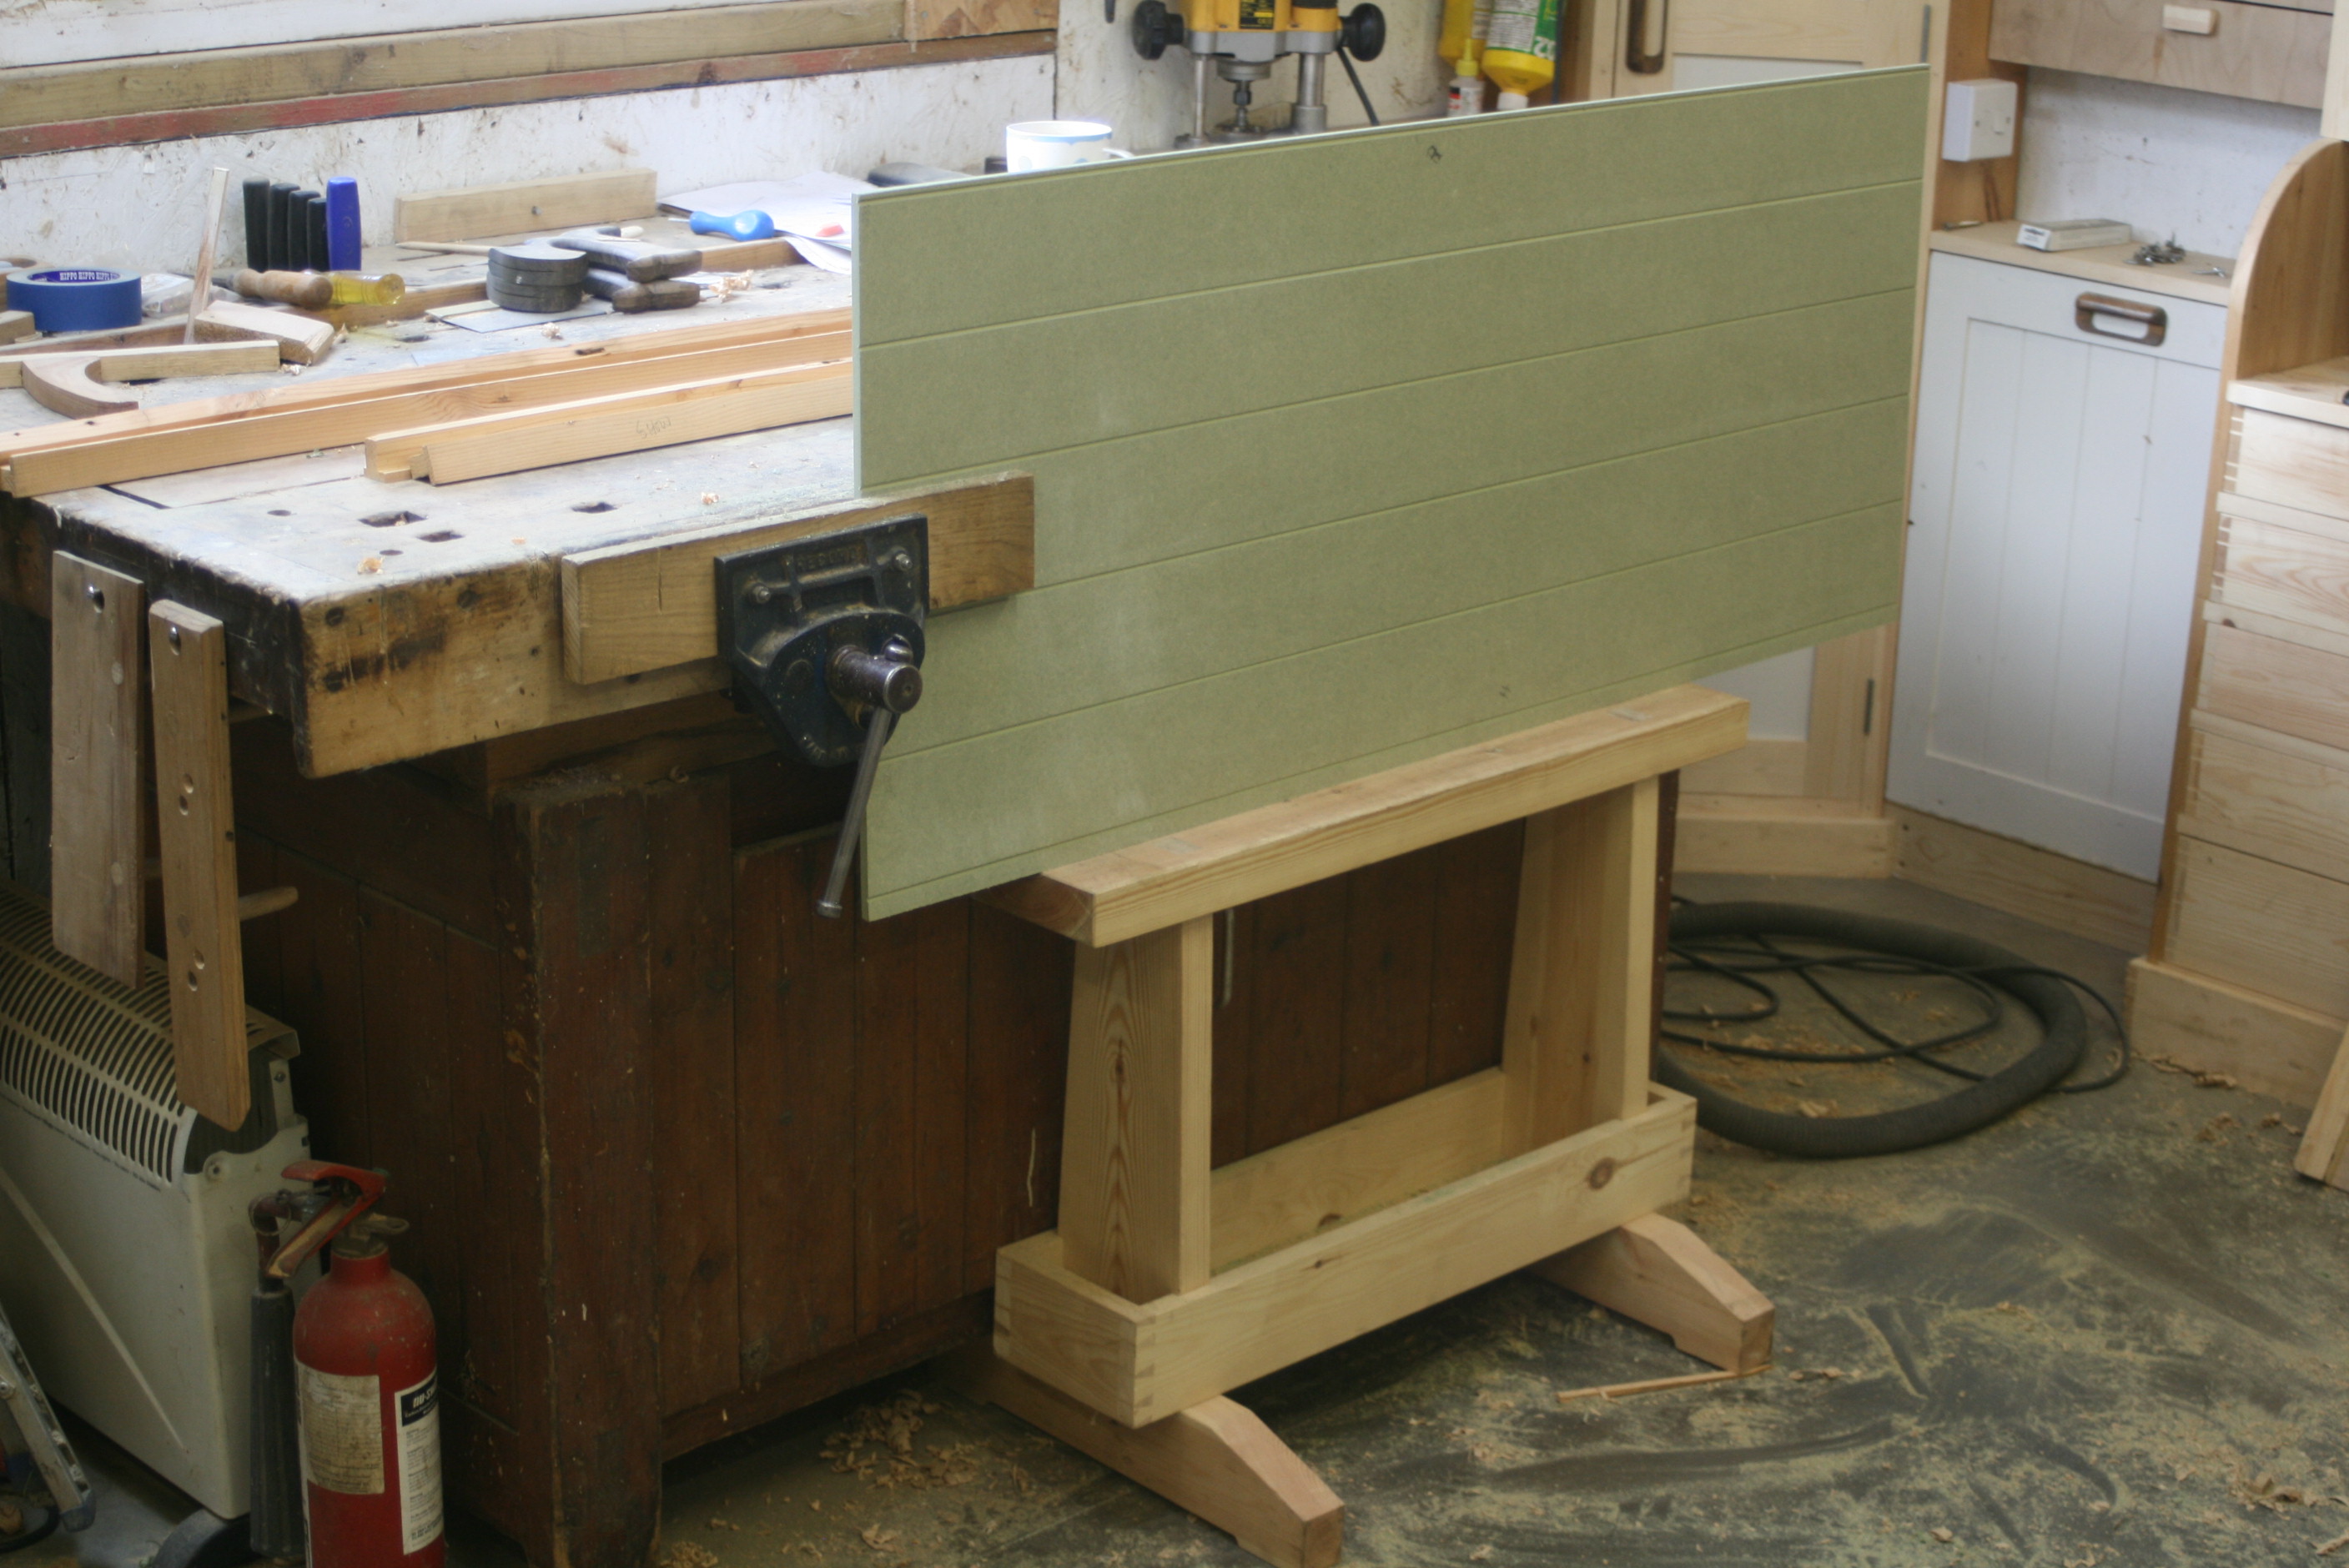
(pictures at link, along with brief description)
https://imgur.com/gallery/0ujixns

It occurs to me that a lot of people probably haven't done this and it's just a little more tricky than planing something on a bench.

But it's made less tricky with...you guessed it, the cap iron.

The wood is a bit ratty on the wall-facing side of this case, but two things will help - I'll fix the small worm groove with the equivalent of beaumontage (I'll make something), and this case will be stained (and sanded) - both staining and sanding are something I rarely do.

The key is only finding a position you can work in, and in this situation, laying my sawbench over and putting cardboard over it, butting the case against the fence was good enough. If you get rough with something like this, the back end of the case can lift, so it's a matter of taking time to get the feel (affixing this to something more tightly is possible, but not a time saver in this case, so I didn't do it).

For ease, I want to plane from the top of this case down (the shelves are all full length dovetail joined, so no endgrain at the bottom end) - the cap iron will guarantee this is good enough.

Once this is all figured out, the process is simple. Sharpen the planes, plane off the high spots with the jointer, take heavier smoother shavings and then lighter. My objective with the plane is really to plane as well as I'd finish plane anything, because anything other than that will result in a lot of follow up sanding (I want to be able to use 220 grit only, the finish level I've chosen for staining - and not have to sand out any other nits).

The whole process for both sides took about 20 minutes, mostly because the fairer side of this thing had a pronounced bow.

Again, there will be two of these - this is the top - the bottom will be similar, but sit in a base and it will be much deeper in depth.

Doing full length dovetails for the shelves was iffy. This isn't going to be glitzy furniture, but I can't bring myself to just throw something together with screws or gimmicks.
 
Interesting question.

I've made a few bookcases with similar construction, but all floor standing. I was trying to remember how I approached the task of cleaning up the dovetails, then I realised that I had largely avoided it by arranging them the other way around. I reasoned that the dovetails at the top of the case serve to hold the sides together so they don't spread horizontally. So I used lap dovetails, but with the tails on the top of the case. In my examples this was up above anyone's head, so getting the joint perfectly smooth was not an issue.
Maybe you are planning to hang your cabinet from the top, so want the dovetails to support the weight of the sides?

This is one of the pieces I am talking about. hand-tooled-bookcase-in-ash-t51016.html

PS Your cabinet looks pretty good in the photos - not too shabby at all!
 
The dovetails are one thing, but planing the side flat is another, I guess. This case will sit on top of another nearly identical case that's 6" deeper. We have a spot in our living room with a double height case like this, but it's IKEA. The Mrs. requested that I hire someone to do this (after 15 years, she's still no big fan of the woodworking) - she knows the "hire it done" line drives me bonkers and uses it a lot.

The dovetailed sides (the shelves are full length dovetailed into the case sides) resulted in a bit of a hump. It's probably not that easy to see from the pictures, but the bottom up view shows a few spots with more color (in the middle of the case) and I'd bet the hump that i had was greater than a 16th. Would it matter to just leave it as is? Probably not, but it seemed like a better thing to tackle planing.

I like your ideas for shelves, including what appears to be some wedgeable bottom joints in some of them.

Like you, I made this case in such a way that it wouldn't require clamps to glue it. Just apply glue and assemble it. The dovetails at the top were just a little loose on purpose so that I could hand fit them quickly, and their small gaps were fixed by the sawdust and glue trick. They'll be covered with moudling, anyway (which is why the groove in the back isn't stopped - it doesn't matter if it's there and showing on the case side as it'll be under moulding).

The bottom case will sit in a base, so it can just be through dovetails on the bottom (they'll be hidden in the base) and dovetails aren't necessary for the shelves, but I"ll probably do them anyway, as the doors will be mounted directly on the case instead of a face frame - based on demands from the mrs.).
 
Firstly, there shouldn't be a bulge. If the shelves are the correct length they won't be pushing the carcass out. The boards should have been planed flat prior to assembly, so the only remaining planing should be to clean up the dovetails. This should be in from each end, obviously, to avoid break-out. If this doesn't work nicely with the grain of the wood, then repair any marks with a cabinet scraper. Workholding is any way that works, but a variation on this is my normal way:

K3DFA5W.jpg


If the piece of work is wider than the opening of your vice, turn that arrangement through 90 degrees and grip just the thickness of the upper or lower board.
 
The boards were planed flat first, of course, then the joinery done (not in the same day).

Wood moves a little bit - if you're in a production shop, you try to get that planed and joined in the same day to erase all sins.

When you cut full length case dovetail joints, there will be some favoring one way or another in glue up. Most people would sand the outside of this case and not notice the bulge without a long square.

What I did is the easiest way to correct the situation (that most probably wouldn't correct). There's no need to plane in from both ends on this case as there's no joinery on the bottom.

You can plane one direction with through dovetails on the bottom, also, especially if they're cased. The finished surface will look better and more even (if finishing off of the plane) with through strokes. The fair side of this case could be finished directly without scraping or sanding, but the mrs. asked for the case to be stained, so it will be stained.

If you're sure that you never have small bulges like this in permanently affixed joints, run a jointer down your case the next time and see if it takes a continuous shaving. It won't.

I posted this because once in a while, someone tells me something like "you can't plane assembled furniture - everything has to be sanded". There is no one way, and in this case (and in the case of the deeper bottom), there will be no use of the vise to hold work in place. If you are good enough with planes, it doesn't need to be clamped, it just needs something to rest against.
 
D_W":13ksotwg said:
......When you cut full length case dovetail joints, there will be some favoring one way or another in glue up. Most people would sand the outside of this case and not notice the bulge without a long square.

I'm not following. Are you not making accurate dovetails? If you have flat boards and accurately gauged dovetails, there is nothing about gluing up which will take your boards out of straight. And if boards are bulging, it would be a straight edge which shows this up, not a square.

I posted this because once in a while, someone tells me something like "you can't plane assembled furniture - everything has to be sanded".

You'd never hear me say that. Of course it can be planed, so long as there aren't mouldings involved. Finish with a scraper, of course.

If you are good enough with planes, it doesn't need to be clamped, it just needs something to rest against.

And? Of course that thing it rests against need to be relatively high up the piece of furniture otherwise.........physics. But if you can restrain it quickly and easily in the bench vice, why wouldn't you?
 
It's deeper than my bench vise (12"). Most cases will be. The bottom will be 18" deep.

It's not the dovetails that cause a bulge - the shelves are dovetail joints, full length of the case. I understand there's no historical precedence for it. The half blinds at the top are easy every day fare and can be cut to exact size and just glued without clamps. Fitting full length dovetailed shelves with everything cut by hand is an entirely different story. Those joints are not evident in these pictures because there's not a face on view. I did those for two reasons:
1) there's no dovetail or structural joint at the bottom, so the shelf becomes that
2) the fronts of these shelves will be flush against the doors.Unless the joint is cut short (which would be fine for the two center shelves) the tails on the end will show at the front. It's possible to do that with exact fit dadoes in the center, but those usually also create humps somewhere on the case. There's many ways to handle that (including cutting only the very front of the dado full length and the rest shy of the case sides).

I have a large framing square that I've hammered square (I found a surplus 24" starrett try square years ago for about $25, so I can use it to make cheap squares square).

when I'm gluing up something like this (which is without clamps except for alignment), then I will use that square to check from the top down to the sides on both sides that the case isn't cocked.

It's not so much the flattening that's important here, it's the difference in the way you'll do things if you start to work entirely by hand and especially if you like to minimize or eliminate sanding. Once the sides are planed, the case sides need to be handled with care. I planed these flat, and with some luck, won't scratch them putting moulding on.

This case is an except for staining - probably - I'm tempted to stain it planed, but I've already sanded the top and shelves. The mrs. wants really dark staining (so dark, that I can only either dye it, tone the top coat (no thanks) or add artist fine ground pigment while applying the stain. It probably doesn't make a difference how it's finished (sandpaper or planing).
 
D_W":idakds6n said:
........It's not so much the flattening that's important here, it's the difference in the way you'll do things if you start to work entirely by hand and especially if you like to minimize or eliminate sanding. Once the sides are planed, the case sides need to be handled with care............

So apart from making the point that you're the only person on the planet who makes things by hand ( :roll: ), or who doesn't sand, you haven't actually explained anything here. Why are your sides bulging? What is so difficult about planing the sides? What is so difficult about holding the workpiece? In short, what point are you trying to make?
 
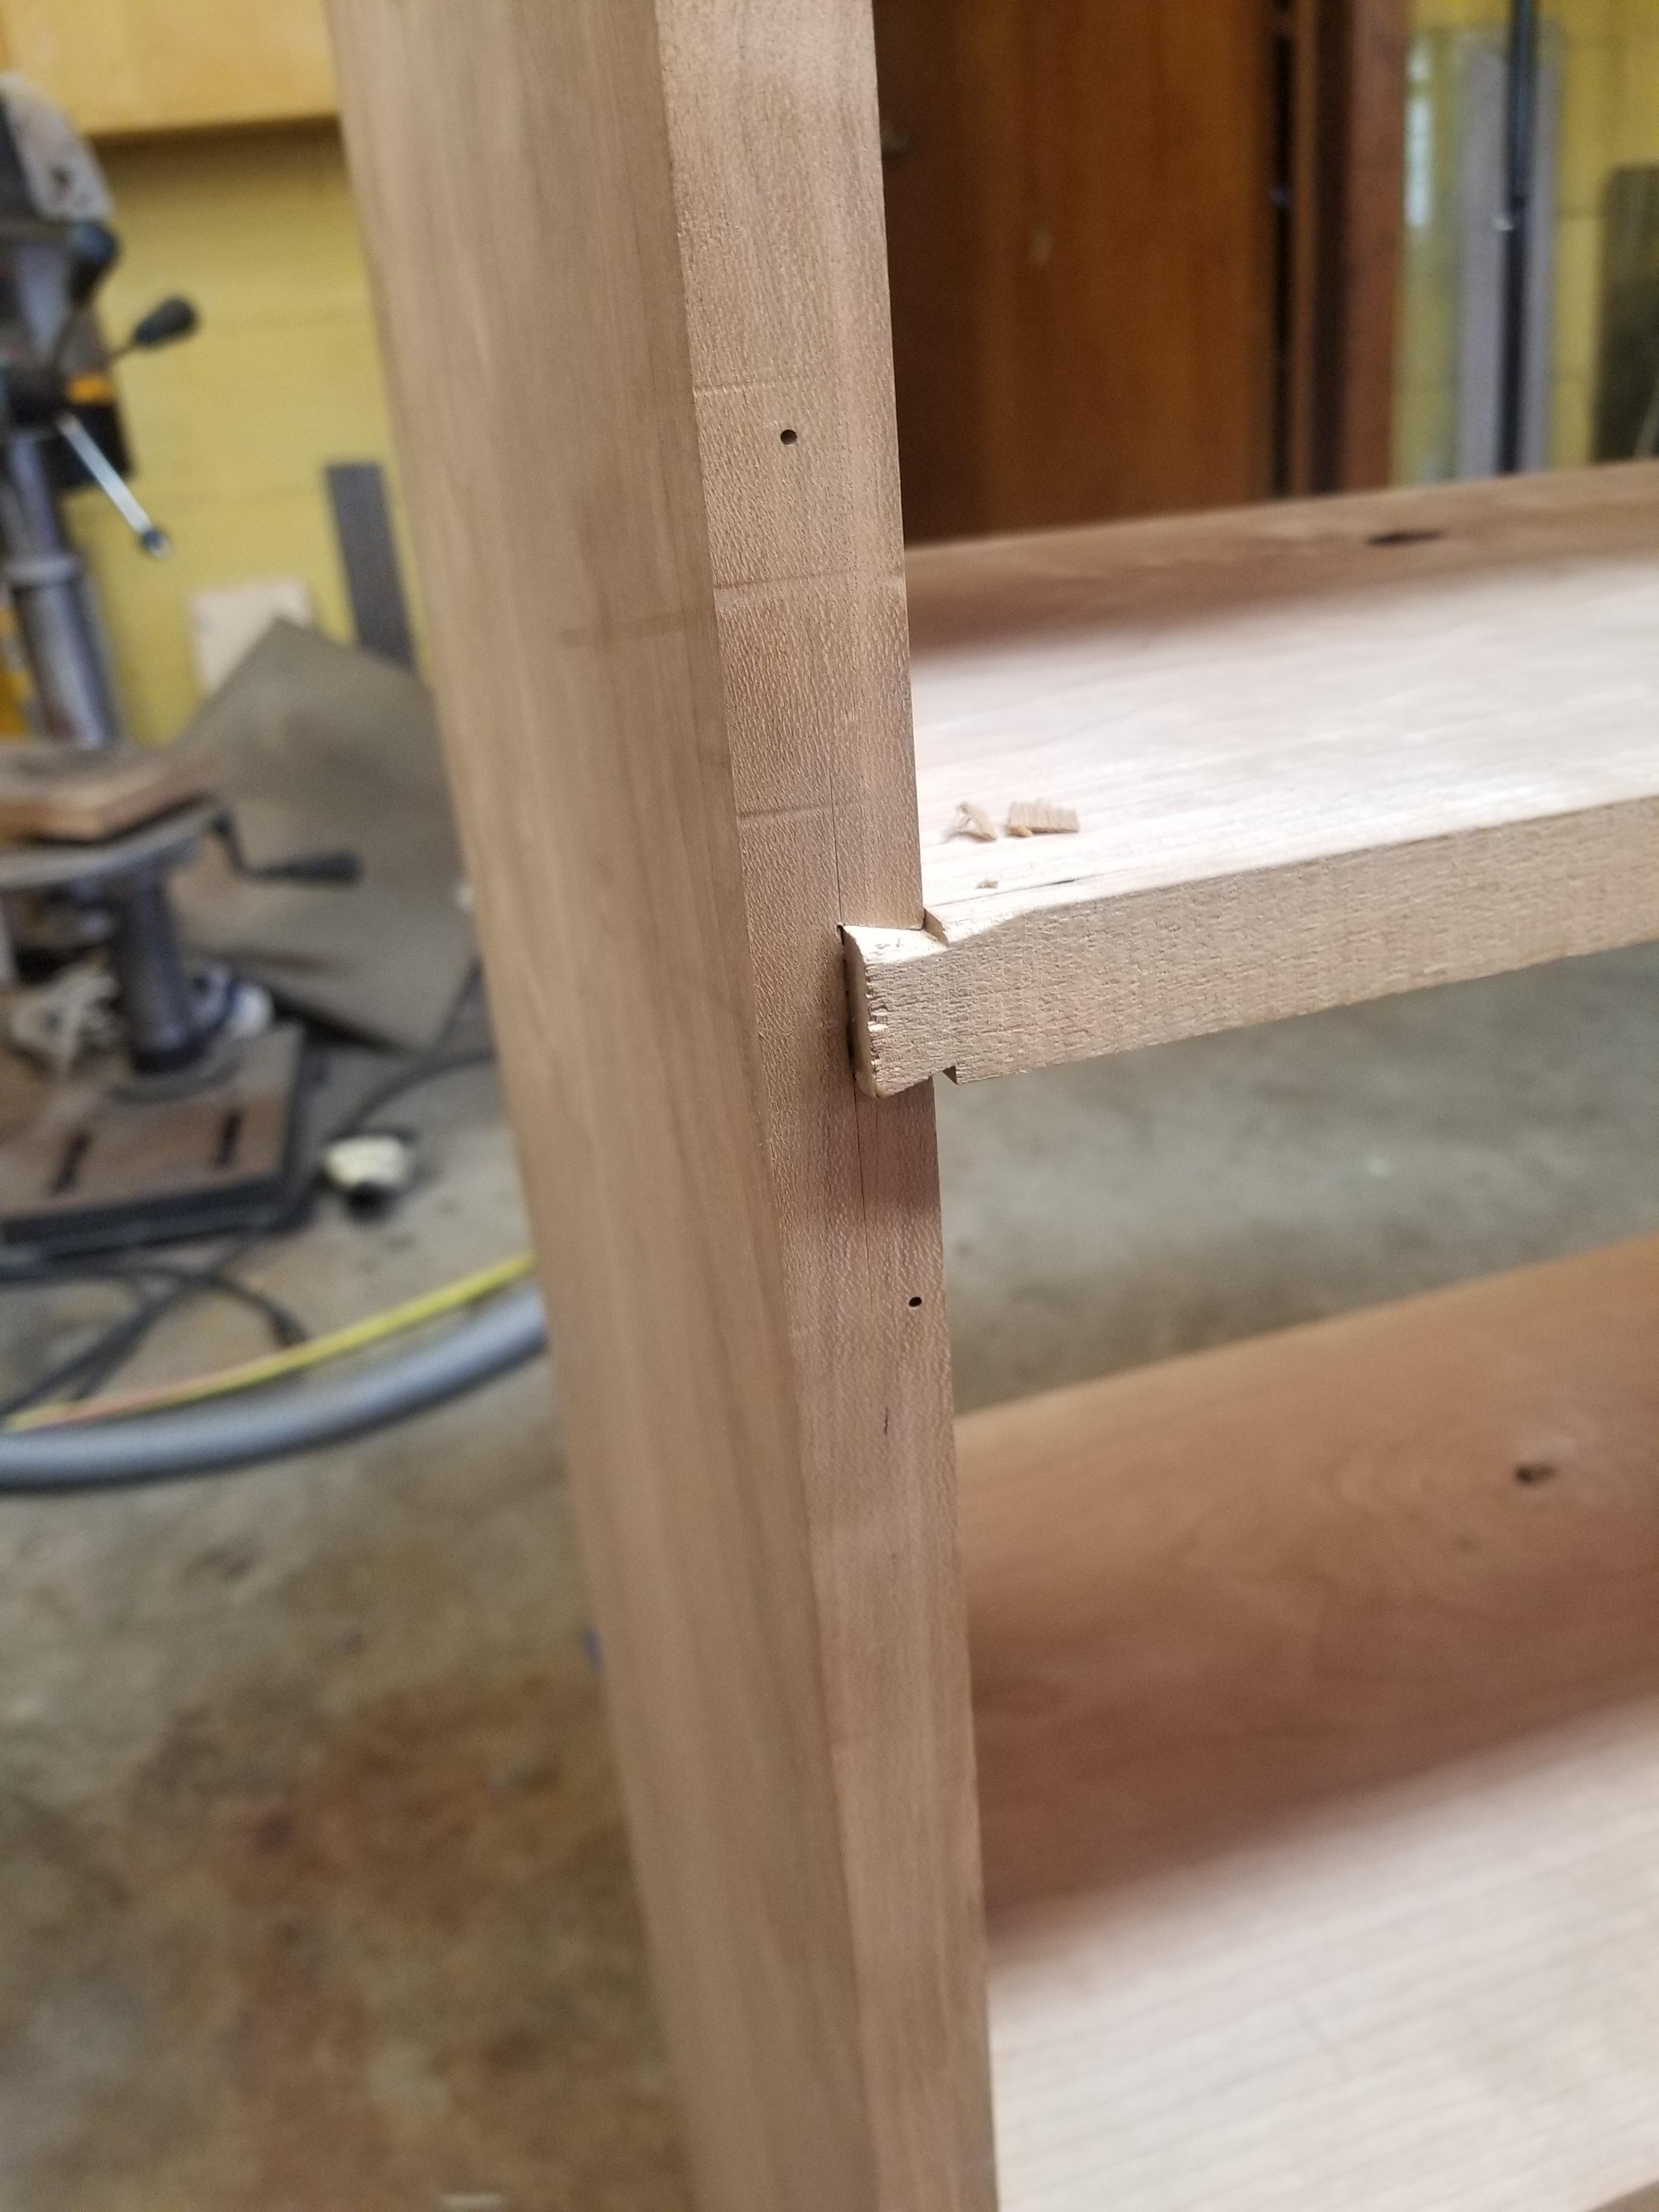
aye!! I forgot when I made the first post that the joints didn't show up in those pictures. The top case isn't going to have a bottom moulding, so I didn't want to do through dovetails. Many ways to hide the joint from the side, but a sliding dovetail shelf is one).

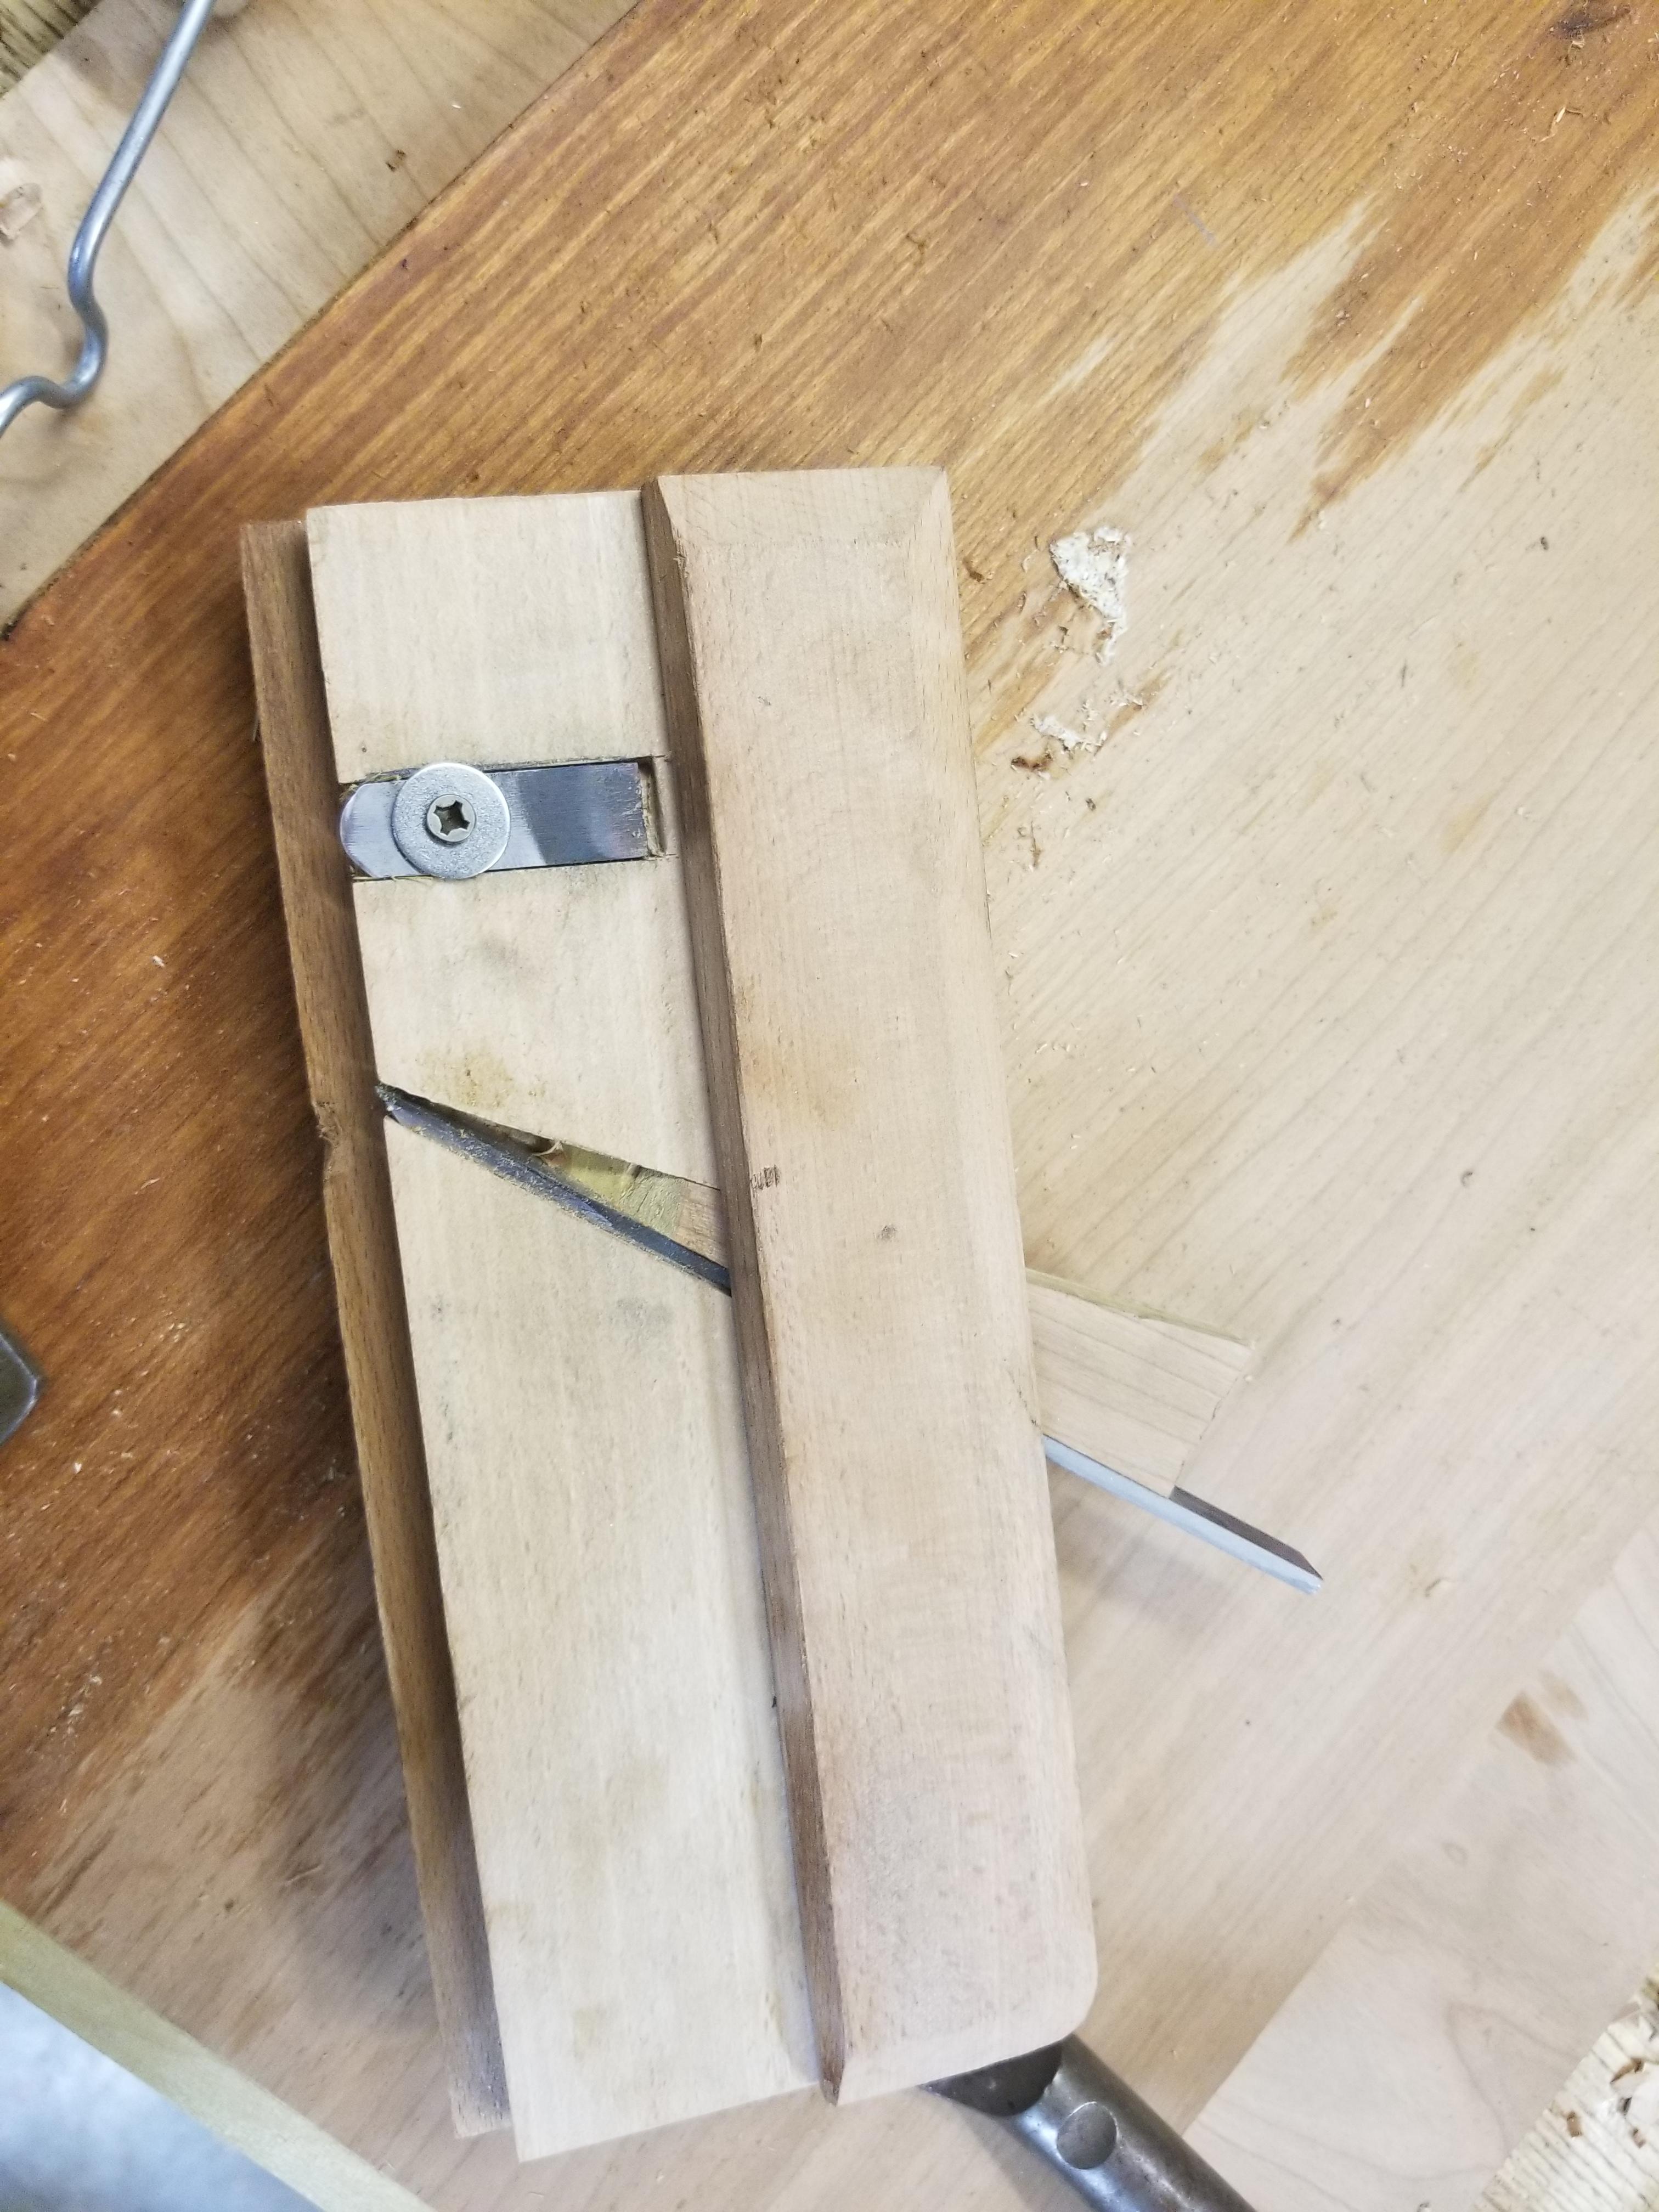
For people who generally use power tools, this is going to look odd. I made a dovetail plane to cut the male part of the dovetail and cut the female with a saw and a router plane (mostly - some chiseling, whatever is faster).

The dovetail plane can be hard on end of the cut (the edge of the board) going toward the front (the rear of the cabinet doesn't matter), which can be handled a lot of ways, but the easiest is probably just to leave some extra and then plane it off of the assembled case. Which i did.

Handmade full case length shelf dovetails aren't that easy. They need to be just a little loose for assembly - glue sets quickly when sliding them in. They can't be slack, though. I can see why they're historically uncommon, even though you could get good at them (These are the first that I've made).

iDhoYzc.jpg


22vxHaH.jpg
 
MikeG.":2zl1f8k1 said:
D_W":2zl1f8k1 said:
........It's not so much the flattening that's important here, it's the difference in the way you'll do things if you start to work entirely by hand and especially if you like to minimize or eliminate sanding. Once the sides are planed, the case sides need to be handled with care............

So apart from making the point that you're the only person on the planet who makes things by hand ( :roll: ), or who doesn't sand, you haven't actually explained anything here. Why are your sides bulging? What is so difficult about planing the sides? What is so difficult about holding the workpiece? In short, what point are you trying to make?

Stand downwind, shedman. Please.
 
The shop made plane that cuts the male end of the dovetail - just glued together from scrap.

y0DiNyH.jpg


it could be nicely made, but this is just a tool for the project, not a tool made to display toolmaking skills.

practically the same as a bearing dovetail bit, but cutting the sockets by hand makes the case for using a plane like this to tune the tail to fit the socket rather than the other way around.

https://imgur.com/gallery/fk0kuv4
 
DW,

when I read your description, I thought that you meant that the sides bulged out between the top and the bottom but looking at the picture, it seems to show that the bulge is around the 4th and 5th dovetails from what I take to be the back. Is that correct?

That would suggest that of the two boards which make up the side, the one nearest the front of the case has cupped a bit. It would surely only be noticeable at the top - as per your pic - and if the case is structurally stable, it is effectively only a cosmetic problem i.e. I would have thought that you'd only have to plane up the side a bit to get rid of what looks to be a bulge of 1/16" at the most.

Or have I interpreted the picture incorrectly?
 
I don't have much in the way of projects? Righto..... You obviously haven't got any idea about how to search this forum. It's possible that I've actually produced more than anyone else here other than the pros. Don't let the facts spoil your little story though, will you.

Now, as to workholding, you might read what I wrote (just ask if there are any words you are having any difficulty with). The case can be held in the place of the board in my photo if it is narrower than the width of the opening of your vice (as can be the case with some bookshelves, for instance). Or (and I said this in my first post), you could turn that arrangement around 90 degrees, clamp the top or bottom board in the vice resting against the apron of the bench. You can lean yours against something if you want.

You still haven't made your point. There is nothing complicated or unusual in planing a finished carcass. There is nothing complicated or unusual about holding a finished piece for planing, or leaning it against something. I actually have literally no idea what you are trying to say.
 
D_W":jiafbo7s said:
Handmade full case length shelf dovetails aren't that easy. They need to be just a little loose for assembly - glue sets quickly when sliding them in. They can't be slack, though. I can see why they're historically uncommon, even though you could get good at them (These are the first that I've made).

iDhoYzc.jpg


22vxHaH.jpg

The first time I made sliding dovetails nearly as deep as those was on a big mahogany bookcase. From memory (I don't have it any more and this was nearly forty years ago) it would have been about six foot high, four foot wide and ten inches deep. I test fitted the dovetails dry but could not get them apart again to add any glue.

It will depend on how compressible the wood you are using is, but I reckon that the limit is about six inches in softwood and four inches in hardwood.

The answer is to use any of the variant forms of tapered sliding dovetail. They look impressive to the uninitiated but once you have worked out a good way to lay them out they are much more forgiving, as you can test them and dismantle them so much easier, though you do still have to allow for watery glue expanding the fibres.
 
In case anyone was wondering, the original text suggested that it's not helpful for someone to show the edge of a board, state what might be in their mind, and that you have a history of doing this in threads - leaving a stink with "I wouldn't do that", but "I haven't done that" kind of stuff. It's your signature here. It stinks.
 
AndyT":3byx0dnv said:
D_W":3byx0dnv said:
Handmade full case length shelf dovetails aren't that easy. They need to be just a little loose for assembly - glue sets quickly when sliding them in. They can't be slack, though. I can see why they're historically uncommon, even though you could get good at them (These are the first that I've made).

iDhoYzc.jpg


22vxHaH.jpg

The first time I made sliding dovetails nearly as deep as those was on a big mahogany bookcase. From memory (I don't have it any more and this was nearly forty years ago) it would have been about six foot high, four foot wide and ten inches deep. I test fitted the dovetails dry but could not get them apart again to add any glue.

It will depend on how compressible the wood you are using is, but I reckon that the limit is about six inches in softwood and four inches in hardwood.

The answer is to use any of the variant forms of tapered sliding dovetail. They look impressive to the uninitiated but once you have worked out a good way to lay them out they are much more forgiving, as you can test them and dismantle them so much easier, though you do still have to allow for watery glue expanding the fibres.

These are biased a bit for some of those things, but the taper is on most of the tail rather than in the socket. Yes on the glue. I made a couple of test joints - there is an art to getting them apart if they only have a tiny bit of give, and that can give way to something less artful of done with force and no nuance.

I thought about making these tight only without glue, but ended up making them a bit more slack so that I could take it apart and put it back together and then glue without a crisis. I don't really know what the right answer is here for everyone else.

Hand tooling is a bit different, I guess, because you have control over biases and you instead of spec accuracy or dimension on everything. Not great for high volume production, but good in the case that you want to make only one of something and then be done. The stock I'm using is not expensive (about $2 a board foot #1 common cherry here in the states - it's really not very good stock, especially for hand work), but I'm not hoping to have more waste than necessary.
 
D_W":19sjg7ax said:
In case anyone was wondering, the original text suggested that it's not helpful for someone to show the edge of a board, state what might be in their mind, and that you have a history of doing this in threads - leaving a stink with "I wouldn't do that", but "I haven't done that" kind of stuff. It's your signature here. It stinks.

Now I'm confused. I've read your post three times and can't make sense of it.

In general I think it's better to check what you write and make sure its clear, rather than getting cross at other people not guessing what you meant to say.
 

Latest posts

Back
Top