October Woodturning Challenge - PLEASE POST ENTRIES HERE

UKworkshop.co.uk

Help Support UKworkshop.co.uk:

This site may earn a commission from merchant affiliate links, including eBay, Amazon, and others.
Status
Not open for further replies.

henton49er

Established Member
Joined
16 Sep 2010
Messages
1,241
Reaction score
1
Location
Beautiful, but wet, Mid-Wales
Sorry it's a bit late this month, but here is the place to post your entries:-

Challenge Requirements: A Bangle

This month’s rules are:-

1. The Challenge is open to anyone and everyone.
Entries must be new and made specifically for the Challenge.
Entries must be made of wood which must be turned on a lathe using woodturning tools.
2. For the purposes of this Challenge, a bangle is defined as a bracelet made of a single piece of wood that will comfortably fit the wrist of an “average” adult without being unduly difficult to put on, and will not easily slide off unintentionally
3. There are no width restrictions to the bangle other than practicality in use
4. Segmented turning is not allowed.
5. Piercing, carving, colouring, pyrography and texturing are all allowed, but the principal requirement is for the judge to be able to see your turning skills, and to gauge the form and finish of your entry, and to judge how accurately your bangle meets these requirements
6. Any wood may be used

Please post three images of your work together with details of the wood used, the tools and methods used to make it and the dimensions (inside and outside diameters, overall width, thickness etc).

Images needed:-

1 showing a general side view of the bangle on an adult person’s wrist
1 view of the inside of the bangle
1 view of the profile of the bangle
A fourth picture may be added (but is not compulsory) if needed to show any other interesting details of your entry.

Image size - please use image size 640 x 480 0.3mp, as in previous challenges

Please upload your pictures and description between 10pm on the 27th October and 10pm on the 29th October.

Please also send me a PM giving me your own opinions of 1st, 2nd and 3rd places amongst the entries (other than your own) between 10pm on 29th October and 10pm on 31st October (for me to compile the entrants’ scoring).


This is the first bangle I have made, had a few problems but got round them ok. The wood is Lyme,I turned it using my Robert Sorby Hollowing tool, Skew Chisel and Spindle Gouge. I cut a centre groove and filled it with some Deco grit using CA glue to hold in place. Sanded it all down to 400 grt finished with Sanding sealer and Friction polish.
100_2154[1].jpg

100_2152[1].jpg

100_2155[1].jpg

100_2156[1].jpg
 

Attachments

  • 100_2152[1].jpg
    100_2152[1].jpg
    55.6 KB
  • 100_2155[1].jpg
    100_2155[1].jpg
    44.3 KB
  • 100_2156[1].jpg
    100_2156[1].jpg
    46 KB
  • 100_2154[1].jpg
    100_2154[1].jpg
    72.3 KB
I decided to keep it very simple this month after being told last months was ‘ambitious’. So, a plain wooden bangle, sorry I don’t know what wood it’s made from as I won the blank in a club raffle, but it was just large enough to squeeze this out of (and it does look rather gorgeous in real life, definitely better than the photos manage).

After rounding the blank with a bowl gouge, the centre was initially hollowed to about half way and the outside, inside and one edge finished with a combination of spindle gouge and square scraper, before sanding to 400 grit. The piece was then reversed and held in expansion mode while the other half was shaped in a similar way and after sanding the outside and the edge, the inside was finally cut through, leaving a small step which was hand sanded away.

The bangle was then finished with two coats of sanding sealer and a buffing that ended in Carnuba wax.

The dimensions are :
Inner diameter: 70 mm
Outer diameter : 80 mm
Width : 23 mm
Thickness : 5 mm
Weight : 18 grams
 

Attachments

  • Bangle_side.jpg
    Bangle_side.jpg
    94.8 KB
  • Bangle_inside.jpg
    Bangle_inside.jpg
    163.6 KB
  • Bangle_wrist.jpg
    Bangle_wrist.jpg
    181.4 KB
  • Bangle_general.jpg
    Bangle_general.jpg
    144.8 KB
Here is my entry for this months challenge. It is made from elm with quite a bit of character and interesting grain.

I roughed it on a screw chuck and recessed the one side to get my chuck jaws into, took it off the screw and turned it around then hollowed the centre just with a bowl gouge. I used the bowl gouge and spindle gouge to refine the shape turning it around on the chuck with the jaws protected.

Sanding sealer then finished up to 1000 grit with a couple of coats of wax to finish.

phplanzM0AM.jpg


phpkforwdAM.jpg


phpXPaJHwAM.jpg


And one for luck!
phpQjLXFpPM.jpg


Mike
 

Attachments

  • phplanzM0AM.jpg
    phplanzM0AM.jpg
    26.5 KB
  • phpkforwdAM.jpg
    phpkforwdAM.jpg
    35.3 KB
  • phpXPaJHwAM.jpg
    phpXPaJHwAM.jpg
    28.9 KB
  • phpQjLXFpPM.jpg
    phpQjLXFpPM.jpg
    30.8 KB
here goes
as most it was my first bangle
I believe to be an elm burr...but can't be sure
mounted on screw chuck
roughed with bowl gouge and outside profile shaped
parting tool to just over half way
put a small bevel to inside so not too sharp edge for SWMBO to wear
mounted in expanded chuck
parted from other way (scary)

a small bit of sanding on outside to 320 and a micro wax
found this quite a challenge
 

Attachments

  • Bangle1.jpg
    Bangle1.jpg
    192.6 KB
  • Bangle2.jpg
    Bangle2.jpg
    190 KB
  • Bangle3.jpg
    Bangle3.jpg
    245.8 KB
This bangle is from African Tulip wood which I was taken with at the Daventry Show earlier this year. It wasn’t large enough for a box or bowl and I had no idea what I would make from it - until I saw the subject of the October Challenge. Since I built my own Elliptical chuck this seemed to be a perfect vehicle.

The blank was mounted in the chuck and I marked the inside ellipse with a pencil - adjusting the eccentricity to achieve that as measured on my own wrist. The blank was dis-mounted and the centre was then removed on a scroll-saw - I hate waste and can use the saved block for jewellery!

After re-mounting the piece, the inside was cleaned up with a side cutting scraper to 62mm x 74mm and sanded to 400grit. The waste was removed from the outside on the bandsaw leaving a roughly parallel thickness ellipse.

Next job was to make a jam-chuck with the same eccentricity from a piece of redwood and mount the bangle. The outside was cleaned up using a SaburrTooth Ball Nose carbide burr and then detailed with the point of a parting tool before sanding to 400 grit given two coats of sanding sealer sanded back with 600 grit.

The inside was further sanded to 600grit by hand and the whole was finished with microcrystalline wax and buffed on a woolen mop.

Finished size : Outside 75 x 89, Inside 62.5 x 75, Width 23mm
 

Attachments

  • Bangle-5.png
    Bangle-5.png
    227 KB
  • Bangle-4.png
    Bangle-4.png
    214.9 KB
  • Bangle-2.png
    Bangle-2.png
    231.1 KB
  • Bangle-6.png
    Bangle-6.png
    222.7 KB
A couple years ago , my brother in law brought me a bunch of burls from the north end of Vancouver Island. This is I believe Hemlock, or maybe Fir, and they call it bear claw grain up there anyways. Managed to get a large enough piece and cut it to round and mounted it in #5 tower jaws, drilled a hole in it and carved out the inside to 3" and worked on the outside about 5/8" as well. Sanded to 320 and then DO, turned it end for end and did the same thing. Then turned a jam chuck and cleaned up the middle raised band.I used a Crown 3/4" heavy scraper for everything just because.
2 coats of DO and 3 brushed coats of shellac , and then buffed up on the Oneway wheel kit. It is 3" inside and 3 5/8" outside and 2" wide and the blonde likes it.
Thanks to everyone who supports this challenge, in any way.
 

Attachments

  • P1020300.JPG
    P1020300.JPG
    133.2 KB
  • P1020297.JPG
    P1020297.JPG
    175.5 KB
  • P1020296.JPG
    P1020296.JPG
    177.5 KB
  • P1020295.JPG
    P1020295.JPG
    168.2 KB
This is my entry which was my practice piece but the one I had turned had a slight accident.

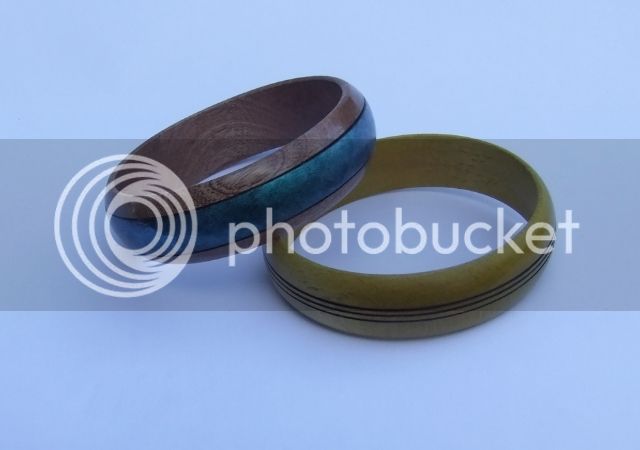
The photo's did not turnout very well so have added a forth so the detail and true colour can be seen. Unfortunately the bangle is down in Devon so I could not retake the photo's

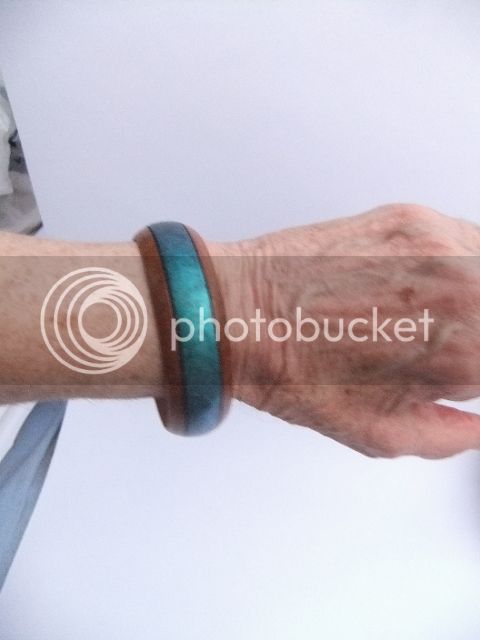
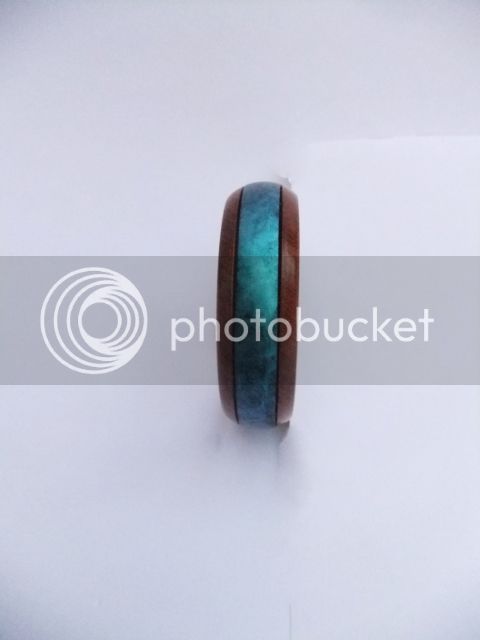
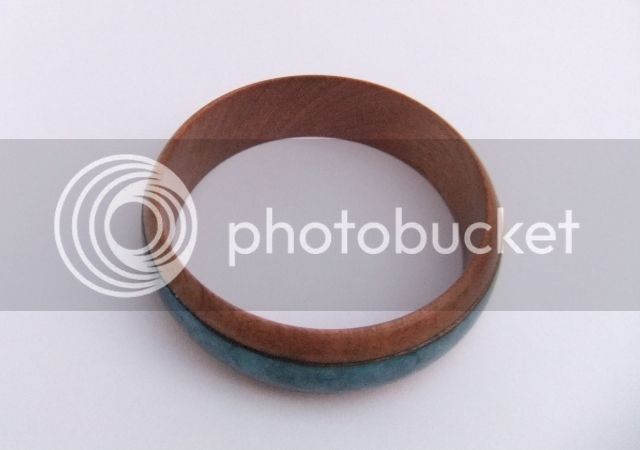
Anyway the bangle is made from Sapele and has a centre band of blue iridescent paint and lines are burnt in

Turned with a bowl gouge on the scroll chuck and is sanded to 600grit

2014-10-19001006_zps6b38aeed.jpg


2014-10-19001002_zps0eb0da91.jpg


2014-10-19001005_zpsf0c955d5.jpg


1cfc9596-b920-4fea-973d-144b67d3715f_zps85ca9701.jpg
 
Here is the bangle I made from Sycamore.

Initial turning was between centres with a roughing gouge and spindle gouge. Created mounting spigots on each side that were quite long for re-mounting in scroll chuck off-true.

First stage was simple round shape, still connected inside. Second stage was off-centre between centres to thin the outside to balance the weight of the final design. Third stage was to turn off-true in the scroll chuck to thin one side, and fourth stage off-true again to thin the other side. Finally removed using a bowl gouge, and had to hand sand inside because of off-true shape.

Sanded to 800grit at each of the 5 stages. Finished with shellac sanding sealer, then wax and buffed to shine.

Diameter is from 83mm to 87mm, width is from 7mm to 11mm, and thickness is 7mm to 10mm

Fourth picture is to try and show the different thickness of the side profile.
 

Attachments

  • K5__2239.JPG
    K5__2239.JPG
    104.3 KB
  • K5__2234.JPG
    K5__2234.JPG
    107 KB
  • K5__2233.JPG
    K5__2233.JPG
    110.3 KB
  • K5__2237.JPG
    K5__2237.JPG
    79.8 KB
Finally got an entry for this year's comp. !

Walnut, bored to a predetermined 74mm with spindle then scraper. This was deemed optimal for the recipient.
Pine mandrel turned to tightish fit, piece mounted on mandrel with a ply keeper plate to prevent take off.
Turned to rough shape with spindle gouge, rings turned then separated with two home made captive ring tools. Bottom of recessed channel finished with scrapers.
Remainder finish turned with spindle and another scraper, except the grooves in the ends which were done with a skew, then sanded all over.

Inner surface finished with melamine lacquer, all outer surfaces finished with two coats of microcrystalline wax, then buffed on a wheel.

DSCF6583.jpg


DSCF6574.jpg


DSCF6576.jpg


DSCF6579.jpg
 

Attachments

  • DSCF6583.jpg
    DSCF6583.jpg
    68.6 KB
  • DSCF6574.jpg
    DSCF6574.jpg
    88.1 KB
  • DSCF6576.jpg
    DSCF6576.jpg
    103.1 KB
  • DSCF6579.jpg
    DSCF6579.jpg
    92 KB
Status
Not open for further replies.
Back
Top