cornucopia
Established Member
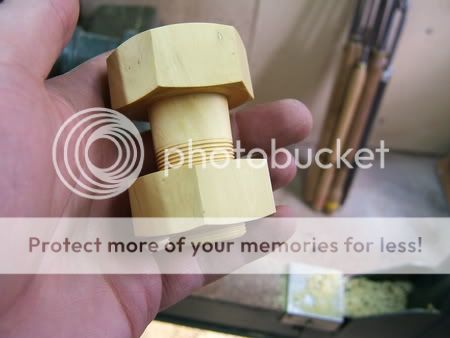
here is how I did the nut and bolt box
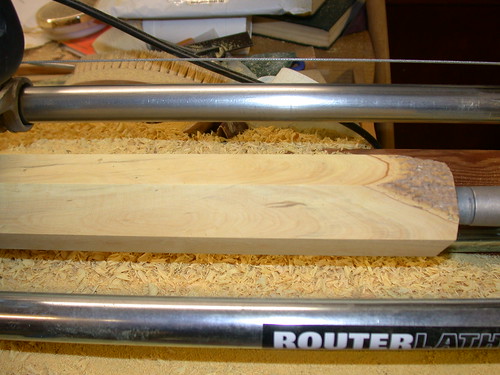
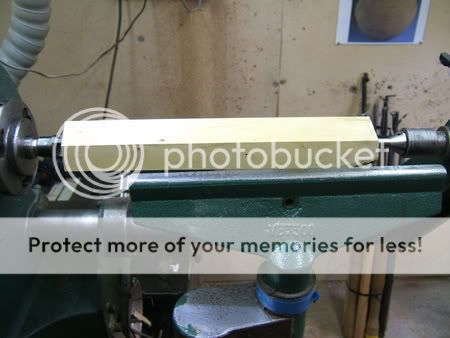
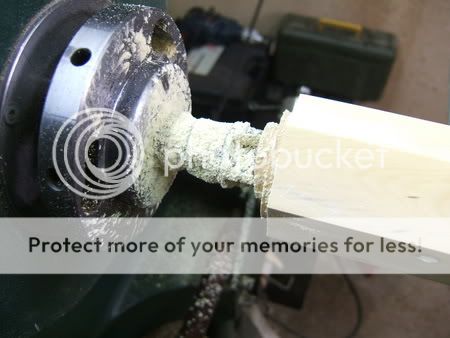
first of I mounted the wood between centres in dave's centre holes (a huge help thank you)
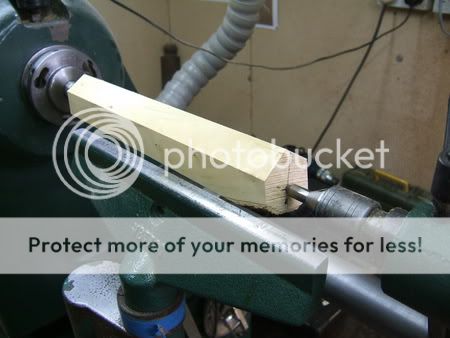
here is my rough marking out of proportions

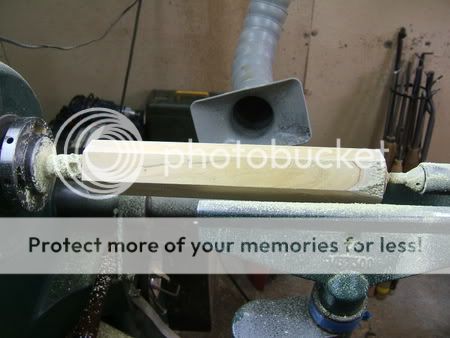
here you can see the results of me hand sanding the blank- i used a wooden block, i started at 120 and went through to 600 by which point the boxwood was like glass.
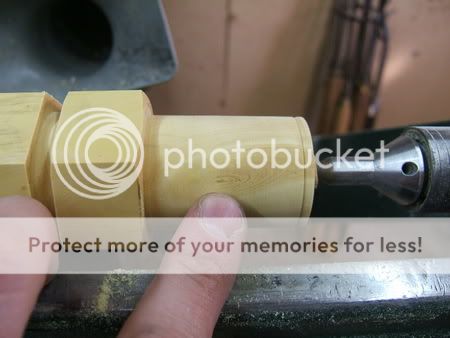
here i have made the basic cuts defining the nut and bolt shape
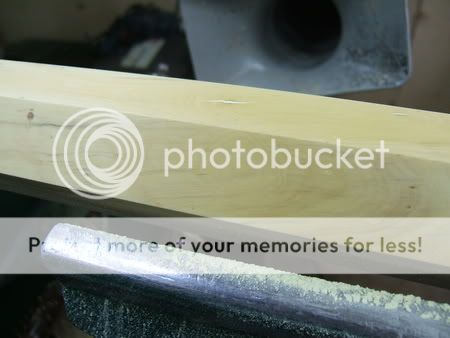
here is the pith- will it cause me a problem? at this stage i don't know-but i was thinking thats a long length of male thread to chase :-k
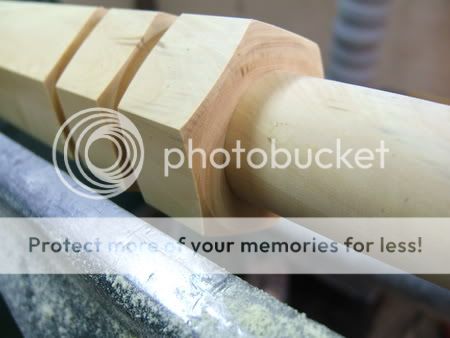
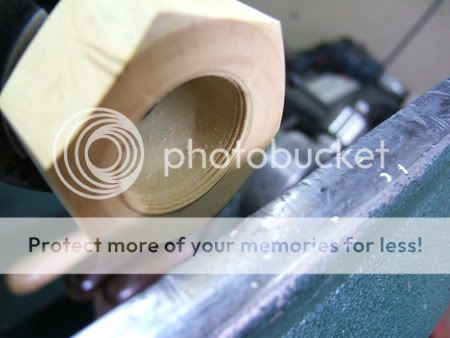
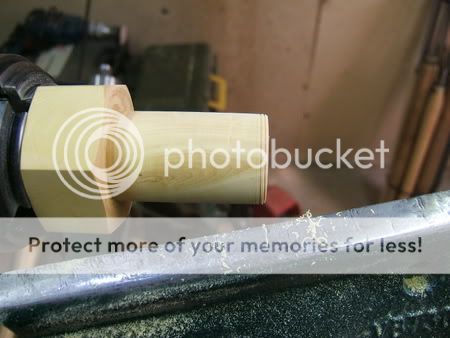
bolt head definition
a slight hiccup here a si needed to make a dovetail spigot to fit my o donnel jaws but i hadn't allot of room- so i found a old parting tool which i got free with my first clarke lathe and ground a skew on the end of it- it worked perfectly.
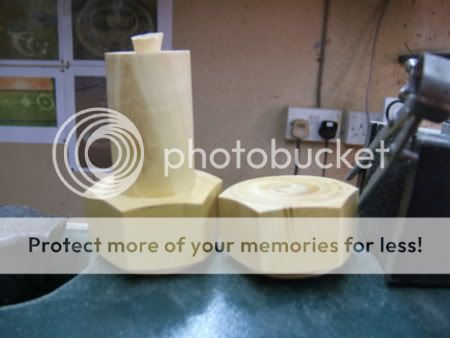
the two blanks parted of and ready to go
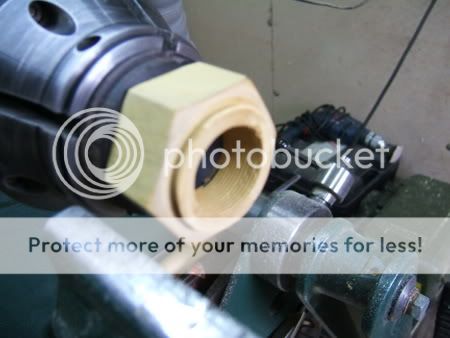
I tend to always do the female thread first- here it is mounted in my chuck jaws ready to go
i cut all the way through with a spindle gouge- at this point i was thinking thats a long female thread to chase will i be able to do it?

with the lathe at about 250rpm (this is the only time i ever care about what speed i am turning at- as it is vital with thread chasing) i have done the hardest part and started the female thread successfully- no double start etc
a few seconds later and a few more threads added
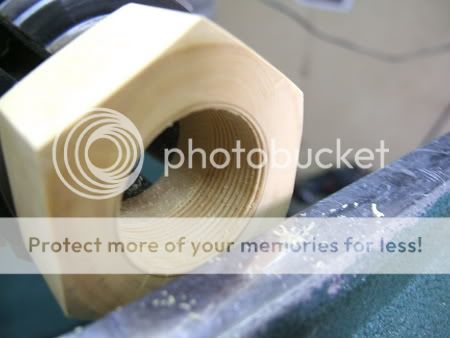
and here is the threads to full depth all the way through the nut- it started to get a bit difficult towards the back to get the thread smooth but this doesn't matter as it will be cut away later when its reversed.
out with the nut in with the bolt
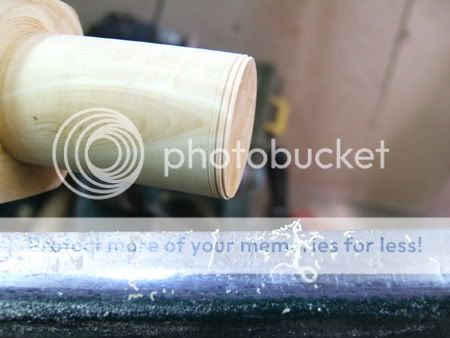
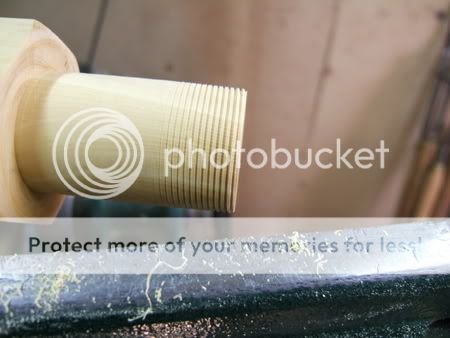
the start of the male thread
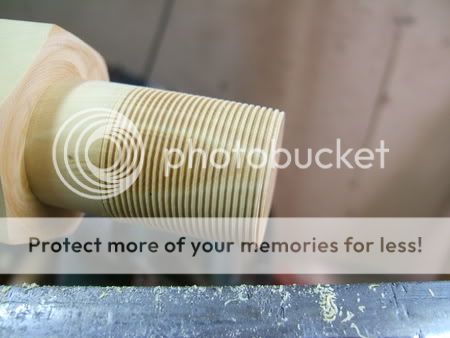
a bit more- by now the chaser is feeding itself in all you have to do is guide it.
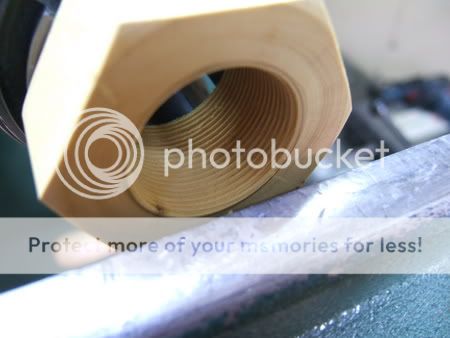
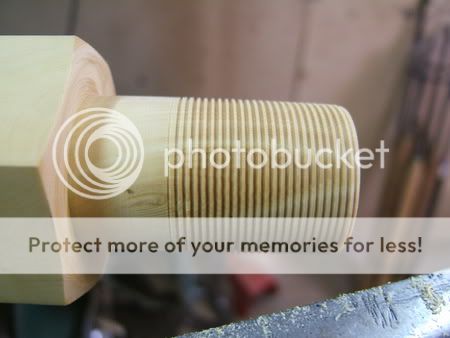
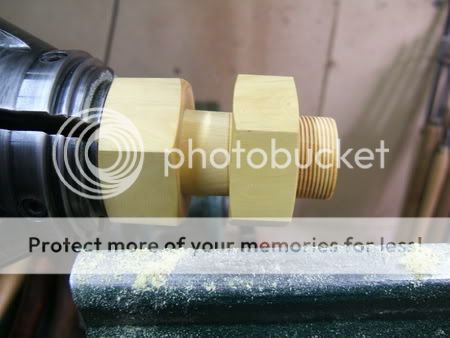
here it is complete- the nut fits but isn't screwing all the way on because of that ragged bit at the back, so i take a risk and take the bolt out of the jaws to sort out the nut- note to self if i ever make another one remember to do this earlier :roll:
heres a blurry pic of the nut threaded onto a waste block of african blackwood, so that i can clean up the back side
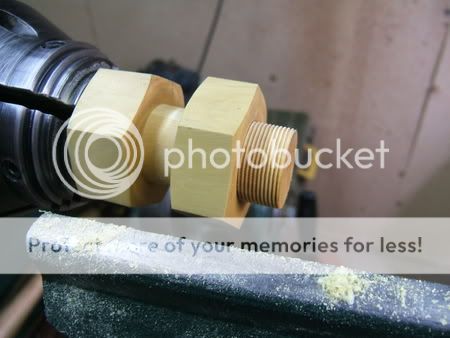
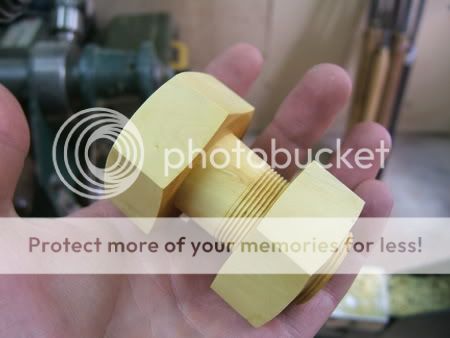
much to my relief with the nut cleaned up and a little more chasing on the bottom end of the male thread it screws on and of the entire length a great feeling.
i reverse turned the bolt to remove the chuck marks by wrapping the thread with masking tape and gently holding it in the central part of my chuck jaws- it worked a treat
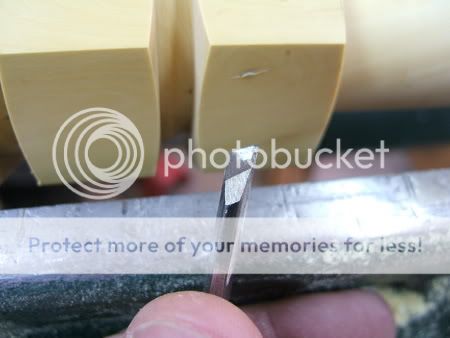
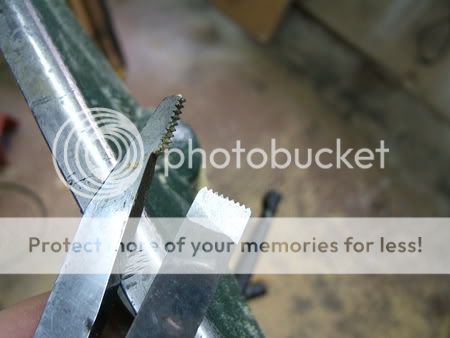
the chasers
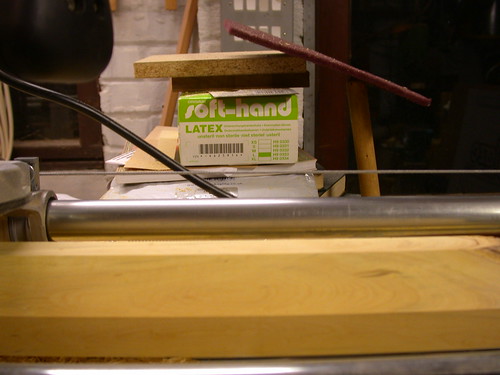
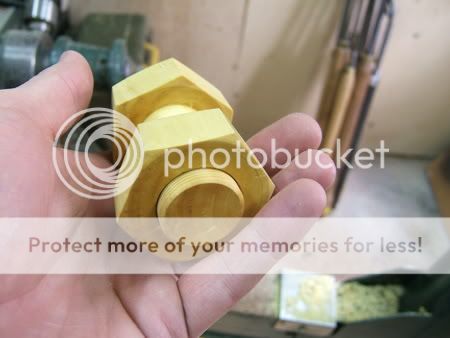
for now i've treated it with lemon oil to protect it- i usually polish my threaded box's with the u-beaut system but I don't think this lighter coloured boxwood will look good shiny so i'll have to think about an alternative finish :-k
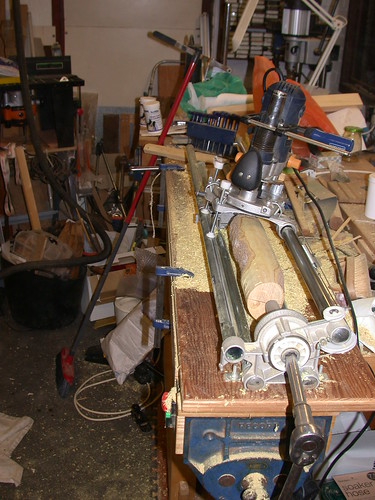
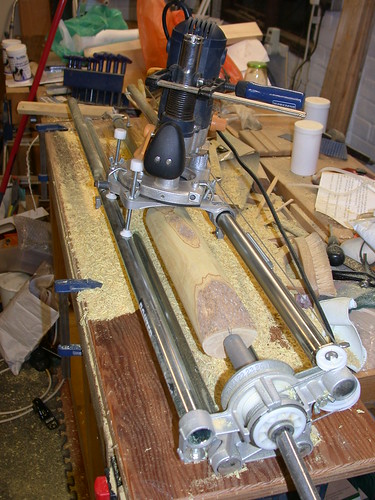
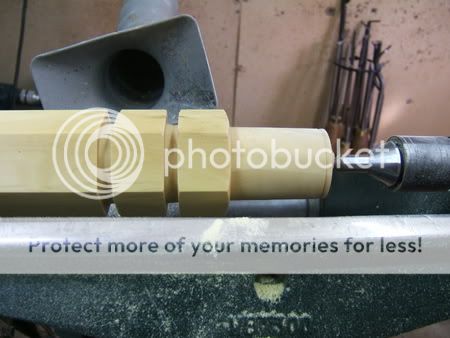
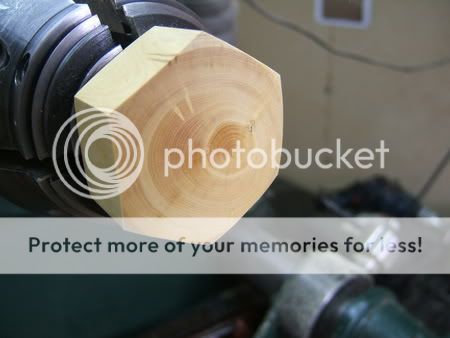
A big thankyou to DaveL for cutting the hexagonal blank on his router thing so accurately =D>
first of I mounted the wood between centres in dave's centre holes (a huge help thank you)
here is my rough marking out of proportions
here you can see the results of me hand sanding the blank- i used a wooden block, i started at 120 and went through to 600 by which point the boxwood was like glass.
here i have made the basic cuts defining the nut and bolt shape
here is the pith- will it cause me a problem? at this stage i don't know-but i was thinking thats a long length of male thread to chase :-k
bolt head definition
a slight hiccup here a si needed to make a dovetail spigot to fit my o donnel jaws but i hadn't allot of room- so i found a old parting tool which i got free with my first clarke lathe and ground a skew on the end of it- it worked perfectly.
the two blanks parted of and ready to go
I tend to always do the female thread first- here it is mounted in my chuck jaws ready to go
i cut all the way through with a spindle gouge- at this point i was thinking thats a long female thread to chase will i be able to do it?
with the lathe at about 250rpm (this is the only time i ever care about what speed i am turning at- as it is vital with thread chasing) i have done the hardest part and started the female thread successfully- no double start etc
a few seconds later and a few more threads added
and here is the threads to full depth all the way through the nut- it started to get a bit difficult towards the back to get the thread smooth but this doesn't matter as it will be cut away later when its reversed.
out with the nut in with the bolt
the start of the male thread
a bit more- by now the chaser is feeding itself in all you have to do is guide it.
here it is complete- the nut fits but isn't screwing all the way on because of that ragged bit at the back, so i take a risk and take the bolt out of the jaws to sort out the nut- note to self if i ever make another one remember to do this earlier :roll:
heres a blurry pic of the nut threaded onto a waste block of african blackwood, so that i can clean up the back side
much to my relief with the nut cleaned up and a little more chasing on the bottom end of the male thread it screws on and of the entire length
a great feeling.
i reverse turned the bolt to remove the chuck marks by wrapping the thread with masking tape and gently holding it in the central part of my chuck jaws- it worked a treat
the chasers
for now i've treated it with lemon oil to protect it- i usually polish my threaded box's with the u-beaut system but I don't think this lighter coloured boxwood will look good shiny so i'll have to think about an alternative finish :-k
A big thankyou to DaveL for cutting the hexagonal blank on his router thing so accurately
=D>