No5 Jack How much is too much

UKworkshop.co.uk

Help Support UKworkshop.co.uk:

This site may earn a commission from merchant affiliate links, including eBay, Amazon, and others.
One small thought - if you do end up deviating from 'dead flat', then it's better to end up slightly (with the emphasis on 'slightly') convex rather than concave. For a jack plane, that'll be no problem - the sole by the mouth will still contact the wood. If it's concave, the sole of the plane won't be in contact with the wood at the front and back of the mouth, so the iron will have to advance more than is needed for a given depth of cut, and there will be nothing to control breaking-out ahead of the iron, thus making any tear-out problems almost impossible to overcome with that plane.

For a try plane and for a smoother, VERY slight convexity would be tolerable, though the nearer 'dead flat' the better.
 
I did give it another hour or so today with the 60 grit again. I had some 40 grit sandpaper but I thought if would just cut deep gouges rather than remove metal in a uniform manner. I may have just as well taken it out into the street and rubbed if on the Tarmac

.
To be honest, I didn't seem to make much of a difference today, possibly due to the issues highlighted by Bugbear?? I was concerned a little with the co planer state of the sole mentioned by CC earlier. So not having much sauces with the 60 grit I pulled a large cross cut file and set about it , probably too much. I set about it too vigorously but it did identify the sole was also slightly concave. I thought removing the high points from the edges would allow me to take it back to the 60 grit, which was placed on the TS as a reference surface.

I had mixed feelings. The hand filing did remove much of the concave (perhaps too much) but it left some heavy scratch marks. The sole now seems far more uniform across the whole,sole but the scratch marks from the file may take some more work to,remove. I will probably just improve this slightly in case I go beyond a flat sole. I have a couple of files with a less aggressive cut so I may take a little more time with those. If nothing else it has been a great learning process.

Thanks again for all the advice boys.

David
 
An hour is too long. With paper backed grit (flatter and cheaper) on a solid base (mdf faced chipboard will do) and a good flood of white spirit it shouldn't take long to get it flat. Keep it flooded and change the paper often but keep the old stuff as effectively a finer grade, though you will have more than you can use in the end.
 
Jacob can you give us a link ?

I've run out and need some more.

Strongest I've found is the sand paper from a belt sander.

(Fed up owner of a lumpy bronze casting)
 
Mr_P":8masczz3 said:
Jacob can you give us a link ?

I've run out and need some more.

Strongest I've found is the sand paper from a belt sander.

(Fed up owner of a lumpy bronze casting)
Google. It's very common. Try Halfords.
Belt sander paper is too thick and uneven - you need the cheapest paper backed stuff which lies very flat on a smooth surface. Don't stick it down (too bumpy) just wet it well and it sticks enough. Water or white spirit. Keep replacing it - unless you are happy to spend a lot of time saving the price of a new sheet (50p ish?).
It's one of those rare (?) circumstances where the very cheapest option is also the best.
 
Silly me .. I would give you the exact opposite advice to that provided by Jacob.

Sandpaper for metal is different from sandpaper for wood. For metal, a waterproof glue is used, the grit used is generally aluminium oxide, and the grit is arranged on the backing so that it does not clog up. All this means that the grit lasts longer, cuts faster, and swarf is more easily cleaned away.

I would also argue that used coarse sandpaper is not "smoother". Sandpaper for smoothing has smaller and more grit. All that happens with coarse grit as it gets used is that the grains round over. It is more likely to polish than sand.

My advice is to get the appropriate sandpaper, rather than just aim for cheapest. For small sections that need only a small amount of work it really does not matter what type of sandpaper is used. However, when it must last longer and cut faster, then it does matter. Then I always glue mine down to avoid it moving, such as curling up, which will dub edges.

As tempting as it seems, I do not start below 80-100 grit. The grit from 60 leaves deep scratches. I could not imagine jumping to 400 from there. If I used 60, I'd next go to 120, and then 240.

Regards from Perth

Derek
 
I would spot grind (by hand) the high spots with emery cloth which most certainly is meant for metal working. It starts at 40 grit or so.

Once you get it close to flat from having knocked down the high spots then practically any sandpaper will do and the thinner the better for polishing out the entire sole. Or continue on with emery paper, 3M is your friend:

http://www.3m.com/product/information/E ... Paper.html

Emery cloth:

http://www.amazon.com/3M-03008-Emery-Cl ... B000FP8HUU

http://en.wikipedia.org/wiki/Emery_cloth
 
There's a culture clash between tool polishers on the one hand and tool users on the other.
You can be both but if you don't want to waste your time polishing you don't have to.

This is for users only (polishers just ignore the following):

A coarse grit will do it all, 100 or less.
Thin paper lies flattest and doesn't need sticking down - it'll stick enough with white spirit or water, on a flat impermeable surface (I use my planer bed).
Is also is cheaper, which doesn't deter you from binning it sooner rather than later and getting the job done quicker. Flood the surface.
One grit will do - the plane will be a bit snatchy at first but the sharp edges of the scratches soon get blunted and the become low friction i.e. you loose the tops of the ridges but the furrows remain.
You can speed this up by going straight to a fine grit say 400 - a very quick pass just 30 seconds of rubbing - still well flooded with white spirit or water
For a long plane use two sheets.

PS and cloth backed grit is completely the wrong material for flattening operations. The cloth back is for strength on belt sanders, flexible ROS bases, or for application to rounded surfaces (car bodies etc) - all non flat activities. So spot grinding (above) is OK but not for "flattening".
 
Sandpaper for metal is different from sandpaper for wood. For metal, a waterproof glue is used, the grit used is generally aluminium oxide, and the grit is arranged on the backing so that it does not clog up. All this means that the grit lasts longer, cuts faster, and swarf is more easily cleaned away.

I would also argue that used coarse sandpaper is not "smoother". Sandpaper for smoothing has smaller and more grit. All that happens with coarse grit as it gets used is that the grains round over. It is more likely to polish than sand.

My advice is to get the appropriate sandpaper, rather than just aim for cheapest. For small sections that need only a small amount of work it really does not matter what type of sandpaper is used. However, when it must last longer and cut faster, then it does matter. Then I always glue mine down to avoid it moving, such as curling up, which will dub edges.

As tempting as it seems, I do not start below 80-100 grit. The grit from 60 leaves deep scratches. I could not imagine jumping to 400 from there. If I used 60, I'd next go to 120, and then 240.

Regards from Perth

Derek

This.
 
Jacob":3ct6njil said:
There's a culture clash between tool polishers on the one hand and tool users on the other.
You can be both but if you don't want to waste your time polishing you don't have to.

This is for users only (polishers just ignore the following):

A coarse grit will do it all, 100 or less.
Thin paper lies flattest and doesn't need sticking down - it'll stick enough with white spirit or water, on a flat impermeable surface (I use my planer bed).
Is also is cheaper, which doesn't deter you from binning it sooner rather than later and getting the job done quicker. Flood the surface.
One grit will do - the plane will be a bit snatchy at first but the sharp edges of the scratches soon get blunted and the become low friction i.e. you loose the tops of the ridges but the furrows remain.
You can speed this up by going straight to a fine grit say 400 - a very quick pass just 30 seconds of rubbing - still well flooded with white spirit or water
For a long plane use two sheets.

PS and cloth backed grit is completely the wrong material for flattening operations. The cloth back is for strength on belt sanders, flexible ROS bases, or for application to rounded surfaces (car bodies etc) - all non flat activities. So spot grinding (above) is OK but not for "flattening".

I have just been using the sandpaper dry, tearing off a section from a roll, placing it on the table top of my saw, simply holding the roll with one hand will flattening one handed. I'll try your advice with the white spirit. I don't wan to use wsater on my cast iron table top.

Thanks for the advice fellahs.

David
 
Bluekingfisher":1p66s2z5 said:
Jacob":1p66s2z5 said:
There's a culture clash between tool polishers on the one hand and tool users on the other.
You can be both but if you don't want to waste your time polishing you don't have to.

This is for users only (polishers just ignore the following):

A coarse grit will do it all, 100 or less.
Thin paper lies flattest and doesn't need sticking down - it'll stick enough with white spirit or water, on a flat impermeable surface (I use my planer bed).
Is also is cheaper, which doesn't deter you from binning it sooner rather than later and getting the job done quicker. Flood the surface.
One grit will do - the plane will be a bit snatchy at first but the sharp edges of the scratches soon get blunted and the become low friction i.e. you loose the tops of the ridges but the furrows remain.
You can speed this up by going straight to a fine grit say 400 - a very quick pass just 30 seconds of rubbing - still well flooded with white spirit or water
For a long plane use two sheets.

PS and cloth backed grit is completely the wrong material for flattening operations. The cloth back is for strength on belt sanders, flexible ROS bases, or for application to rounded surfaces (car bodies etc) - all non flat activities. So spot grinding (above) is OK but not for "flattening".

I have just been using the sandpaper dry, tearing off a section from a roll, placing it on the table top of my saw, simply holding the roll with one hand will flattening one handed. I'll try your advice with the white spirit. I don't wan to use wsater on my cast iron table top.

Thanks for the advice fellahs.

David
it's the thin A4 sheets which stick down (enough) with white spirit alone. Too thick and it might not stick. Try it.
 
I clamp my abrasive down and stretch it tight, if you don't it forms a wrinkle just ahead and behind the plane as you push it, this causes a the front and rear edges to round over.
I found this out the hard way.
My set up.


Pete
 
The key to all of this is to spot grind the high spots (with the abrasive around a small block) before attempting to lap the entire sole. You have to get it pretty close before moving to the stage where the abrasive is attached to one's flat substrate of choice. Otherwise, a banana is almost the sure result.

Only when the plane is both concave from end-to-end and either concave or dead flat from side-to-side does it really make sense to go straight to the lapping table, and then you still have to be very careful.

If the plane has irregular bumps, swales, and twist you have to methodically knock the high spots down before lapping it out.

And if it's really bad, as in the OP's plane, it might make more sense to scrape the sole:

http://www.amgron.clara.net/plane%20sol ... 20105.html
 
The best way to flatten the sole of a cast iron plane is to scrape it. Mark the high spots on a lapping plate with lapping fluid, and then scrape these away. Redo ... and redo ... and redo ... until there are no further high spots.

If you are not looking for precision (woodworking is not metal working, and all that), then sandpaper on a flat surface is the next best thing. Two points to keep in mind: (1) the substrate for the sandpaper must be flat, and the sandpaper must be flat on the flat substrate. There is no point in lapping on a sandpaper that is not flat. Keeping it flat is the job of a thin, even coat of sprayed contact glue. Use a medium tack glue that can be scraped off when so needed. Holding the sandpaper down with water or anything that evaporates is just not good enough. Long lengths will curl at the edges, or lift as you push on them. (2) Technique is important. Lapping is not the same as sanding. If you try and sand the plane on the flat substrate, you will rock it and cause the sole to turn into a banana (that's how mine was). You have to push down on the plane as you simultaneously push it forward-and-back. Find a position where the load is spread along the whole length.

As I mentioned earlier, sandpaper for metal abrading is different from that used for wood. Charles gave it a name, emery cloth. That is one form (it comes in long roles). Another is A4 sheets on a fabric backing. That's the one I can get, in 100 grit. I cut it into sections and contact glue it to the substrate. It is flat, flat, flat.

You can re-use the contact glue on the substrate several times. No need to scrape it off.

Before I acquired the current substrate, a 3' x 4" section of 1/2" granite, I had a similar section of glass. I also experimented with belt sander belts (removing the join area). These work OK, but not as good as emery paper.

Lappingboard.jpg


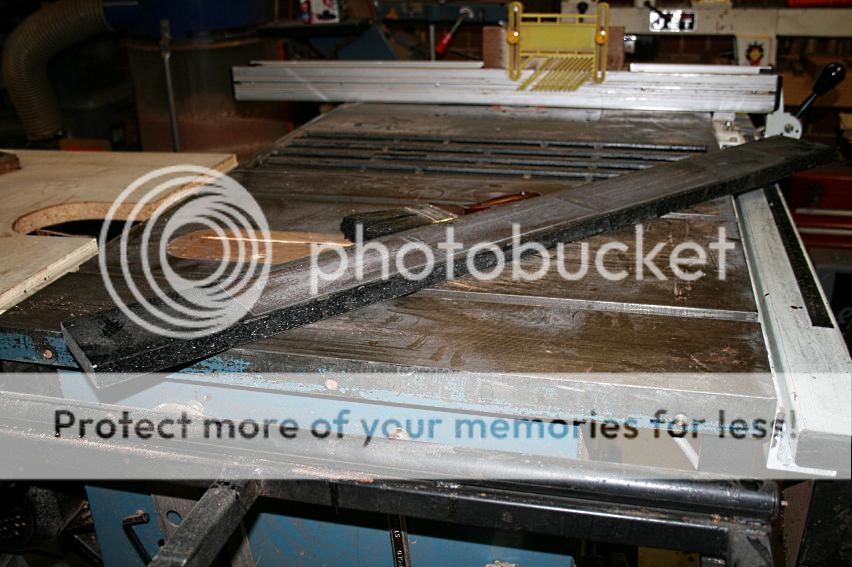
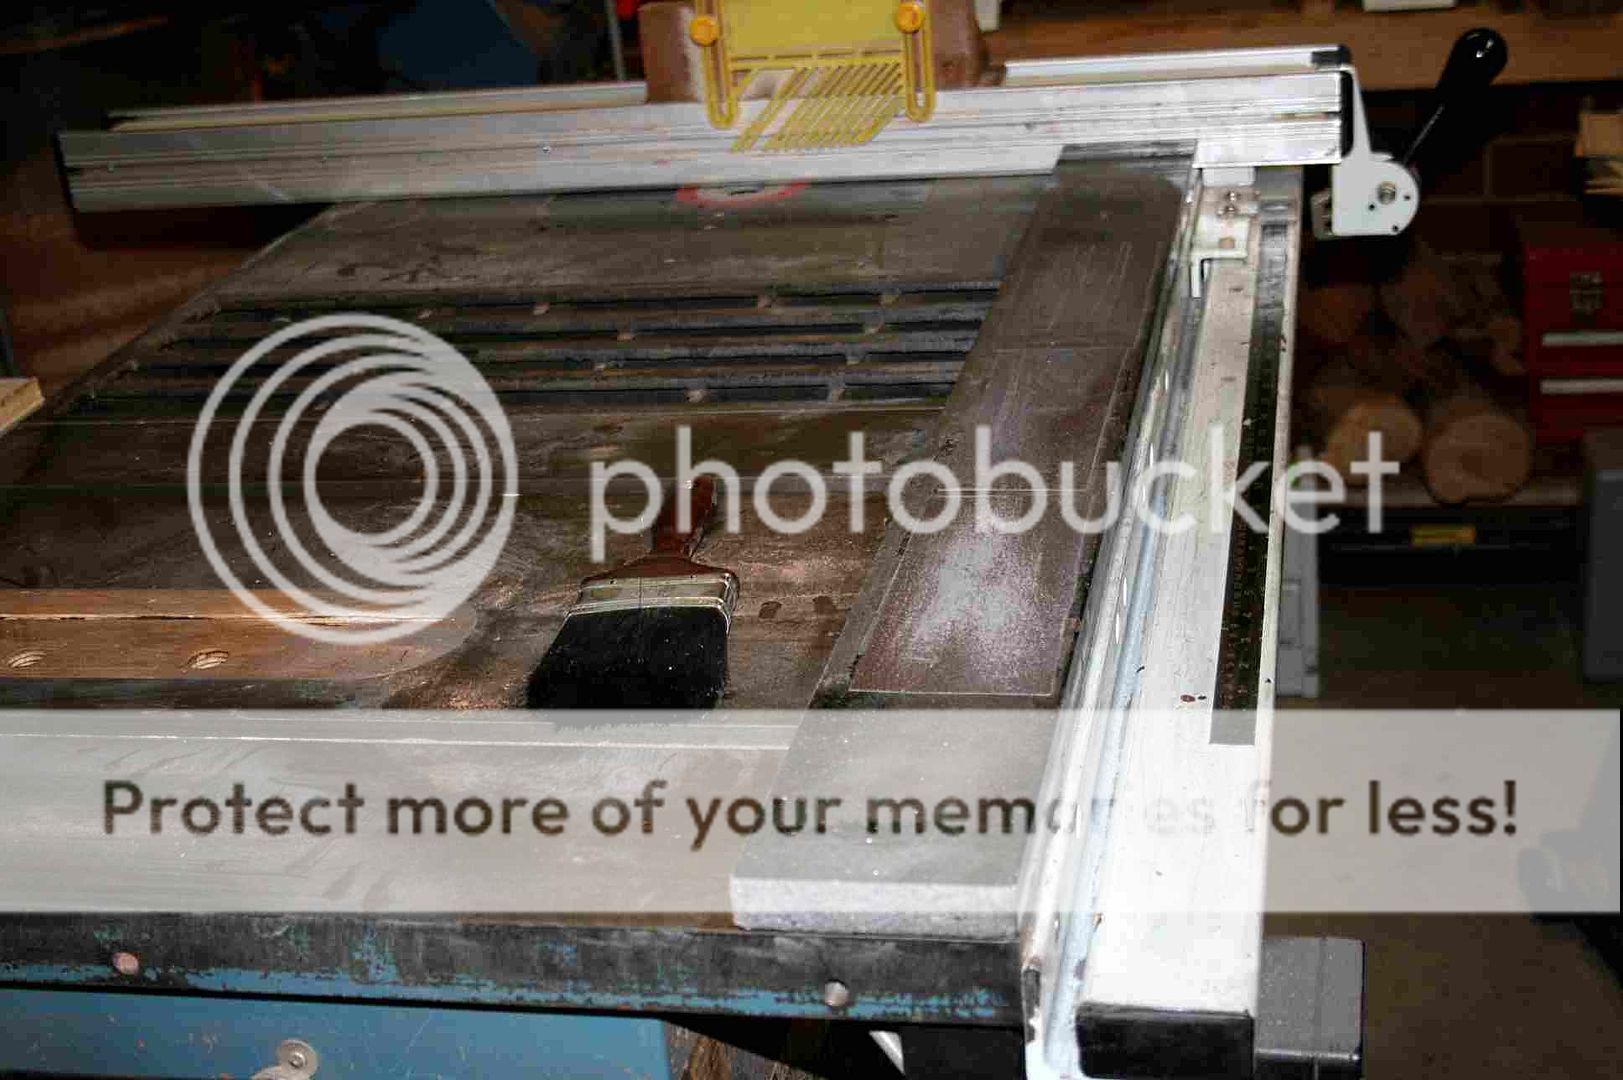
Here is the granite:

lapping1_zpsb971aa60.jpg


I simply rest it on the tablesaw when it is used. Afterwards it stands in a corner.

lapping2_zpsa34dedaa.jpg


The paint brush is to brush away any swarf.

Glue it down to a flat substrate. Use the appropriate sandpaper. Watch your technique.

Regards from Perth

Derek
 
You're right about scraping but one can use spot sanding as a proxy.

The main point is not to start at the lapping table which is where the whole mess will almost always go from bad to worse if the plane has anything but the most minor irregularities, i.e. it probably didn't need treatment in the first place.

Most people start at the lapping table assuming that a flat substrate makes the process fool-proof. It doesn't, by a long shot. One has to be able to unerringly identify high spots. If there is any confusion about where the plane's sole is actually high then failure is the likely result.

My main point is this: all of this can actually be done, and should be done, without lapping at all. Or if lapping is done it's more of a high-grit polishing operation at the tail-end of it all.
 
CStanford":clgz4i3y said:
You're right about scraping but one can use spot sanding as a proxy.

The main point is not to start at the lapping table which is where the whole mess will almost always go from bad to worse if the plane has anything but the most minor irregularities, i.e. it probably didn't need treatment in the first place.

Most people start at the lapping table assuming that a flat substrate makes the process fool-proof. It doesn't, by a long shot. One has to be able to unerringly identify high spots. If there is any confusion about where the plane's sole is actually high then failure is the likely result.

IME, plane sole errors are either overall curves (and convexity is hard to remove) or localised wear (i.e. localised low spots).

I don't think I've seen a plane with localised high spots, which would be very easy to remove of course.

BugBear
 
..... Holding the sandpaper down with water or anything that evaporates is just not good enough.
Yes it is - if the paper is thin and the table flat and impermeable. You don't leave it to evaporate - you do the job and then put it away
Long lengths will curl at the edges, or lift as you push on them.....
No they won't - if the paper is thin and the whole kept well flooded with white spirit (or water if you aren't using your planer!). Helps if you store your paper flat between boards.
I see why you are confused - it's not like glue you don't leave it in situ - you wet it, do the job, put it away.
Try it and see.
I don't make this bolox up you know! I've done several plane soles this way. If I have to do another I'll do it the same because it is quicker, simpler, cheaper and faster than all the other hand methods I've tried or seen described. And the finish from 80 grit is perfectly OK once the sharpness has gone or been eased.
 
CStanford":2fils26z said:
The use of engineer's marking blue might convince you otherwise about the irregular bumps and swales.

If you're talking to me, I'm semi notorious for my advocacy of a print-cut approach using surface plate and prussian blue.

I know whereof I speak.

BugBear
 
Back
Top