New workshop build, with a difference!

UKworkshop.co.uk

Help Support UKworkshop.co.uk:

This site may earn a commission from merchant affiliate links, including eBay, Amazon, and others.
Hello Kirk,

You are reading correctly. As it's not fixed, it can be slid back so the clabbords go over the front. This makes marking easy.
Then at night we pull it forward and clamp a sheet of polythene over the ring to keep the rain out.
It really is a slow job, or maybe it's us :D We are one level below the top of the ring now and ran out of pre painted board.
So we had a frantic painting session as the light failed, and then realised we hadn't cut any kindling for the fire. There's nowt like forward planning.
Ahh, translation needed perhaps; 'nowt' is Yorkshire dialect for 'nothing.' Although you probably knew that. :roll: :roll:
What is it they say 'two countries divided by a common tongue.' :lol: :lol:

We were discussing sealing the window tube to insulation gap, and where the window fits tight at the centre between the battens (as water would be trapped there). And I said that I would shape the foam out to the front to divert any water. I then got one of those 'so why exactly did I marry this dunderhead' looks - I'd forgotten about the front ring. What a dope.
So now I have the unenviable task of wrapping the ring in poly' and trying to foam it, but be able to remove it afterwards. I will have to experiment and see if it will work, or whether I will have to put some kind of release agent on the poly. Perhaps silicone spray would work ... or just old fashioned grease?
And to think that all you folks out there reading this thought that this build was well planned and executed, down to the last detail :roll: :D :D :D

Regards....Dick.
 
Keep it up, loving every update, is a really interesting project.

I am thoroughly enjoying reading of your efforts. The actual build is wonderful. You have created a truly beautiful building.

Mick
 
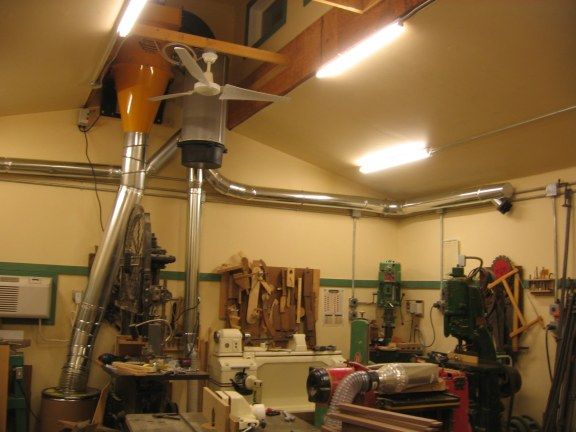
Dick, nothing is ever as easy if you're on a ladder. For instance, it took about 4 hours to get my new cyclone assembled and installed because it's mounted way up on a wall:
hoist4.jpg

And that was with three people working.

I've been following the window in a tube issue and haven't been able to visualize it very well. By my understanding, you're going to put the window into the tube, seal around it, and install the tube itself. You're worried about water pooling on the level tube surface outside the window--correct? Or are you more concerned with water getting in at the junction of the clapboards and the outer ring?

If the former is the main concern, I'd build up a layer of sealant in the bottom of the ring so that there is some slope from the window surface to the front edge, and the water will tend to run out. If the latter, how about adding some thick foam weatherstripping to the inside (shop-facing) edge of the ring? When you press the ring into place, the foam will compress and (theoretically) forming a tight seal. You can caulk it after it's in place, but it shouldn't take much.

Oh, I've seen "nowt" before. In Tolkien, I think.:)

Kirk
 
Hello Mick,

Thanks for the continuing support. I still can’t believe that so many people are enjoying this; I must be doing something right. :shock: :D :D

Hello Kirk,

Whilst I understand the old saying that ‘everything in America is bigger’ did you have to buy a cyclone that is as tall as you are? :D :D :D
No wonder it was difficult to fit. =D> =D>

If you look back to Pg24, note where the tube is actually squeezed between the clapboard battens. That is the ‘pinch point’ I was concerned with. Normally, with this design of building, as recommended by Jo Lstiburek, the pre-eminent building scientist in the USA, the idea is to design as if the clapboard will let some water by, but make the next building face as watertight as possible. This way, it will act as a drainage plane, and the free air movement will dry it out later. By butting the window tight to the battens, I have stopped the downwards free flow of the water. Why it didn’t occur to me at the time of sizing the window goodness only knows. It’s not as if I haven’t read Dr. Joe’s pearls of wisdom many times. Anyone interested in building science can find him at http://www.finehomebuilding.com or http://www.buildingscience.com

So, having pontificated about this problem, what did this numbwit do. He carried on cladding - because he is impatient by nature. Thus covering over the problem area and making rectification ten times harder ..... I despair of me sometimes. I could of course remove the cladding; we tried that earlier in the project. It wrecks the board; those ring shank nails are good......unfortunately.
My task now is to scorp out enough of the battens to create a free running waterway between the tube and the batten .... from the side. :shock:
Had the cladding not been there, I could have used my trusty Fein to easily remove enough material, literally, in minutes. This tool was horrendously expensive at the time,
but it has dug me out of the ordure many times. I would highly recommend them, if you are as thick as me. I could still use it edge on I suppose, and then clean the chipped surface after, perhaps with a sharp chisel? I don't need anywhere that the wood can easily absorb water.

No self respecting tradesman would divulge the fact that he is an incompetant buttocks :shock: , but I feel that it is my duty to report this build with honesty - warts and all, so that no one else will make the same mistakes.....maybe.

Well, now is the winter of my discount tent, it’s time to go and sort out the up cock.

Regards...Dick.

Doh! I forgot to mention to Kirk about the pooling in the bottom of the tube. This is something that is a concern, but we will adopt a suck it and see approach.
The overhang is large so it may not be a problem, if it is, we will address it later. :roll:
 
If I understand it you are concerned about the ring being tight to the battens and with cladding in place it is not easy to alter the battens.... If that is so can you not just plane a small flat each side of the tube to provide clearance when the whole thing is assembled? As the ring slides in and out at the moment it may be easier.

Graham
 
Hello Graham (Boatfixer),

Welcome aboard, and thanks for a very practical idea.
Unfortunately, the ring for this end is assembled, that is, the end overlapping circle that covers the cladding cuts is already glued on. See pic Pg24.
I do have a rabbet plane though.....hmmm.
The only downside that I can see is that it would be like slicing an onion, cutting through the layers would weaken the structure maybe? Food for thought and thanks once again for the input.

Regards...Dick.
PS. Now if I had a convex rabbet plane.........
 
That high up under the overhang I would not think you are talking about much water if any at all getting behind the cladding so you don't need a huge clearance. Just a couple of shallow cuts with a saw and clear between them with a sharp chisel then paint to seal? You really won't be affecting the structural strength to any major degree.

Regards
Graham
 
OK, I see now.

How about using a router with a guide bushing and straight bit and running it along the edge of the ring through the pinch point? It will cut most of the batten away at that point and leave a downward channel. You can cut & fit an arc-shaped piece of scrap to fill the cut away clapboard. As long as you don't hit any nails, you should be fine.

Kirk

Oh, since you have the ceiling space, you'll probably want to put your dust collector up high too. It really saves space. Of course, you need to do it before you sell your scaffolding.
interim_stop.jpg
 
Hello Graham,

If only I could have got a saw in there! Between the overhanging cladding, and not wanting to damage the insulation any further, I couldn’t get a saw in there. So it was chisel the worst and then use the Fein with the masonry curved blade to shape, and finish with some sandpaper. Typically, having finished, I remembered that I have some small 12mm wide wood blades for the Fein, so I could have made the cuts after all. It would have made the job a lot easier, as the grain was all over the place, and there were several knots.
If only I had a memory, I wouldn’t get into these pickles. :wink: :wink:

See the finished job before applying some finish. Just enough gap to allow any water to run down. I hope.

p1010199u.jpg


p1010200x.jpg


Hello Kirk,

I could just see me doing that with a router, the next report would have been from my hospital bed, whilst I waited for them to re-attach the parts of me that I had routed off in the process. The idea was good, but not with me doing it. #-o #-o

Good grief, no wonder it took so long, and off a ladder...not fun. That looks a tight fit, considering that people had to be in that space as well.
Now we know why you fitted clerestory windows :) :)

That is an interesting word; you would call it clere story(or clearstorey), over here it is cle res tory, with the accent on the res. I think that in this case, you folks have it right, especially with the clear spelling. Because the opposite of a clearstory or storey, is a blindstory or storey...a wall or storey without windows, usually relating to a church.

Why am I cursed with remembering useless information, but forget to leave a gap in the rain screen .... It drives me mad...grrrr.

I can just see that in the roof; every time I fired it up, the entire shop would start to vibrate.
And the whole frame would start to resonate until it hit harmonic unison ( like soldiers marching over a bridge - ‘break step’ as they used to say), at which point it would implode, probably with me in it. I am considering making an attached ‘outhouse’ or sentry box, to house the extraction. But that’s for later.
 
Sorry, but I am a bit confused.

Is the idea to slide the widow with frame into that tube from the outside so there is (Don't know what to call it) 'architrave' overlapping the feather-edge, then sealing behind the 'architrave' to stop water getting behind the boards?

Or

Should I just be patient and wait for the photo's?

Mick
 
Morning Mick,

Disclaimer.
Let me assure you, no widows will be harmed in the fitting of this window. :shock: :) :)
Sorry Mick, I just couldn’t resist it...... French widows in every room ....Gerard Hoffnung rules. =D>

I have two tubes, one plain, or unfinished, and the other, with its architrave/overlap ready finished (bar the shouting). The first tube is used as a means of marking the cladding for the curved cuts. The finished one will then be finally fitted into the hole from the outside. The architrave, for that is what it is I suppose - just a curved version, will sit against the peaks of the featheredge cladding. There is no way that the created gaps behind could be sealed (without an alarming amount of caulk or gasketing, which would leak in the end and probably look awful) so the idea is to accept some leakage and create an efficient drainage plane behind, as I have mentioned before.
Whilst language is a wonderful thing; in this instance, a picture or drawing, would be far more clear. I hope that what I have written makes some sense. Don't ever be afraid to ask again if not.
I always adopted the stance of 'there is only a bad teacher' when I had an apprentice. I felt that it was my job to find a way to explain the 'ways of the electron.' Not an easy task. Start with single and two way switching, and if that went well, move on to star/delta starting and the like; these days it would be an inverter.

Regards....Dick.
 
Are you trying to tease the rest of us with the little glimpses of the inside of your workshop that we have just had through the round window (Starting to sound like Play School now!)

More pics please so we can go green with envy again!
 
Hello flying haggis,

That was just what we needed; we did have a good giggle :) :) =D>
We have been freezing our butts off trying to fit the last few layers of cladding, and we have got to the difficult (for us) cuts where one or two millimetres make a big difference - the angled cuts against the roof. At the same time, the top insect mesh has to be accomodated, and that's a fiddly job as well :wink:

Now we can't have envy here :shock: it's very unwoodworkerly. :mrgreen: :mrgreen: :evil: :) :)
Besides, the inside of the shop looks like the back end of a tram smash at the moment. And don't forget that the inside is still naked :oops: :) as I still have to add further insulation and then clad it. You will just have to learn the Virtue of Patience, or sit on the Naughty Step....
I suppose that is something else on the list of things to make :D :D

Regards...Dick.
 
I think i can help you out on your worries about a tight seal.

I have been looking into expanding polyurathane self adhesive strips. these are attached and then can expand up to 50mm or even more to give a weather tight seal. that would do you perfect, it will follow the contours of your shiplap perfect

Here is the link

http://expandingfoamtape.co.uk/gap-size-10-18-mm
 
Hello chris,

Thanks for the link, that would do the job well.
It's a pity that they don't do it in green......or should it be white? :lol: :lol:

Regards....Dick.
 
Hi folks,

Not much to report this time; we’ve been travelling - up the M6 and over to Edinburgh.
A far easier journey than we expected and beautiful scenery. :) Then down the other side of the country to York; through the blizzards,...oh joy. :(
Then back home across many motorway junctions......With a satnav that is out of date, so we bought a new, fully manual map. :roll: :wink:
We enquired about the cost of a new disc :evil: :evil: Strewth, they are expensive. It would be cheaper to buy a Tom Tom or the like.

So, we have now fitted the last pieces of cladding round the circular hole.
I left the insulation in this time, in case I overexcited flying haggis :mrgreen: :mrgreen:
The window circle has been painted again and will require one more coat, then it’s assembly/fitting time ... at last.

circularcladding.jpg


That’s all for now.

Regards....Dick.
 

Latest posts

Back
Top