New Plane...curved sole

UKworkshop.co.uk

Help Support UKworkshop.co.uk:

This site may earn a commission from merchant affiliate links, including eBay, Amazon, and others.

woodbloke

Established Member
Joined
13 Apr 2006
Messages
11,770
Reaction score
1
Location
Salisbury, UK
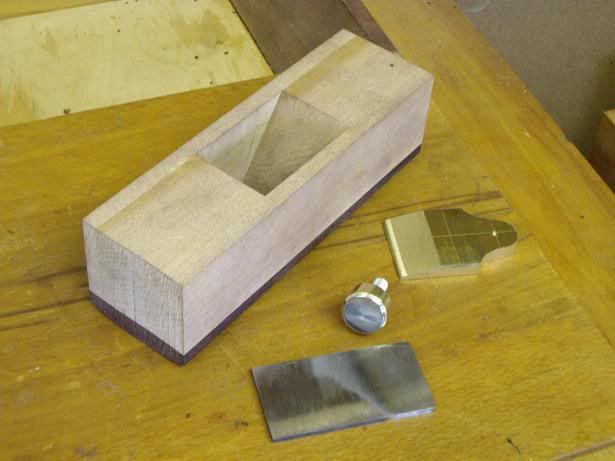
In order to do the shaping on my casket entered for the comp, I've had to make a special plane so a few WIP picis. This one is made in maple with a rosewood sole, single cutter set at 55deg, brass cap iron and Derek of Oz style bolt, with the iron secured with a couple of 4mm set screws to act as pivots in the sides. The maple's a bit grubby at the mo' as there's a lot of rosewood dust on it...final shaping yet to be done:
3we1r11r.jpg


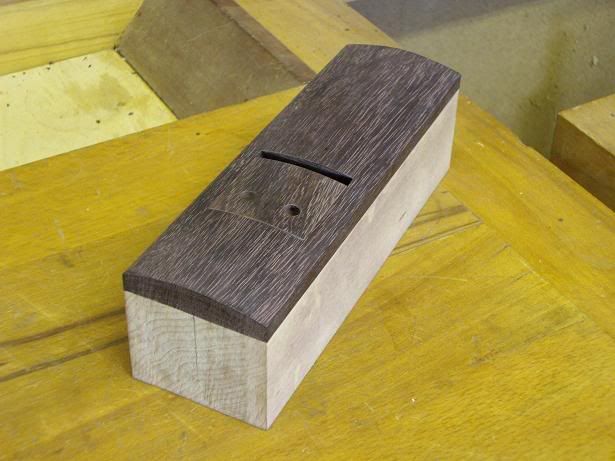
In order to make a plane with an inset sole, it's fairly essential and much easier to clean out and shape the mouth if an insert is fitted as seen in this pic. Insert held in place by two deeply counterbored brass screws, sole shaped and sanded to a suitable curve for the casket sides:
22as1d1fr.jpg


After I've finished the cap iron (very hard work to saw 8mm solid brass by hand) I need to have a trawl thru' the early editions of F&C to find MrC's article(s) on making a jig to fit on the Tormek so that the cutter can be ground to a set radius. Will post a pic of completed plane later...coffee time now :D - Rob
 
Rob,
That is looking great! Re the cutter - you could shape it before hardening perhaps? Just saw/file etc to the desired radius and primary bevel.
 
waterhead37":1ieoqa9f said:
you could shape it before hardening perhaps? Just saw/file etc to the desired radius and primary bevel.

The only way! I did this to all mine as grinding a lot of metal off hardened blade is a complete waste of time if it can be avoided.

It means you can grind the bevel on a normal 6" grindstone and not even care if the metal gets hot and turns blue as the heat treatment will sort all that out later :D
 
It is indeed a good idea to grind before sharpening....but what do you do if the blade is already hardened and tempered as this one is, or as MrC has done, convert an existing 2" woodie to a curved sole plane? You then have the problem of grinding a thickish lump of hardened steel....freehand to a curve? :cry: Much better I think to make a jig to fit the grinder which is what I'm doing now, will post pics when done - Rob
 
woodbloke":3aga0y8e said:
It is indeed a good idea to grind before sharpening....but what do you do if the blade is already hardened and tempered as this one is, or as MrC has done, convert an existing 2" woodie to a curved sole plane? You then have the problem of grinding a thickish lump of hardened steel....freehand to a curve? :cry: Much better I think to make a jig to fit the grinder which is what I'm doing now, will post pics when done - Rob

I did the whole of my grinding freehand, switching to a jig only to get a consistent bevel at the sharpening stage. Grinding to a line isn't hard at all. Keeping the curve even whilst working the bevel just means never keeping the blade still (in a lefty-righty sense) whilst using the jig.

http://www.geocities.com/plybench/scrub.html#blade

BugBear
 
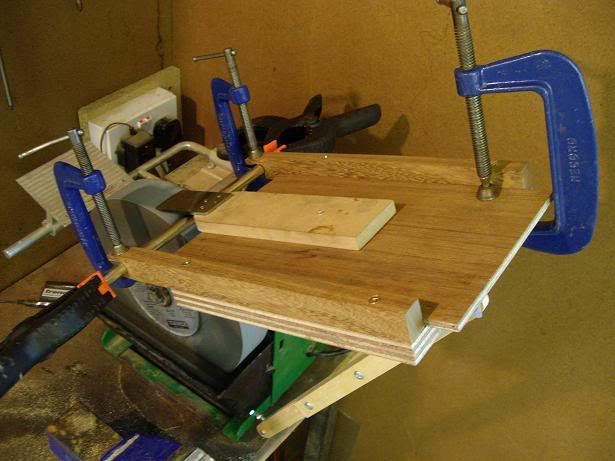
Have had a go at making a MrC type jig for the Tormek this afternoon. I've put a slightly more elegant stay arrangement that Davids which makes adjustment easier. The cutter is very short so has had to be fixed to an additional piece of mdf which is then pivoted on a nail to the sledge (teak veneered ply) which is slowly edged forward as the grinding progresses:

kkemmd.jpg


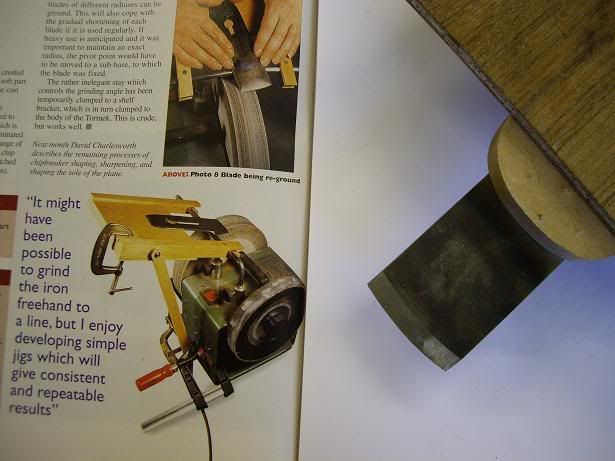
It's quite difficult to get the exact radius required so a little bit of extra grinding is needed on the corners to get the radius bang on, but as you can see from the pics, the result is quite impressive and I'm a bit chuffed with it :D . MrC's original design from F&C can be seen in the pic as well:

kodskfkr.jpg


Need to do a little bit more grinding later on - Rob
 
That turned out very well, Rob =D> Much easier doing things like that on the Tormek than on a high speed grinder where the spark guards and stuff get in the way - and when you get over the that, it still burns the blade DAMHIKT :cry:

Cheers :wink:

Paul
 
woodbloke":2rxm5hyq said:
It is indeed a good idea to grind before sharpening....but what do you do if the blade is already hardened and tempered as this one is, or as MrC has done, convert an existing 2" woodie to a curved sole plane? You then have the problem of grinding a thickish lump of hardened steel....freehand to a curve? :cry: Much better I think to make a jig to fit the grinder which is what I'm doing now, will post pics when done - Rob
I use a jig. Just a piece of plywood cut to the desired radius. I use the Veritas MkI to clamp it together, and just reference off the radius assuming your grinder has an edge to reference off of.

Oops forgot to mention. Very nice plane =D>
 
Rob,

That is a much nicer stay than mine!

There is a substantial difference between my jig and Derek's.

His is much simpler to arrange but requires some skill and marking out?

Mine is more cumbersome to make but requires no skill or marking out to use, with absolute repeatability. It is also adjustable for different radii.

All roads lead to Rome.

David C
 
David C wrote:
That is a much nicer stay than mine!
David - it's just a simple slotted sliding stay with a couple of bolts in the middle. The bottom fixing is a 6mm part threaded bolt with the hex head cut off and bent to 90deg and then fixed to the Tormek with a couple of nuts, one each side, the top fixing is by a normal 'L' bracket with nut and bolt.

The jig works very well, so top marks there and you are quite correct in that the grind angle is easily repeatable. What made this very tricky to do was the fact that the blade is only 75mm long and I wanted to put a radius of 195mm on it, hence the reason for screwing the cutter to an additional piece of mdf. I found that the radius needed could be quite easily obtained with subtle pressure using my forefingers on the corners of the blade as it was being passed across the stone.

What I completley forgot tho' was that the front of the mouth is also curved #-o so I've had to make a small rebate in the leading edge and glue in a piece of Tufnol (really excellent stuff) which I'll then file to shape to the blade profile:

26506.jpg


Hope to get the plane finished today so will post further pics when done - Rob
 
Rob
The mouth - I made a similar mistake on a recent panel raiser! An insert saves the day, though. :wink:
Cheers
Philly :D
 
Smart move going for that insert in the sole, Rob :wink: :wink: This is really interesting stuff, Rob, thanks for posting the details.

Cheers :wink:

Paul
 
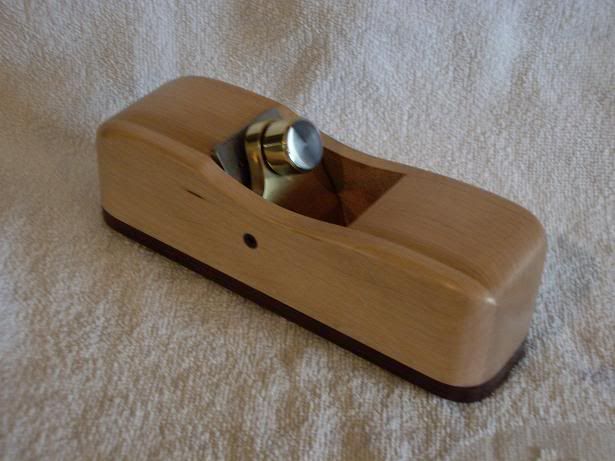
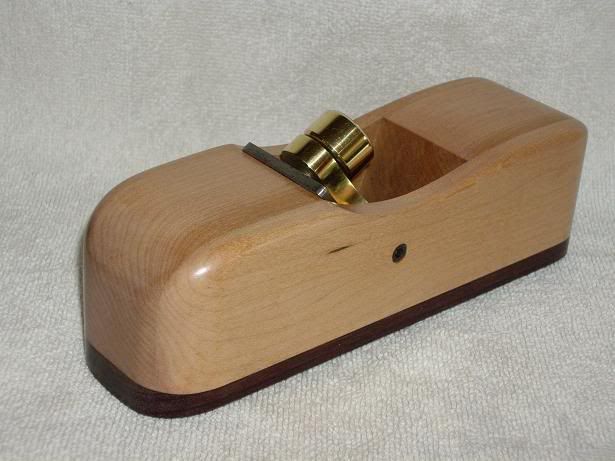
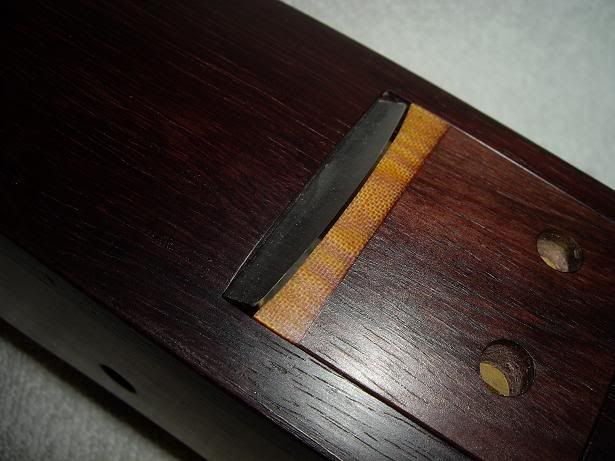
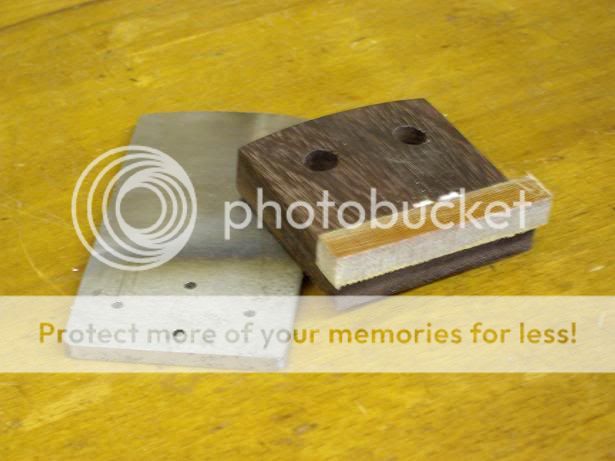
Here's a couple of pics of the finished plane. Brass cap iron and screw (the plain brass finger grip is a turning tool ferrule from Axminster) with the pivot points made from 4mm hex set screws. Finish is two coats of matt acrylic varnish with some wax over the top:

asdmmdm.jpg


kamfl2f5r.jpg


The final pic shows the mouth. The insert, made from Tufnol at the mouth, took about 2 hours to file and sand to the correct blade profile.... very, very fiddly :x as it's curved in two planes but I got there in the end:

rkrklwokerbdr.jpg


Have to see if it works now 8-[ .....definitely deserve some vino ce soir tonight after this one :lol: - Rob
 
David C":3eo6zvk9 said:
Rob,

That is a much nicer stay than mine!

There is a substantial difference between my jig and Derek's.

His is much simpler to arrange but requires some skill and marking out?

Mine is more cumbersome to make but requires no skill or marking out to use, with absolute repeatability. It is also adjustable for different radii.

All roads lead to Rome.

David C

Agreed. I had a long and slightly heated discussion with Derek about the degree to which his jig controls the curve in the blade.

BugBear
 

Latest posts

Back
Top