Making wooden planes---Advice needed

UKworkshop.co.uk

Help Support UKworkshop.co.uk:

This site may earn a commission from merchant affiliate links, including eBay, Amazon, and others.

NeilO

Established Member
Joined
1 Mar 2006
Messages
718
Reaction score
1
Location
Buckinghamshire
what kind of wood should be used for the body??(got a nice piece of zebrano, i thought would look nice) any preferences?

any particular way to grind the bevel?, normal bench grinder, worried about the heat from that, or tormek?

what kind of metal, iknow its tool steel, but HSS, carbon or what?

i was unable to get a copy of Tonys write up in good woodeorking , my Smiffs either dont stock it , or it was all sold out :shock: if thats the case where are all my local woodies :lol:

so any help would be grateful, will try to see if Smiffs can get a copy for me, by back order, or whatever..
 
Hi Mike, was looking at Philly`s Forge.....Egg fried rice will never be the same :lol:
but despite that , ingenious use of everyday household items...
would be interested if the results were as good as he expected.
 
Hi mr (Mike)

thanks for the link, but really want an "how to make" rather than where to buy, ...but after seeing some of Phillys handiwork, I could be tempted. :D
 
For tool steel Cromwells are an online supplier that I have used, don't know how they compare with Tilgear though.

Grind the bevel any way you like but do it before you heat treat it then no worries about overheating the edge.

There are couple of books on wooden plane making on Axminsters site.

John
 
Speaking for myself, I'd keep a first plane simple - cheaper wood, readily available iron (plenty to choose from from a Hock to one from a defunct woodie) and just have a bash. You may get it right first time of course, but on the other hand...

Cheers, Alf
 
I'd definitely recommend carbon steel for the cutting iron if you are going to make one from scratch. Heat treating HSS is a specialised business, but something like O1 is easy enough to do yourself.

Once you've got it in the shape that you want it, warm it up to just shy of cherry red and dunk the sharp end in a bath of oil (preferably without any detergents or additives in it) for about 20 seconds and then remove it and allow it to finish cooling slowly in the air. If you cool it too slowly you'll get Austenite (big crystals) rather than Martensite (small crystals). Don't dunk it all the way in as you want to keep the upper part of the blade soft.

At this stage it will be too hard, so you need to temper it, this can be done by popping it in the oven with your sunday roast at 200 degrees - it should end up a straw yellow colour if you've got everything right.

I'm sure that UKW's resident woodiewright Mr Edwards will be along shortly with some top tips for you.

Congratulations on the new site by the way Philly - looks great!
 
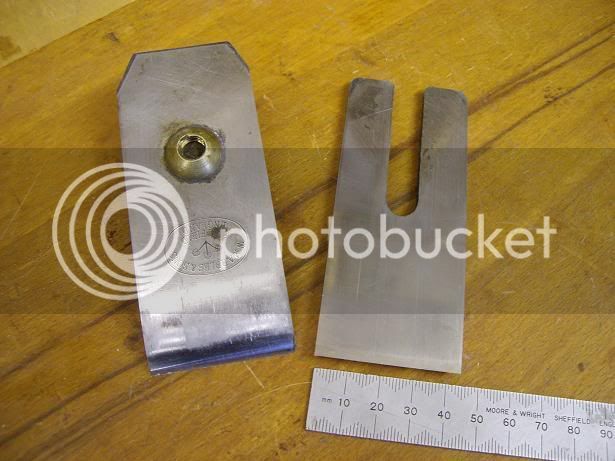
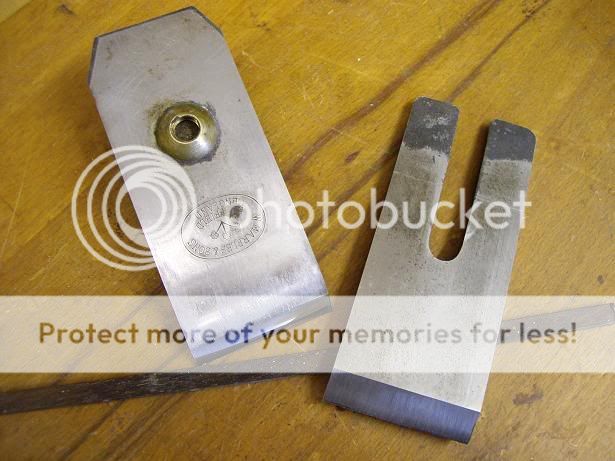
Another way to obtain a very good iron is to find a thick 50mm wide iron from an old woodie (PFT have got a box of thick old plane irons) and grind it down to the size needed:

llwer.jpg


11fg0.jpg


This particular iron is 5mm thick and only tapers very slightly in thickness. It's going into a longish woodie and I've ground it down on my bench grinder over the course of a few days to 44mm. I had to be quite careful not to overheat the cutting edge so it was frequent dunks into a big pot of cold water every few seconds.
'Tis very helpful tho' to do this sort of thing if you do have a bench grinder :roll: :wink: :D - Rob
 
cheers for the links fellas...

Alf, wasnt planning on "hacking up" a nice looking piece of Zebrano straight away :shock: , its been floating around my shop for some time so im quite happy for it to stay intact for a little longer :D 100x100x500mm

will have a go at a mock up in pine, and i have a couple of older(rubbish) planes knocking around..

he/she who dares, usually messes it up first time around... :lol:
 
One other thing is that it's useful to add a separate sole tho' a bit more tricky to do ('specially to cut the mouth etc) but it does mean that you can make the body from something relatively easy to work with such as a nice lump of zebrano and then glue on a much harder timber for the sole, lignum is ideal but there are lots of others. If you do decide to go down the separate sole route then a 1:1 sectioned drawing and separate mouth insert are highly recommended:

kamfl2f5r.jpg


rkrklwokerbdr.jpg


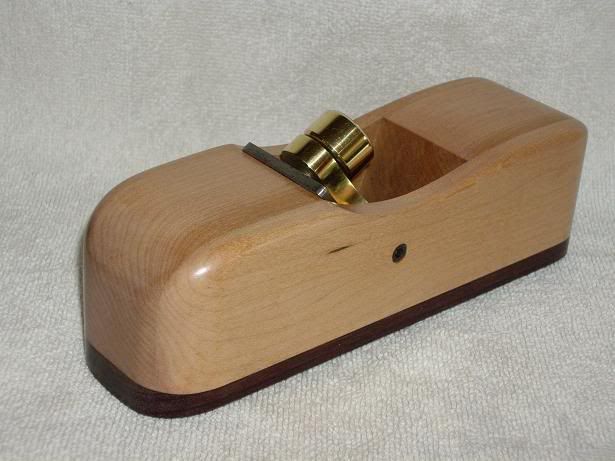
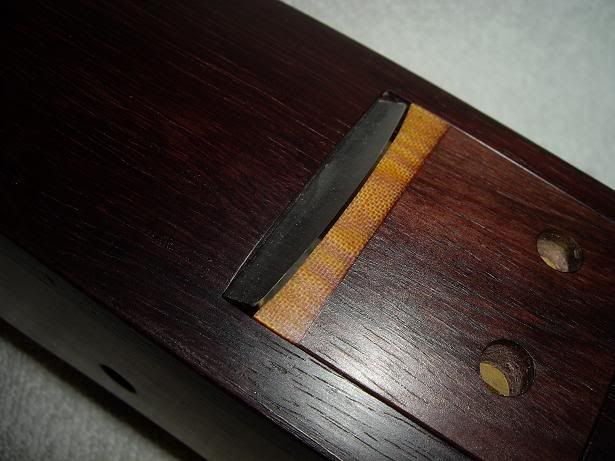
This one is a special that I made recently with a curved sole. The plane is in maple with a rosewood sole and inset mouth tho' I forgot that the curvature of the insert at the mouth is in two planes #-o so I had to glue in a bit of tufnol and then file to fit, however the priciple for a flat bottomed plane remains the same - Rob
 
woodbloke":1muk4fp4 said:
One other thing is that it's useful to add a separate sole tho' a bit more tricky to do ('specially to cut the mouth etc) but it does mean that you can make the body from something relatively easy to work with such as a nice lump of zebrano and then glue on a much harder timber for the sole, lignum is ideal but there are lots of others.

Caveats might include difficulty of glueing, and different expansion/contraction under humidity changes.

BugBear
 
BB - true enough, but over such a small area differential shrinkage rates between the two timbers is negligible and a thorough degrease with acetone (please don't mention the fumes as exposure is about 5 seconds before evaporation means that it's all gone :wink: ) ensures a sound bond between the rosewood and maple - Rob
 
Woodbloke , is the body of your plane a lamination of 4 pieces (nose,2x sides, tail ) or simply a trick of the light??

BTW, nice looking plane, even with the addition of the tufnol :D

also , are the cap irons?( brass shiny bit) available retail, or is that home made too?
 
All laminated and the brass bits home made as well, pivot points for the cap iron are a couple of 4mm machine socket screws - Rob
 

Latest posts

Back
Top