Make your own hand router

UKworkshop.co.uk

Help Support UKworkshop.co.uk:

This site may earn a commission from merchant affiliate links, including eBay, Amazon, and others.

Gerard Scanlan

Established Member
Joined
5 Mar 2011
Messages
326
Reaction score
27
Location
The Netherlands
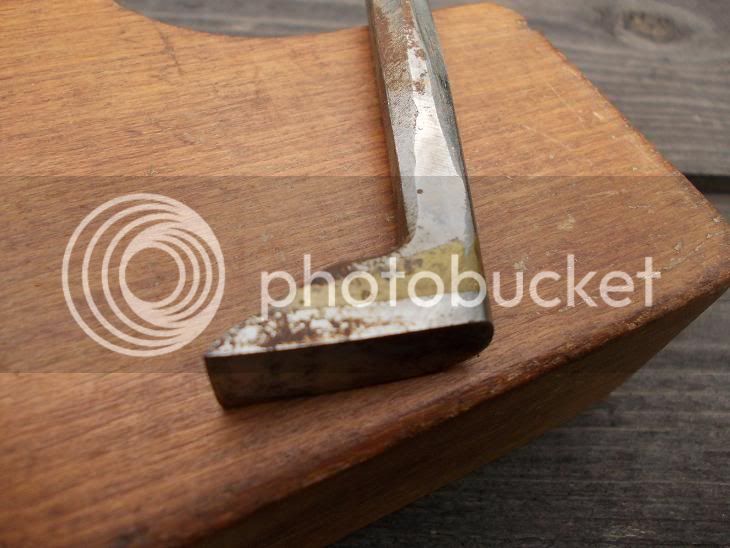
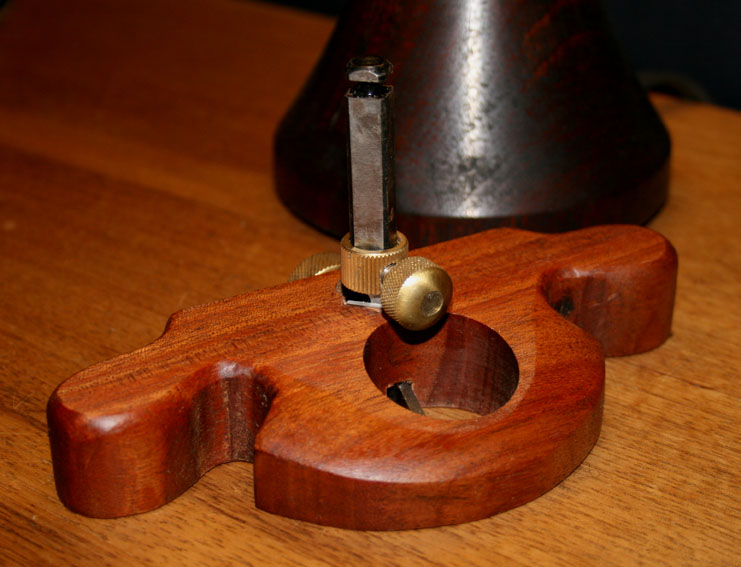
I was inspired by Pauls Sellers' blog about the poorman's router. Then a couple of days later he posted the 'not so poorman's router' again with instructions for building it. I was all fired up now at the idea of saving 30 quid plus on a hand router off ebay that I set to work. Paul Sellers suggest using an allen key for the cutter. Unfortunately ten minutes in to filing the allen key I realised that this soft steel was not going to stay sharp for long. A decent allen key would no doubt have done the job a whle lot better. So on my next trip to the local scrap merchants I had a dig around in the broken lathe tools box and found myself a piece of hardened steel.
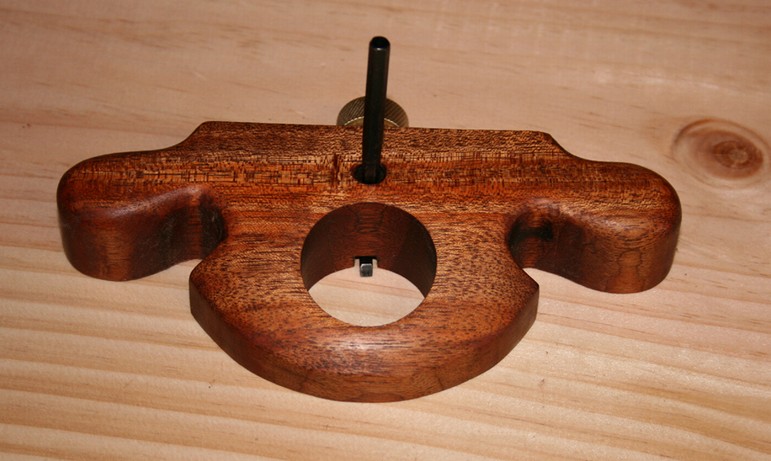
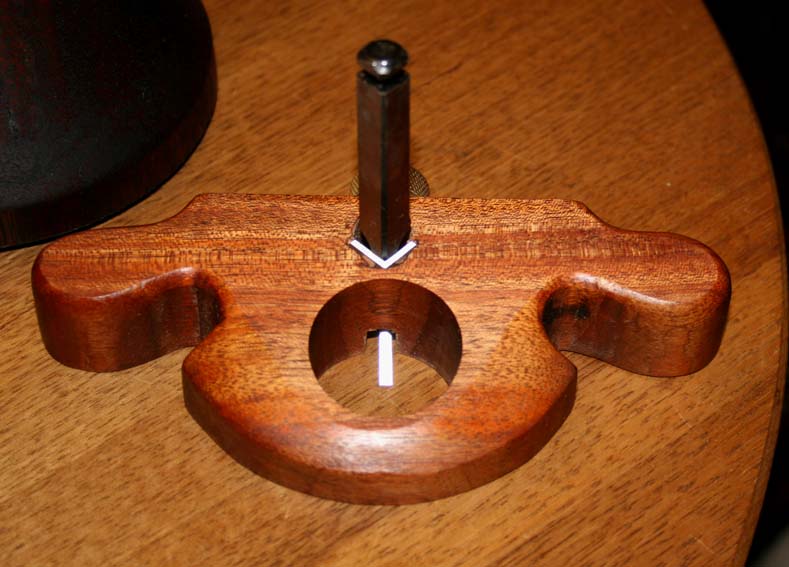
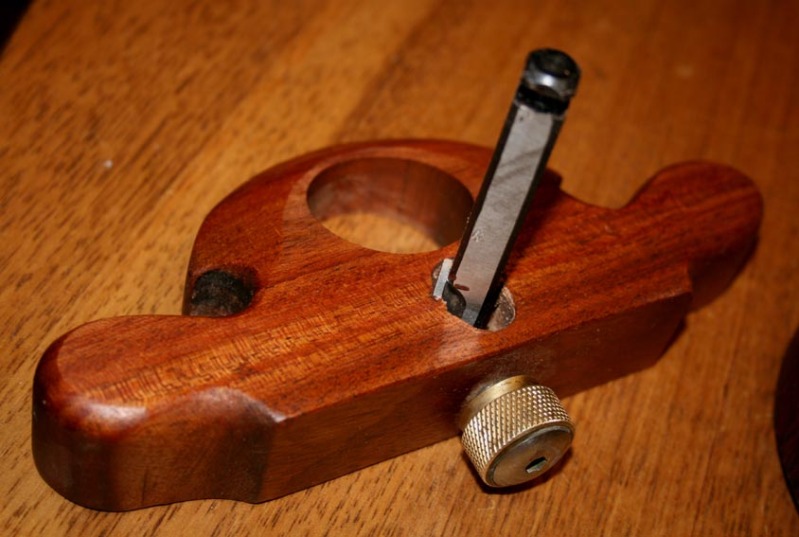
The pictures tell the story. As it was a sort of trial and error design I would probably go for a simpler design next time. The wing nut is tapped through a piece of brass and fixes the cutter in place. I made it with a scrap of sycamore I had in the off cuts box. And it works!

Please post your pictures if you made a Sellers design or one of your own.
 

Attachments

  • IMG_5073-S.JPG
    IMG_5073-S.JPG
    51.5 KB
  • IMG_5074_S.JPG
    IMG_5074_S.JPG
    76.1 KB
  • IMG_5076-S.JPG
    IMG_5076-S.JPG
    52.1 KB
Nice job Gerard!

Not sure how the cutter cuts...I see what you have used but the edge needs to be at the front surely?

You can grind these HSS lathe tools to the shape you want though..

Cheers

Jim
 
Hi Jim,
The pictures show the cutter retracted.
As it is lowered is protrudes not only downwards but also forward.
I can see what you mean as the cutter on most routers sticks out futher at the front but this does not seem to effect how this router works. The advantage of a router cutter that protrudes further is that it is easier to see what you are doing from above. I have been using this one Japanese style pulling it towards me so I have had no problem controlling it. All the same it is good that you pointed this out, as I mentioned my design was trial and error so anyone inspired to make one would be well advised to take from the trial and leave out my errors.
 
Not a criticism at all mate...I couldn't visualise it but I get it now...

If you do have problems with the centre line you can always put a mark on the front in line with the centre of the cutter...

Nice job

Jim
 
Nice one Gerard,

Presumably if you had a stock of similar lathe tools you could make up different width cutters if necessary as well.
 
.

I read Seller's article some while ago and reading your project reminded me of it.
I'll have to tip out my box of odds and sods, 'cos I've got a little idea of my own.....

All Best from Wild Wales


.
 
Thanks for the idea of putting a mark on the front Jim. I was pleased with your comment about how it worked, it is so very easy to overlook a detail.

Yes Matthew, other lathe tools with different widths would be an option for someone building a router with that in mind. I however did not have such foresight and so I made this router for this cutter. I do not know if it is clear from the photographs but the narrow sharpened edge is centred. If I put a lathe tool in with a wider edge it would be a bit off centre. It would be possible to use a lathe tool with a narrower cutting edge.

I am keen to see what comes from mid Wales, Argus.
Making tools is a lot trickier than I had expected especially when an improvement occurs to me that turns out to be anything but that. #-o
 
Gerard Scanlan":qvvay7xc said:
Paul Sellers suggest using an allen key for the cutter. Unfortunately ten minutes in to filing the allen key I realised that this soft steel was not going to stay sharp for long.

Wow - that must have been a spectacularly cheap example. Most allen keys are so hard the working them requires power grinders.

BugBear
 
Unfortunately I have had trouble finding good allen keys in recent years and they have become very expensive. Every DIY shed has a basket with sets of buttery soft allen keys and they are in every flat pack the wife brings in from the ubiquitos Swedish store. Perhaps that is why retailers have stopped stocking decent ones. I knew that lots of allen keys got chewed if I used too much force, and I even put a treble twist in one recently whilst tightening a grub screw but I only really saw how soft them had become when I tried to turn one into a chisel.
 
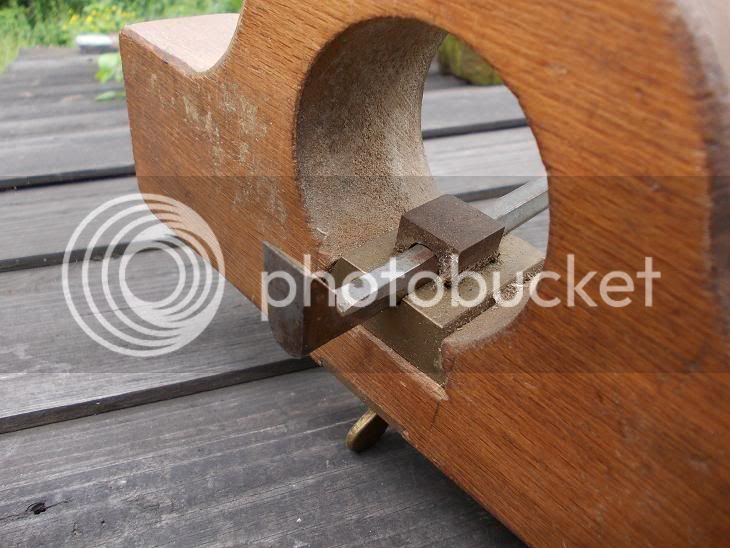
I got this one a few years ago in a box of bits from a house clearance -

DSCN0465s.jpg


It has a dovetailed brass block for the tool holding bit to slide through and a brass plate let in the other side. What's really neat is the viewing window - just peep through the porthole.

DSCN0464s.jpg


At first I thought the allen key had been properly upset blacksmith style but when I cleaned it up it turned out to have been ground down and a piece of good steel braised on.
DSCN0467s.jpg


I haven't had a play with it yet though.
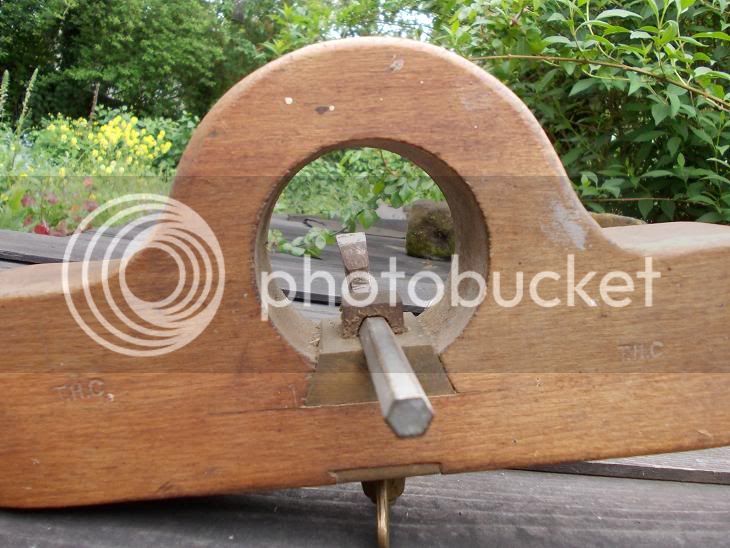
 
Now that is a good design.
Wish I had seen it before I made mine! It has a couple of very nice features (as well as the porthole).
I had hoped people would post other designs when I made my original post, brilliant.
Thanks for posting it Richard.
 
.

Very nice, Richard. I like that blade.

The one thing I do miss, nowadays, is access to a small oxy-acetylene pack for brazing bits together.


.
 
adidat":3jimvbmf said:
is brazing a good way of joining flat steel to flat steel?

adidat


.

Welding or forging is the obvious way, for steel to steel, but brazing will join two small pieces cleanly and accurately, and with sufficient strength for a small cutter tip, such as this.

Brass rod has a relatively high melt point, but ordinary silver solders will be adequate for the cutter in Richards example.
It also comes with the prospect of being able to detatch the part later for modification or re-use if you use a low melting point eutectic rod.
 
'fraid I don't know much about the science of brazing Mr. A - when we did it at school it seemed like soldering with brass; though the temperatures involved are much higher - the steel touched a dull red before the brass would run. So any tool steel given that treatment would (I'm guessing) have to be air hardening, or you could hope that the brazing temperature was enough and quench it from that heat .... there ain't nothing easy is there?

I'll put an edge on this one and report back on its performance, though it seems hard to the file ...
 
adidat":2xbn5i78 said:
but the two metals wont fuse? so its a surface grip?

adidat

Yes. It's glorified soldering - but perfectly adequate for a small cutter tip. Low temperature solder done properly is very strong.

The idea with this application is to use a low temperature eutectic rod or silver solder with flux, to avoid losing the temper in the steel - not brass rod, so it's not true brazing, but who cares.

Both pieces are cleaned and flattened to give a flat mating surface.
The larger shank is stood upright in a metal vice.
The areas of both to be brazed are anointed with flux.
Heat the shank surface and a small amount of solder rod is allowed to melt on the end of the shank where it's to be joined.
Let it all cool, the flux the surface of the cutter and shank and lay it on the shank in the required position.
Heat slowly and gently from below to the point where the solder melts. Don't get the cutter portion anywhere near the point where it loses its temper.
Let it set and clean the sides.

The point with all this is that you need a small, concentrated flame - Oxy-Acetalene.
Mapp gas and oxy-propane probably won't do it without overheating and loosing the temper in the cutter.


.
 
Some years ago I built this one, and the iron was from an allen (hex) key ..

OldWoman'sTooth_html_m65d2df6c.jpg


The builds of both router and iron are here: http://www.inthewoodshop.com/ShopMadeTo ... Tooth.html

Fairly recently I decided to upgrade it.

First I drilled it out and added aluminium section to house the Veritas blades (since there is now a wide selection of sizes from which to choose) ..

UpgradingTheOWT_html_m3ba8390.jpg


UpgradingTheOWT_html_m3ea2455a.jpg


Then I added a shopmade depth stop (since these are really the made-or-break of these planes) ..

UpgradingTheOWT_html_59880358.jpg


Regards from Perth

Derek
 
I’m trying to make a simple router plane at the moment, grinding and sharpening an allen key as a first step. Grinding the sides flat and putting a small underside relief was easy on a belt sander but I couldn’t grind the blade freehand, I ended up with a blade with about a dozen facets. I used an old eclipse type honing jig to complete the bevel, hopefully this set-up will be repeatable.
IMAG0279.jpg


I used an old ¼ inch allen key and was wondering if a ¼ inch square drive socket could be used as a blade holder. I was proposing to epoxy this into a base with the lower hex section providing support to the blade and the upper square section having a hole drilled and tapped for a blade clamping screw. I’ve never tried drilling a socket, I imagine I’ll have to heat it to soften the metal. The only heat source I have is a small handheld butane torch, the type that uses the disposable canisters. Anyone know if this would be sufficient to soften the steel in a socket?

Jim
 

Latest posts

Back
Top