Keepsake box - competition entry WIP

UKworkshop.co.uk

Help Support UKworkshop.co.uk:

This site may earn a commission from merchant affiliate links, including eBay, Amazon, and others.

motownmartin

Established Member
Joined
10 May 2007
Messages
2,147
Reaction score
0
Location
Enderby, Leicester
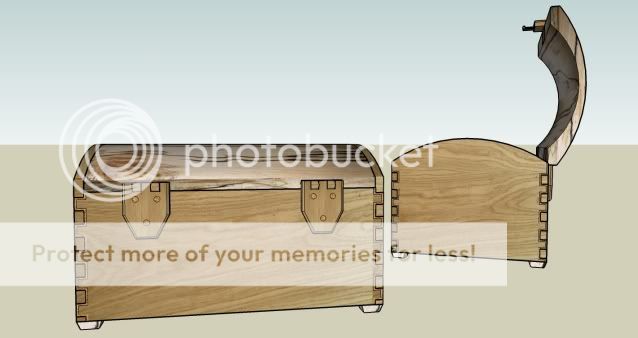
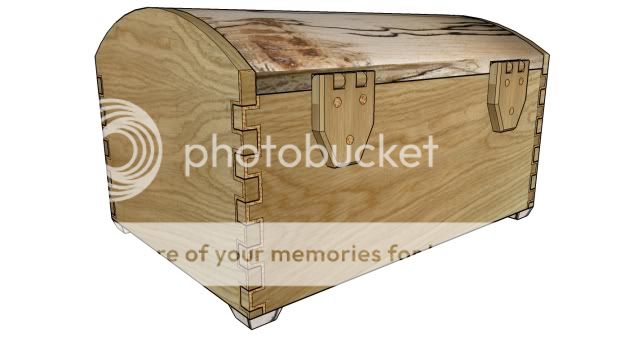
I have finally finished designing my competition entry, there are quite a few challenges for me within the project which are a curved lid, wooden hinges wooden latch/catch and a double box joint.

The box will be made from Oak and Spalted Beech, it will be big enough to hold size A4 paper and deep enough to hold a number of items that are precious to one.

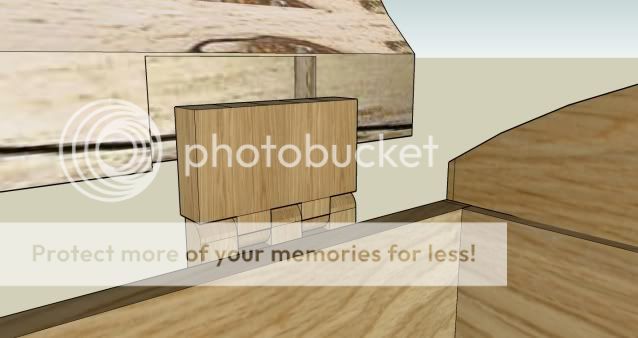
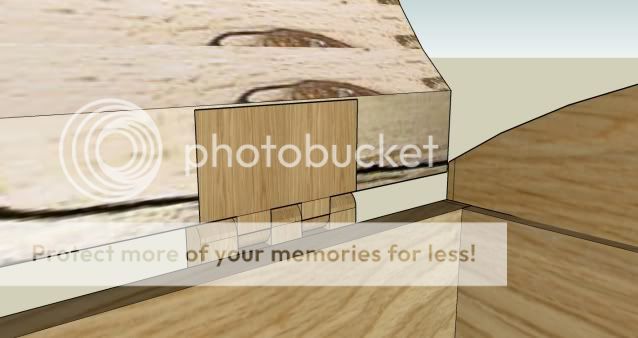
The design of the latch/catch is not final yet, I think it will have to be trial and error to see what will work best. The latch is shown in the first drawing and has been designed to look like the hinges which are shown in the second drawing.

compboxfront.jpg

compboxrear.jpg


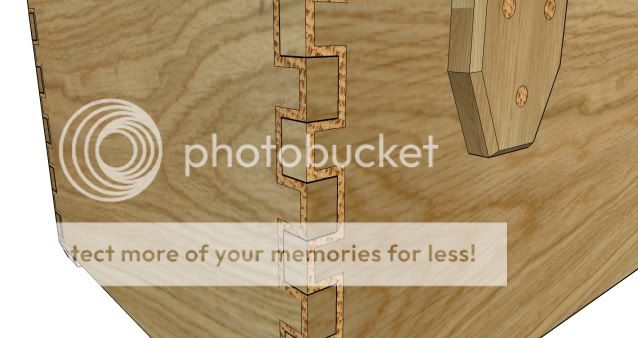
This third drawing shows a closer view of the double box joint which has a border around the first cut with the end grain showing, I am very nervous about getting this right but will show the progress in this thread.
compboxjoint.jpg
 
Good luck with this one!!

Looking forwars to seeing these box joints done!! :)
 
Geno":1cork8yo said:
Good luck with this one!!

Looking forwars to seeing these box joints done!! :)
Thanks, I think i'm gonna need it.

It will be some time before I get round to doing them and I'll do the lid first just in case I have to alter any dimensions to suit, I doubt if there will be any probs but I don't have a lot of 2" thick Spalted Beech to play with.
 
This looks exciting, Martin!

I haven't worked out how the hinges attach to the lid.........and wonder if they might just be eased a gnat's further apart?

I can see how you will set about doing the double finger-joint detail..........but I would hesitate to say that I can see how you can do it perfectly accurately. You obviously know the secret!!

Best of luck!

Mike
 
Mike Garnham":2uoggkgo said:
This looks exciting, Martin!

I haven't worked out how the hinges attach to the lid.........and wonder if they might just be eased a gnat's further apart?

I can see how you will set about doing the double finger-joint detail..........but I would hesitate to say that I can see how you can do it perfectly accurately. You obviously know the secret!!

Best of luck!

Mike
Thanks Mike

The hinge upper will be set into the lid like so, I may even put some dowels in there too.
hinge1.jpg

hinge.jpg


When you look at the hinge positions from a different angle they look ok to me, what do you think?

Keepsakeboxview.jpg
 
Mike Garnham":1n18lxwn said:
I can see how you will set about doing the double finger-joint detail..........but I would hesitate to say that I can see how you can do it perfectly accurately. You obviously know the secret!!


Mike
No secret Mike, it will be done on the incra positioner, thats if I can work it out :?
 
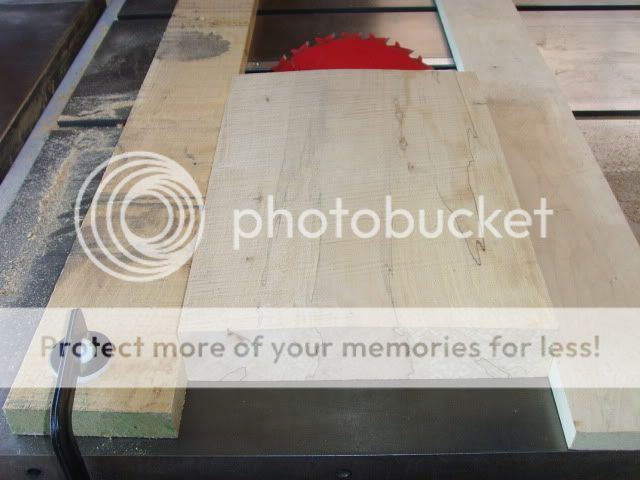
Managed to make a start on the lid today I decided to cut out the curve on the inside with the table saw.

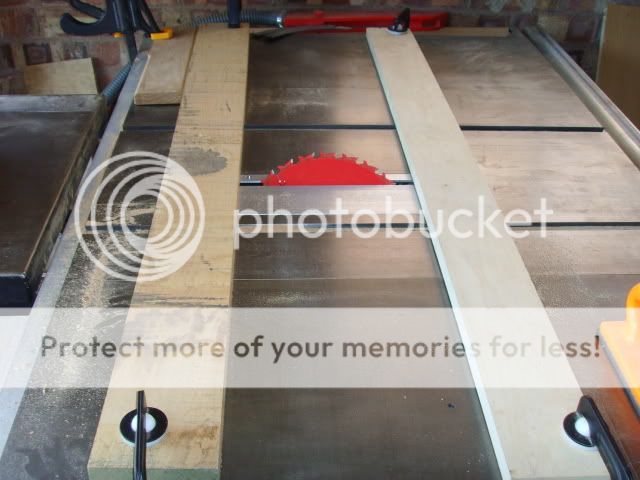
I had to angle the blade at 30 degrees and slide the workpiece over the blade at right angles, obviously there is not a crown guard or riving knife fitted but you take great care its not much different to using a planer, taking shallow cuts, about 2mm, just like planing, it coped with very well.

Here are sme pics to show you how it went.

The first 2 pics shows some lengths of timber clamped to the table, these made a channel to slide the workpiece across the saw.
SSL21457.jpg

SSL21458.jpg


The first cut
SSL21459.jpg


The final cut from the underside
SSL21460.jpg


A little surprise, I found some lead shot in this one, I hope its not in the whole board, oh well start again this afternoon :cry:

SSL21463.jpg
 
That looks really good! I've only seen someone do that once with the table saw, you must have to be fairly brave. Bad luck on those imperfections.

Whats your plan for radiusing the top?
 
Another of my favourite threads. Are you using a special blade on your TS for this hollowing out method Martin, or just your standard one?
 
RogerM":5e7ktu2k said:
Another of my favourite threads. Are you using a special blade on your TS for this hollowing out method Martin, or just your standard one?
I did wonder about this but proceeded with my standard ripping 24 tooth blade and seen or felt no reason to use any other, I didn't know whether or not to put a 60 tooth in for the finishing cut but decided not to push my luck :D
 
motownmartin":25uonqvz said:
Chems":25uonqvz said:
Whats your plan for radiusing the top?
I plan to cut the bulk off on the table saw then hand plane :shock:

Like I said

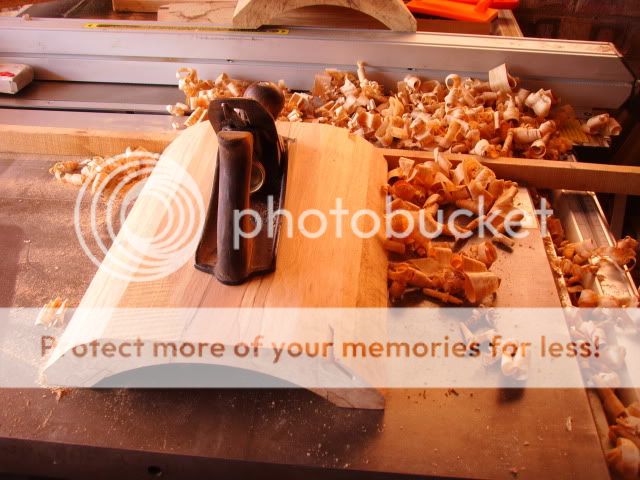
Scribe out the Radius, a bit of a Heath Robinson setup but worked very well.

SSL21466.jpg


Blimey, this is going to take ages.

SSL21467.jpg


And it did, about 2 hours later :eek: and 2 pints of sweat in this hot weather, I measured it at 30 degrees in my Garage/Workshop.

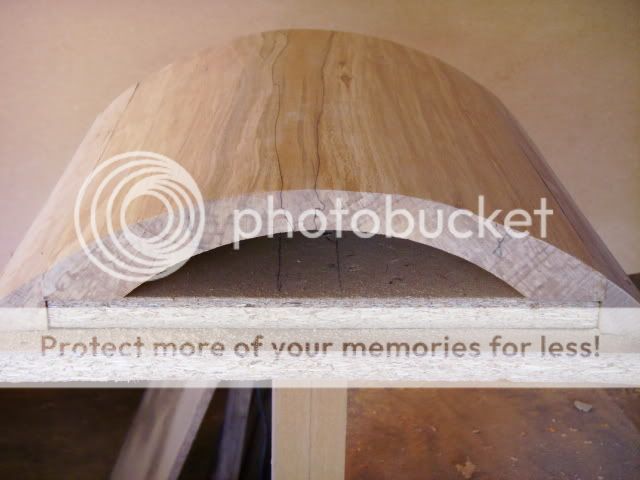
I have oiled it, not for the finished article but to show up any imperfections, I do this a lot and find it helps me to get a better finish.

SSL21469.jpg

SSL21468.jpg
 
Doesn't that go against the golden rule of remove equal amounts of wood from each side to avoid cupping? The rule one should follow when thicknessing?

Steve
 
kityuser":1nwrzc1m said:
Doesn't that go against the golden rule of remove equal amounts of wood from each side to avoid cupping? The rule one should follow when thicknessing?

Steve
This is one of the reasons why I am making the lids first, it could all go terribly wrong but I can adjust the dimensions on the box if need be.
I have also gone against the growth rings if you take a close look at the pics, I am thinking that this will limit the movement or will it make it worse :?
 
The lid looks fairly smooth and neatly curved on a photo but I can tell you that is not the case, I run my hand over the surface and it feels like a ploughed field :shock:

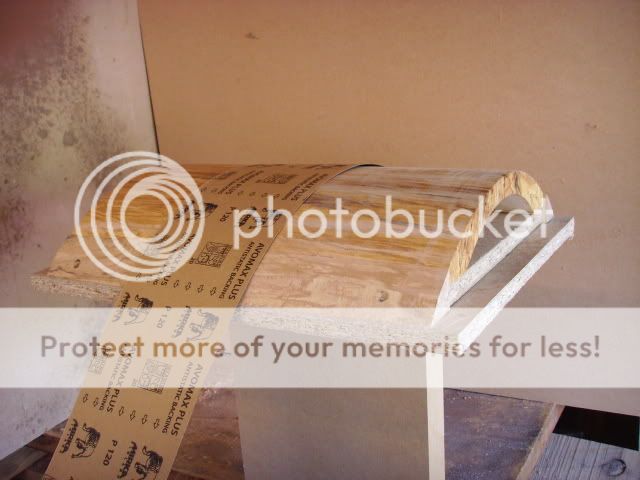
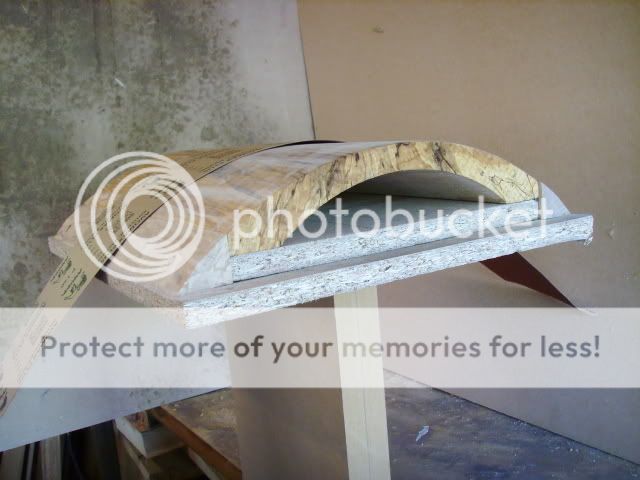
To get rid of this I have used the same technique as you would employ when rebuilding an old machine with a rusty old shaft, a small shaft is easy but a big diameter is hard graft and patience, to do this I made a device to hold the lid whilst sanding with a strip of 120 grit.

Here are some pics to show how

The first pic shows how uneven this lid is

SSL21472.jpg


This pic also sows how uneven, you can just about see the lighter strips along the length.

SSL21470.jpg


The third pic just shows the make up of the stand better

SSL21471.jpg


By the way, I am making 2 of everything, especially after finding lead shot in the lid.
 
motownmartin":1x78g3yx said:
The lid looks fairly smooth and neatly curved on a photo but I can tell you that is not the case, I run my hand over the surface and it feels like a ploughed field :shock:

That's one of the hallmarks of 'Hand-planed' surfaces Martin. I love those 'furrows'... Straight from the iron!
:D

Coming along nicely.

John
 
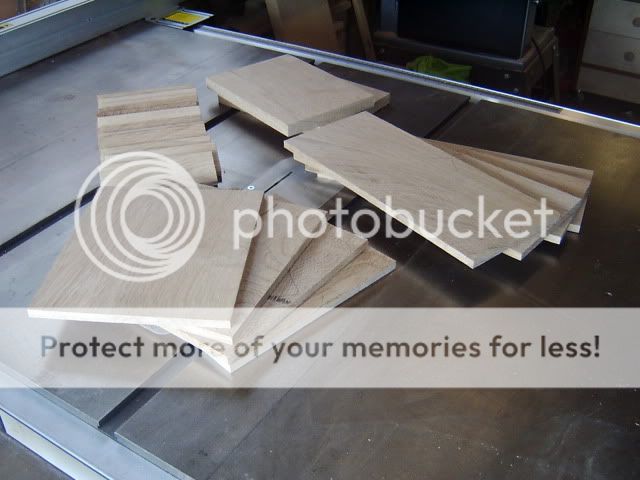
I have been busy with the project over the last few days and managed to get all the stock thicknessed and cut to size.

S2400070.jpg


Then I spent a couple of hours scratching my head to try and figure out how to to these joints :? as you may or may not know I built a Norm style router table and kitted it out with the Incra LS Positioner, this marvelous bit of kit enables me to do such complex joints like this Double double box joints with a fair amount of precision, this joint requires 6 different cuts altogether :shock:

I shall try my best to explain how its done.

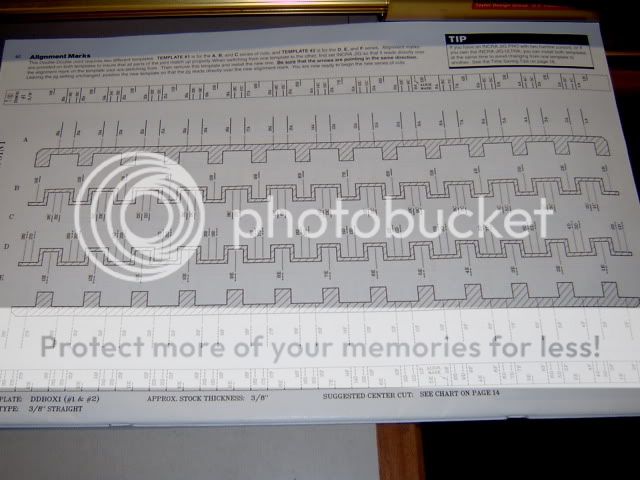
When you buy this positioner you will also receive 50 plus templates and a guide book, the first pic shows the joint, with all the cuts A, B, C, D, E & F, I have chosen for this project.

S2400071.jpg


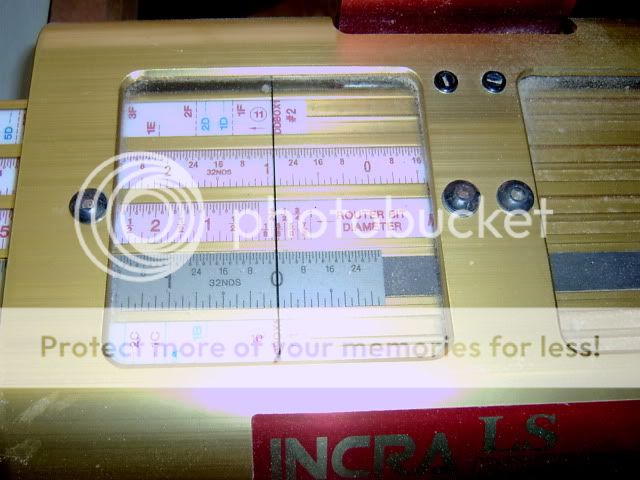
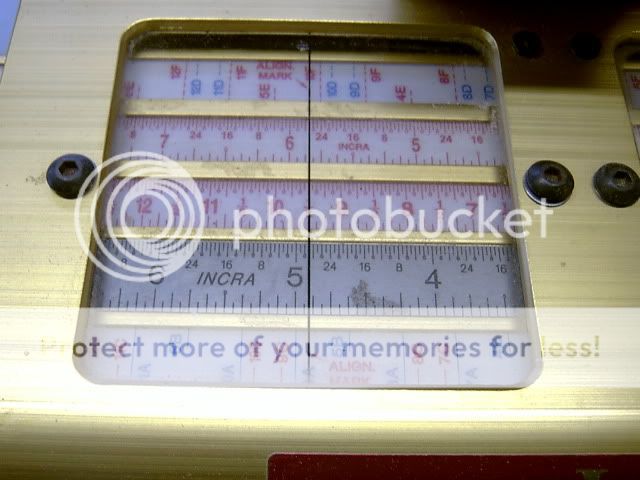
Confused, yeah, so was I, first of all we have to set the cutter in a datum position, I do this by setting the fence level with the cutter then placing the measure on zero, as you will see in the next pic, then move the fence to the first cut position, which in this case is 1/2", I then have to place my templates in position, in this case there are 2, A,B & C cuts on one and D, E & F cuts on the other, template 1 is in the bottom of the pic and template 2 is at the top.

S2400073.jpg


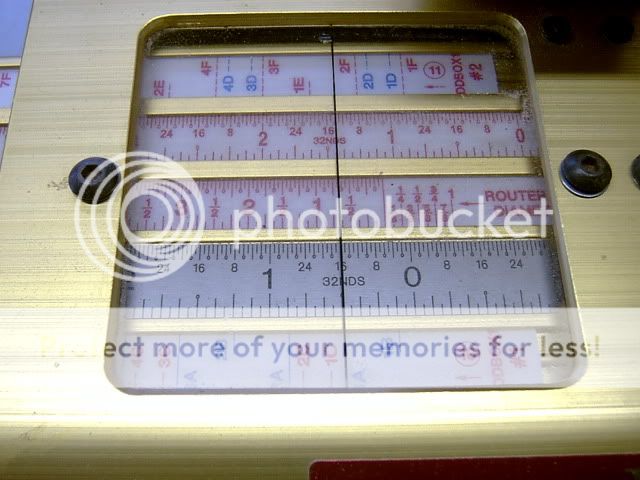
This next pic shows template 1 aligned with cut 1A (in blue) positioned on the black line, I hope you can follow this.


S2400069.jpg


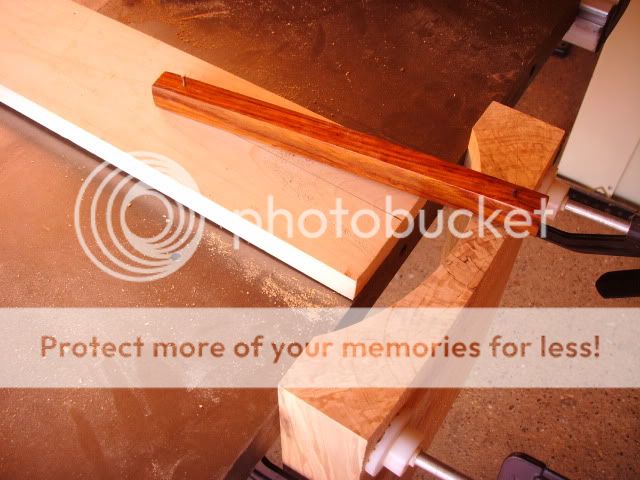
Then we align template 2 with template 1 there are some align marks on the templates as shown in the pic, template 1 is already set so we just have to move template 2 in line.

S24000702.jpg


Time for a break
 
Yes, I think I'm following :shock:. This is interesting, I've always wondered how these fences work, please keep going with the explanation, once you've recovered enough :D.

Boz
 

Latest posts

Back
Top