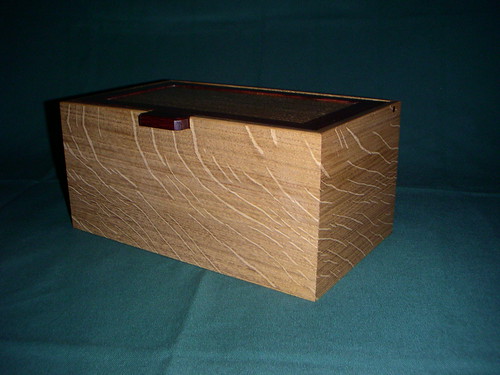
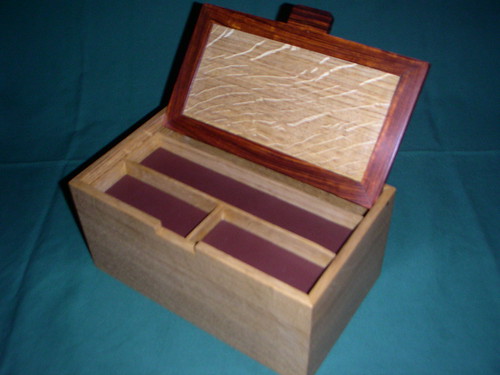
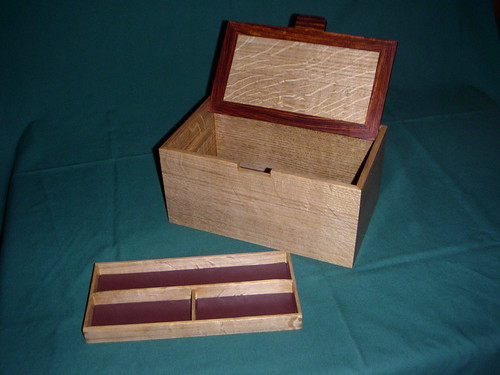
Jewellery box - Final pictures of completed project.

UKworkshop.co.uk

Help Support UKworkshop.co.uk:

This site may earn a commission from merchant affiliate links, including eBay, Amazon, and others.

Escudo

Established Member
UKW Supporter
Joined
26 Nov 2006
Messages
965
Reaction score
81
Location
Sheringham, North Norfolk
Hello all,

Thought I should post a few pictures of the jewellery box I have been working on over the last month or so.

The box is made from quartersawn oak with a cocobolo and oak lid. I plan to make some little cocobolo feet and an inner tray. The box is based on a design by Peter Lloyd.
2237179251_e327537f91.jpg


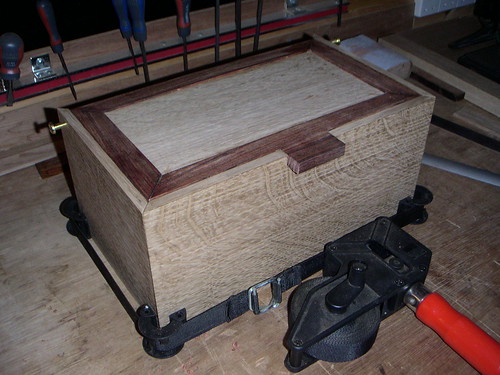
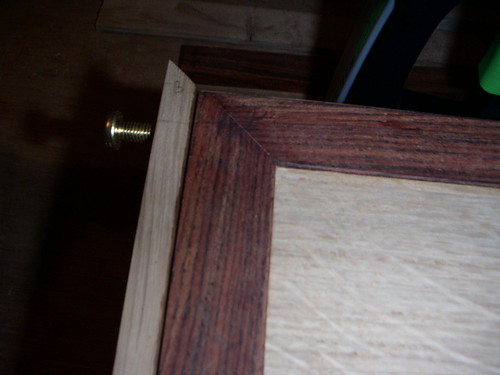
I decided to trial fit the lid before glueing the box together. This will hopefully enable me to accurately calculate the amount of waste to remove from the rear of the lid to enable this to open.

Here you can see the bolt which will hinge the lid. I plan to cut the head off the bolt and make a plug to cover this up.
2237179265_77acdaa5d4.jpg


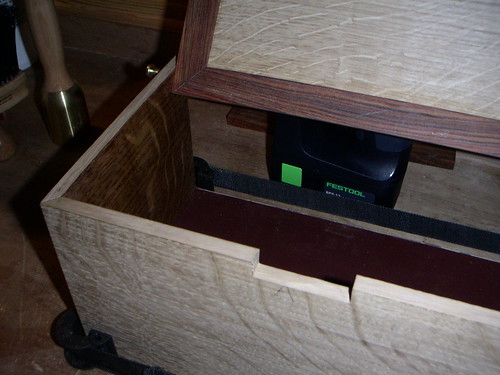
This picture shows the lid open, you will see that I have already finished the inside, save for a another coat of oil and wax. The base has a leather covering.
2237179257_8578736101.jpg


I will have to give some thought to the final shape of the handle.

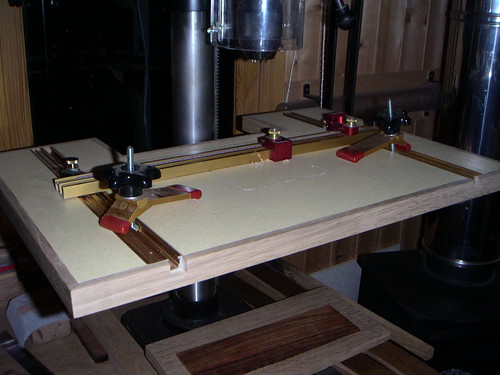
Whilst I had the camera to hand I took a picture of the drill press table I made. This was really useful when drilling the holes in the sides of the box. The fence and stops make all the difference.
2237179271_2bf28fd366.jpg


Hope this post is interesting, will post some more photo's as progress continues.

Cheers, Tony
 
Esc - like the contrast between the two timbers, very classy.

Don't have anything green in my 'shop :( - Rob
 
Don't have anything green in my 'shop - Rob
Apart from envy Rob :)

Tony that's a cracking box you've started on there. You've made a nice job of the drill press table too...definately need that workshop extension :)

Alan
 
Thanks for the comments fellas.

How careless of me to leave my festool drill in shot. I had just used it to drill the holes in the lid.

As you know, I would never knowingly make a gloat, I am to humble and shy :oops:

Alan your right, I badly need to extend my little hut. I have a cunning plan to double the size, a project for the summer given the inclement weather at the moment.

Tony.
 
Nice box there, I would also think about the handle shape, alittle too square for my taste, but then its not my box
 
I really like the quarter-sawn oak, as well as the cocobolo for contrast.

Nice drill press/pillar drill table as well - wouldn't want to drill too many holes in that thing! :wink:
 
I agree Bean, it is too square at the moment and a bit oversize.

I think I will bevel the edges and knock the corners off. I am mulling over bevelling the edge of the top of the box, (in a small, subtle way) and may carry this feature through to the handle.

I think a rounded handle would look wrong.

Thanks for taking the time to look and comment.

Cheers, Tony.
 
Olly I am glad you like my drill press table. The picture only just shows the outline of a sacrifical insert which drops flush into the top of the table.

When this is all chewed up I just insert another.

I can also remove the insert when using the drill press as a sort of bobbin sander, with some of these;

http://www.axminster.co.uk/product.asp? ... rc=froogle

I have seen a similar setup with a round sacrifical insert and on reflection this is a better design, as the insert can simply be rotated after each drilling.

Thanks for your comments, cheers Tony.
 
Esc

Where did you get the hardware (fence, t-track and hold downs) for the drill press table?
 
Hello there Gary,

Roger at the wood workers workshop can supply the incra t-track, hold downs and flip stops. Here is the link;

http://www.woodworkersworkshop.co.uk/woodpeckers.htm

You might spot the woodpecker tables on which my table is based.

I think Rutlands have a few of the items. They are quite expensive, to save a bit I also bought some directly from Woodcraft in America (my brother picked them up when he was there on holiday)

Hope this helps. If you would like to know exactly what I purchased I will draw up a list of the items for you, just let me know.

Cheers, Tony
 
What ho all,

Here are some pictures of my finished Jewellery box. I am very pleased with how it finally turned out. The missus is also very happy, which is no bad thing given my planned trip to yandles next week. :wink:


2393829460_647ab0f766.jpg


2393829464_ec6b2abe52.jpg


2393829468_6d5d7d9c5c.jpg


2393829472_268d59b5d0.jpg


I finished the box using some button polish, then danish oil and finally some wax.

I have enjoyed making this style of box, the pegs for hinges are very effective. I used a pin and some cardboard cut to size as a means of locating the perfect position for the peg. This is quite important as the positioning of the peg determines the angle of the lid when open and also the amount of bevel required to enable the lid to pivot.

Hope you all approve of my efforts.

Cheers, Tony.
 
Escudo":3uxzex90 said:
Hello there Gary,

Roger at the wood workers workshop can supply the incra t-track, hold downs and flip stops. Here is the link;

http://www.woodworkersworkshop.co.uk/woodpeckers.htm

You might spot the woodpecker tables on which my table is based.

I think Rutlands have a few of the items. They are quite expensive, to save a bit I also bought some directly from Woodcraft in America (my brother picked them up when he was there on holiday)

Hope this helps. If you would like to know exactly what I purchased I will draw up a list of the items for you, just let me know.

Cheers, Tony

Can you pm me a list please , looks good and very useful :p
 
Hi Tony
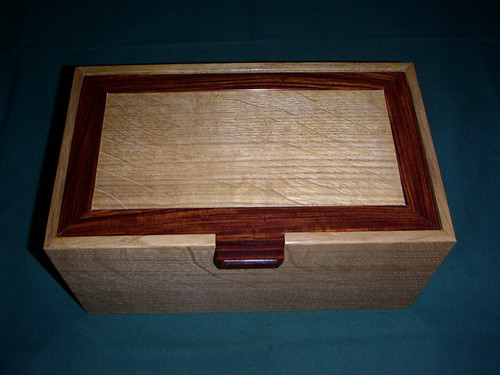
Cracking job you've done there. I really like those strong rays that move around the box sides.

Alan
 
That's a lovely box Tony. Another TUIT.

Speaking of TUITs I'd also like to hear more about that drill press table. As I need one ;)
 

Latest posts

Back
Top