hand done m/t's

UKworkshop.co.uk

Help Support UKworkshop.co.uk:

This site may earn a commission from merchant affiliate links, including eBay, Amazon, and others.

engineer one

Established Member
Joined
25 May 2005
Messages
3,070
Reaction score
0
Location
Wembley, Middx
slowly i inch my way into the dark world of hand made stuff again.

having sort of mastered planing flat panels, and my square legs, the next scary piece if providing at least 12 m/t joints around the frame, apart from the ones to go into the top.

last time i did them by machine, so the question is how do you "guarantee" that you get the mortise holes at the same height on each of the four legs??

i understand that you work to the line, but what happens if you are slightly ham fisted, and go over or is it below the line :?

is there a logic to clamping all four sides together showing the specific faces, and then clamp a block across the bottom so you cannot go below that, or is there a better , more effective way of doing it?

i want to do this by hand, but do have the machinery too, so what's the scoop? please :roll:

paul :wink:
 
Hi Rob,

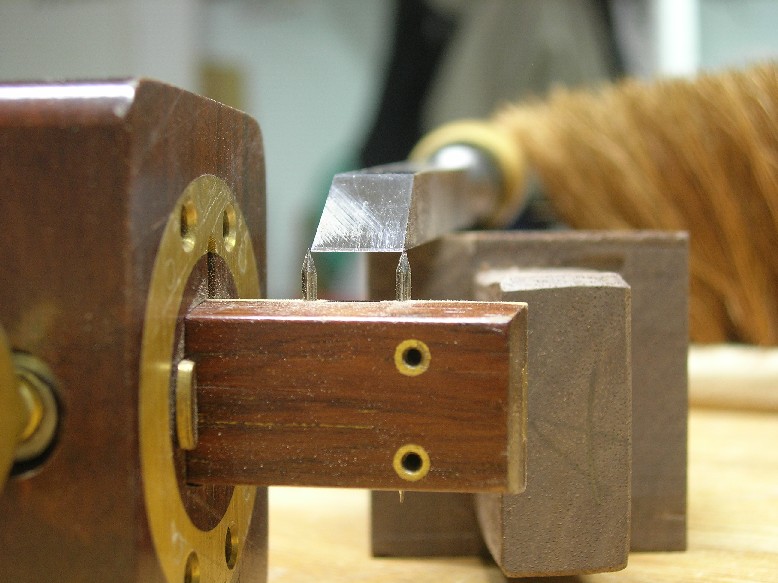
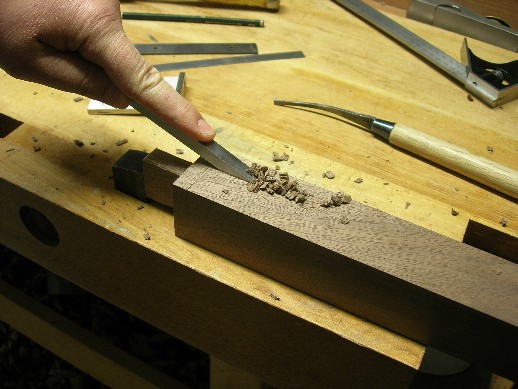
You have marked at least four lines for the mortise. The mortise has the width of the chisel. Like this:

022.JPG


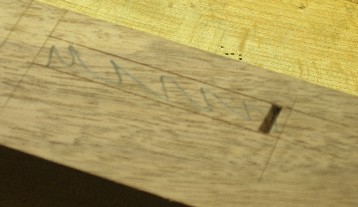
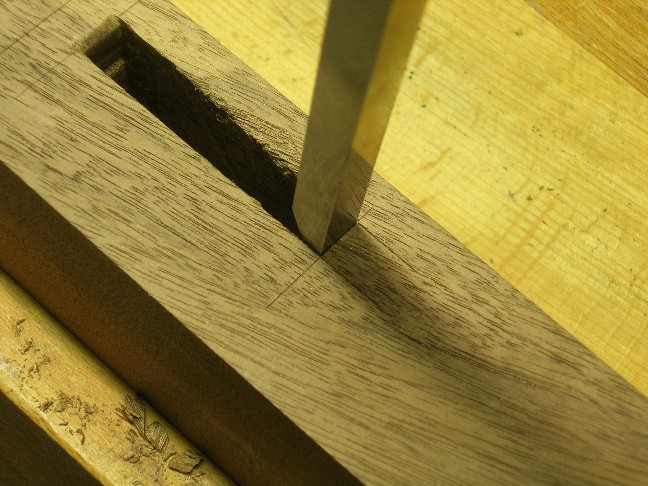
Then you start at the edge near to you face of the chisel to you, a 2 or 3 mm above the lower line as seen here:

024.JPG


You continue and take care to position the chisels edges in between the lines, take your time, the first row of stitches is the most important. You can align the chisel to the line by tapping it with the mallet or hammer at the cutting edge.

025.JPG


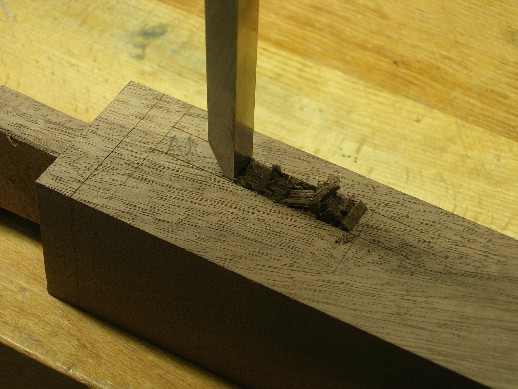
Nearing the far end of the mortise you will turn the chisel bevel to you and will stay 2 or 3 mm again from the line. Not like this I didn't succceed well here, I was to near to the line.

027.JPG


After having chiseled a full row you clean the bottom with the mortise chisel in its position you had when making the last stitch. You lean the chisel opposite of you and scratch on the bottom.

028.JPG


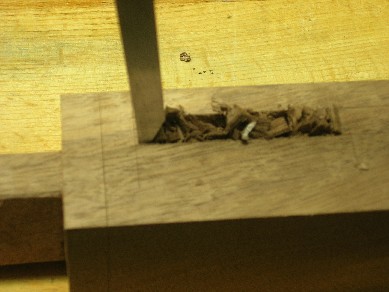
Then you will go on and make another row in depth from one end to the other. You will have more or less the same depth in the whole length of the mortise bottom, because you ride over the whole. You continue until you reached the final depth.

Here you are glad to not have chiseled out the whole mortise, because the chisel will bruise with the face's opposite side the far edge of the mortise as seen on the far end of the mortise. Having reached the final depth, you then pare to the line the two ends as seen here for the near end. Damaging over the marked line is no problem as long as you have shoulders, they will hide the damage (see the far end).

029.JPG


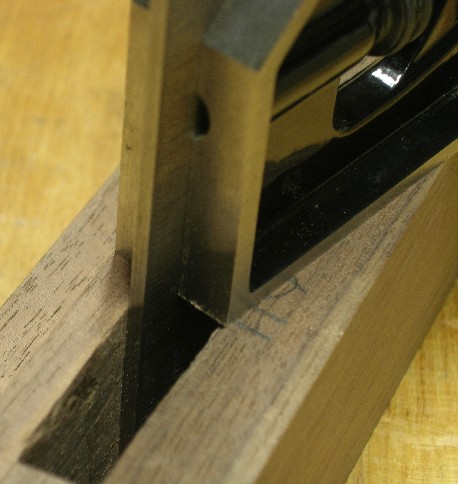
For the depth control you can help with a bit of tape wrapped on the chisel. A little practice will make you reach for the combination square at the right moment. BTW it is not only good for measuring depth but squareness too.

030.JPG


I hope I could help and have answered your questions.
 
marc, thanks as the other paul :roll:
says a good tutorial.

however i am still trying to see if there is another way of guaranteeing
that each set of four matching mortices are at exactly the same place.
:-k
paul :wink:
 
Hi Paul
If you're like me the distance from the top of the mortise to the top of the let is not set until after the mortise is cut. In otherwords there's probably a horn that will get trimmed or cut off after the mortise is chopped. in which case and if you have the same issue at the foot end of the leg (ie they're not cut to size) I would gang the legs together and mark two lines for top and bottom of the mortise accros all legs at once then measure from the top of the mortise to the top of the leg for trimming and likewise bottom of the mortise to whatever distance you need for the bottom of the leg. Cut the leg off at the bottom in the waste and creep up on the mark on a shooting board.

OR

If the "foot" of the leg is prepared gang the legs together using a straight edge to guarantee that the feet are all aligned, measure up to the bottom of the mortice on one leg and then mark accross all legs together.
In terms of actually chopping them out I think again its a case of taking care, or as you suggest you could clamp a straight edge accross the legs as a boundary marker. I haven't tried that but it might work.
Cheers Mike
 
thanks mike i was kind of gathering the courage to creep up on it that way :lol:

i guess at the end of the day it is just like being a trapeze artiste, you have to start slowly and build up the height :twisted:

so i think i will go the route of clamping all four legs together, having cut to almost length.

my feeling is it is safer to work from the bottom up rather than the top down in this case since i shall be morticing the legs into the top, and can shave the waste at the top off later.

so i will make sure the bottom of all the legs is cut and level, then as you say, use a straight edge to align them and clamp across. i guess actually that as long as you use haunched tenons you can adjust the depth of the haunch to adjust the horizon.

paul :wink:
 
engineer one":253pliww said:
i guess actually that as long as you use haunched tenons you can adjust the depth of the haunch to adjust the horizon.

paul :wink:

You could but I suspect that making adjustments like that might result in a rail that isn't level unless you're very careful because you're rectifying an error at one end so to speak and then trying to match it at the other. Its certainly harder to get two tenons matching in 4 planes than it is just two. I avoid haunches if I can for just that reason though it does mean you have to be careful to avoid bruising the end of the mortise. Of course as with everything I could be talking out of my hat :)
Cheers Mike
 
Do not make the mistake I made with my first table, I had routed flutes on the show faces and the rails were set back from the face of the legs. I forgot they were handed, and ruined 2 legs :oops: .
 
you're right newt, it is another lesson to learn.

one of the reasons for asking for help :roll:

also confirms the old thing about doing the joint work first, then the pretty bits, which if i remember correctly were always designed to take the eye away from any errors, as well as add beauty :twisted:

paul :wink:
 
Engineer one wrote:
last time i did them by machine, so the question is how do you "guarantee" that you get the mortise holes at the same height on each of the four legs??

Paul - technically, the right way to do this (and am happy to be shot down....again :cry:) is to trim the legs to size once the whole thing has been glued up so you don't really need to worry unduly about getting the mortices at exactly the right height, within reason.
This is done in the following way, firstly allow say 6mm extra in the length of each leg, proceed as normal with joint cutting ops and glue up the frame. Then stand the the frame on a dead level surface (machine table or similar) and pack out the underside of each leg until the top of the frame is the same distance from the level surface on all four sides...put some weights on top of the frame to give a bit of stability. Here's the cunning part.....now find a scrap of stuff and bang in a panel pin which has been filed to a chisel edge so that it cuts a line. All you then do is to scribe a line all round the bottom of each leg on all faces such that the distance from the line scribed to the top of the stand is the ultimate stand height that you're aiming for. Remove the waste from the bottom of each leg with saw and clean up to the line with a block plane. If done accurately, not only will your stand be the correct height but it'll also be level and true....it's easy when you try it - Rob
 
so after a couple of moments thinking i wonder whether it is not possible to build the thing so it is straight from the get go.

since the legs will be vertical, i wonder at the need for a design that demands after construction adjustment :twisted:

must be the engineer in me :lol: :roll:

oh yes do you cut the mortises first or the tenons :?

paul :wink:
 
Engineer one wrote:
oh yes do you cut the mortises first or the tenons
Doesn't make any differance either way I think, but I usually cut the tenons first but sometimes..... :wink: - Rob
 
Hi Paul,

Mark has covered the mortises beautifully. You are still asking 'how do I register the mortises so they're all the same height on every leg?' This need not be critical, cause you'll mark the tenons from the mortises.

What is critical is to have the panels truly square, and planed to the same width (top to bottom). Then you want a marking system, so that you can orient the panels to the legs correctly every time. For example, the legs might be denoted A, B, C, D. The leg faces to be mortised might be A' and A''; B' and B'', C' and C'', D' and D''. Then the corresponding panels can be marked the same--mark everything "right reading", so you know if you're reading it, then it's in its correct assembly position.

As to the vertical reference on the legs, I would suggest you use the lower edge of the panels. Mark that reference line, and lay out everything from there. Those lower panel edges will be either exposed, or will be wrapped with a molding, so you want them to be aligned. So get the legs lined up side by side, and mark that reference line for the lower panel edges.

So now you make your mortises as Marc showed.

At this point, you're ready to mark the tenons. Lining up, say, leg face A'' with panel end A'', get the panel's lower edge aligned to the reference mark on the leg--you've marked it all 'right reading', so shouldn't be a problem getting the thing backward or upside down. Now mark your tenons to match the mortises you've already chopped. Arrange the boards, so that your marking knife registers against the mortise wall as it marks the tenon position. Talking about the tenon's height position now--the tenon width should be gauged, and gauged off the same reference face used to gauge the mortises. So the precise vertical position of the mortise is not especially critical--it is the tenon location that will be critical, but you have the advantage of setting it off directly from the mortise which has already been chopped, and with it physically aligned with the reference line on the leg.

I gauge the tenon widths with the same gauge used for the mortises, unless there is to be an offset between panel and leg face, in which case you might want to use a separate gauge, so that you keep all your original gauge settings until the project is finished.

Why mortises first? If you oversize the mortise a bit for example, you can always correct when marking the tenon. And if you screw up the tenon by overcutting for example, it's easier to fix it than to fix the mortise. Just glue a shim to the tenon face. Course this is all theoretical because all of us always make perfect mortises and tenons (<:).

Wiley
 
gee wiley, now you know why i was asking :?

last time i made m/t's noah and i were making the b**** ark.

thanks guys this is all useful, now i have to prove that not only can i read and write, but put it into practice :lol: :twisted:

paul :wink:
 
I'm with Wiley. All of my hand-cut mortises tend to be 'off' a little here and there, assuming 'off' means not identical ... in fact, there is no particular reason for them to be identical, so in reality they are not off. Anyway, I mark each tenon to the mortise it is destined for. Since I hand-saw the tenons in these cases, no actual extra work. The other way I occasionally employ is make em all a tiny bit fat (the tenons) and pare em useing a #140 to fit. Usually the mortises are close enough that only a little fat is required.
 
not so final thought, is there a minimum and maximum depth of tenon??

i assume that if you are using 19mm or thereabouts wood, you need at least 12mm long tenons, but would over 30mm be too long???

is there a sort of standard in the same way there is a standard that seems to say that the tenons should be about 1/3rd the width of the wood???

paul :wink:
 
Hi Paul,

is there a sort of standard in the same way there is a standard that seems to say that the tenons should be about 1/3rd the width of the wood???

paul :wink:

______

This information is usually taught in terms of 'what is the standard way that a tradesman makes this particular joint', and the rules of thumb are subsidiary to the standard design. The one-third rule applies in the situation of a simple frame for a panel: Quoting from Charles Hayward, 'Woodwork Joints', p. 25-26,

"The tenon should be about one-third the thickness of the wood being jointed, and it is a case of selecting the chisel nearest to the size and working to this. Thus for 3/4-in. wood the 1/4-in. chisel is best; for 7/8-in. and 1-in. stuff the 5/16-in. size is advisable; and for 1-1/4-in. wood the 3/8-in. is used."

However, situations differ. When tenoning case sides into legs, the tenons will meet in the middle of the leg, and if you used the one-third rule, there would be a severe loss of glueing surface, plus weakening the leg. Or, when tenoning drawer blades into the two front legs, the top rail is usually double-dovetailed, and the lower rails are double-tenoned.

As far as length goes, you are generally looking for the longest insertion which is consistent with the aesthetics of the piece, and the physical construction situation. But the discussion gets very nuanced. You mentioned (I think) tenoning into 3/4" stuff, like a case side. On this side of the pond, that joint is usually made with a through-tenon, which is pinned (American arts and crafts style, Stickley for example).

If I might make a suggestion, which I think would be forever helpful to you, as it is to me, buy the book 'Woodwork Joints' by Charles H. Hayward. This is a wonderful reference to the joints we use in furniture making and joinery, and is not particularly expensive (check abebooks, for example). Like other texts, it proceed from 'here is how you make this typical joint', rather than leading with numerical specs and rules of thumb.

Congratulations on your great progress!

Wiley
 

Latest posts

Back
Top