Garage Storage/Work desk

UKworkshop.co.uk

Help Support UKworkshop.co.uk:

This site may earn a commission from merchant affiliate links, including eBay, Amazon, and others.

MrPie

Member
Joined
13 Aug 2018
Messages
7
Reaction score
0
Hi all, long time occassional lurker and finally i've decided to create an account to get some advice/input on a design i'm working on for my garage. I've currently taken the week off to de-clutter my garage and create a storage solution at the back as well as a work bench for when i need to tinker with things.

When it comes to wood working i'm an absolute amateur save for doing 'Resistant Materials' in high school back in the day. I've had a look at the type of wood i could use and have set my eyes on 4x2 CLS studding timber for the frame work and OSB 3 18mm for the sheets but i don't know if this is overkill or not enough? My sketchup is below, would appretiated any and all help!

Cheers
 

Attachments

  • garageshelving.png
    garageshelving.png
    45.3 KB
Welcome to the forum.

OSB is not good for horizontal surfaces as it tends to sag and the exposed edges are nasty. Some cheap hardwood or shuttering plywood would be better.

I think the bench looks a bit shallow, do you have space to make it a bit deeper? 600mm is a good depth for a woodwork bench. Use two layers of 18mm MDF for the top, screwed down so you can flip it over when it gets damaged. MDF is nice and flat and suitably heavy, as you want a bench to have some mass so it doesn't move when hammering or planing on it.

As for the joinery on the bench, try and make everything as sturdy as possible using half laps or mortise and tenons if you feel adventurous.

Matthias Wandell on youtube has a good video on constructing a simple workbench. https://www.youtube.com/watch?v=M_xJD_aylYw
 
Thanks man, I'm kinda scared trying mortise on a big project (for me) so i might just stick with butt joints for this project. However, i do plan to make a seperate work table and some more furniture and storage solutions for the garage later down the line which will allow me to work on different types of joints.

At the moment the depth is sitting at 713mm so should be good, i do have shelves on the opposite side and the garage is quite narrow and long so i need to be careful i have enough room to maneuver around the back and thanks a lot for the input on wood choice, i'll go with double mdf for the workbench, would a single 18mm MDF piece be enough for the storage slots around the work area? Much appretiated on the link, i'll be looking into it!
 
MDF is not a good choice for shelves either as it sags under its own weight, unless the span is short or you add support underneath it. The smaller shelves at the ends of your unit would probably be ok, but the wider shelves in the middle would need extra support.

As for butt joints, they're not the strongest but if you add dowels to them like in the video I linked, that will make them significantly more sturdy. Why not have a go at half laps? They're not hard to do and would be good practise. If you do try them and you end up with gaps, just use polyurethane construction adhesive instead of normal wood glue and that will take care of the gaps for you.
 
How pretty does it need to be. OSB will be fine as will ply. Butt joints and screws will be good also. I have built plenty similar shelving using 3*2 cls and 9mm osb, shelf braced under osb every 600mm or so. My shelving is only 400mm deep though. Your material size will be more than good enough but if using osb i would round over the top of the leading edge as it tends to splinter when loading / unloading.
On a side note why not make it 600mm deep. Much better for timber supply sizing as less waste/offcuts made. A sheet of osb can be 1200mm by 2400mm if metric and 1220mm by 2440mm if imperial. Good advise on doubling up mdf, makes good heavy worktop (hammer) (hammer)
 
Lesson learned for the future, didn't think about looking at the sheet sizes and now it looks like i'll have some offcuts i'm going to have to use to reduce waste (i'll probably use them for the top shelf). The middle section will have a brace in the middle so provides strength and prevents sagging, doesn't show at all in the sketchup picture i posted.

It's Functionality over prettiness, i've yet to buy the sheets but 18mm MDF is quite heavy. Good shout on the edging of OSB. What would you use to round it off?

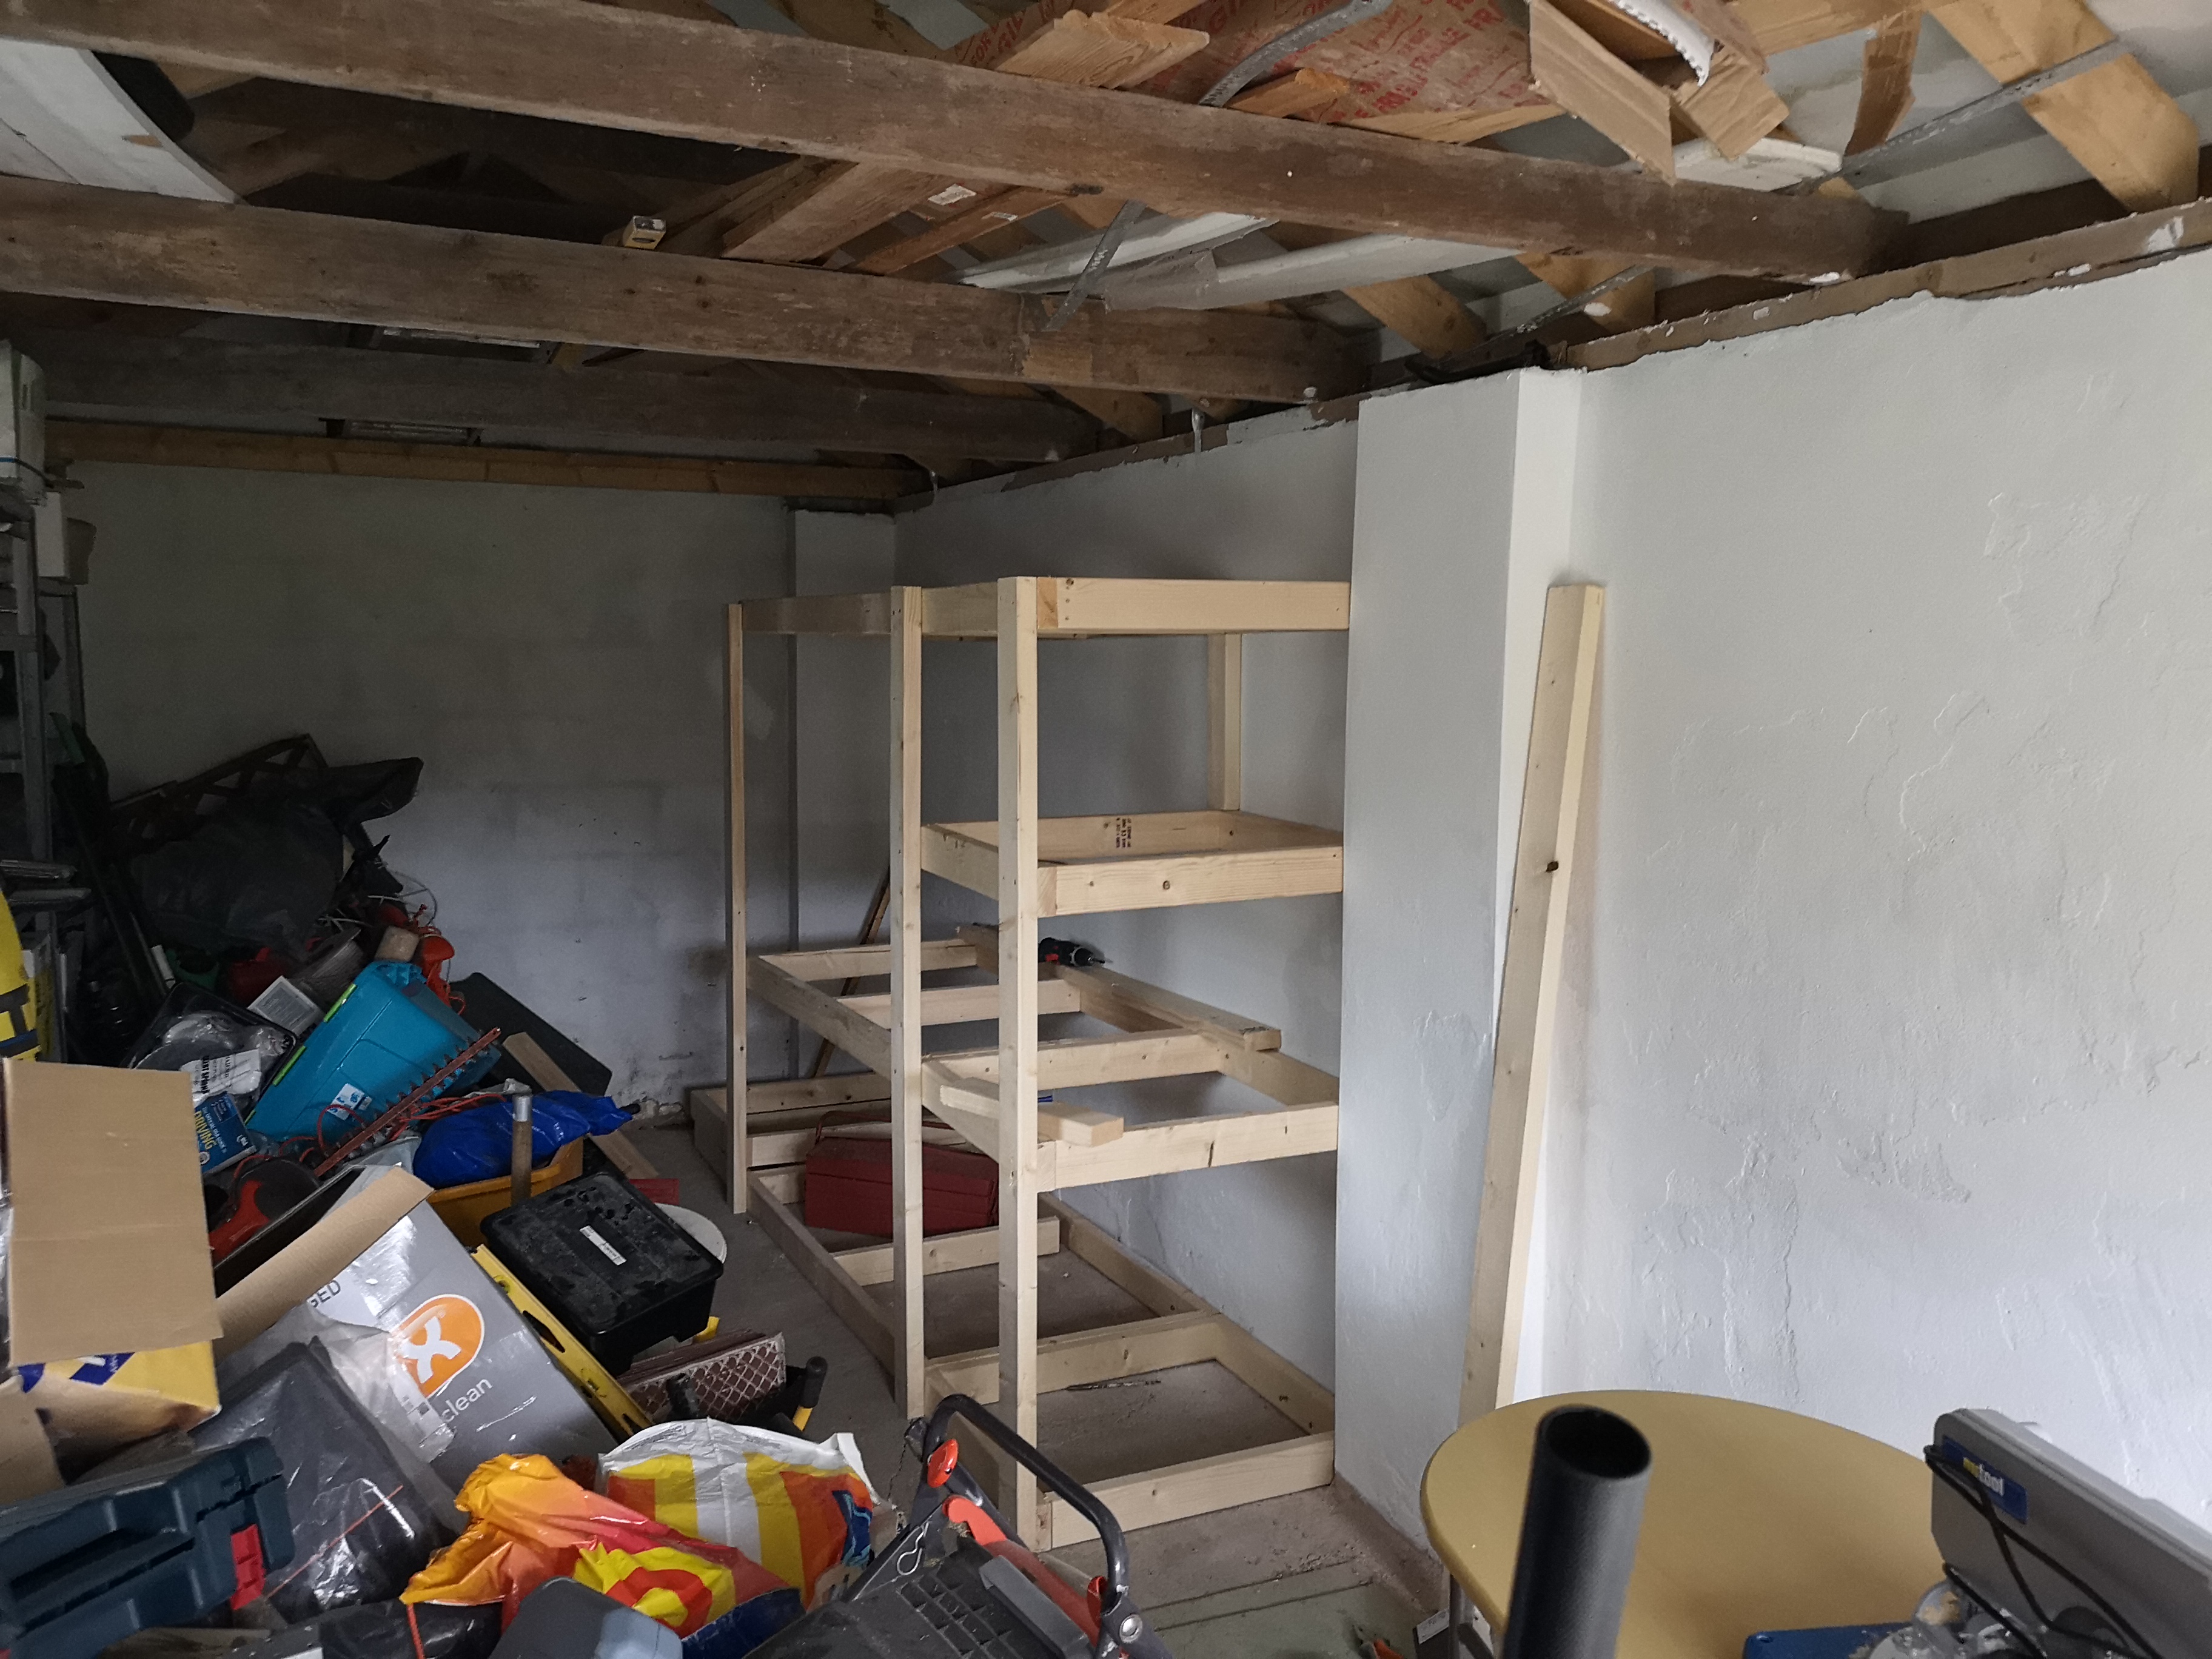
I've spent today making all the cuts and i've done all 8 of the frames. First time using a mitre saw and noticed half way through my cuts that the angle wasn't exactly at 0º #-o Luckily it's not been too off and was enough to secure them although will take Fergals tip and get some polyurethane and fill the holes around the corners.

Tomorrow i'll be joining the 3 long frames and get to securing it on the wall.
 
So little update today. I'm nearly there. Fixed half of the shelf and now have the smaller side shelves left to secure on the far end. Had some pita issues with these concrete screws not drilling into the wall so had to pilot some on and it became messy, didn't help that the render was very flaky and loose. I had some help securing the frames on and he told me to lay the last frame on the floor as it gives more room on the bottom shelf and it's less wasted space so in the end we went with that.


62ldYlk.jpg
 
You could round off the OSB corners with a router and roundover bit if you have one, it does knacker the router bits though. Or a file or rasp then sand. Or angle grinder + flap disc.

I've never had much luck with concrete screws either, I tend to stick to wall plugs or expanding fixings now. There is a way to fix things to solid walls without all the messing about. it's not the "official" way to do it, but it does work. Forgive me if you already know this. I wish somebody had told me this technique when I was refurbishing my first house.

1. Put the thing that you want to attach to the wall where you want it and drill through it with a normal drill until you hit the wall.
2. Swap the drill bit for a masonry bit of the appropriate size for the wall plug
you are using and drill the wall to the correct depth.
3. Screw your screw into the wall plug just enough to hold it and then hammer the screw with plug attached into the wall through the hole in your work piece.
4. Tighten screw.
 
I'm leaning more towards plywood even though its slighty more expensive. But osb is still on the board.

The concrete screws I got were supposedly self drilling with no pilot needed but that wasn't the case I did exactly what you said but reinserted the screw after drilling through the wood and masonry, screwed it down and tightened it off with a ratchet. They are sturdy though so that's good.

Sent from my CLT-L09 using Tapatalk
 
hi. Good progress, i used a 1/4" roundover bit in a router. As said above hand sanding or power sanding are options. I try to build stuff with as little off cuts as possible produced. I have paid for those bits to go in the bin :shock: ....so no....i keep them to use on something and end up swamped with bits. Now with every off cut something smaller get made :roll:
My shelving similar to yours did not get rounded over :oops: . This is how i know it chips/flakes. Although next time i did osb shelving I did the rounding over.
 
you could easily put a hardwood lipping around the edges by nailing them in around the ply, it doesn't have to be fancy, then plane it down to size and remove the arris on the edges.
 
Thanks for the tips. Need to get a router to sort the edges as I'm keen on seeing how it'd look.

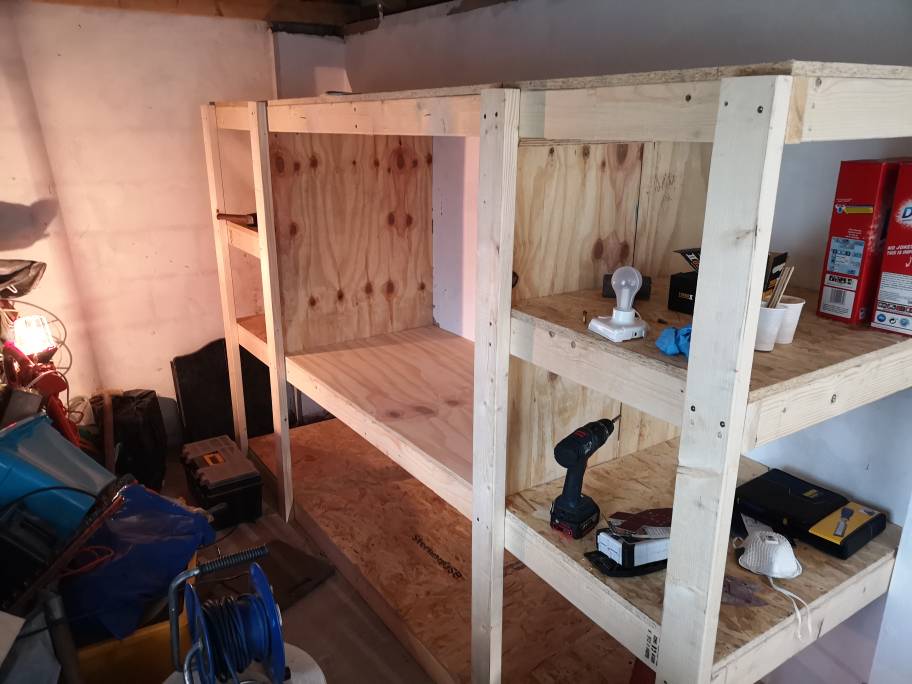
I decided to go for osb for the side shelving and for the work desk I went for sheathing ply.

Spent the part of yesterday and all of today putting the sheeting in. I found it very cumbersome and inaccurate cutting the boards with my circular saw. I clamped a long spirit level to act as my guide when using the saw but the problem was making sure the spirit level was straight. Had to take measurements from the spirit to the edge of the board at the top and bottom to make sure it was straight as possible. Surely there must be a better way? Doing this for every cut was time consuming!

As you can see on the upright ply board closest to the camera my cutting wasn't so great and I have a big gap. I attempted to cut a small strip and shove it in but by now you must know how inefficient it is for me to make cuts with my saw. So is there some sort of filler I can buy that can hide the gap? Obviously I'm not expecting it to match the grain, just want to make it less obvious. I used sawdust and pva to fill the smaller gaps that I found around the shelving.

Next up I want to add a slide rack of sorts to the top timber frame and make a tool Holder board thingy as well as add a vice to the desk.

This first project has definitely been a learning experience. It's cost me about £200 odd for the wood materials excluding the tools I've had to buy (circular saw, screws, clamps) I've also now got so much more available space to use up! Rolling work bench in the future perhaps!
742052aeca5112915c5e8e23c7c87c5c.jpg


Sent from my CLT-L09 using Tapatalk
 
Looking good.

If you are going to use a router - make sure any nail and screw heads are sunk. The base of the router will knock into them and won't be able to slide pass.

I've just fallen over piles of wood in my shed and shot straight out the door!! When you get a moment - have a ruthless clearout of boxes and tat. I know your are mid project and a lot of it will go onto the shelves - but you don't want to trip and ruin your work or hurt yourself. Plus you'll have a great little space to work in afterwards with room to move.
 
A track or plunge saw is invaluable for making long cuts in sheet material and saves a lot of time compared to the method you've been using. You can turn your circular saw into a track saw by making a simple guide out of scraps. Search youtube for "diy track saw" for lots of videos on how to do it.
 
Stanleymonkey":d59eoqxq said:
Looking good.

If you are going to use a router - make sure any nail and screw heads are sunk. The base of the router will knock into them and won't be able to slide pass.

I've just fallen over piles of wood in my shed and shot straight out the door!! When you get a moment - have a ruthless clearout of boxes and tat. I know your are mid project and a lot of it will go onto the shelves - but you don't want to trip and ruin your work or hurt yourself. Plus you'll have a great little space to work in afterwards with room to move.
Thanks, yeah I've sunk the majority of the screws so they wouldn't get caught on anything I slid across the shelves.

I hired a skip to throw a lot of crap i didn't need but I still have a few boxes worth of stuff I need to get rid off. I've tripped countless times getting this shelving up lol

Was looking at the workzone router they sell at lidl,any idea if they're worth it? No point buying an expensive one as I don't believe I'll use it enough to warrant a high purchase

Wow thanks fergal . I didn't know these were a thing!

Sent from my CLT-L09 using Tapatalk
 
I bought a router+table from Aldi years ago when I was starting out. It was rubbish. Things may have improved since then, but I've always found Aldi tools to be a bit hit and miss. The Parkside tools from Lidl are consistently better and I have had good use out of the ones that I have.

As for budget routers, Katsu are supposed to be pretty good. I don't have one so can't vouch for them, but there's been favourable reviews on this forum.

katsu-router-trimmer-t92553.html
 

Latest posts

Back
Top