Galoot Block Plane - WIP

UKworkshop.co.uk

Help Support UKworkshop.co.uk:

This site may earn a commission from merchant affiliate links, including eBay, Amazon, and others.
Hi HC

I decided to take it one step at a time from this point...

First I cut down the old iron so that I got an idea of the handling once I make a parallel iron....and did more work on the staining and polishing of the infill....
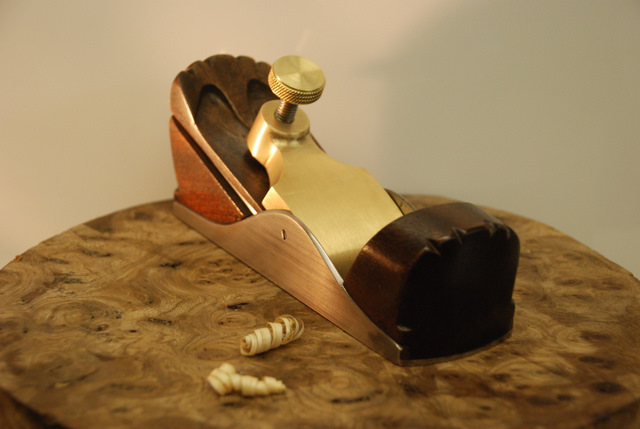
DSC_0270.JPG


Then I mirrored the wool from the back wedge to the front tote...
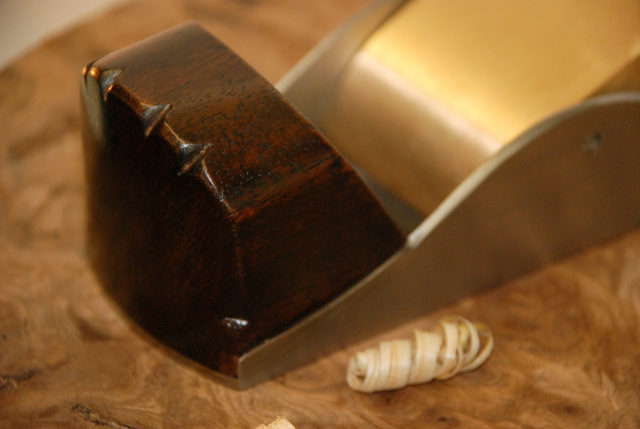
DSC_0284.JPG


I think this works enough...I think it would be too much to mirror the whole ram's head at the front...this would create an inbalance....do you agree?

Now to find a 2009 two pound coin...
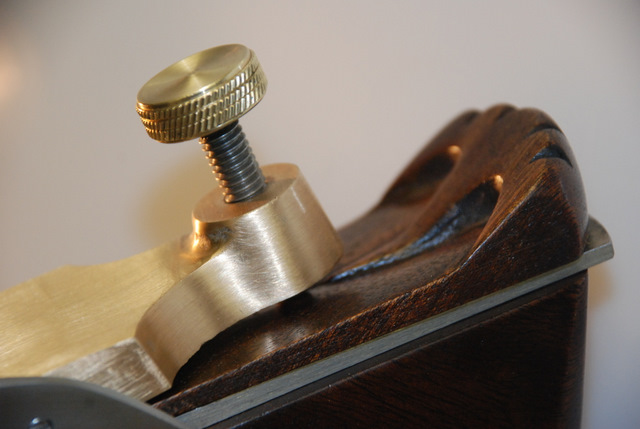
DSC_0280.JPG


They do exist but the bank and post office don't have any....more searching!!

Derek...on your wedge...does the tip go all the way under the lever cap or does it fall short. For mine it is currently under the front lip of the lever cap along with the front of the iron but I think I would prefer to cut it back so that the tip of the cap presses down directly on the front of the iron...this makes more sense to me but before I cut it back, I need your opinion mate....

Cheers guys....

Jim
 
Derek...on your wedge...does the tip go all the way under the lever cap or does it fall short. For mine it is currently under the front lip of the lever cap along with the front of the iron but I think I would prefer to cut it back so that the tip of the cap presses down directly on the front of the iron...this makes more sense to me but before I cut it back, I need your opinion mate....

Hi Jim

I'll answer your PM here as well.

I had always planned to add a grip to my smoother. In the Mk I you can see that the gap between the lever cap and bed/blade is quite large. I used the plane sans grip for 4 years. It was OK but not always comfortable. Hence I added the grip.

The grip does not extend under the front of the lever cap, instead it stops short so that the lever cap presses down on the blade. So you can freely modify yours to do the same.

I am curious to know how comfortable your grip is - it is very attractive and great workmanship, but practical? Perhaps you need to live with it for a while as I did mine ...

Regards from Perth

Derek
 
hi jim

sorry i haven't replied earlier been changing broadband suppliers to day just got back on line, perfick mate perfick , leave it is as it is look good to me, remember when you do the hardening and tempering on your new blade i want a blow by blow detailed description with tons of pics , all that is new to me so it will be a big learning curve . nice one jim, well done take it to the show and be proud of it . hc
 
I'm dead impressed with this. It's come so far - many people would have tossed that original body in the bin, but you've made something to be proud of and enjoy. Inspiring!
 
Cheers Phil and thanks again for the cap! It turned out fine!

I cut the wedge now "handle" back it it is much better...the clamp comes down further and holds the iron better...I will take a picture when I cut the recess for the coin...

Typically the two pound coin is 28mm and my Forstner bits are 24mm, 25mm and 30mm....so that will have to wait a while! The actual carving is now quite subtle and gentle and the arch of the palm cups over it anyway and it is very comfortable....much better than the two pointy horns! You live and learn!

Cheers HC! Much appreciated and thanks for your constant assistance too...it was a great help during the various stages to have someone interested in a parallel activity...and I certainly will be taking pictures of the forge and hardening...if only for the insurance company later! :D :D

I think I will bring it along to the Staplehurst do....even as a novelty attraction!! There are many things I could have done better and this learning experience has set me up to want to do another one...trying next time to avoid some of the pitfalls.

There is some fine tuning to be done...but most of that involves the mouth, front frog recess and will need the new blade to get it right....I want the blade thickness to be just enough to hit the front of the mouth with a tiny gap ultimately.

An adjuster may very well be another addition!

Cheers guys and gals...you have been a great help along the way!

Jim
 
AndyT":35e6hrj6 said:
I'm dead impressed with this. It's come so far - many people would have tossed that original body in the bin, but you've made something to be proud of and enjoy. Inspiring!

Cheers Andy! Our posts passed in the ether!

I appreciate your comments greatly!

Jim
 
I want the blade thickness to be just enough to hit the front of the mouth with a tiny gap ultimately.

Jim, for the next one, install the rear infill after you have the blade you will use. That way you can snug it up as close as you want.

Regards from Perth

Derek
 
I want the blade thickness to be just enough to hit the front of the mouth with a tiny gap ultimately.

Jim, for the next one, install the rear infill after you have the blade you will use. That way you can snug it up as close as you want.

Regards from Perth

Derek

Yup Derek! One of my "hindsight" moments!!! The way I have worked it the rear mouth angle is a tiny amount higher than the rear infill and should bed down nicely.

I am getting gauge steel the same thickness as the Isaac Greaves that I used to set the plane. The plan is to cut the same bevel and it should result in a tight mouth at the transparent shaving point.

Yes...the next one will not be so "reverse engineered"! :wink: :D

Jim
 

Latest posts

Back
Top