First WIP - Jewellery Box - with pics - NOW FINISHED!

UKworkshop.co.uk

Help Support UKworkshop.co.uk:

This site may earn a commission from merchant affiliate links, including eBay, Amazon, and others.

WoodAddict

Established Member
Joined
4 Feb 2010
Messages
408
Reaction score
0
Location
Rothley, Nr Loughborough
I've been lucky enough to have been given a nice little selection of hardwood "offcuts" recently. The majority of which was from MotownMartin so thanks again for that :wink:

kimsjb001.jpg


I wanted to use it for practising joints and general sizing/thicknessing. I thought the best way to practice would be to actually make something! So here we are......... I've still got no bench :roll: for a couple of reasons, so until then I'm working on the floor and various boxes and tool boxes which isn't the best but I'll hopefully have the bench sorted when it comes to cutting the joints and assembling.

I chose an assortment of pieces based on size and looks, then I thicknessed a piece to around 6mm for the box sides....

kimsjb002.jpg


This particular piece had a nice little detail on one edge so I'll shamelessly be leaving this on as I think it could look nice when it's finished :oops: :lol:

I did the sizing and thicknessing all on the bandsaw with my new "Tuff-Saws" blade! 8) and very nice it is too, Thanks Ian!

kimsjb003.jpg


I really must get some dust extraction sorted for this! I was wearing a mask and I left the door open but it's not ideal.

I got a few bits cut to size, it's the first time I've tried the BS with any kind of precision and it seems pretty good so far!

kimsjb004.jpg


kimsjb006.jpg


The darker wood in the last picture will be for the drawer in the bottom, the thin square piece will be for the hinge piece of the lid. I'll be hinging with dowels which is why the back piece is lower than the side pieces.

I've not done a drawing of what the box will look like as I'm kind of just going with it and seeing what happens. My basic plan is a drawer on the bottom and a top section with a lid. I'll be joining the box sides and the drawer with finger joints. Basic but hopefully effective. If you guys can help out with wood ID as I go I'd be very greatfull as I'm not sure what any of it is. :roll:

Any general pointers or observations welcome.........

Thanks
 
Looks like oak and sapele to me.

I would do some sort of drawing, as any potential mistakes can be nipped in the bud then. Probably a full sized one, then any design issues that arise can be sorted too.
 
Hello WA
My 10ps worth would be to trim the oak down alittle to get rid of the curved growth rings. This will be where the wood is going to move as they try to straighten out.
If you get rid of that bit, you are left with a fairly quarter sawn pieces.
Have fun mate
Rich
 
Thanks for the comments. I will do a drawing before I get much further. I usually draw most stuff, but this on ejust sort of took off too quickly. I didn't even plan on doing it for a while yet but I just couldn't resist :)

richburrow":52jacpqw said:
Hello WA
My 10ps worth would be to trim the oak down alittle to get rid of the curved growth rings. This will be where the wood is going to move as they try to straighten out.
If you get rid of that bit, you are left with a fairly quarter sawn pieces.
Have fun mate
Rich

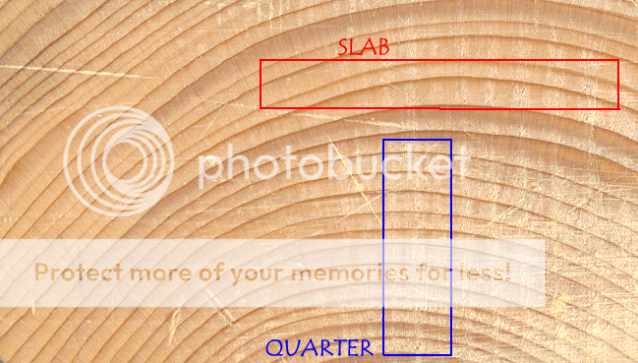
Excuse my obvious lack of knowledge here Rich but do you mean this bit?

temp.jpg


And what does fairly quarter sawn mean? :? :oops: :D

Thanks
 
Yes that is the bit that could move.
When wood drys out or moves into a centrally heated house the growth rings try to straighten out.
Quarter sawn is when the growth rings go 90 degrees to the face of the board, so are very short and less likely to move.
Also more expensive

Softwood_endgrain_marked.png


I hope this has helped
Rich
 
Hi Wood Addict

That's a nice straight parallel cut you've got from the bandsaw. But if you do have a plane, now's the time to get the bandsaw marks off, unless you are either going to line the inside or use it for something rough. If you can't plane (which is easier with a bench!) some careful sanding would be worthwhile.

With the lid being hinged on dowels between the sides, you can control how far back the lid will pivot before the edge of the lid hits the top edge of the back of the box.

Draw the cross section full size and play about with a cardboard cut-out of the lid section to see what I mean.
 
AndyT":1uhbjan1 said:
Hi Wood Addict

That's a nice straight parallel cut you've got from the bandsaw. But if you do have a plane, now's the time to get the bandsaw marks off, unless you are either going to line the inside or use it for something rough. If you can't plane (which is easier with a bench!) some careful sanding would be worthwhile.

With the lid being hinged on dowels between the sides, you can control how far back the lid will pivot before the edge of the lid hits the top edge of the back of the box.

Draw the cross section full size and play about with a cardboard cut-out of the lid section to see what I mean.

Thanks for the tips. I'll be running over the boards with the sander, I have tried playing with the plane but I just can't get to grips with it without a bench. The bandsawn side will be the inside and only a little will be seen as the bottom half will be the drawer section and the top half may be covered (although I'll decide later on about that).

I see what you mean about the hinge piece at the back of the lid. I measured the corner-to-corner of the block and cut the back down by that measurement. Since then I've realised though that I'll need to take off the thickness of the lid piece too :oops: as it will be sitting inside the side pieces.

Thanks again.
 
WoodAddict":2f3l90nv said:
I've been lucky enough to have been given a nice little selection of hardwood "offcuts" recently. The majority of which was from MotownMartin so thanks again for that :wink:

kimsjb001.jpg
No problem Paul, glad to it being worked on, good luck.
 
Here's the start of something for sure...... on that slippery slope everyone talks about :D good luck and have fun, just watch your fingers!
 
I took the advice above and had a go at drawing this today......

jeweleryboxfront.jpg


jeweleryboxback.jpg


The joints are going to be finger joints. I had a little trouble drawing them but you get the idea. It was good to draw it in 3d as it gave me a couple of ideas and answered a couple of questions on the construction side of it.....

The colurs aren't exactly the same but I think the contrast will look good.

I've been promised the timbre early next week that I'm waiting for to make my bench legs so I can hopefully get that done and get on with this project soon. :)
 
Now with a bench in the workshop I've spent loads of time in there this week. I've been working on this jewellery that I started a while ago.

I glued some strips to the side pieces that the drawer wood run along. As they were small I didn't want to clamp them, I thought it would be easier to just weight them down with some timbre.

Stupidly I used the legs that were cut ready for a couple more benches that I'll be building. :oops: it seemed like a good idea at the time, but now I realise that the legs were quite damp and the box pieces soaked up some of the moisture. After 3 days they came out like this -

glueup002.jpg


I'm not very confident in my band saw at the moment as it's not been cutting well so I didn't want to thickness anything. I had a look through the wood that I had in the pile and found a couple of strips of beech. I decided to use these. They are a lot thicker than the original idea but I think it will work well. No real plans for this one, I just went with it and we'll see how it turns out.

glueup003.jpg


glueup001.jpg


glueup004.jpg


The finger joints worked out better in the thicker wood than they did in my original effort. I'm still not happy with them though so I may invest in a gents saw as advised instead of my tennon saw and see if that makes a difference. Maybe I just need more practice :?

The drawer is made and the box is glued up overnight so I'll be back in there tomorrow and it shouldn't be far off ready for finishing 8)

I've just noticed that in the picture of the drawer the front was only offered up and not glued, but the front is actually upside down :lol:
 
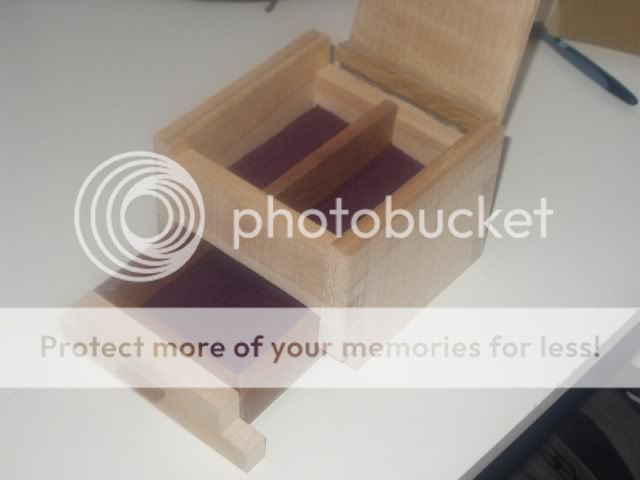
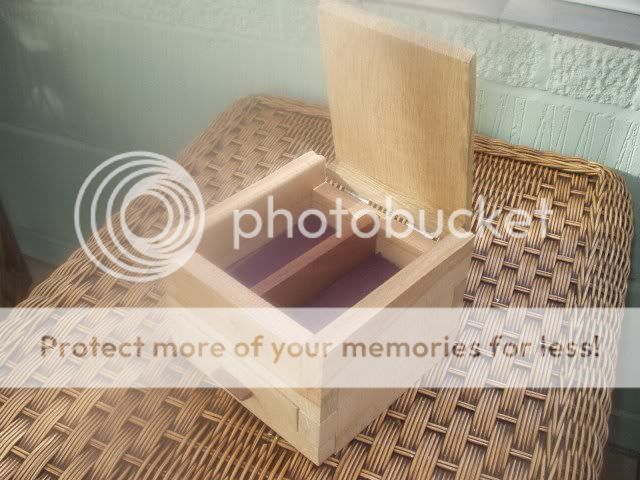
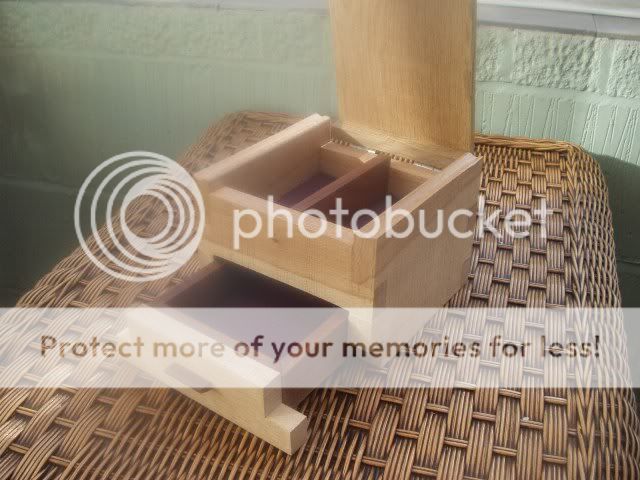
I got this finished this morning/thursday night as far as the workshop side of things.

finishing004.jpg


finishing005.jpg


finishing006.jpg


I decided on something a little different for the lining in the end. The box is for my sister-in-law's birthday, and she's actually get married on the same day. I got hold of some of the material from the lady making her bridesmaid dresses and I wrapped some around some cardboard so they just drop in as bases.

finishing011.jpg


I thought the actual wood on the sides looked ok as it is.

finishing009.jpg


I'll be varnishing every 4 hours or so over the weekend which should see it finished soon 8)
 
Chems":39kihdn7 said:
Looks really good!

Varnish? Wouldn't a nice oil give a better finish? I hate varnish :(

It may well do. It's just that I have some varnish and nothing else. If I had more money this month then I may well have tried something different. Finishing is a big subject that I really need to read up on and experiment with. I'll see how this ones looks when it's finished. Hopefully it will come out ok.

Thanks for the comments ;)
 
It's not perfect

When I was doing woodwork at school This wasn't in the teachers vocabulary.

If you didn't get it right then you had to do it again,this meant you'd fall behind in the next project.

Keep striving to better yourself and if one piece doesn't fit then recut another.

Perfection will not come if your keep saying that "its not perfect" in your own mind.
 
RussianRouter":1vcyaw8x said:
It's not perfect

When I was doing woodwork at school This wasn't in the teachers vocabulary.

If you didn't get it right then you had to do it again,this meant you'd fall behind in the next project.

Keep striving to better yourself and if one piece doesn't fit then recut another.

Perfection will not come if your keep saying that "its not perfect" in your own mind.

Nor will it ever come if you never finish anything. I have only ever made 4 pieces that I consider good enough to sell or give to someone else, however I have lots of other pieces that I can see improvement over which is just as important.

Often you can not decide if something is wrong until after you have finished it and stepped back.

Woodaddict: Keep trying, experimenting and improving. I know of no one who has created something 'perfect' in their own mind , set your own standards and then try to raise them with every piece.
 
Thanks,

Don't get me wrong, I am happy with it. But there are definitely things that I'd do differently next time. It was nice to get it finished and having it look very similar to the original design idea. It's all a big learning curve and obviously I will get better the more I make and the more I practice.

For this project I am happy 8)
 
WoodAddict":341ocefz said:
I will get better the more I make and the more I practice.

For this project I am happy 8)

Wasn't being funny or sarcastic but a bit of critique works wonders for the ego. :wink:

I reckon you got the idea of that box from a recliner chair? :)
 
Back
Top