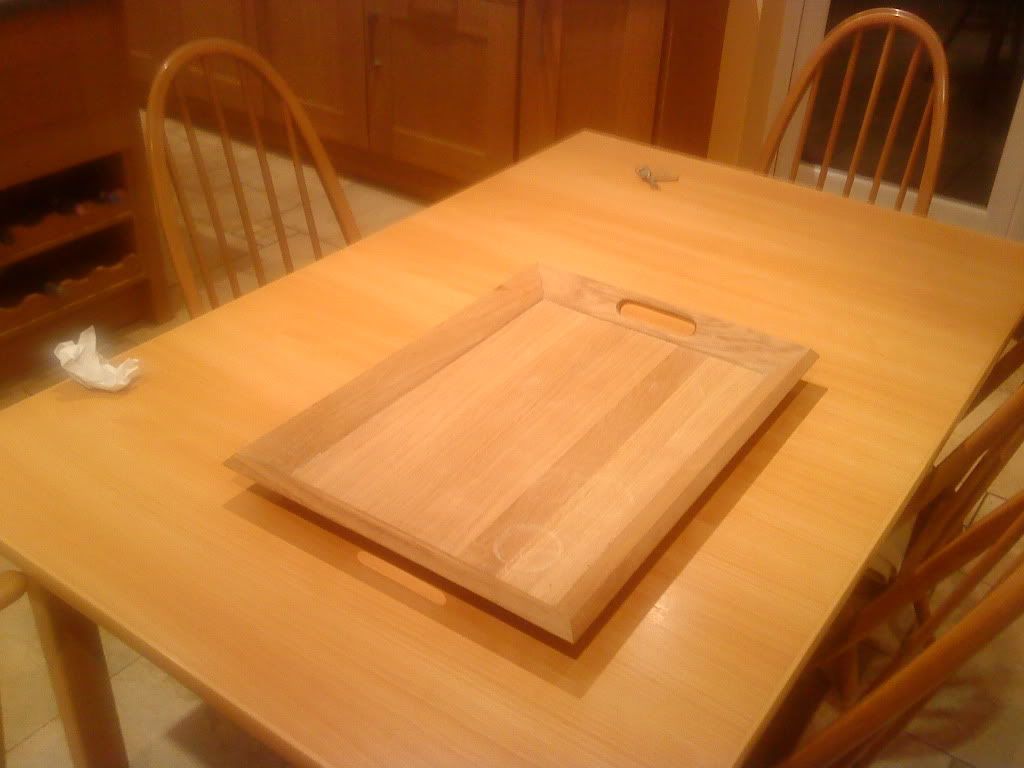
European Oak Serving Tray

UKworkshop.co.uk

Help Support UKworkshop.co.uk:

This site may earn a commission from merchant affiliate links, including eBay, Amazon, and others.
Here it is:

(Looks in the picture like there is a gap in the base, there isn't its just the shadow!)
DSC00788.jpg


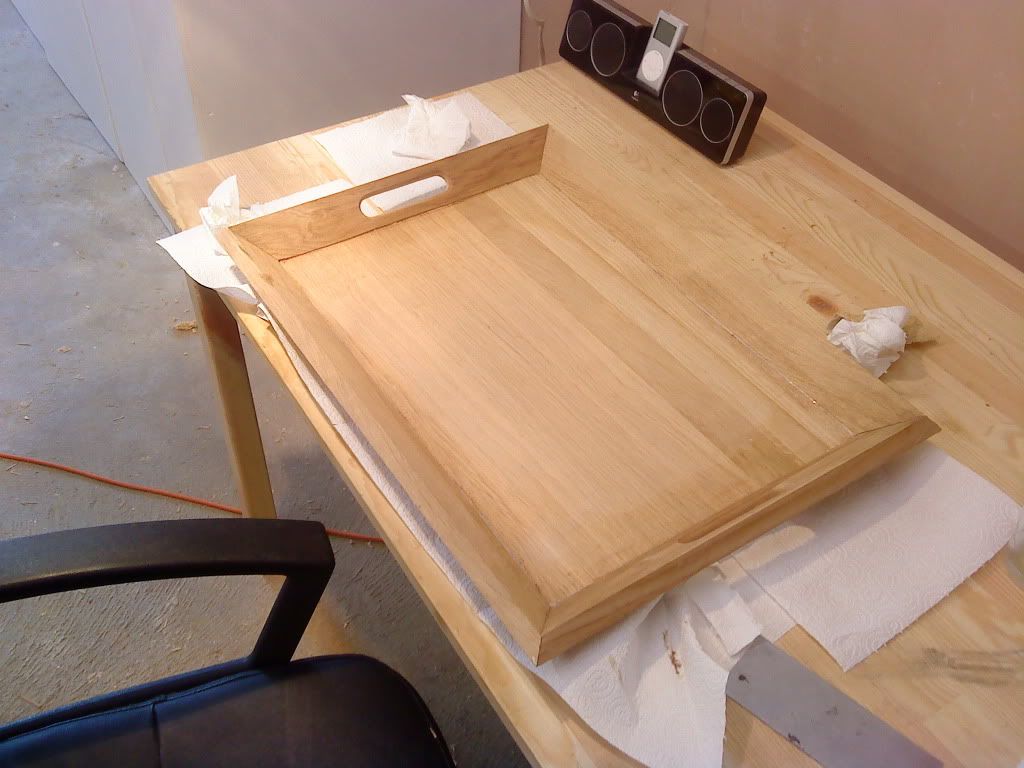
I used a brilliant clamping method in the end, I used a 2 part 90 second epoxy coupled with my hands. Worked great. Its all dirty at the mo with squeeze out so will clean that up in the morning and give it a few coats of melamine lacquer to give it some heat resistance.
 
Chems":21fanh86 said:
I don't think I'm going to be able to use the dominos, its not accurate enough to align them perfectly. I think I'll glue them then spline them.

Nice to hear of a job where the Domino isn't fit for purpose!! :D Guess you should've hung on to your biscuit jointer...! :wink:

Seriously, I like the solution you came up with. I think Steve Maskery has done something similar with compound mitres; using one of those fast-setting mitre adhesives and reinforcing the joint afterwards with splines (as you are proposing).
 
A biscuit jointer would have been just the same. I'm really not sure about weather to do splines or not. Seems pretty solid how it is. I mean these modern glues are rather good. I'll sand it tomorrow and see how I feel about adding splines.

I think a 2 part epoxy is the only way to go, the one I used was 90 second quick clear araldite mix it up and away you go.

I was going to add a walnut string around the base, but I was worried that doing it before hand the base may glue in slightly out of square and then it would look stupid. I may try an route out the groove with my dremel and a DIY base, think it would work?
 
If you do go with the inlay idea (I assume it's to disguise or hide the gap you mentioned earlier?) then I'd be concerned that you may end up gluing the base in place. Meaning that, if it's solid wood, it won't be able to expand and contract. :?

Also, as good as the glue may be, those mitre joints remain essentially end-grain to end-grain; without overlapping fibres, there is little strength in the bond, really. If the tray gets 'abused' later in its life, I'd fear a sharp knock might be enough to open one of the joints.
 
There are no gaps to hide! Its just a shadow! There is a tiny reveal where I put a little chamfer on the wafer thing edge but thats all.

I was going to use the dremel to do an inlay about 3-4cm from the edge using 6mm walnut the same as I did for the top of the bedside table I did last month. The dremel has packed in so I won't be doing that now. A good sand down and I'll have to have a really good think about adding the splines. One half of me says it will be great fun to do the other half says it will ruin the look of the joints.

A simple jig like this would do fine:
dscn5442xgt8.jpg


Just have to take into account the 45 degree sidewards slant and tilt the blade to 45 degrees as well to get the cuts square. I think I'll have a go, will be good fun.
 
Never finished this thread, but ER's thread reminded me. I gave it a coat of melamine lacquer and bison wax. Probably shouldn't have waxed it. The steel wool I used set of a tanin reaction so I wasn't happy about that. Cleared away as much as I could. Anyhow its been very well used, as shown by the cup mark and the slug I cleaned off it this evening. So I'm sort of glad its not a fine perfect piece as it would make it hard to see it been used and abused so much. So my lessons, if you have any wire wool, throw it out its horrible. Use hermes 800 grit foam pads that cost £1.20 and last ages.

DSC01000.jpg
 
Chems":3cs9b4i8 said:
The steel wool I used set of a tanin reaction so I wasn't happy about that.
.
.
.
So my lessons, if you have any wire wool, throw it out its horrible. Use hermes 800 grit foam pads that cost £1.20 and last ages.

Yep, I've learn that very same thing in the hard way... Steel wool and oak is a big no-no... :) Mirka's Abralon pads (http://www.mirka.com/abralon_automotive) are excellent for that job also.

In your design the angle of frame is way more steeper than mine, so I can imagine difficulties to get fit reasonable. You sorted that out very nicely! :wink:

Next time I will do base plate from plywood or mdf and veneer it. It's pretty hard to control solid wood extracting/shrinking in this kind of design, even if using enviroment of the tray is pretty stable. Seasonal huminidy changes will be so different anyway, at least here in Finland... :lol:
 
Yeah, the only trouble with a veneered base if any water does get through the finish or the heat of a pot of tea it could lift the veneer up. Tricky one. The mitres were the devils work, but once I got the right formula for the angles it was a bit easier.
 

Latest posts

Back
Top