Eterno Ivica Star.T tile pedestal system

UKworkshop.co.uk

Help Support UKworkshop.co.uk:

This site may earn a commission from merchant affiliate links, including eBay, Amazon, and others.

RogerS

Established Member
Joined
20 Feb 2004
Messages
17,921
Reaction score
276
Location
In the eternally wet North
I've got an outside terrace to tile using bloody heavy 800 x 400 porcelain tiles. 5.6m x 3.2m - approx 56 tiles in total. 20mm thick. Originally planned to use the traditional approach of tile adhesive and notched. Only trouble with that approach is how do you lay them without having to wait a day for the adhesive to dry underneath the previous row. As with that sort of size I can't easily see how one can reach over the layer just laid to do the next one. Youtube isn't much help.

The very thick solid concrete (well hardened) substrate has the right slope on it and good to go. Only trouble is that the finished height of the slab assumed the traditional tile fixing approach.

So I looked into pedestal systems (totally new to me as a concept) and most seemed too high. But the lowest one is the Eterno Ivica Star.T. at 10mm..which is the thickness of adhesive!

https://www.eternoivica.com/en/posts/ne ... n-supports

Height-wise it's perfect..the only downside I can see is that you don't grout between the tiles.

Anyone used this system before ?

Would not having any grout be bad ? The gaps between the tiles when laid look to be quite small..maybe 2mm.

The other downside is cost...£200 by my reckoning. :( But my fingers and thumbs aren't what they used to be and my years allowance of profanities has already been used up on other projects.
 
Why would you not just work backwards so you don’t have to reach over the tiles already laid?

Also rapid set adhesive is set in 3 hours, I personally wouldn’t want my tiles not grouted I’ve had the type of system you linked to demonstrated to me, I wasn’t that impressed & really don’t see why it costs so much.
 
Doug B":3unoxdjf said:
Why would you not just work backwards so you don’t have to reach over the tiles already laid?

My hands (especially thumbs :( ) haven't got the strength any more to manhandle these size tiles by myself and so it needs me and the missus and I just can't see how we'd fit into the space to do it.

Phil...it's not access that's the issue.
 
Doug...re grout/no grout. Other than an aesthetic/purist PoV (and I initially shared that) I got to thinking...well, why not 'Not grout'. Is there any practical reason not to ?
 
RogerS":2j0e6jev said:
My hands (especially thumbs :( ) haven't got the strength any more to manhandle these size tiles by myself and so it needs me and the missus and I just can't see how we'd fit into the space to do it.
Would something like this not help
https://www.festool.co.uk/accessory/492 ... h#Overview
There are loads of other brands out there with multiple suction cups for heavier loads ?
 
RogerS":374s334u said:
Doug...re grout/no grout. Other than an aesthetic/purist PoV (and I initially shared that) I got to thinking...well, why not 'Not grout'. Is there any practical reason not to ?

I don’t like the idea of water standing under the tiles & any problems that could lead to, yes you could lift them & clean underneath periodically but that would be a ball ache
 
Doug B":1m8je92v said:
RogerS":1m8je92v said:
My hands (especially thumbs :( ) haven't got the strength any more to manhandle these size tiles by myself and so it needs me and the missus and I just can't see how we'd fit into the space to do it.
Would something like this not help
https://www.festool.co.uk/accessory/492 ... h#Overview
There are loads of other brands out there with multiple suction cups for heavier loads ?

Thanks Doug...that looks rather nifty (and if I'd had one a few months back it would have been perfect for putting in one of the shower trays properly .. :( )

I wonder how smooth the source has to be for the suction to work properly.
 
Jonathan S":3ne6wpzj said:
https://www.kwiksplit.co.uk/acatalog/Handling-Large-Format-Tiles--1.html

Rubi also make simular systems.....don't know about uk availability.

Sent from my SM-J530F using Tapatalk

Thanks Jonathan..those tiles on the promo page are ENORMOUS ! Think I'll pass on the price BUT....

based on your suggestion, this looks very promising https://www.tilefixdirect.com/product/VVZ-LIFTER600 and would let me do the traditional approach with ease. Not so good with the lower pedestal stuff (Star.T) because the metal 'gripping' part is too thick to allow you to get the tile in the right place.
 
Doug B":36p20k37 said:
RogerS":36p20k37 said:
Doug...re grout/no grout. Other than an aesthetic/purist PoV (and I initially shared that) I got to thinking...well, why not 'Not grout'. Is there any practical reason not to ?

I don’t like the idea of water standing under the tiles & any problems that could lead to, yes you could lift them & clean underneath periodically but that would be a ball ache

Mmm..the only problems would be as breeding ground for slugs and snails as far as I can see. But they can be blocked out without too much fuss. Anyway the amount of water we get here (well, used to get here..we've not had much rain for a couple of months now - if not longer - just hope our spring for our water doesn't dry up)...the amount of water means that anything under there will get flushed out. The pedestal system also means that I can even lay them in the wet if I wanted to.

Lots of plusses for me at the moment, Doug.
 
You need to be working backwards away from the tiles you have just laid? You should start the far end and work towards yourself. I've never seen those tile things in person but I can't imagine they are very easy to use. When laying the tiles you want to make sure you get a nice even spread of adhesive because you don't want to have to try and take those tiles back up to level them with each other. Aslong the area has a slope for the rain to run off, what's the problem with grouting them?
 
owen":pcvtvu2y said:
You need to be working backwards away from the tiles you have just laid? You should start the far end and work towards yourself. I've never seen those tile things in person but I can't imagine they are very easy to use.

Trouble is, as mentioned earlier, the weight and size of the tiles. I've got a different take on those Star.T as for me they seem simplicity itself. Place on the concrete substrate in the right position. Use a sucker gizmo on the tile. Lift and place. Next.

As opposed to messing about with tile adhesive.

owen":pcvtvu2y said:
.... Aslong the area has a slope for the rain to run off, what's the problem with grouting them?

Not sure what you mean. With adhesive or with the Star. T?
 
One thought occurred to me and that is how coplanar the underside of the tiles are. Reason for saying this is that large format porcelain tiles have a tolerance on the top surface (ie they can be dished slightly along the length) which usually means that you need to stagger the tiles 1/3-2/3 rather than 50:50. If the undersides are also dished then that means rocking possibilities...not good.

So I'm going to get 30-35 of these pedestals to see how they go before committing.
 
After a few years won't it just silt up into something pretty solid-ish anyway with only a 10mm gap. For better or worse, I don't know.
 
RogerS":16giblwm said:
owen":16giblwm said:
You need to be working backwards away from the tiles you have just laid? You should start the far end and work towards yourself. I've never seen those tile things in person but I can't imagine they are very easy to use.

Trouble is, as mentioned earlier, the weight and size of the tiles. I've got a different take on those Star.T as for me they seem simplicity itself. Place on the concrete substrate in the right position. Use a sucker gizmo on the tile. Lift and place. Next.

As opposed to messing about with tile adhesive.

owen":16giblwm said:
.... Aslong the area has a slope for the rain to run off, what's the problem with grouting them?

Not sure what you mean. With adhesive or with the Star. T?

I imagine getting those pedestals in the exact position to just drop the tiles in place is going to be awkward but I'm happy to be proved wrong :D. Let us know how it goes I'm interested to know.
Sorry I got confused, I thought you weren't going to grout them if you used adhesive but now I can see you meant with the tile pedestals :oops:
 
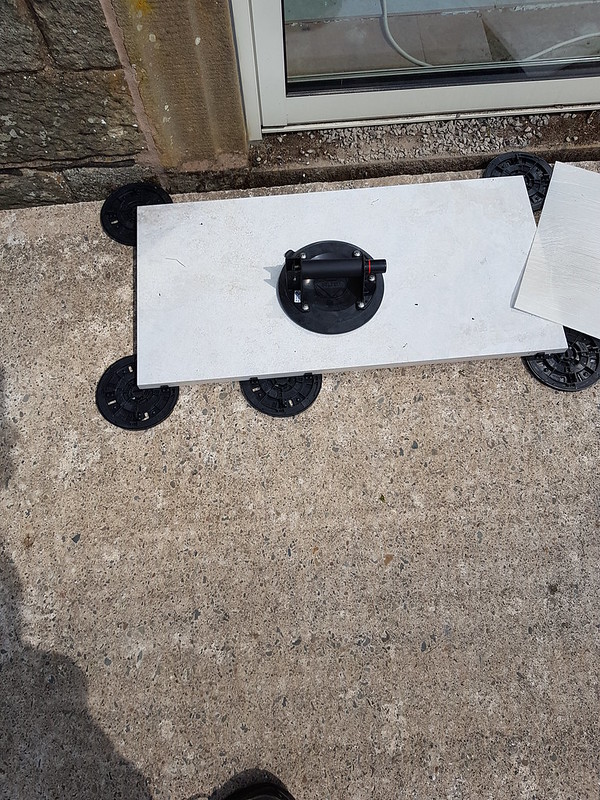
OK...pilot trial completed. OK...only three tiles but 100% success.

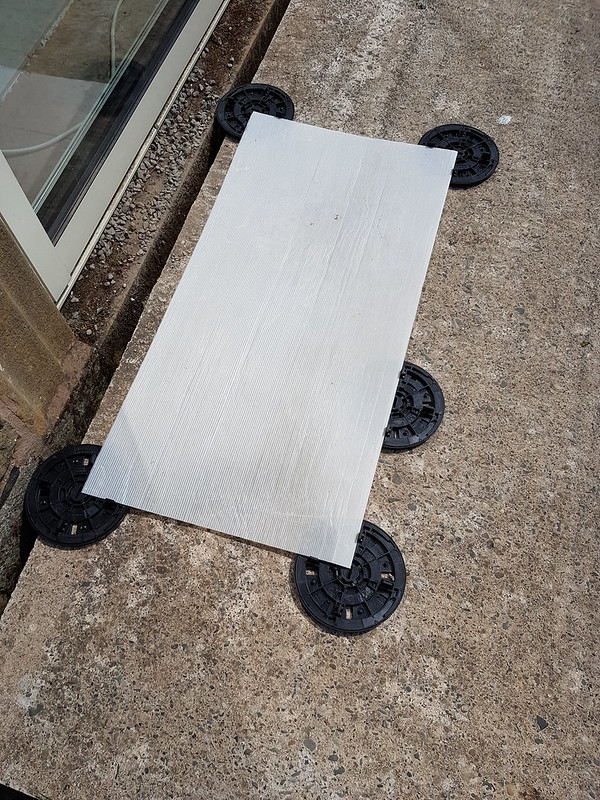
Positioning the discs is a doddle. Just need a bit of lateral thinking and some spare Correx and make up a template.

(Actual placing irrelevant for the purposes of a trial)
Lift tile into place using the Rubi Rough Tile suction pad....stonkingly brilliant bit of kit....THANK YOU, Jonathan for the suggestion.

And five minutes later

I only needed to adjust the height of one of them which says a lot about the calibre of work my builder does. Just 1mm. Must have word with him next time I see him. Tsk tsk.

Downsides ?
They are slippy and so I will be putting some dabs of adhesive underneath when I come to do the job for real.

Grouting..well, the gap is much wider than I was led to believe at 5mm. SWMBO isn't too keen on zero grout. So since the tiles (a) don't rock (b) I can use an item from another range to block the gap at the bottom

then I reckon grouting is possible.
 
Looks like that tile laying "thingy" is the bees knees. Never seen that before.

Personally Roger, I WOULD grout (if you're still not decided).

Otherwise the gaps will get silted up (fine "earth" dust on a windy day) which then becomes an ideal "breeding ground" for dandelions & all sorts of other weeds. DAMHIKT! And also don't ask me how back-breaking (and knee-graunching) it is going round with an old knife getting the blooming things out (AT LEAST 2 -3 times/year)!!!

And forget the stand-up gas cartridge weed burners - unless the gaps between the tiles is about a million miles, the weed burner does NOT get the roots and the blooming things come up again twice as quickly as when you knife them out.

Spoken as someone who abhors gardening in any shape or form (but who nevertheless regularly gets roped in to "help"). ;-)
 
It's difficult to imagine grout lasting more than a winter or two balanced on top of a system like that though..
 
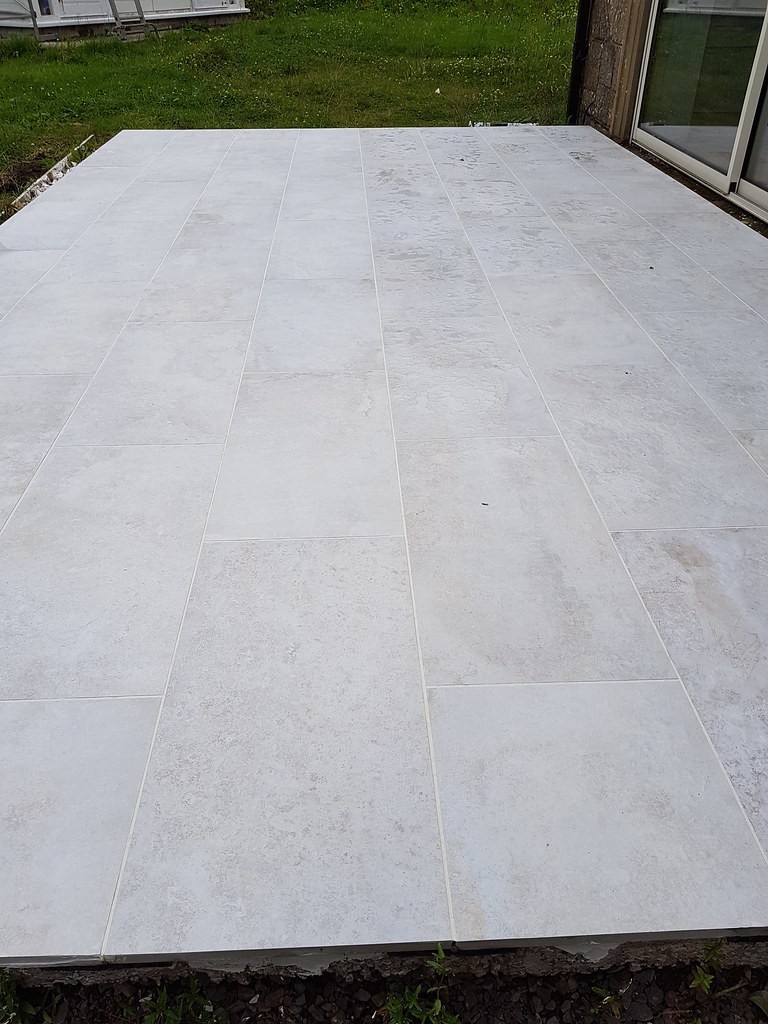
Just realised that I never came back with the final results.

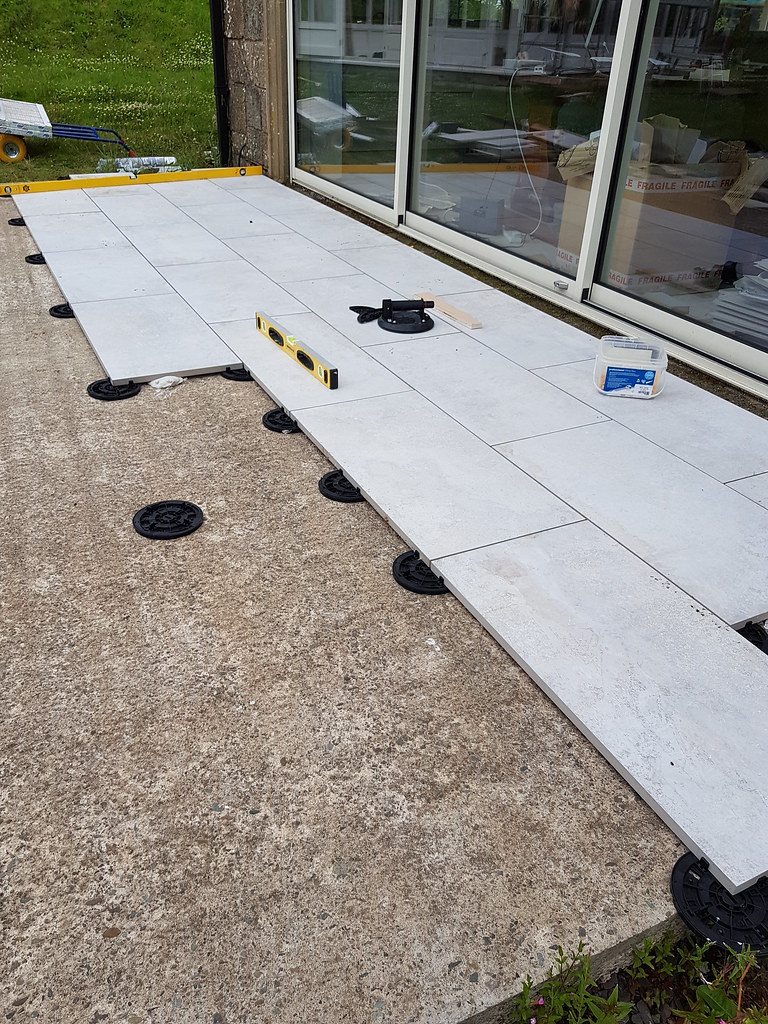
Started laying the slabs. The advantage of brick bond is that each slab has three supports under each long edge. Although the tile suppliers tell me that they don’t need support, I still decided to put some dabs of tile adhesive down first.

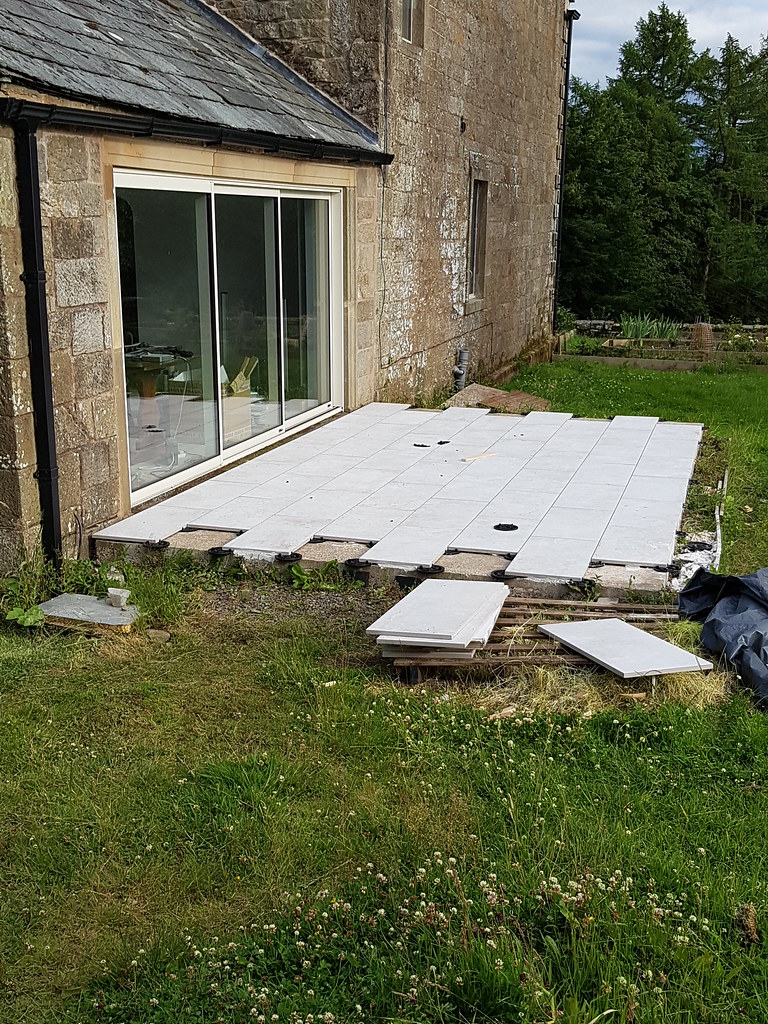
The whole process is remarkably quick and easy. Aligning the tiles in the right place is automatically done for you by the preceding tile. After about 45 minutes I’d got this far.


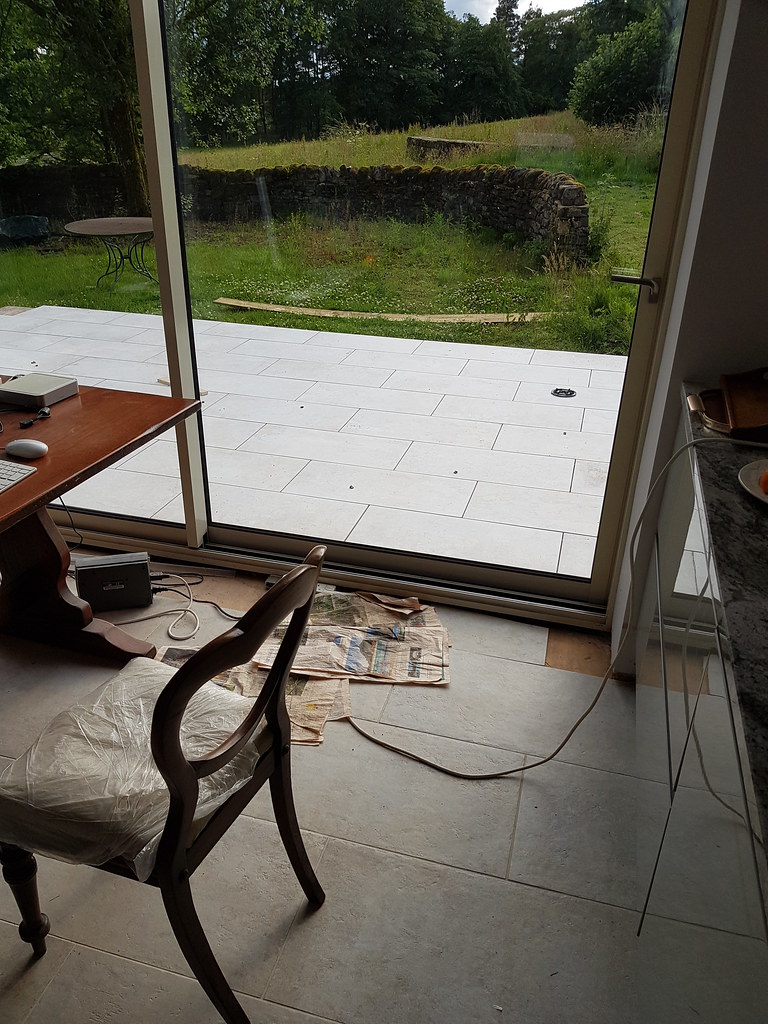
And after a couple of hours, this


It was helped a lot by the fact that my builder had done a superb job of laying the concrete slab nigh on perfectly flat with a slight slope for drainage.

The manufacturers sell a key to adjust the black pads. You don’t need it as I found it very easy to lay the tile and then nudge the pad round to raise it a smidgeon when needed. Round the perimeter I used tiling wedges. So just the cuts left to do the next day.

The next day dawned and I found that a few tiles rocked and sounded a bit hollow when tapped. I came to the conclusion that one can’t get the pads exactly right. You can adjust them for one tile but it won’t be quite right for the adjoining tile. We’re only talking 1mm or less but enough to break the bond with the dabs as one walked about laying the rest of the tiles.

The fix was sublimely easy as using that brilliant rough tile sucker from Rubi, you simply lift the tile up, put down a more liberal amount of adhesive, drop the tile back in place, step on it to bed it in nicely and job done. Cuts done and wait to dry before grouting.
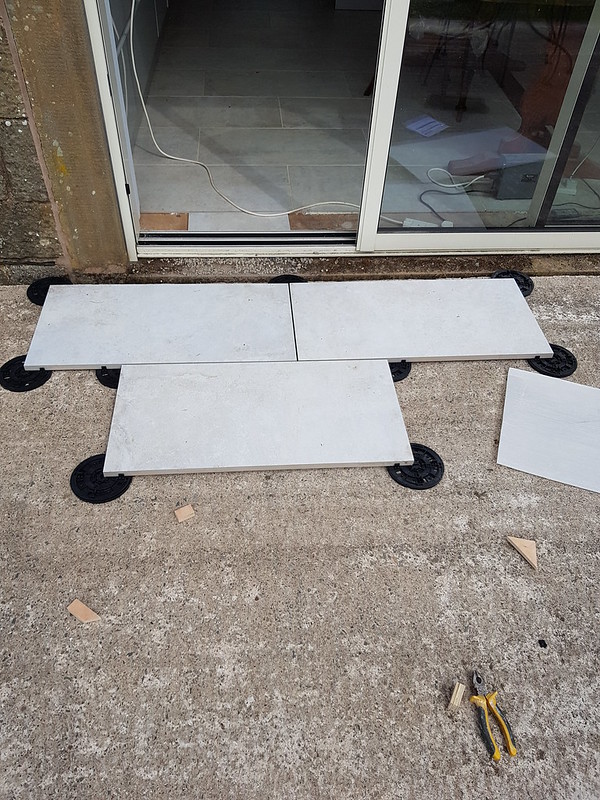

Now, enquiries of the pad suppliers say that you don’t need to grout with these pads. Well, that’s being economical with the truth. The thing is that as it stands the grout simply falls out the bottom of the gap between the tiles since there is nothing underneath to stop it.

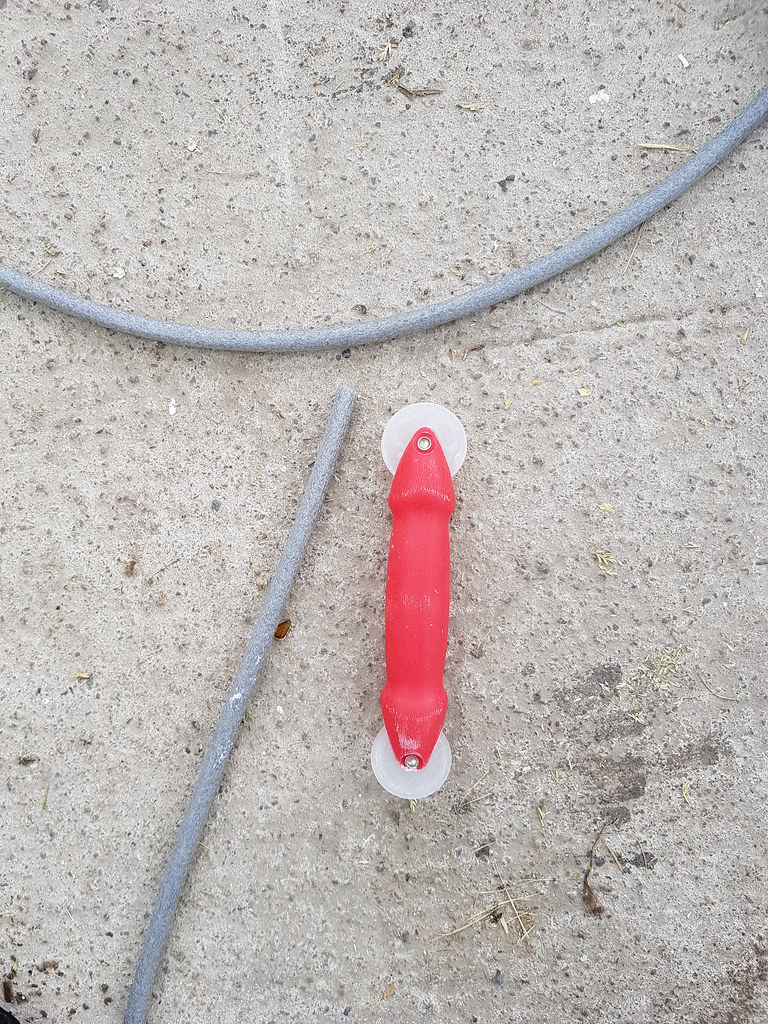
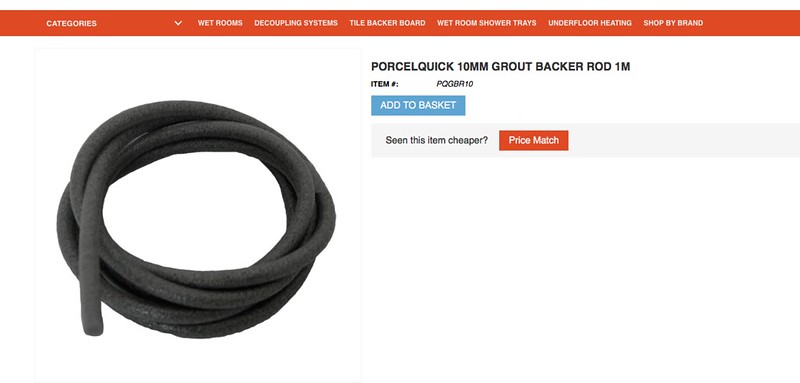
But a bit of lateral thinking on my part and I found this product from another company.


It’s a squidgy foam roll that you push down into the gap between tiles using the gizmo in the photo. Actually they do two…this one which costs about £6 and a more deluxe version at £99 or so. Looking at the one in the photo, you’d think ‘Ah, simple job..just push the foam in the groove and run that wee roller along to push the rest in.’. And you’d be wrong. The design is rubbish. The width of the wheel is OK for thinner foam but not for the 10mm that I was using. So it ends up slicing into the foam which doesn’t help. Wetting the gaps helped but it was still much more time consuming that it should have been …if only they’d designed the tool better.
And onto grouting. Now all the books say to use a grouting float. Yup..works well for small smooth tiles. Not large rough tiles like these. After a first attempt on a couple of tiles, I found that I was losing a huge amount of grout in the pores of the tiles and was looking at having to buy a whole load more grout. Simple solution…just use a spatula and press the grout into the grooves. Quicker and more economical.

So there we have it. The grout has hardened. The tiles are (and sound) rock solid. Zero movement.

Definitely recommend these pads.

I did make one mistake though. I thought it would be a good idea to put a protecting sealing coating on these tiles especially the grout. I’ve used DRAI before from an Italian company and it certainly does what it says on the tin. Only…these are porcelain tiles. They don’t need sealing. I also was running out of DRAI and so I only managed to do four rows and splash the remaining DRAI on the grout lines on the other four rows. As the DRAI dried and the setting sun came out, to my horror I saw a really blotchy finish on the tiles especially around the tiles to either side of the grout lines. It looked horrible. Contacting the manufacturer, all they could suggest was mechanical removal. One day, I’ll get the Jif out and see what I can do. It does work though. Look at this picture. Surface tension beats gravity. The four rows with DRAI have yet to drain but the tiles without the water simply ran off and are perfectly dry.

 
Back
Top