Chris' Parquet Flooring Project.

UKworkshop.co.uk

Help Support UKworkshop.co.uk:

This site may earn a commission from merchant affiliate links, including eBay, Amazon, and others.
Chris,

The blocks I used were new, fully planed and had a mini chamfer along all edges so they didn't need sanded. I had used a floor sander in the past and didn't do a great job, some real dodgy gouges at the edges where I started. But there's some good advice on here for alternatives so I'd go with that. When I decide to refinish the floor I will get a professional to do it for me. I think I've earned that!

I found old hand written instructions online on how to fit herringbone that had been scanned. I'll send them to you. Totally invaluable but as Siggy said, your lines and angles need to be perfect or a line of gaps will start to form. I started the job in our dining room and there's a row of gaps that annoy me every day. By the time I had finished the living room and the hall I had learned my lesson. The hall is 7-8m long and the spines are perfect. It not only looks better but it makes it easier and quicker to fit if everything is straight. Keep checking as you go along.

I never went with expansion gaps between the rooms. Technically parquet doesn't need expansion gaps as the grain direction isn't uniform and if you're fitting flooring in a dry, central heated home it won't be a problem. Wouldn't be so confident on a concrete sub floor though. I also laid 6mm ply to help smooth out the lumps and bumps. I'll take a pic of how I filled the gap between the rooms. Tried to make a feature of it and it turned out quite nice (I think).

For the finish I never went with the full polished look. I used Rubio Monocoat, another online find. Gives a low sheen finish and just rubs on with a cloth and rub off the excess 15 mins later and it's done. Really tough too.

Hope this helps, I use this site a lot as it's such a great resource so it would be nice to think I could help someone else

Keep us up to date on the progress!!

K.


Thanks for the advice Quadie, With the Rubio Monocoat, how long after application can it be walked on. The hall is in the middle of the house.

If you want to send me the instructions it would be good. [email protected]

Chris
 
I would use F Ball F21 on reclaimed blocks, not Lecol. Dipping is easier (if messier) than laying on trowelled glue. F21 is wholly compatible with any bitumen residues, Lecol is pretty much compatible in practice but might set slowly and I don't think they would stand behind its use on reclaimed blocks.
 
Jake":2elszeqg said:
The big belt sander is more important than the Trio. Drum sanders are a perfect recipe for divots. If you belted it up to 80G and had the patience to 80G (again) and 120G with a ROS you could get the job done (eventually). The Trio won't take off enough fast enough to deal with reclaimed blocks imho.

Hello Jake,

When you say "belted it up to 80G"

Are you referencing to

A 4" hand sander

ae235_zpsa7yd1esw.jpg


Or

A floor sander using a belt and a lever to control the belt.

Hummel2_1024x1024_zpslihyljqr.jpg


Thanks

Chris
 
To keep you all informed...... I'm not shirking starting the parquet. I've got other stuff to sort, wood burning stove, cracks in ceilings etc.
 
ChrisxBates":2n1u8agx said:
Jake":2n1u8agx said:
The big belt sander is more important than the Trio. Drum sanders are a perfect recipe for divots. If you belted it up to 80G and had the patience to 80G (again) and 120G with a ROS you could get the job done (eventually). The Trio won't take off enough fast enough to deal with reclaimed blocks imho.

Hello Jake,

When you say "belted it up to 80G"

Are you referencing to

A 4" hand sander

ae235_zpsa7yd1esw.jpg


Or

A floor sander using a belt and a lever to control the belt.

Hummel2_1024x1024_zpslihyljqr.jpg


Thanks

Chris
The big one - Hummel or the big Bona (or a Cobra if you could find one). Take a look at my woodblock floor thread a little down forum \/
 
Quadie":12xcdxja said:
I found old hand written instructions online on how to fit herringbone that had been scanned. I'll send them to you. Totally invaluable but as Siggy said, your lines and angles need to be perfect or a line of gaps will start to form.
K.

Quadie, please can you send those to me too? Or maybe post them in a new thread?

Cheers
Will
 
will1983":32558bfa said:
Quadie":32558bfa said:
I found old hand written instructions online on how to fit herringbone that had been scanned. I'll send them to you. Totally invaluable but as Siggy said, your lines and angles need to be perfect or a line of gaps will start to form.
K.

Quadie, please can you send those to me too? Or maybe post them in a new thread?

Cheers
Will

Will do. I'll make a new thread, hopefully that way more people can find it.

Keith.
 
Hello All,

Well, I've made a start.

The floor was level apart from a few small areas around the edges (old fire place, old radiator pipes etc), which I filled with floor leveller.

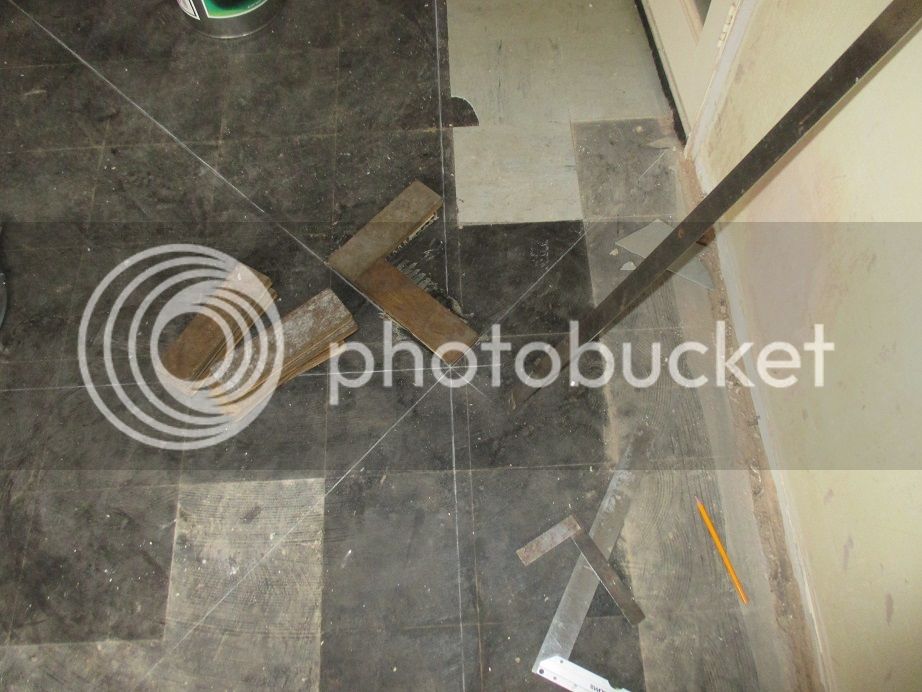
I followed Keith's instructions regarding the marking out (straightforward and helpful), fixed the first two blocks down using Lecol 5500 and allowed the adhesive to cure. The idea was this would give me something firm as a start.

IMG_1923_zpsw0ehdlyt.jpg


Today I attempted to fit more block and found that they were running slightly in the wrong direction. Experience of tiling etc has taught me that the first row must be true, otherwise it will only get worse as the job progresses.

So I decided to remove the first two blocks (hammer and old paint scrapper required) and the existing floor leveller / screed came up.

IMG_1928_zps8piwon9c.jpg


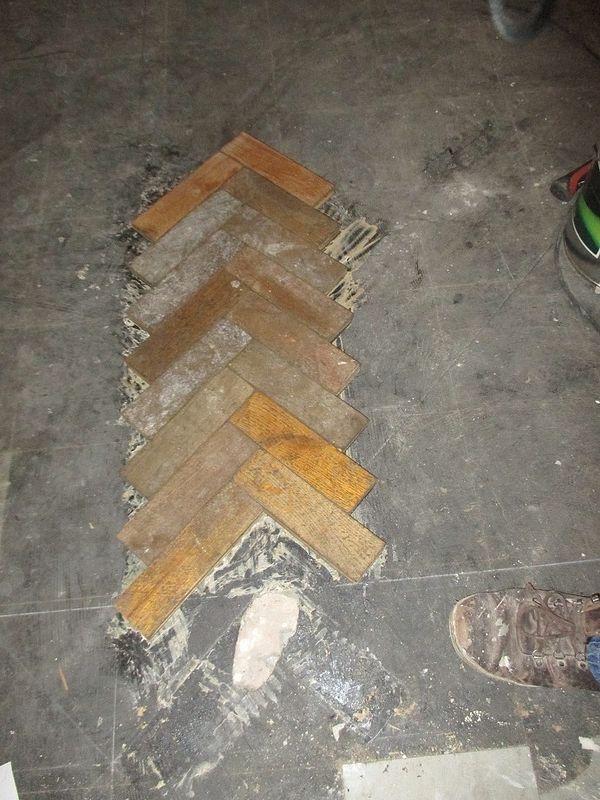
Undeterred, I re-marked the area and fitted the first 16 blocks.

I'm just about to mix a spot of leveller and fill the hole.

Chris
 

Latest posts

Back
Top