You are using an out of date browser. It may not display this or other websites correctly.
You should upgrade or use an alternative browser.
You should upgrade or use an alternative browser.
Bog oak coffee table (Finished.....photo heavy).
- Thread starter MikeG.
- Start date


Help Support UKworkshop.co.uk:
This site may earn a commission from merchant affiliate
links, including eBay, Amazon, and others.
Racers
Established Member
- Joined
- 22 Apr 2005
- Messages
- 9,172
- Reaction score
- 136
I have made shallow round depresions in wood just with a gouge and cabinet scraper, if you scrape from different directions you can smooth out any ireagularitys.
Pete
Edit goose necked scraper, not a cabinet scraper!
Pete
Edit goose necked scraper, not a cabinet scraper!
Hi Mike, what's the benefit of the bread knife in the blind dovetails? Doesn't it split the wood if pressed into an unsawn area?MikeG.":9m1sqb77 said:I've got an old plastic handled knife from a kids cutlery set, cut off square at the end, which I use for driving down into the saw kerf in half-blind dovetails:
Sent from my SM-G973F using Tapatalk
Another thought about the drawer pulls... if you do want to try the recessed style with a bar across, have you considered a square depression rather than a round one? Possibly with sloping sides. It would be far more practical to make without needing special tools and it could echo the visible square tops to the legs.
MikeG.
Established Member
sammy.se":126eqzlj said:Hi Mike, what's the benefit of the bread knife in the blind dovetails? Doesn't it split the wood if pressed into an unsawn area?MikeG.":126eqzlj said:I've got an old plastic handled knife from a kids cutlery set, cut off square at the end, which I use for driving down into the saw kerf in half-blind dovetails:
Sent from my SM-G973F using Tapatalk
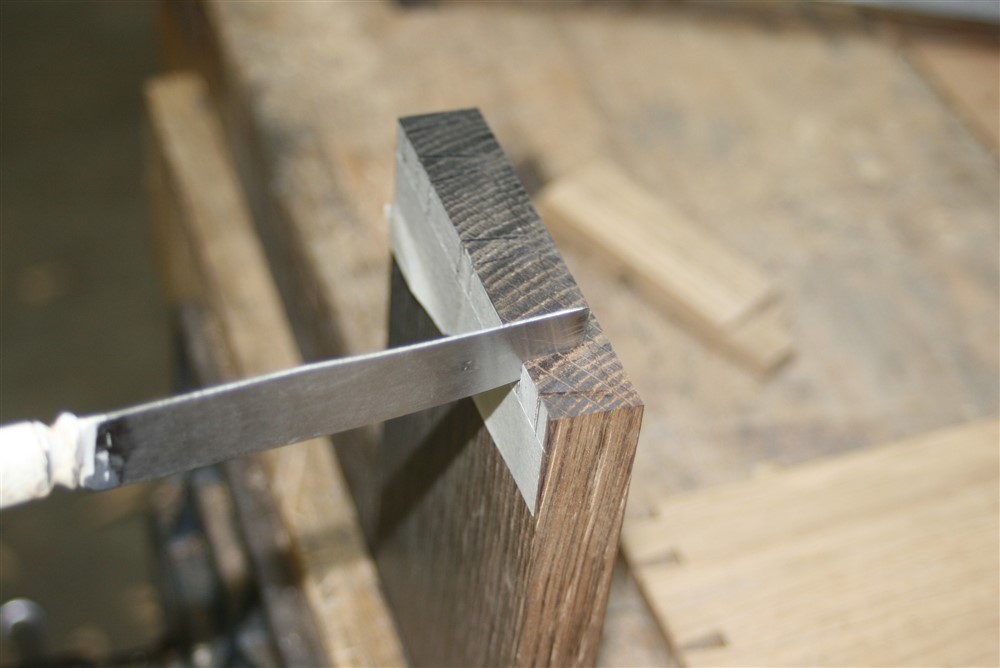
Pick your wood carefully!!.......but with the right wood this gets the back of the socket down to full depth quicker and easier than hacking away at it with a chisel. It is so thin that it fits within the saw kerf, and it has less risk of splitting than if you attempted the same thing with a chisel (which you wouldn't). It means you can lay your board flat on the bench and chop down into it the waste with a chisel all the way down to full depth, without having to work in from the end grain end of the board at all other than for the final clean up.
MikeG.
Established Member
AndyT":2oh19ig1 said:Another thought about the drawer pulls... if you do want to try the recessed style with a bar across, have you considered a square depression rather than a round one? Possibly with sloping sides. It would be far more practical to make without needing special tools and it could echo the visible square tops to the legs.
I'm coming to the view, I think, that a depression isn't appropriate for this piece of furniture. It may just look a little too mid-century, I feel.


£12.50 (£1.25 / count)
£14.45 (£1.44 / count)
JSP M632 FFP3moulded Disposable Dustmask (Box of 10) One Size suitable for Construction, DIY, Industrial, Sanding, dust protection 99 Percent particle filtration Conforms and Complies to EN 149
Amazon.co.uk


£17.99 (£1.80 / count)
£27.44 (£2.74 / count)
3M 8822 Disposable-fine dust mask FFP2 (10-pack)
Amazon.co.uk

£96.66
£102.61
O'SKOOL Mortise and Tenon Jig is Ideal for cabinets, Chairs, and Table Construction Using a Plunge Router
Amazon US

£13.99 (£2.80 / count)
VEVOX® FFP1 Dust Mask - Set of 5 - Valved Face Masks - Respirator - Protection e.g. for Construction, Building Work, Sanding, Woodworking, Fine Dusts, Aersoles or Particles
SLSK Ventures GmbH (UK)


£17.99 (£9.00 / count)
JORGENSEN 300mm Professional Woodworking Clamps 2 Pack, Quick Release Clamps for Wood, F Clamps Set
GreatStarTools


MikeG.":27u872jy said:Anyone think welding a shaft to a piece of 1/4" steel ground to shape, then mounting that in a pillar drill before plunging it confidently into a piece of priceless timber could be good for a giggle? The faint-hearted might consider clamping the workpiece down rather than holding it by hand....
I think you are on the right lines, but I'd suggest an old method used by woodwind instrument makers for making almost any symmetrical shape on a woodwind bell - a reamer. Turn the profile out of oak (i.e. a dome), with a good shaft on it that can be held in a chuck. Slit the dome shape down with a saw, and insert a reasonably hard but thin steel blade (eg made from an old saw) and grind that to shape, flush with the surface of the oak. If needed use a lateral screw or two to fix it in place. You finish grinding the profile after the blade is secured in the wood part of the reamer.
This is much gentler than the bare steel reamer you suggest, and much less liable to pick up and fly your precious drawer fronts around the workshop.
Some more info is given here https://www.fomrhi.org/vanilla/fomrhi/u ... 202061.pdf though this is mostly about the long bores of woodwinds.
Keith
xy mosian
Established Member
Sorry of topic here.
MusicMan,
That is a real blast from the past, Fomrhi. The Fellowship of Makers and Restorers of Historical Instruments.
I was in at the start, with the likes of Ephraim Zegerman, and Djilda of course, Donald Gill and the like.
Thank you for the reminder.
PM on its way.
xy
MusicMan,
That is a real blast from the past, Fomrhi. The Fellowship of Makers and Restorers of Historical Instruments.
I was in at the start, with the likes of Ephraim Zegerman, and Djilda of course, Donald Gill and the like.
Thank you for the reminder.
PM on its way.
xy
MikeG.
Established Member
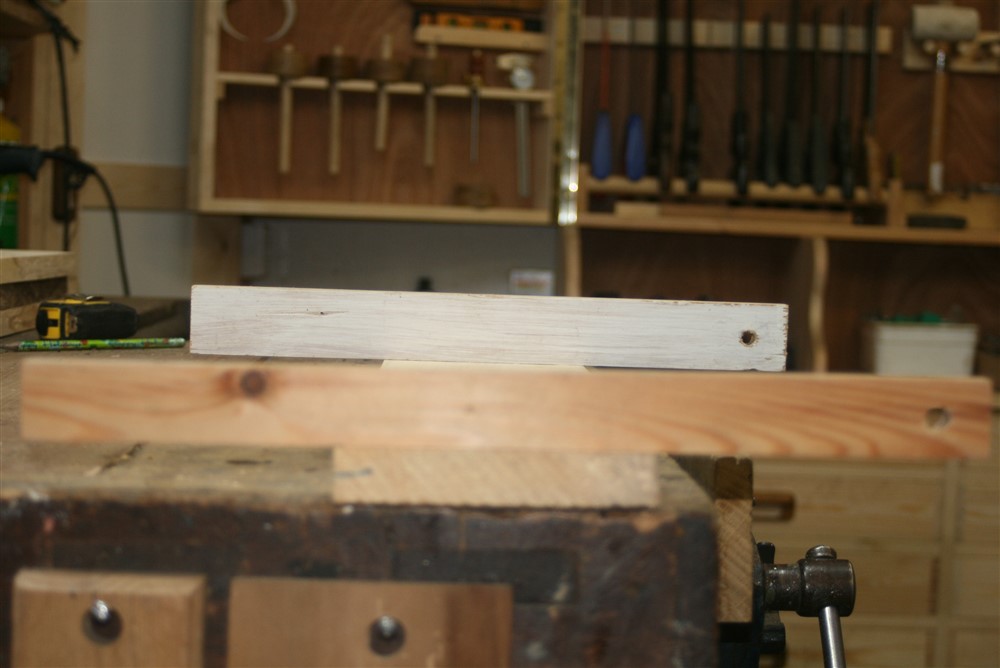
I haven't even looked at this for a couple of weeks, so it was great to get a few hours in the workshop yesterday evening and today. I started by rifling through my stash of spalted sycamore, looking for something to use for drawer bottoms. This looked like it would work:
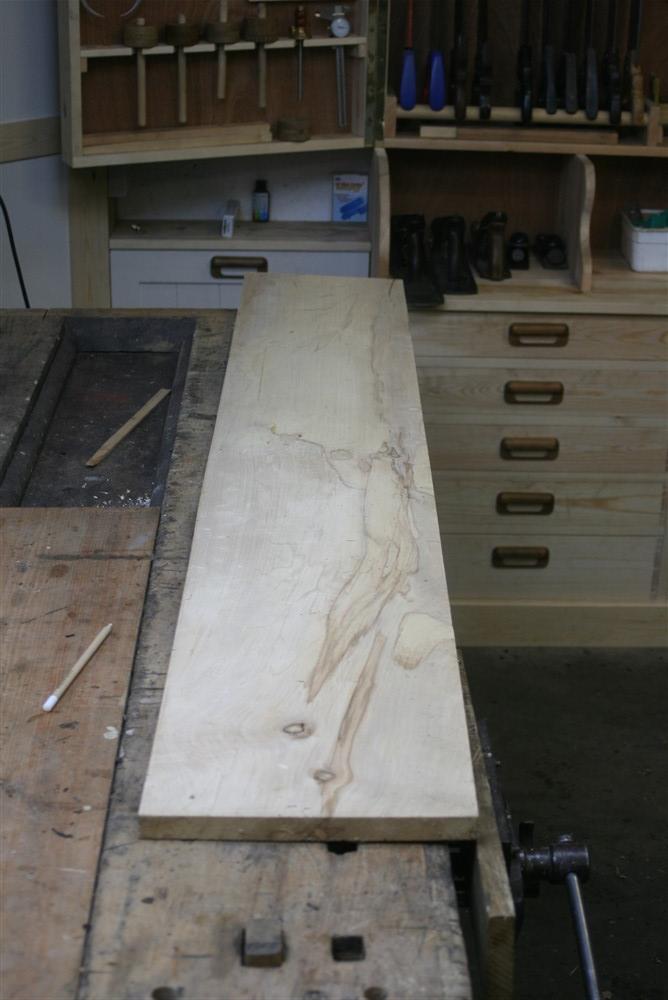
Unfortunately it was very much "in wind":
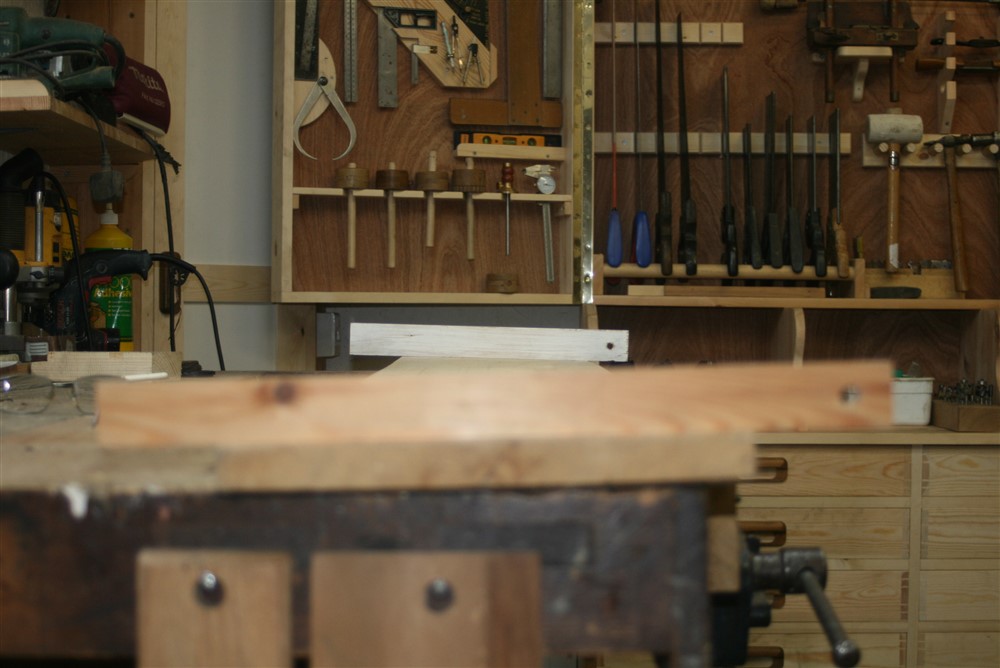
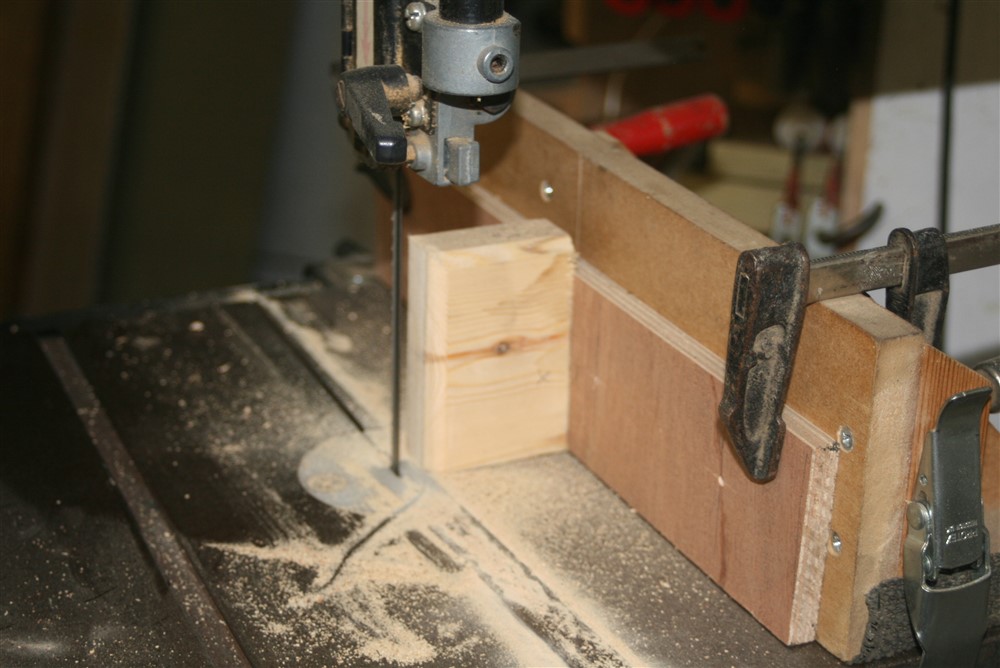
To save wastage I cut it to length, and halved the width:
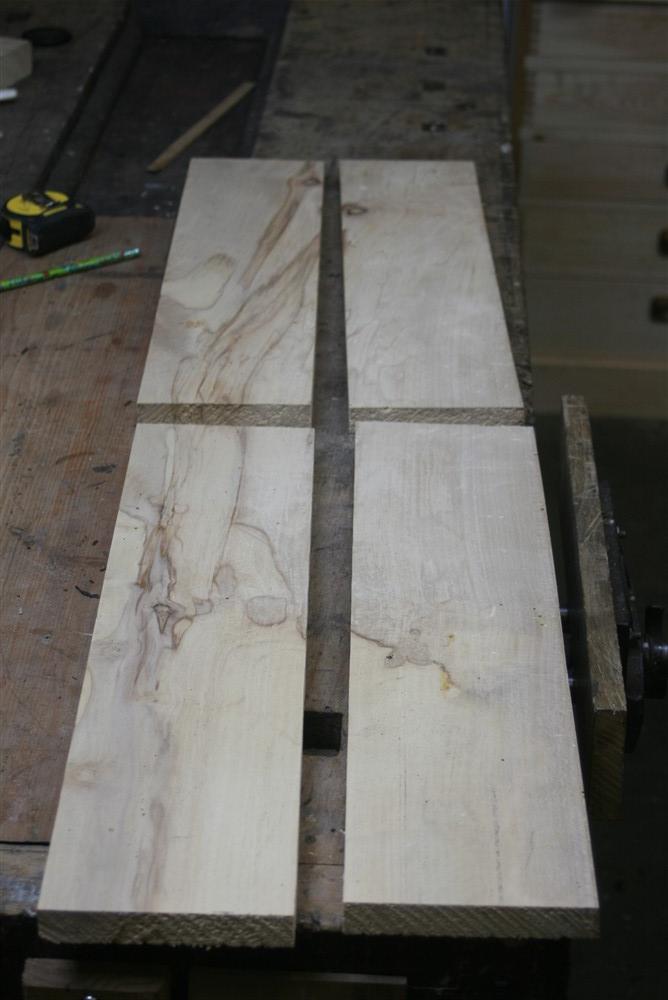
Flattening from there only cost a couple of millimetres of thickness. I then proceeded to the bandsaw for re-sawing:
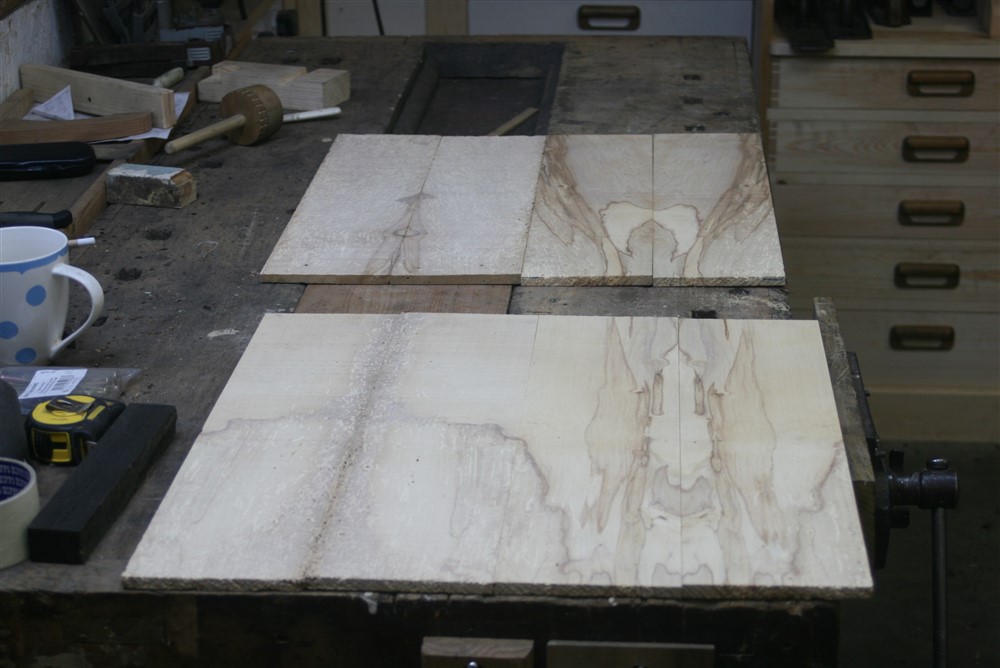
Looks good, hey?
Well, it's all gone on a bonfire. It was riddled with woodworm, and I came across at least 2 live larvae. I chucked probably a quarter of my spalted sycamore on the same fire. So, there's a couple of hours wasted, and I started all over again.
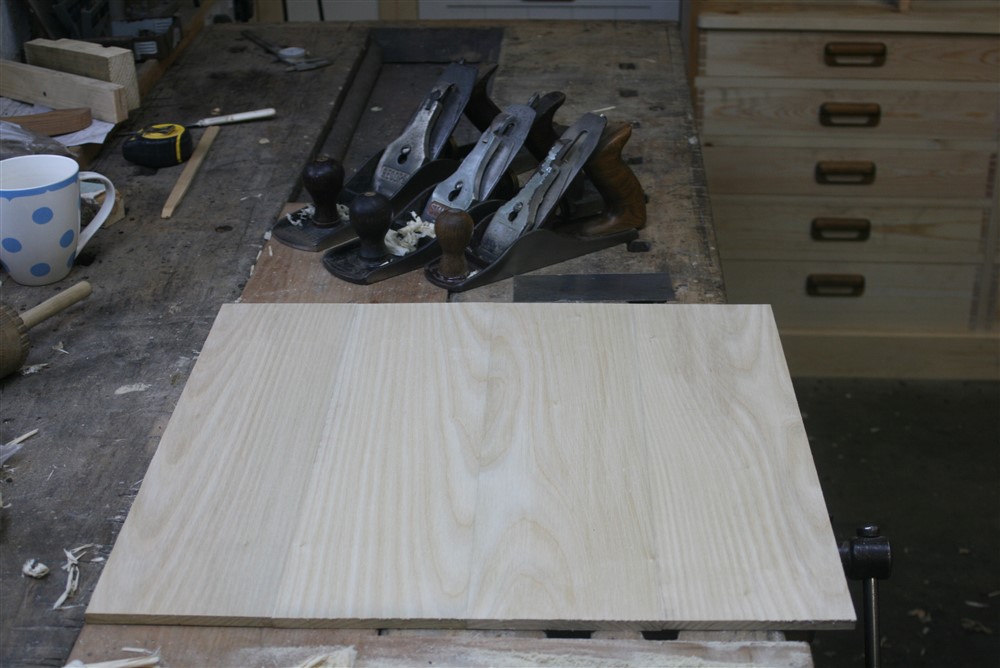
This time, I grabbed some ash:
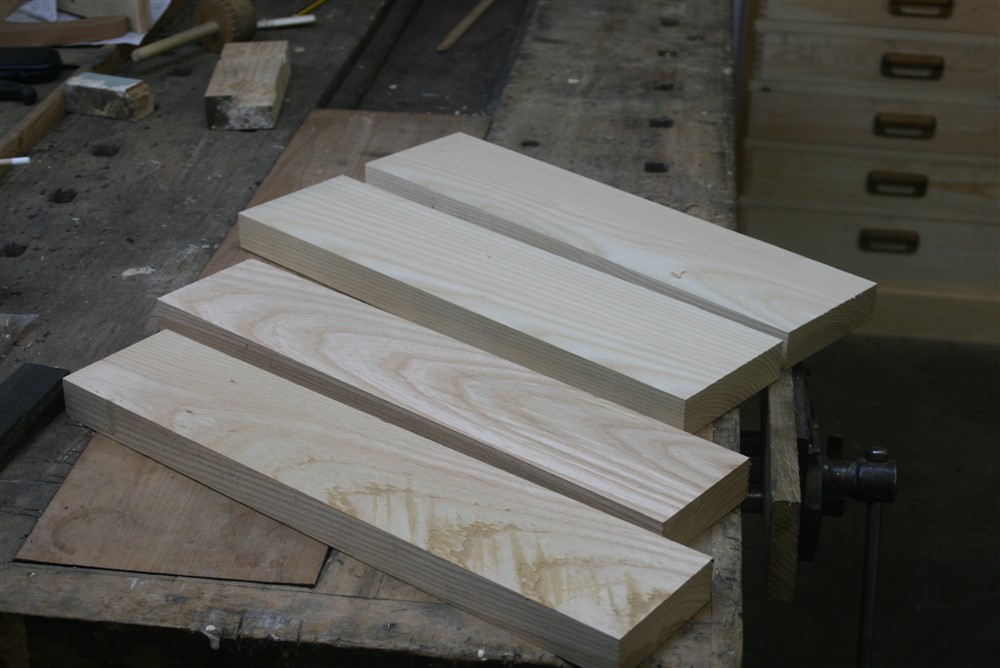
After re-sawing and planing it was down to about 10mm for the glue up:
I did both drawer bottoms of course, and they were in clamps overnight. This morning, I cleaned them up:
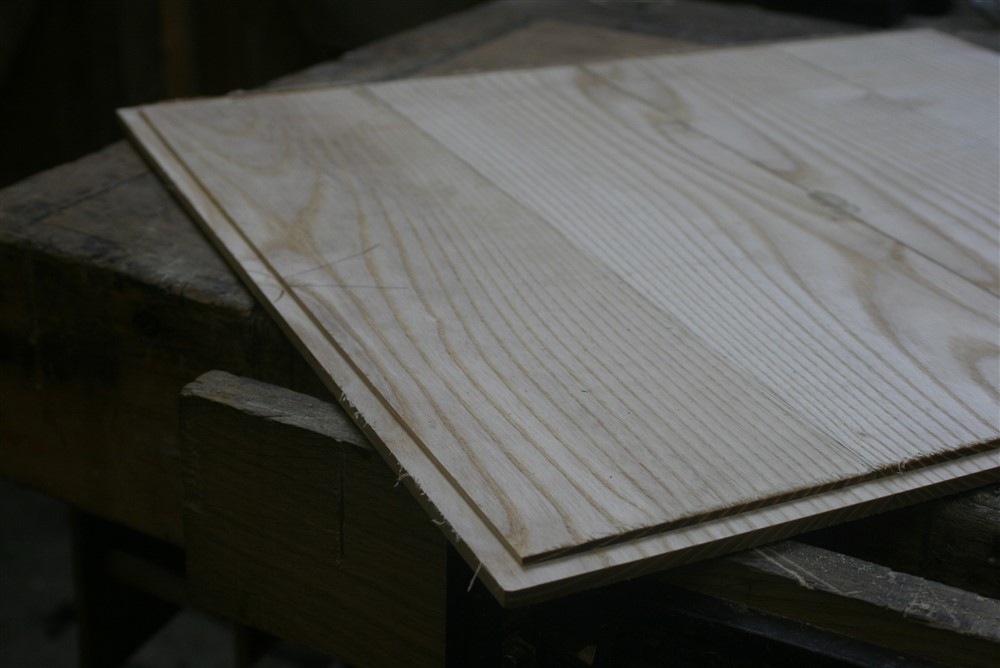
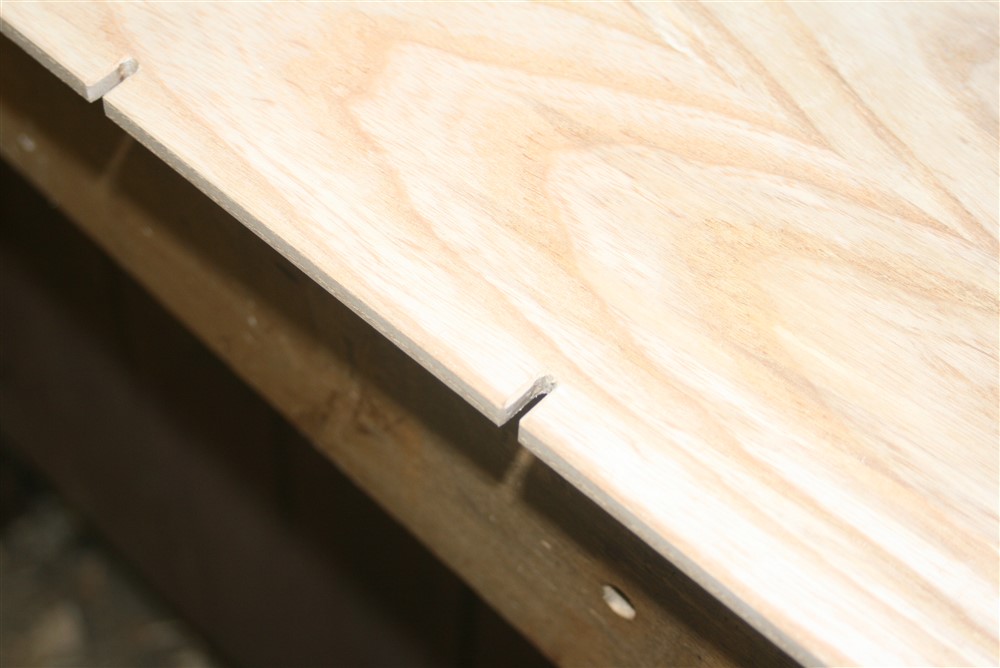
I ran the grooves around the front and two sides of the drawer carcasses which enabled me to accurately measure the size of the drawer bases. I cut the bases to size, and ran a rebate around 3 sides to get them down to the thickness necessary to fit the groove. We're dealing with fairly critical dimensions here as the drawer sides are thinnish.....8 or 9mm, so the grooves aren't deep:
Dry assembly:
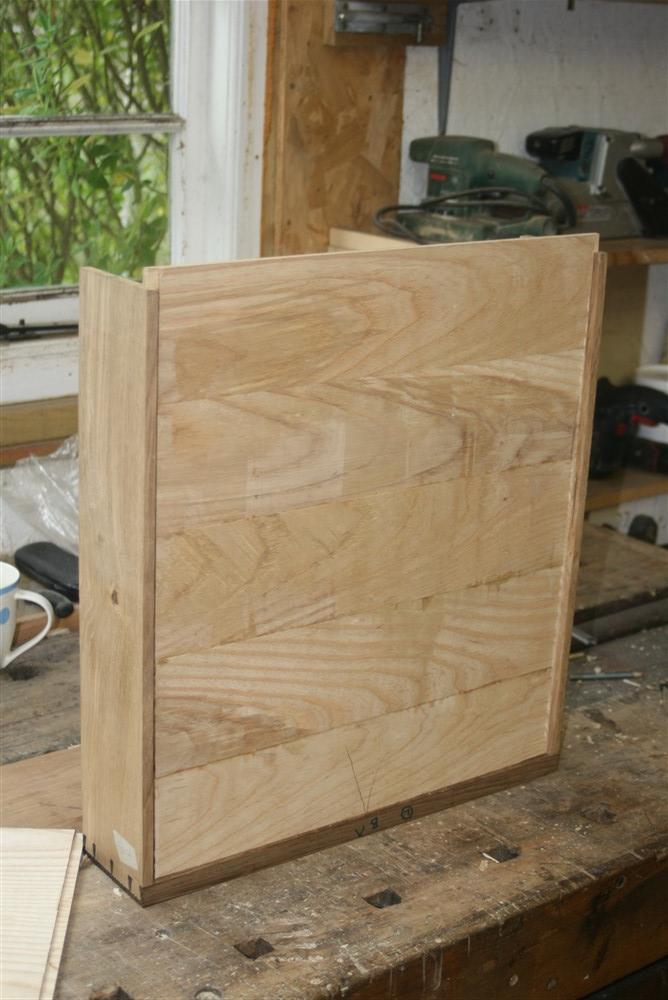
The back edge of the drawers bottoms will be screwed to the under-edge of the rearmost member of the drawer carcass, so I did the grooves for those:
I forgot to show the through dovetails for the drawer backs, but they were quick and easy. Here is one of the drawers glued up:
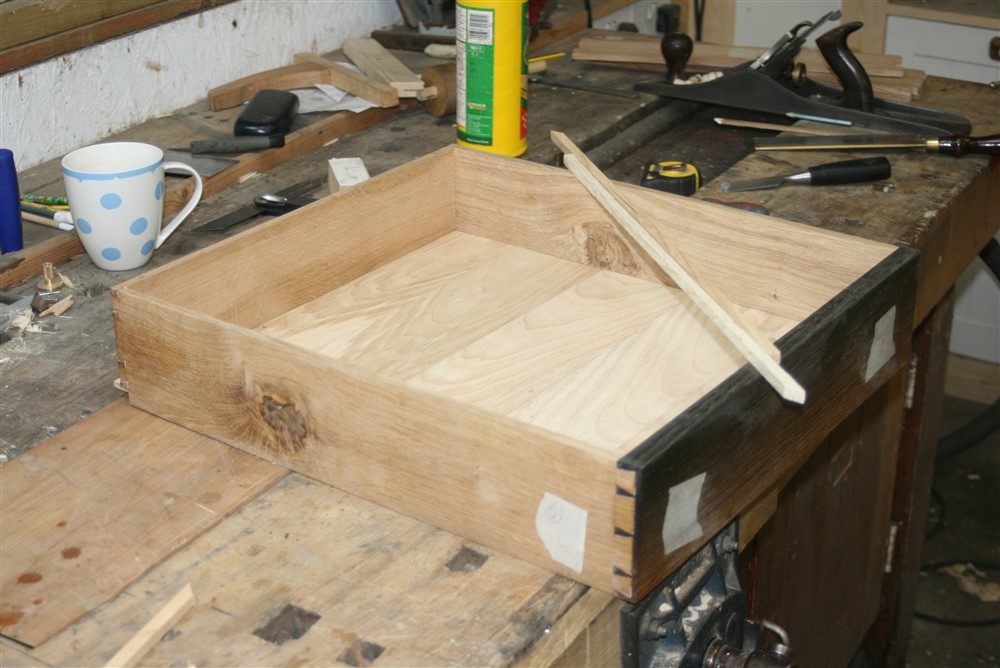
Note the pinch-sticks for checking the diagonals. No need for clamps, as all the jointing is really tight. I glued the front edge of the drawer bottom into the drawer front groove, and then the sides about a third of the way back up the drawer. Any movement there will be minimal. Behind that, it's floating free.
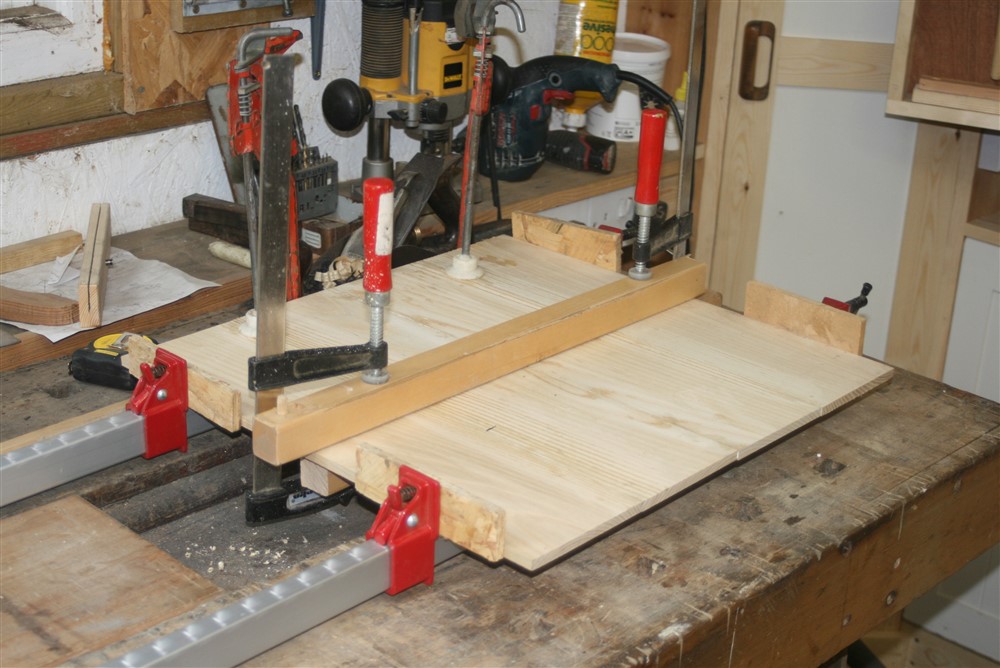
This morning I had also glued up the table top:
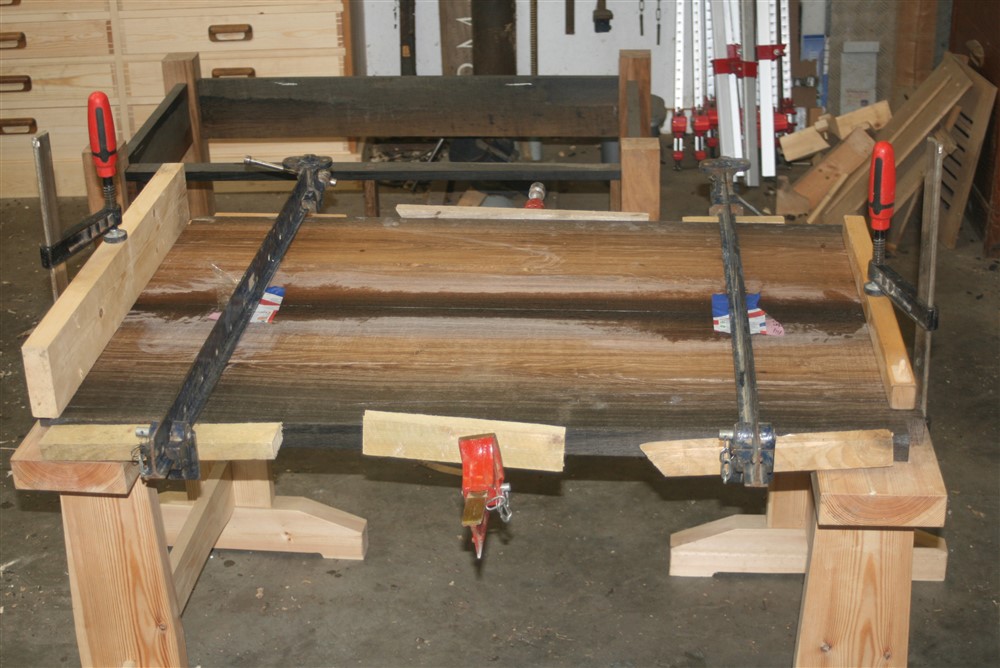
Note the plastic scraps to keep the steel of the clamp away from the glue and the oak. Those three can be a nasty combination if they come into contact:
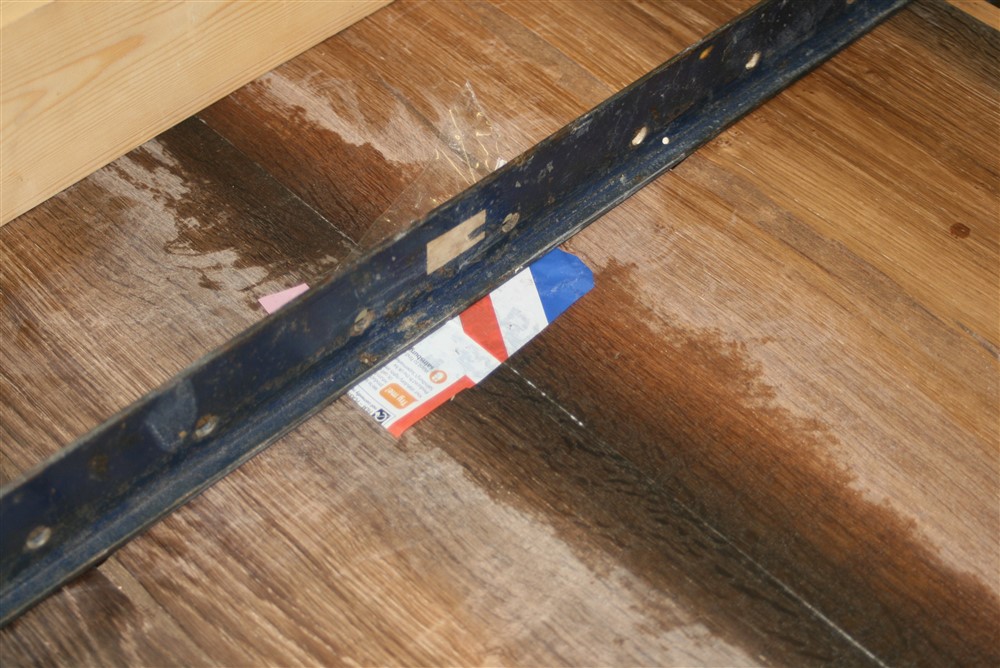
I also prepared a scrap for a test of the resin/ brass mix:
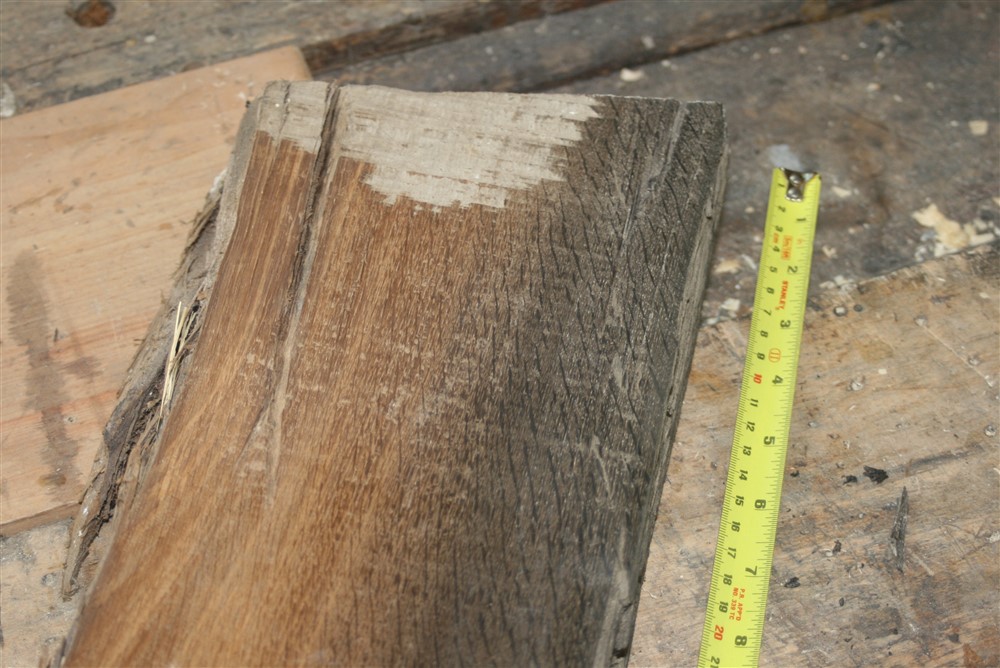
I used a hot melt glue gun to seal up the underside and ends of the cracks, but I wasn't as assiduous as I should have been. Frankly, I had no idea this stuff would have the viscosity of milk. It was surprised by the colour of the brass filings when mixed into the epoxy:
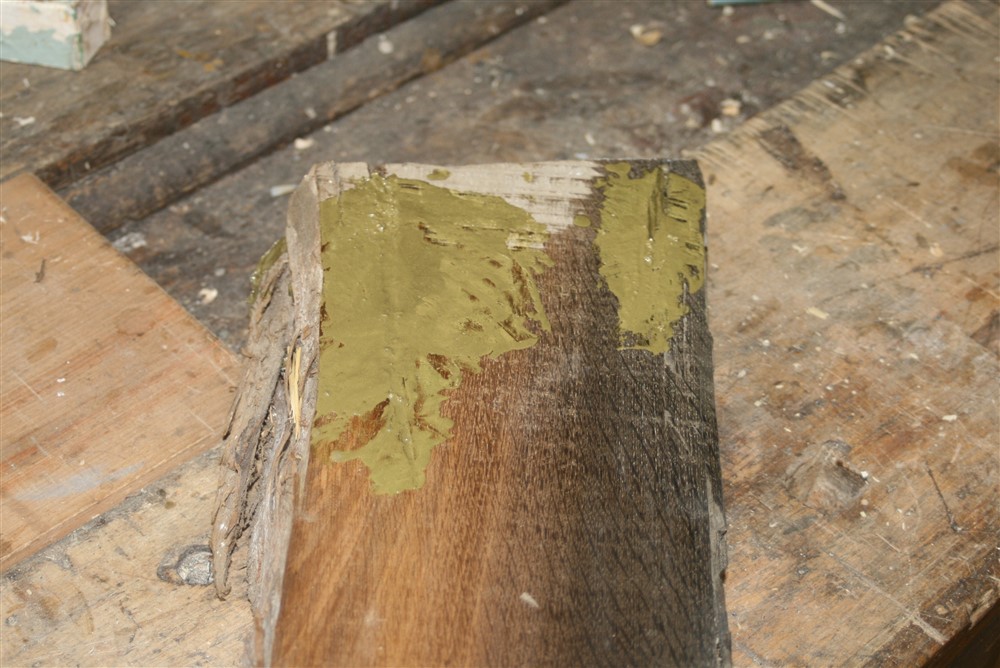
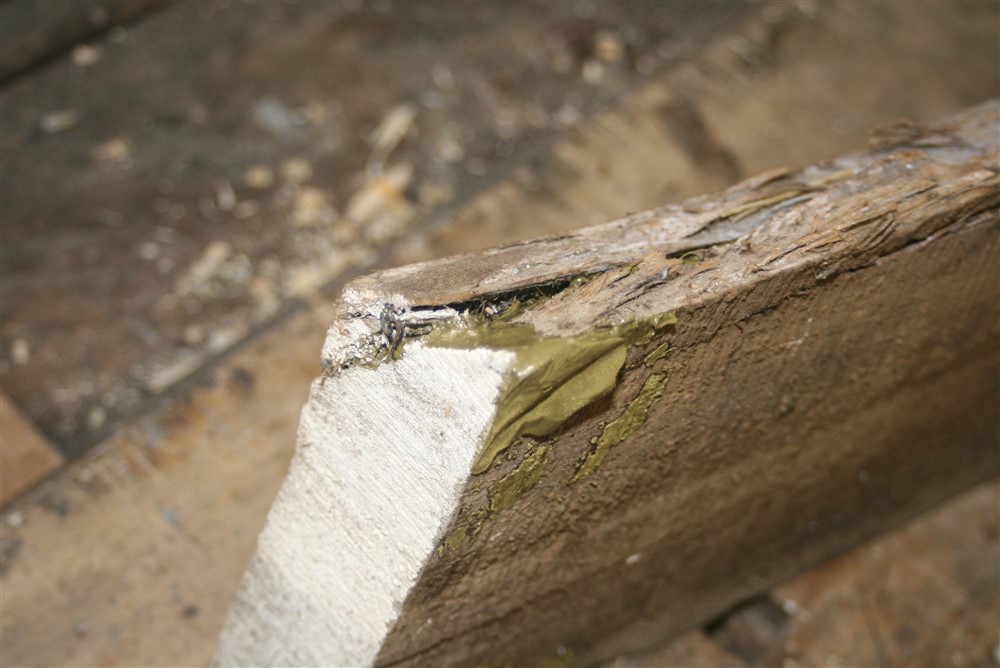
And yeah, it leaked:
I did the epoxy in the house because of the warmer temperature, but apparently it smells a bit so I won't be doing that again.
Unfortunately it was very much "in wind":
To save wastage I cut it to length, and halved the width:
Flattening from there only cost a couple of millimetres of thickness. I then proceeded to the bandsaw for re-sawing:
Looks good, hey?
Well, it's all gone on a bonfire. It was riddled with woodworm, and I came across at least 2 live larvae. I chucked probably a quarter of my spalted sycamore on the same fire. So, there's a couple of hours wasted, and I started all over again.
This time, I grabbed some ash:
After re-sawing and planing it was down to about 10mm for the glue up:
I did both drawer bottoms of course, and they were in clamps overnight. This morning, I cleaned them up:
I ran the grooves around the front and two sides of the drawer carcasses which enabled me to accurately measure the size of the drawer bases. I cut the bases to size, and ran a rebate around 3 sides to get them down to the thickness necessary to fit the groove. We're dealing with fairly critical dimensions here as the drawer sides are thinnish.....8 or 9mm, so the grooves aren't deep:
Dry assembly:
The back edge of the drawers bottoms will be screwed to the under-edge of the rearmost member of the drawer carcass, so I did the grooves for those:
I forgot to show the through dovetails for the drawer backs, but they were quick and easy. Here is one of the drawers glued up:
Note the pinch-sticks for checking the diagonals. No need for clamps, as all the jointing is really tight. I glued the front edge of the drawer bottom into the drawer front groove, and then the sides about a third of the way back up the drawer. Any movement there will be minimal. Behind that, it's floating free.
This morning I had also glued up the table top:
Note the plastic scraps to keep the steel of the clamp away from the glue and the oak. Those three can be a nasty combination if they come into contact:
I also prepared a scrap for a test of the resin/ brass mix:
I used a hot melt glue gun to seal up the underside and ends of the cracks, but I wasn't as assiduous as I should have been. Frankly, I had no idea this stuff would have the viscosity of milk. It was surprised by the colour of the brass filings when mixed into the epoxy:
And yeah, it leaked:
I did the epoxy in the house because of the warmer temperature, but apparently it smells a bit so I won't be doing that again.
tomthumbtom8
Established Member
Looking good Mike.
if it smells it's NOT Epoxy resin it's poly resin.
I've had some bad results with the poly resin and wood combination where the resin has not bonded with the wood and also poly resin will shrink a bit in height.
if it smells it's NOT Epoxy resin it's poly resin.
I've had some bad results with the poly resin and wood combination where the resin has not bonded with the wood and also poly resin will shrink a bit in height.
MikeG.
Established Member
Yes, it is indeed a poly. It bonded OK, and shrinkage shouldn't be an issue because I'll build a little hot-melt glue wall around the areas to be filled enabling a little over-filling. What I learnt from my little experiment was that the ratio of brass dust needs to be higher than I used, because it seems like the brass sinks through the resin. The stuff that leaked out of the underside of the cracks cleaned up really nicely, and polished to an obvious brass. However, the stuff on the show side is too resin-y, and only polishes up here and there.
-
I only managed a few minutes in the workshop today (damn christmas parties........), but came up with a rather nice alternative wooden drawer handle, which has subsequently had design team approval.
-
I only managed a few minutes in the workshop today (damn christmas parties........), but came up with a rather nice alternative wooden drawer handle, which has subsequently had design team approval.
tomthumbtom8
Established Member
brass mix will sink apply your mix BUT if you turn the worktop upside down the brass will be in the right place.
drill a small hole if you've filled all the gap
drill a small hole if you've filled all the gap
tomthumbtom8
Established Member
Acrylic sheet will hotmelt glue in place
MikeG.
Established Member
tomthumbtom8":36np05b5 said:brass mix will sink apply your mix BUT if you turn the worktop upside down the brass will be in the right place.
I'm thinking of doing the pours in two goes, with the first one clear, and leaving me say 6 or 8mm of brass for the final pour a day or so later. This will mean less depth of resin for the brass to sink through, and with an increased ratio of brass I'm pretty confident this will do the trick.
drill a small hole if you've filled all the gap
Sorry, I don't follow. Drill a hole in what? And why?
tomthumbtom8
Established Member
Seal the top with hot melt glue and Acrylic turn the work top over, then drill a small hole then pour the resin and brass mix in.
So you are working the worktop upside down
So you are working the worktop upside down
MikeG.
Established Member
I can't do that, because there are only couple of the cracks which go all the way through. There are half a dozen others which are just on the top surface.
MikeG.
Established Member
Following the lessons of the first handle trial......:
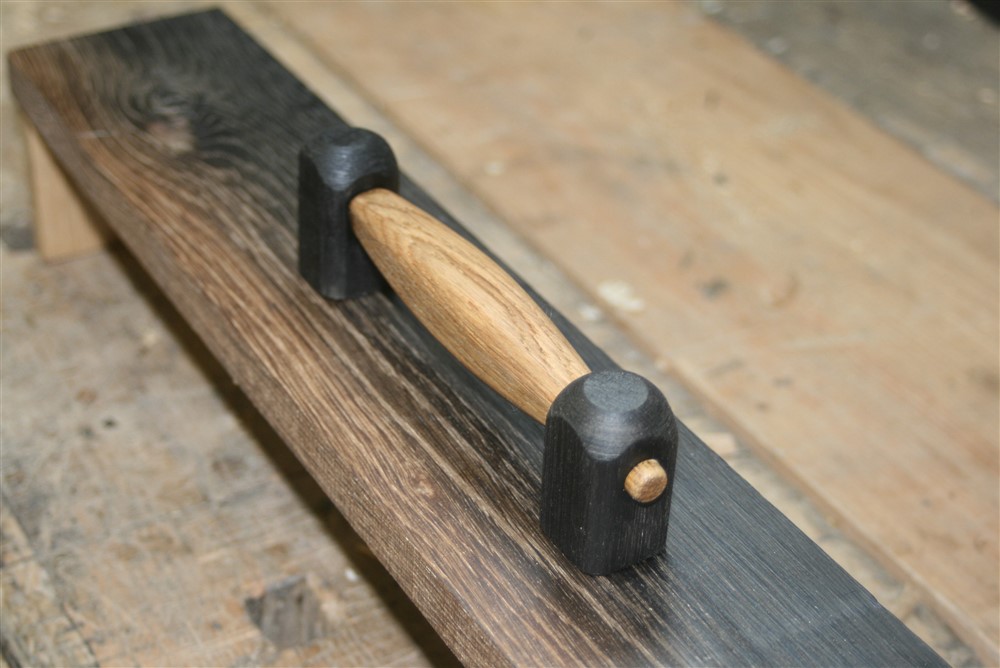
....... I produced something else for discussion:
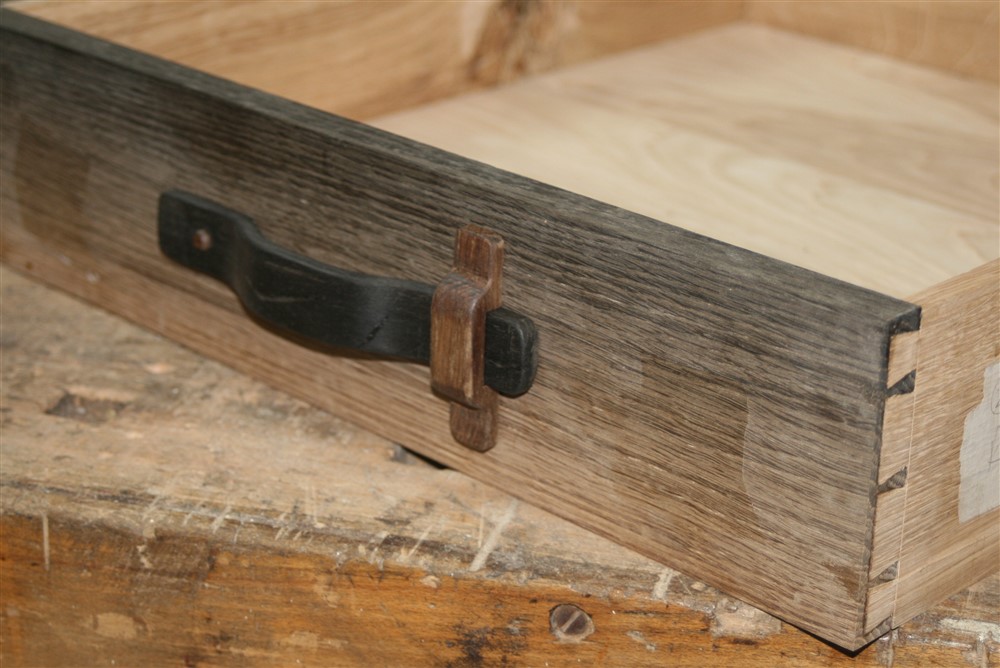
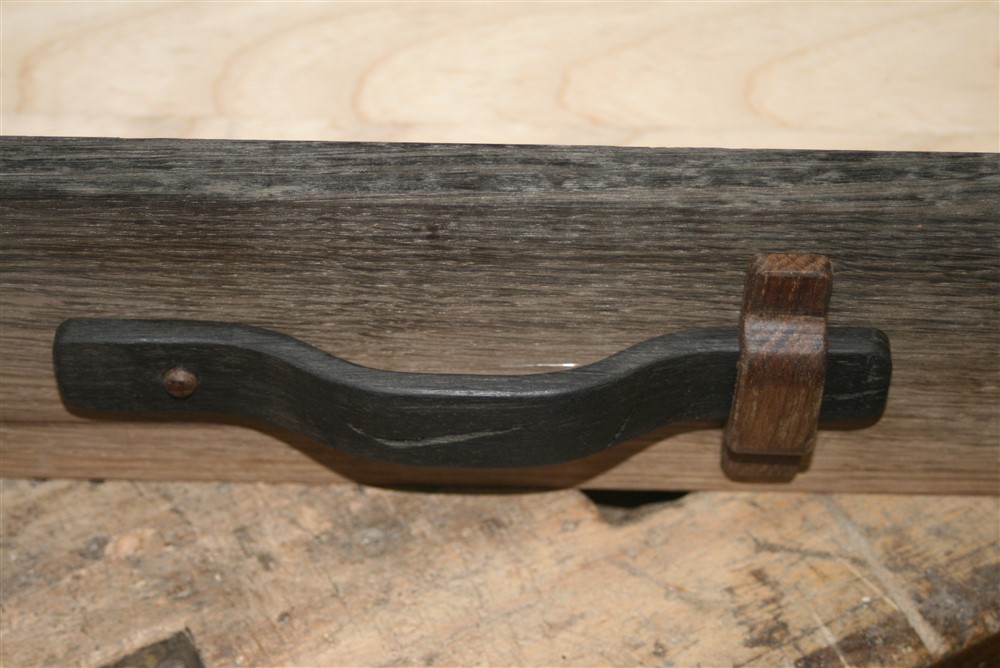
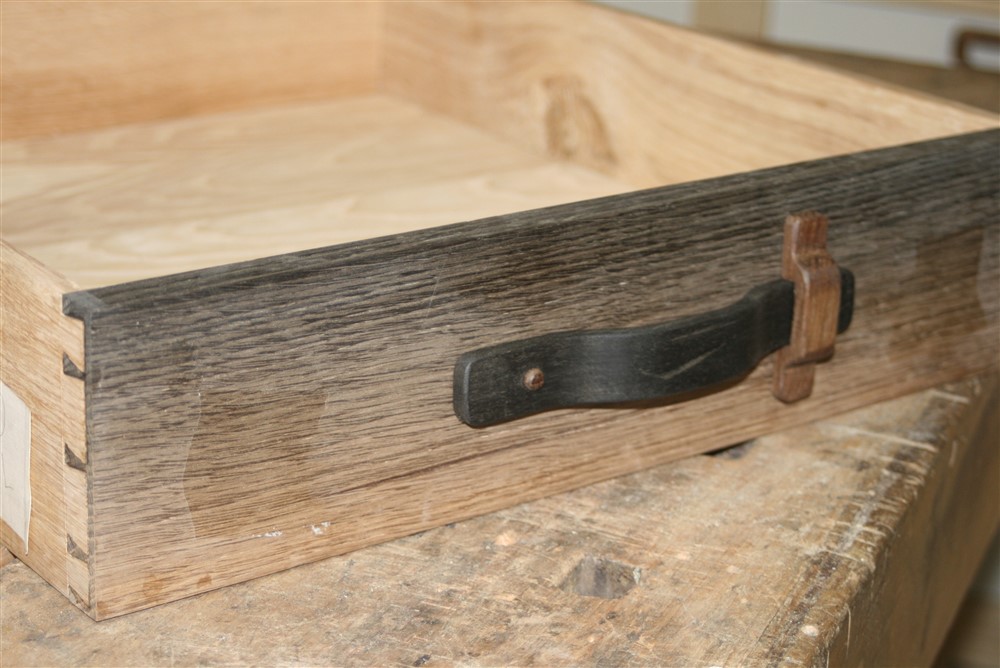
We like the shape of the handle itself. The options with this mock up include the vertical cross-pieces, the raised plugs (should be larger and more of a contrast), and to colour reverse everything (brown handle, black plugs/ cross piece). Let's see what you guys prefer, but we've got a favourite at the moment.
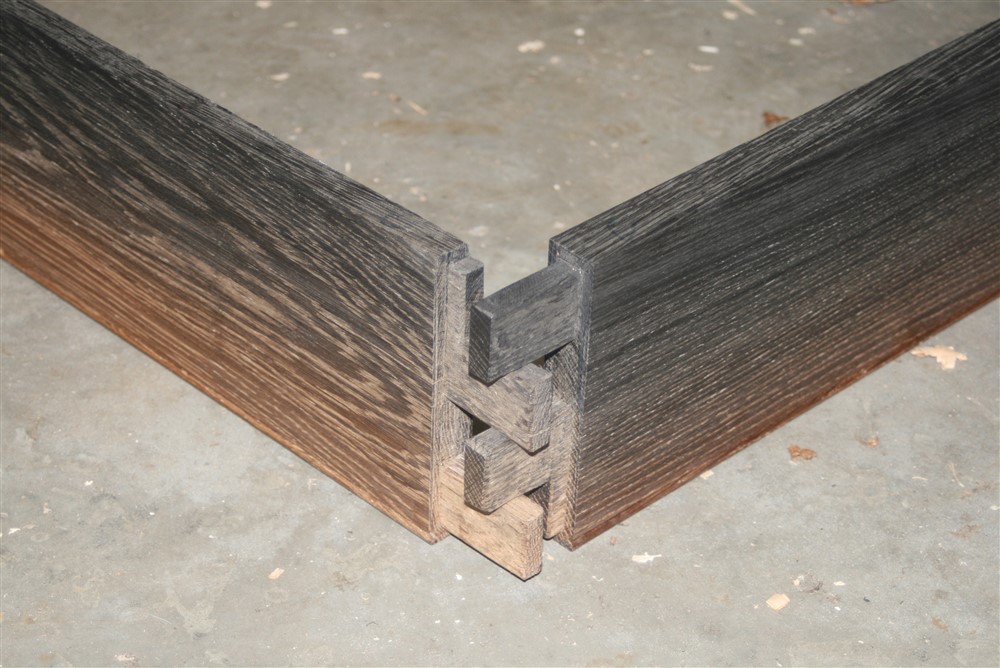
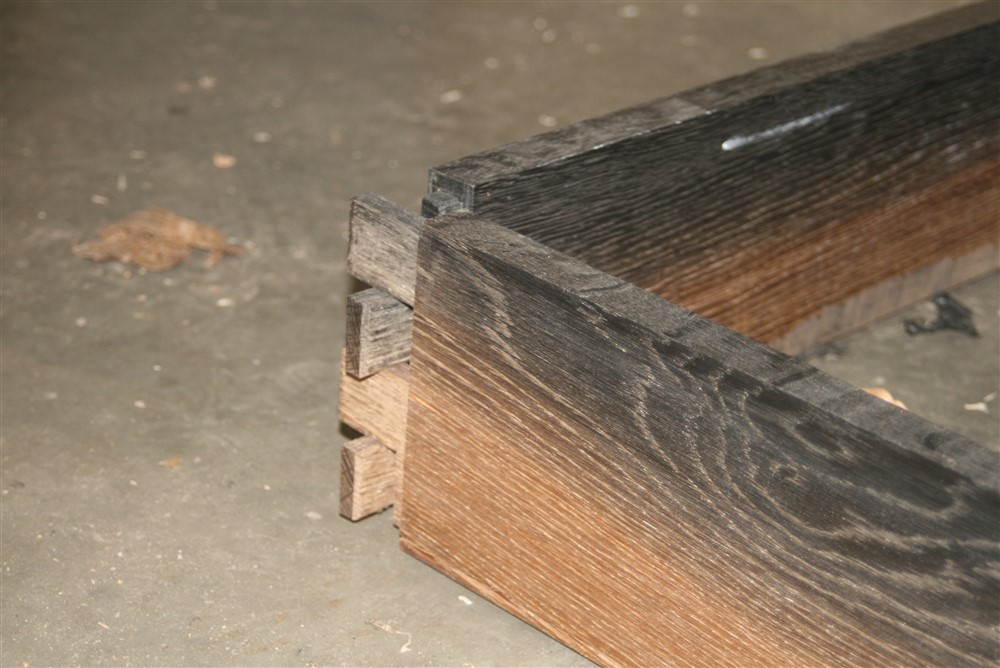
I finished off work on the frame by adding a bead to the bottom edge of the apron, shooting the edges, and scraping a finish on the outer face. In pulling it apart from the dry fit as it has stood for a couple of weeks, I thought I'd mock-up the corner join to show how the tenons overlap inside the legs:
I then added a finish so that I could glue without worrying so much about cleaning up the squeeze out:
I'd also added a round-over to the long edges and top of the legs, and cleaned up the faces with a plane:
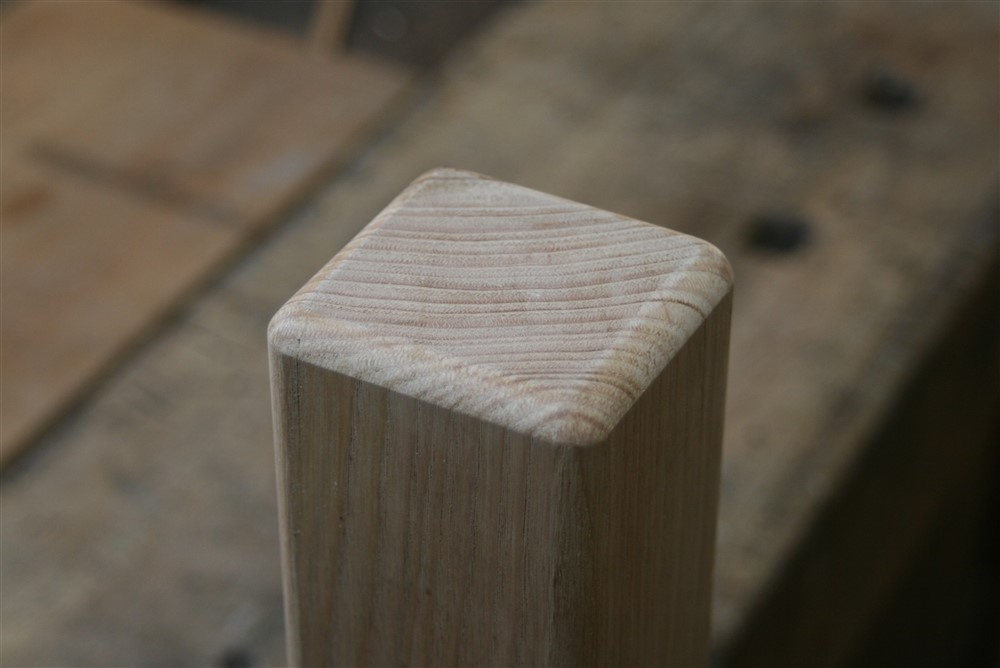
This is the finish the legs got:
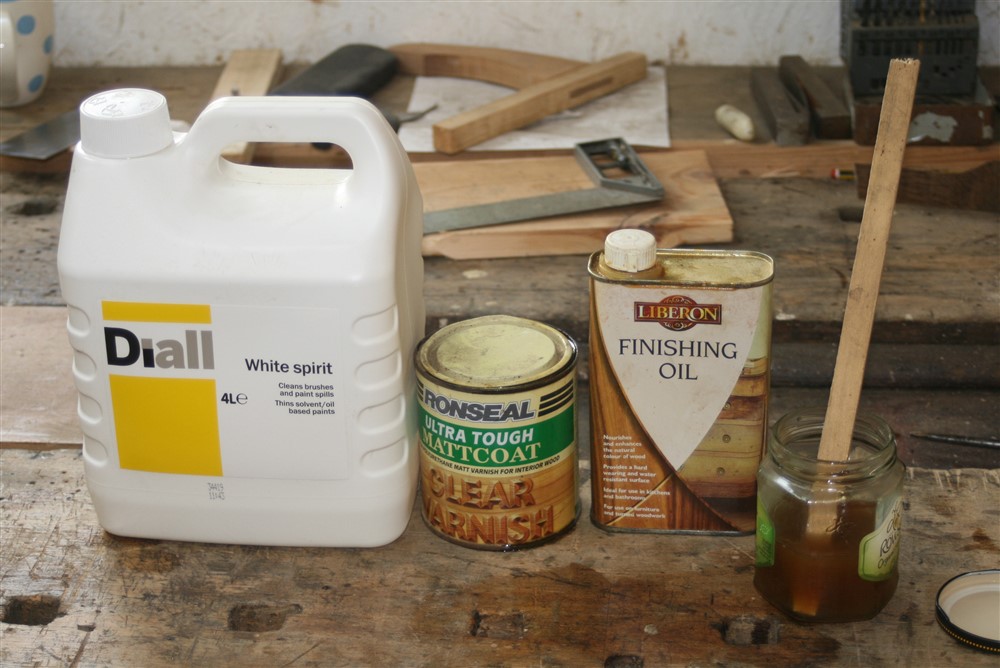
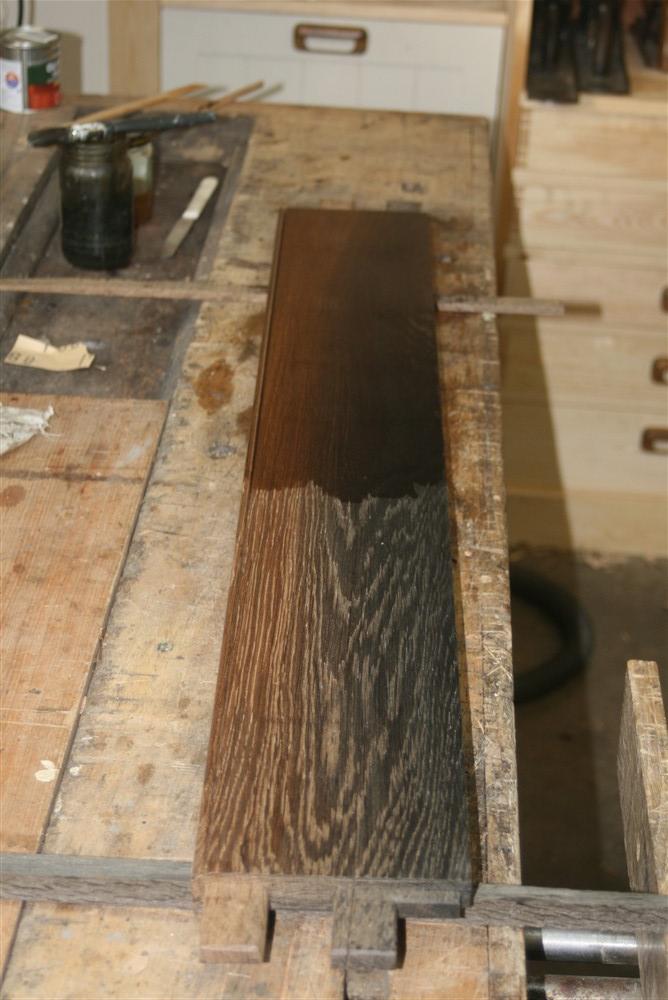
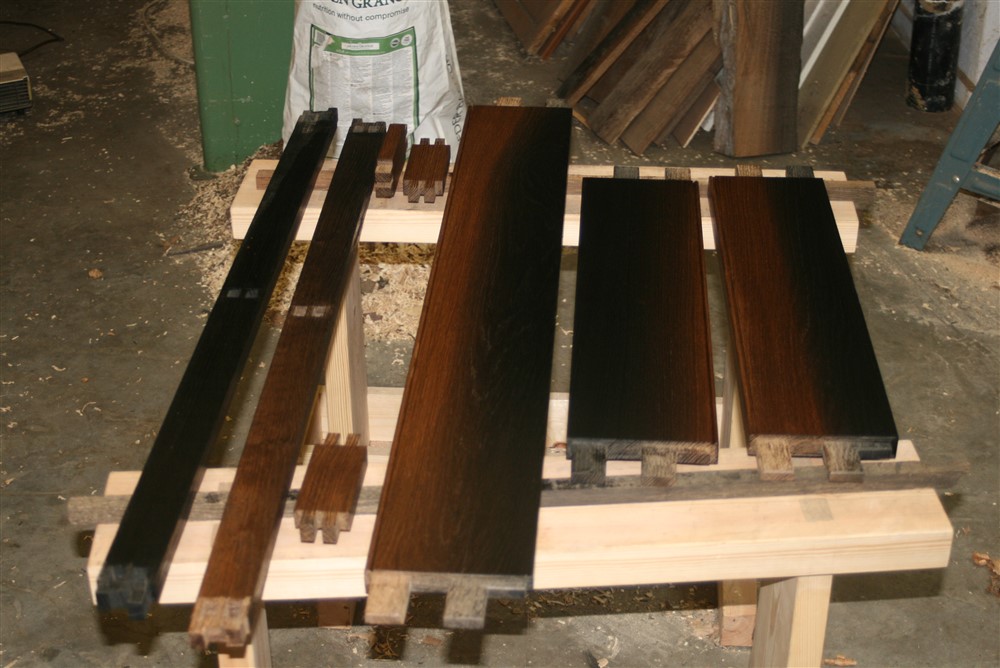
The bog oak gets the same, but with a dark varnish rather than clear. Here are the legs:
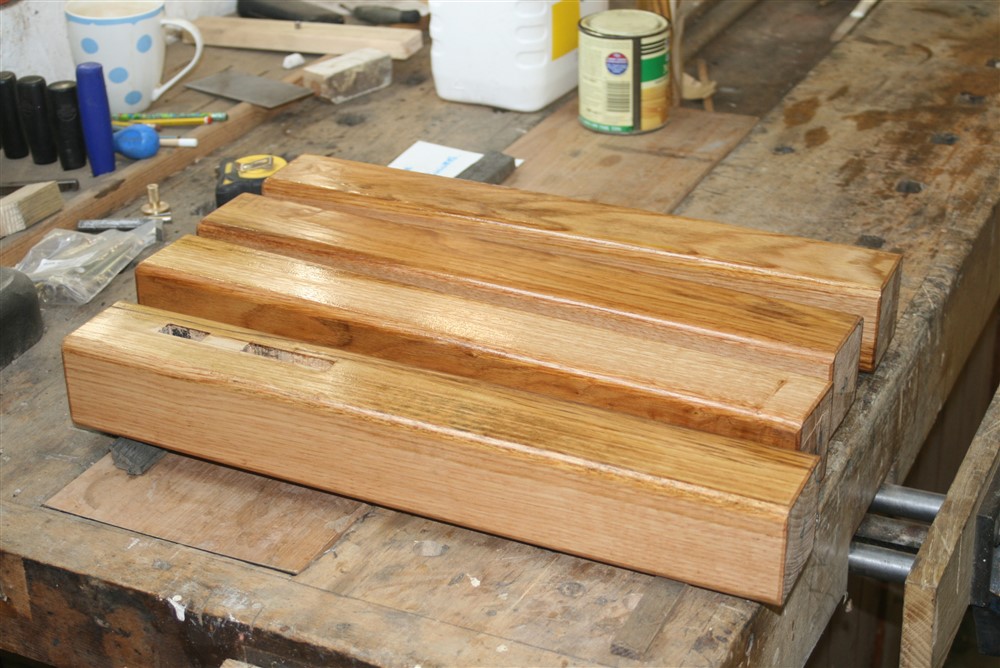
This 1:1:1 mixture is brushed on then wiped off after 5 to 10 minutes. That lot will dry overnight and the gluing up of the frame can happen tomorrow. If the legs seem like too much of a contrast to the bog-oak, then I'll rub them back fairly hard and apply the darker finish. Finally, the end of this drawn out build is in sight.
....... I produced something else for discussion:
We like the shape of the handle itself. The options with this mock up include the vertical cross-pieces, the raised plugs (should be larger and more of a contrast), and to colour reverse everything (brown handle, black plugs/ cross piece). Let's see what you guys prefer, but we've got a favourite at the moment.
I finished off work on the frame by adding a bead to the bottom edge of the apron, shooting the edges, and scraping a finish on the outer face. In pulling it apart from the dry fit as it has stood for a couple of weeks, I thought I'd mock-up the corner join to show how the tenons overlap inside the legs:
I then added a finish so that I could glue without worrying so much about cleaning up the squeeze out:
I'd also added a round-over to the long edges and top of the legs, and cleaned up the faces with a plane:
This is the finish the legs got:
The bog oak gets the same, but with a dark varnish rather than clear. Here are the legs:
This 1:1:1 mixture is brushed on then wiped off after 5 to 10 minutes. That lot will dry overnight and the gluing up of the frame can happen tomorrow. If the legs seem like too much of a contrast to the bog-oak, then I'll rub them back fairly hard and apply the darker finish. Finally, the end of this drawn out build is in sight.
I'd go for black handles with studs or just screws, but without making the studs visible. That way the rather nice carved double curve is what you see.
The carved vertical cross strap idea looks a bit busy and doesn't relate to any other part of the table, in my opinion.
The carved vertical cross strap idea looks a bit busy and doesn't relate to any other part of the table, in my opinion.
Orraloon
Established Member
I like the handle that looks like a leather strap. Hope you don't mind if I copy that one day.
Regards
John
Regards
John