andersonec
Established Member
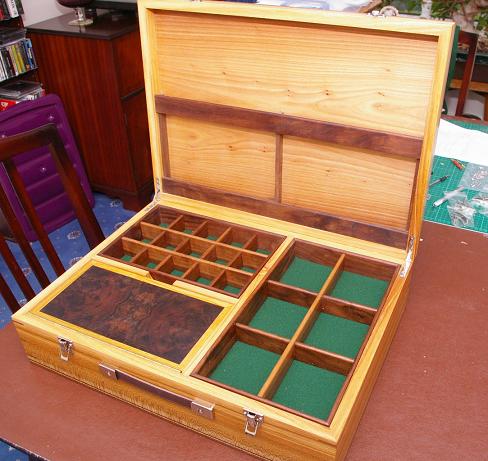
Delivered the other one (in exchange for some timber Black Walnut) and now asked if I would do another to be used as a gift.
Some folks asked forsome WIP piccies which I didn't do for the last one so this is my offering.
1; The eagle eyed of you will notice the change of timbers half way through, it originally started life as a piece of Cherry but I had a change of mind and wanted to do something a little different with the lid, I had some Elm veneer with quite straight grain and also a nice piece of quarter-sawn Elm so changed the timber mid stream so to speak, the work was carried out the same way so the photo's are relevant.
Strip of Walnut being glued to Cherry which has had one edge straightened and then paralleled, this is important as it will be required to cut the Walnut down when the glue is dried, I glue it thick so that I can get more clamping pressure spread along the wood when clamping

2; Walnut cut and sides thicknessed then cut to length, plus a few mm.

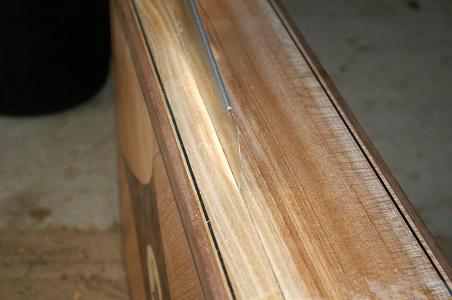
3; Inlaid some1.5mm black lines top and bottom, had to leave space at the top because it is going to have a Walnut edge, Here it is being cleaned up with a scraper.

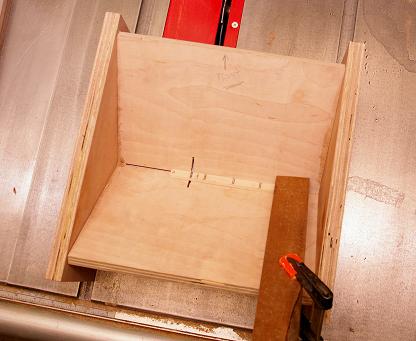
4; Cutting the mitres on my little mitre sled, the little pad the toggle clamp is mounted on slides forward to hold the work in place, tightened down, then the toggle clamp holds the work securely in place with no need to hold the work or place hands anywhere near it.
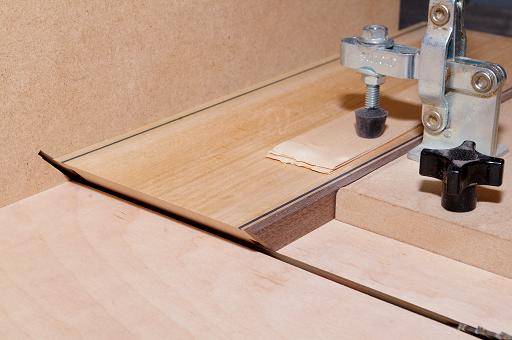
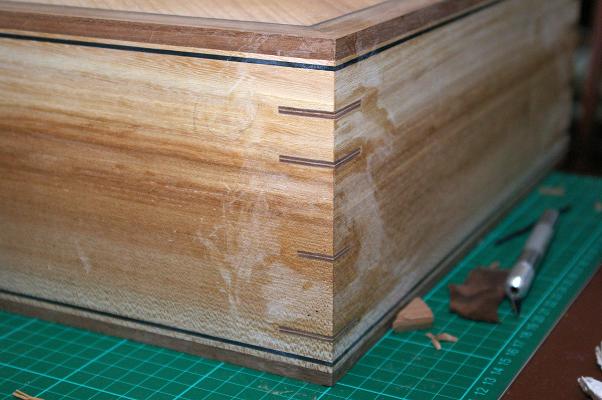
5; Here you can see the sort of corner I get with my sled, this is not clamped but just free standing and held up with the square. Just to say, it is imperative that the fence on the sled is set to exactly 90deg to the cut and I set my 45deg with a Wixey digital angle finder.
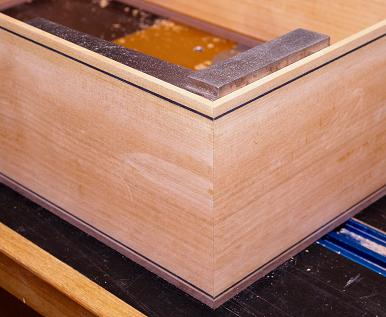
6; Slot for base has been routed and rebate for lid (9mm thick) has been routed so getting ready for glue-up, the inside is finished, plane only, I do not use sandpaper for this and you can see the shavings produced, it leaves a nice shiny finish which really highlights the grain

7; Box glued up and while it is drying Ill get on with the lid, this is the design I have in mind for the lid, all will become clear. Remember, the wood for the box has now changed and it is now Elm.

8; The elm veneer I had being cut to accept some four-matched Burr walnut

9; The Burr Walnut matched with a fly insert being cut into the Elm veneer

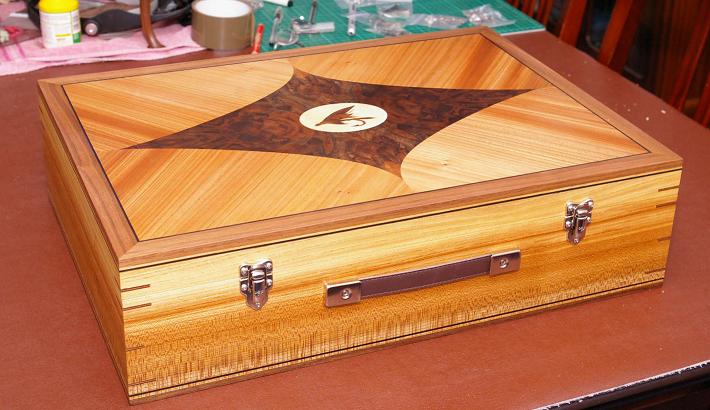
10; The lid glued on, Walnut edging applied and the veneer cleaned up, now it looks a lot better.

Part two to follow..........
Some folks asked forsome WIP piccies which I didn't do for the last one so this is my offering.
1; The eagle eyed of you will notice the change of timbers half way through, it originally started life as a piece of Cherry but I had a change of mind and wanted to do something a little different with the lid, I had some Elm veneer with quite straight grain and also a nice piece of quarter-sawn Elm so changed the timber mid stream so to speak, the work was carried out the same way so the photo's are relevant.
Strip of Walnut being glued to Cherry which has had one edge straightened and then paralleled, this is important as it will be required to cut the Walnut down when the glue is dried, I glue it thick so that I can get more clamping pressure spread along the wood when clamping

2; Walnut cut and sides thicknessed then cut to length, plus a few mm.

3; Inlaid some1.5mm black lines top and bottom, had to leave space at the top because it is going to have a Walnut edge, Here it is being cleaned up with a scraper.

4; Cutting the mitres on my little mitre sled, the little pad the toggle clamp is mounted on slides forward to hold the work in place, tightened down, then the toggle clamp holds the work securely in place with no need to hold the work or place hands anywhere near it.

5; Here you can see the sort of corner I get with my sled, this is not clamped but just free standing and held up with the square. Just to say, it is imperative that the fence on the sled is set to exactly 90deg to the cut and I set my 45deg with a Wixey digital angle finder.

6; Slot for base has been routed and rebate for lid (9mm thick) has been routed so getting ready for glue-up, the inside is finished, plane only, I do not use sandpaper for this and you can see the shavings produced, it leaves a nice shiny finish which really highlights the grain

7; Box glued up and while it is drying Ill get on with the lid, this is the design I have in mind for the lid, all will become clear. Remember, the wood for the box has now changed and it is now Elm.

8; The elm veneer I had being cut to accept some four-matched Burr walnut

9; The Burr Walnut matched with a fly insert being cut into the Elm veneer

10; The lid glued on, Walnut edging applied and the veneer cleaned up, now it looks a lot better.

Part two to follow..........


