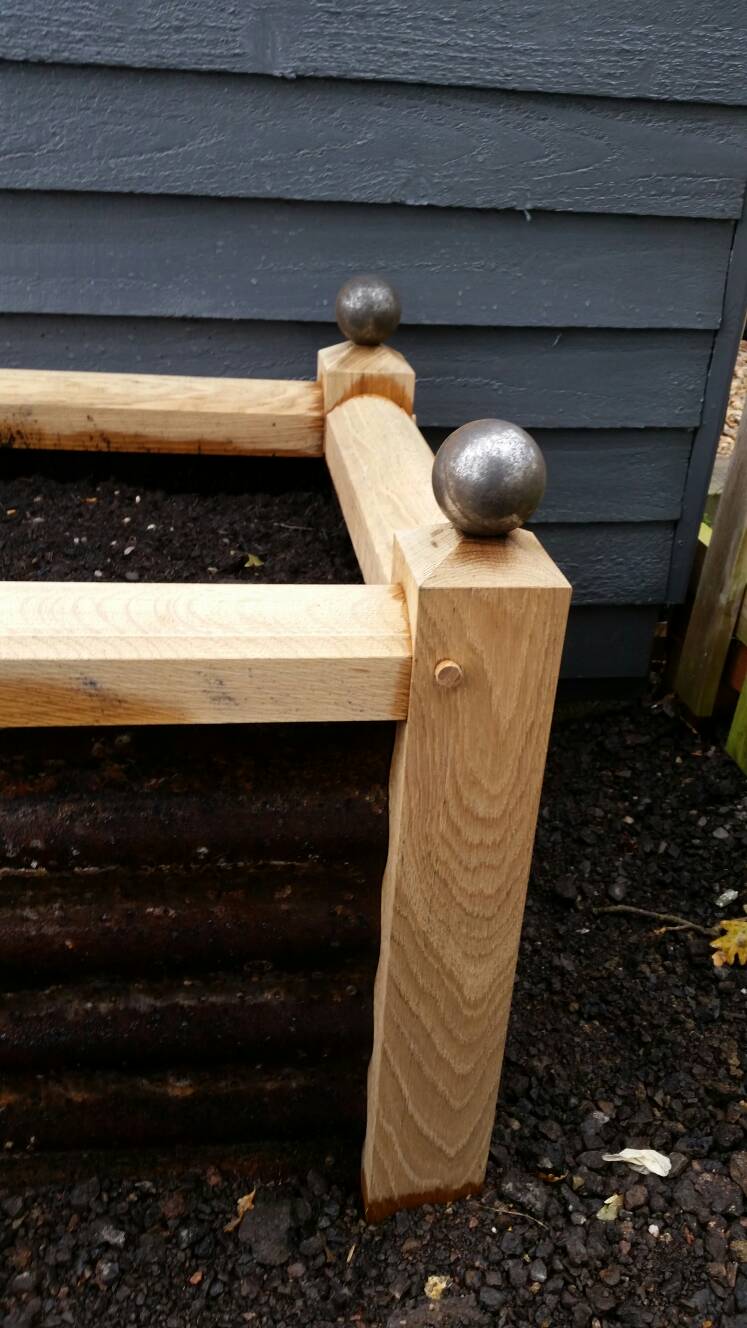
I finished this yesterday and thought I might share a few wip type pics.
For some reason I really like using oil drums. There free, strong and seem a waste to chuck out.
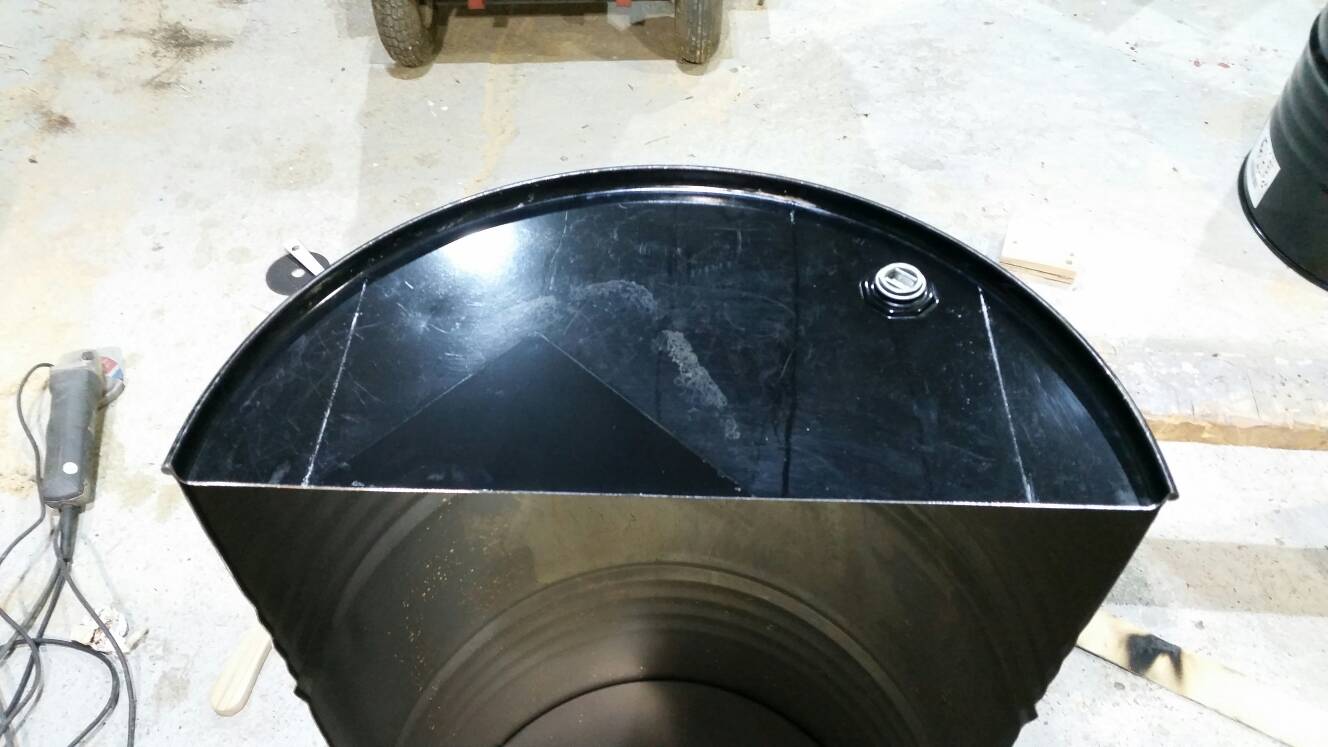
After recently painting the side of my shed there was a large space a long planter could go- brighten it up a bit.
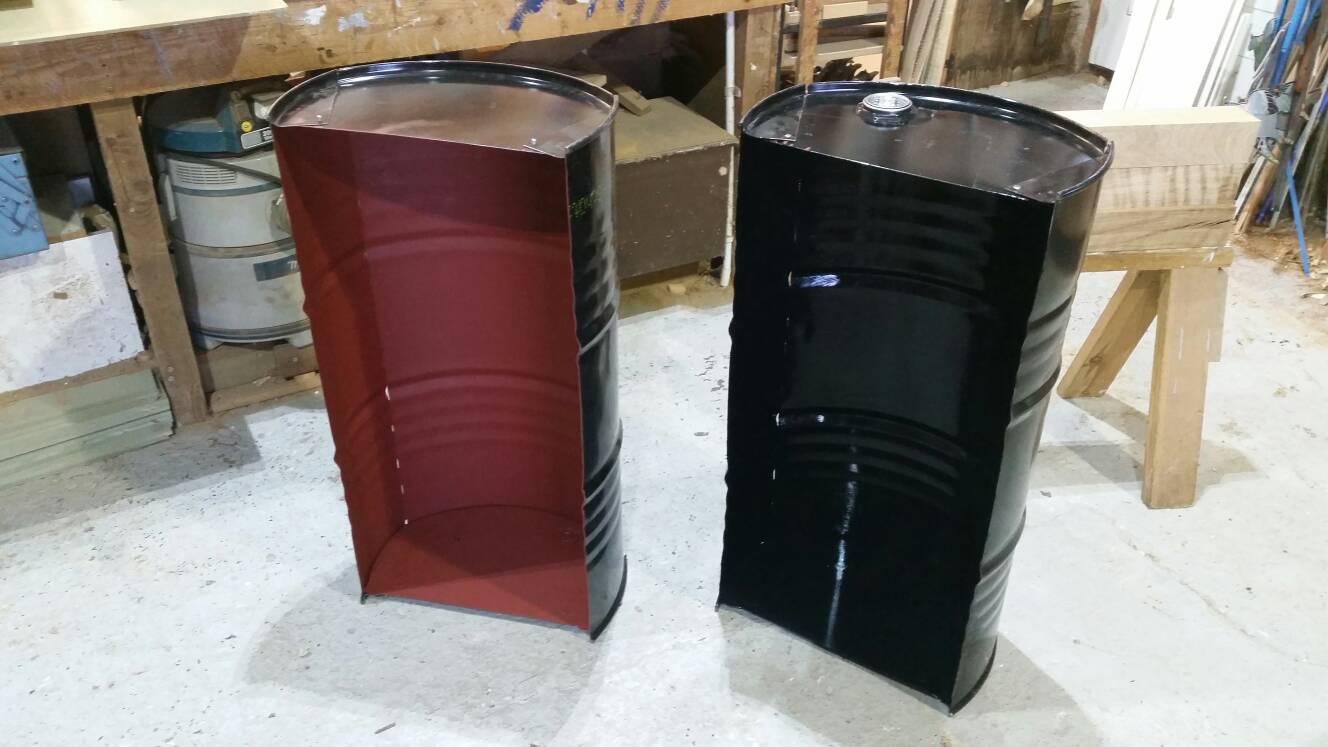
I cut some slots in the drums and pop riveted them together. I knocked six inches off the width which meant I could still get the car to fit on the drive, also meant I could have a decent amount of soil depth near the edges.
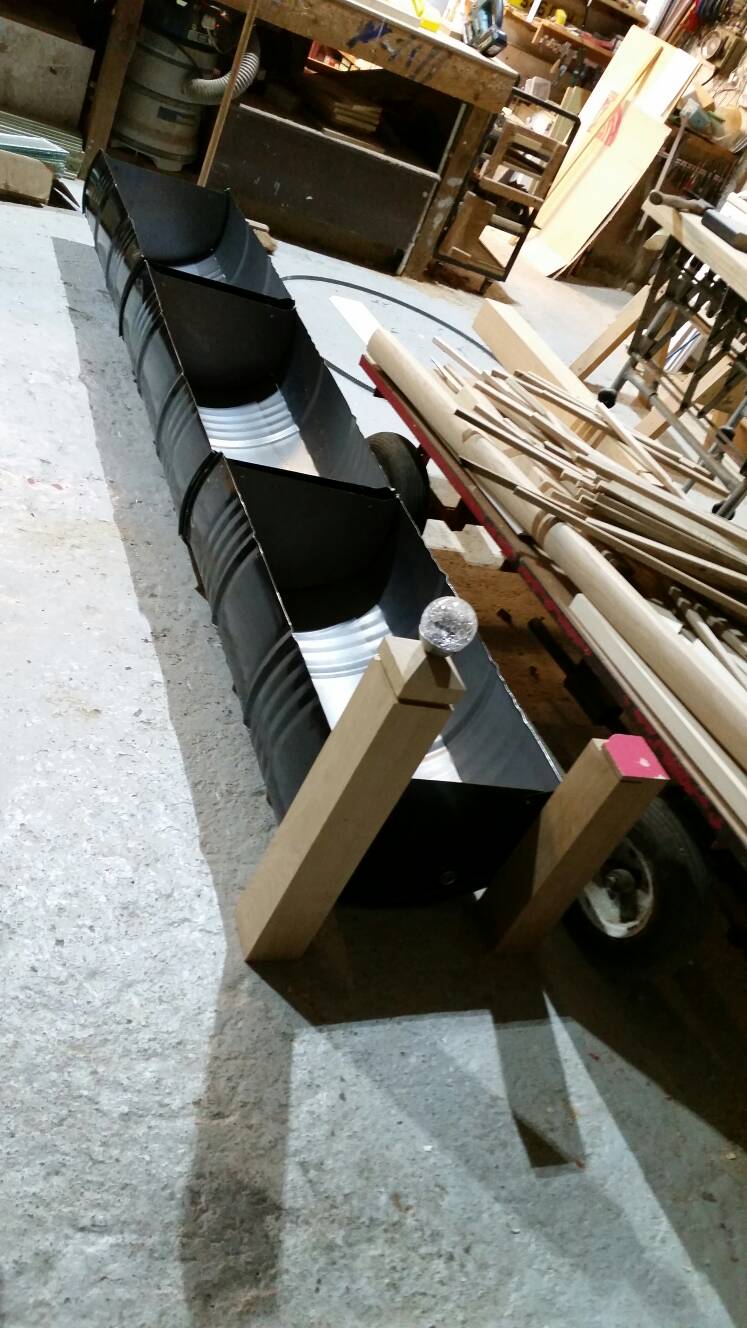
I've had a small pile of green oak I've needed to get rid of, so this seemed like a good time to use it up.
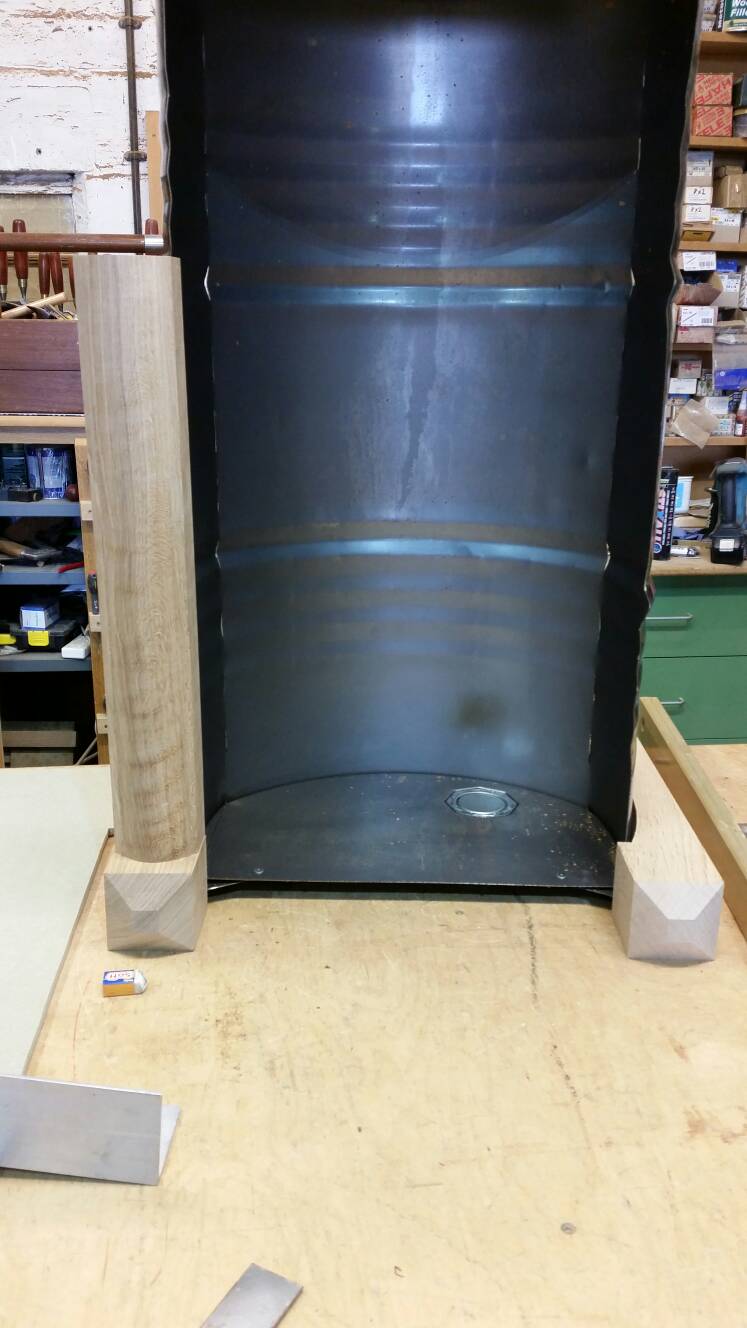
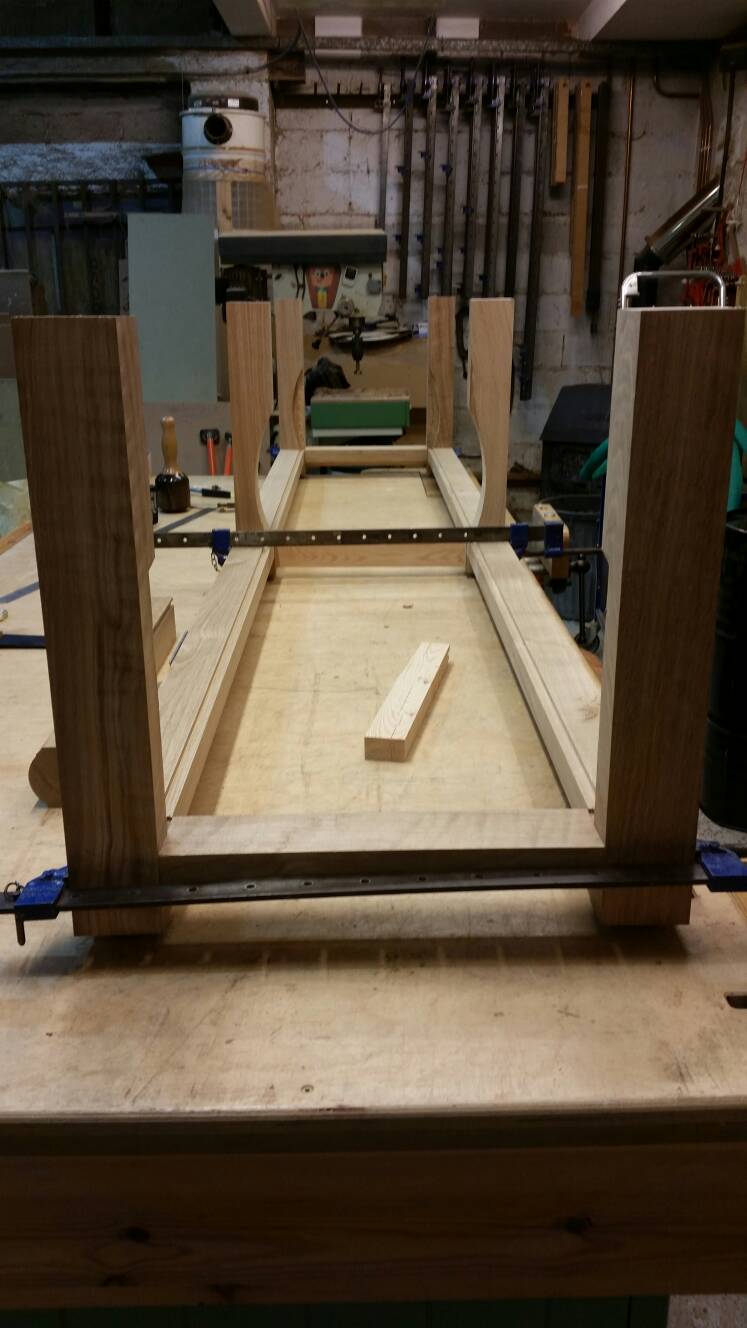
The overall width is just under 550mm so it's 30mm smaller than the original 580mm diameter drum.
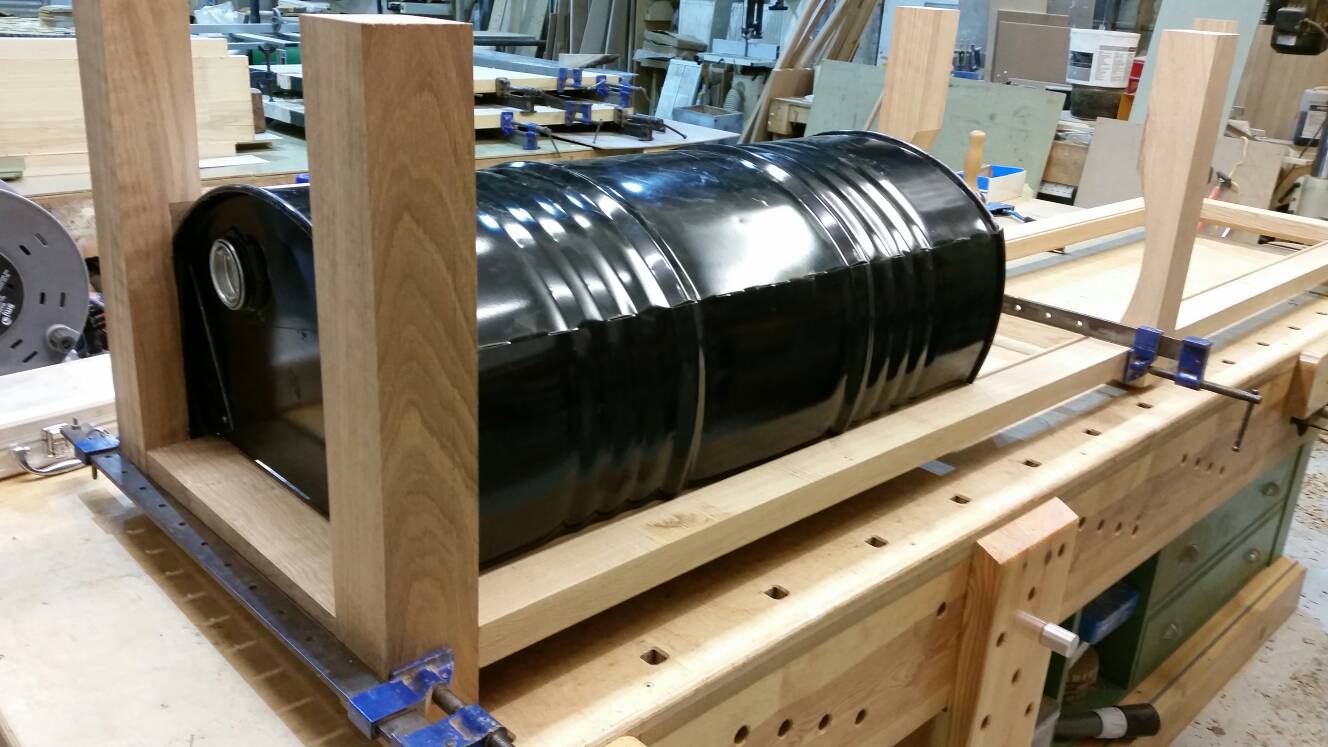
The notches in the legs were a pain in the butt ! Unfortunately I've had to build the frame around the drums as there was no way to get them in once the joints of the frame were drawbored. If/when I need to replace the drums, I'll have to drill out a couple pins to get it apart :?
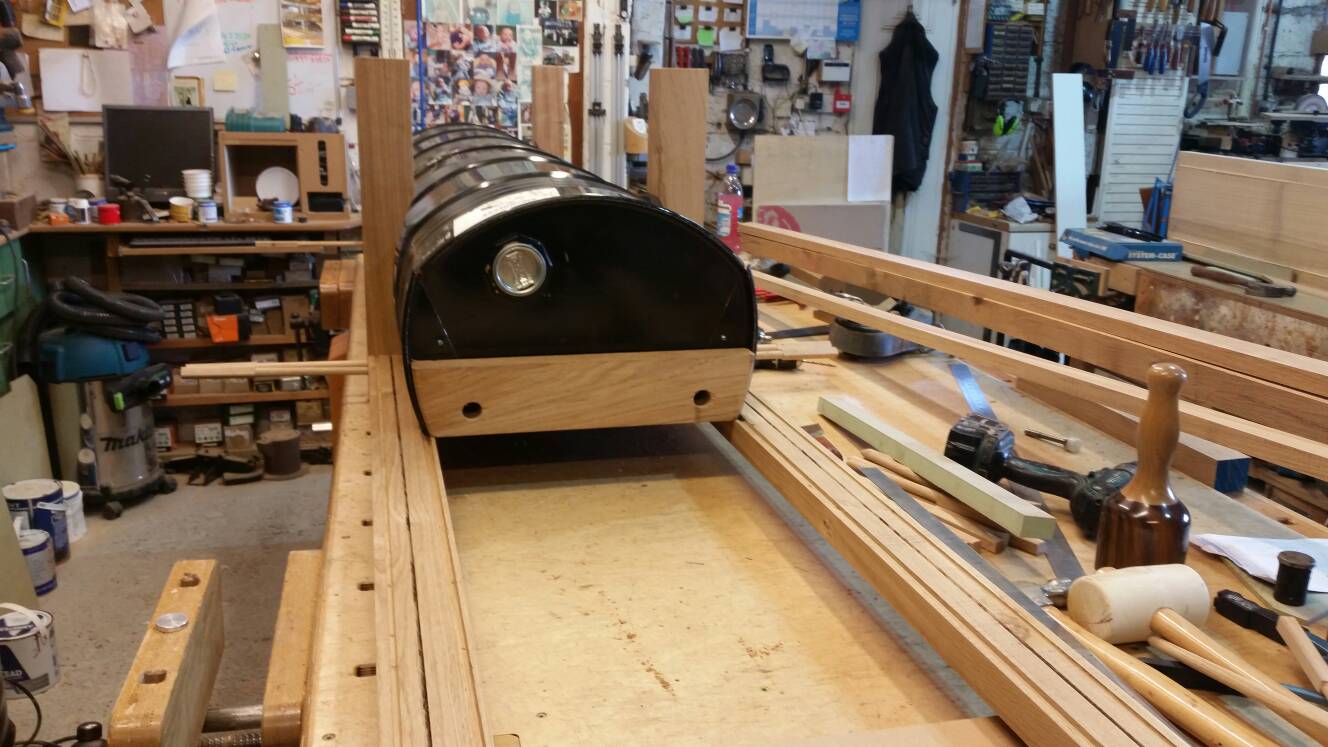
A few bits of oak between each drum end, to allow me to fix a cover piece on the drum joints.
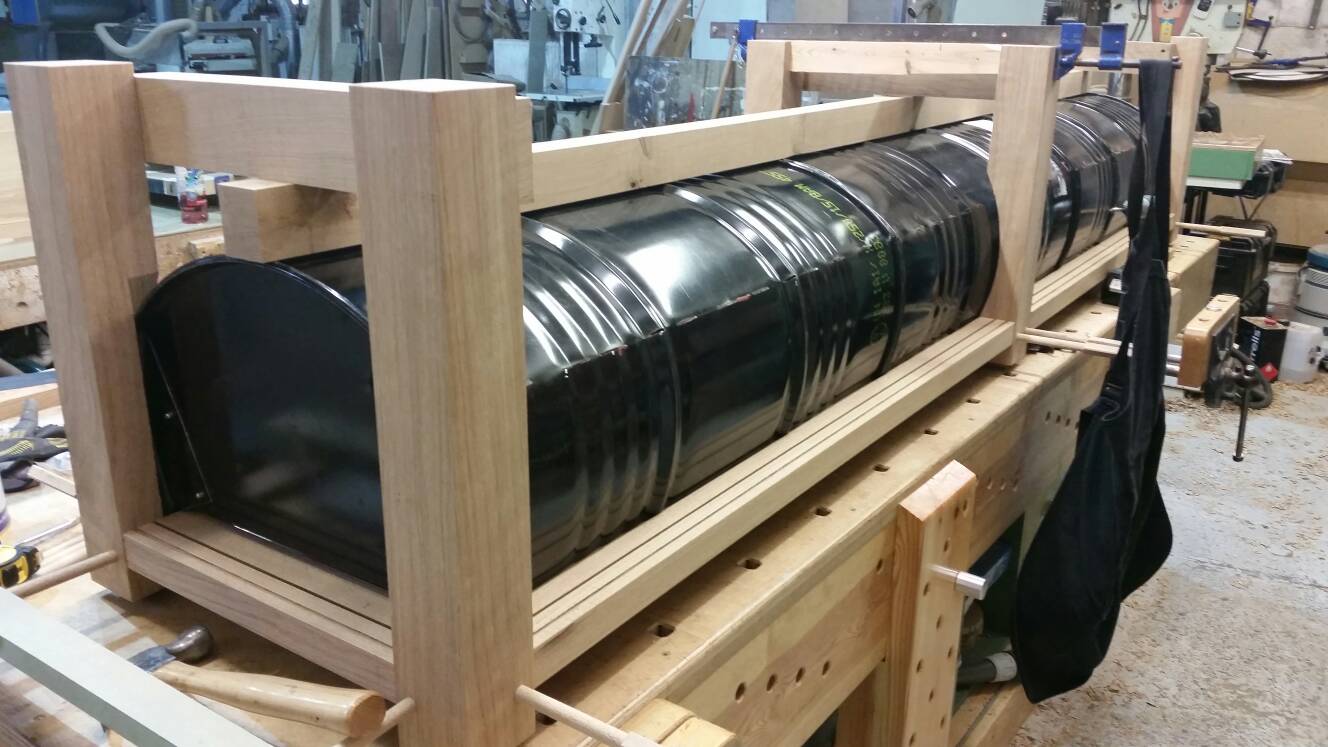
Spreaders on the legs supporting a long length of wood that keeps the drums up tight.
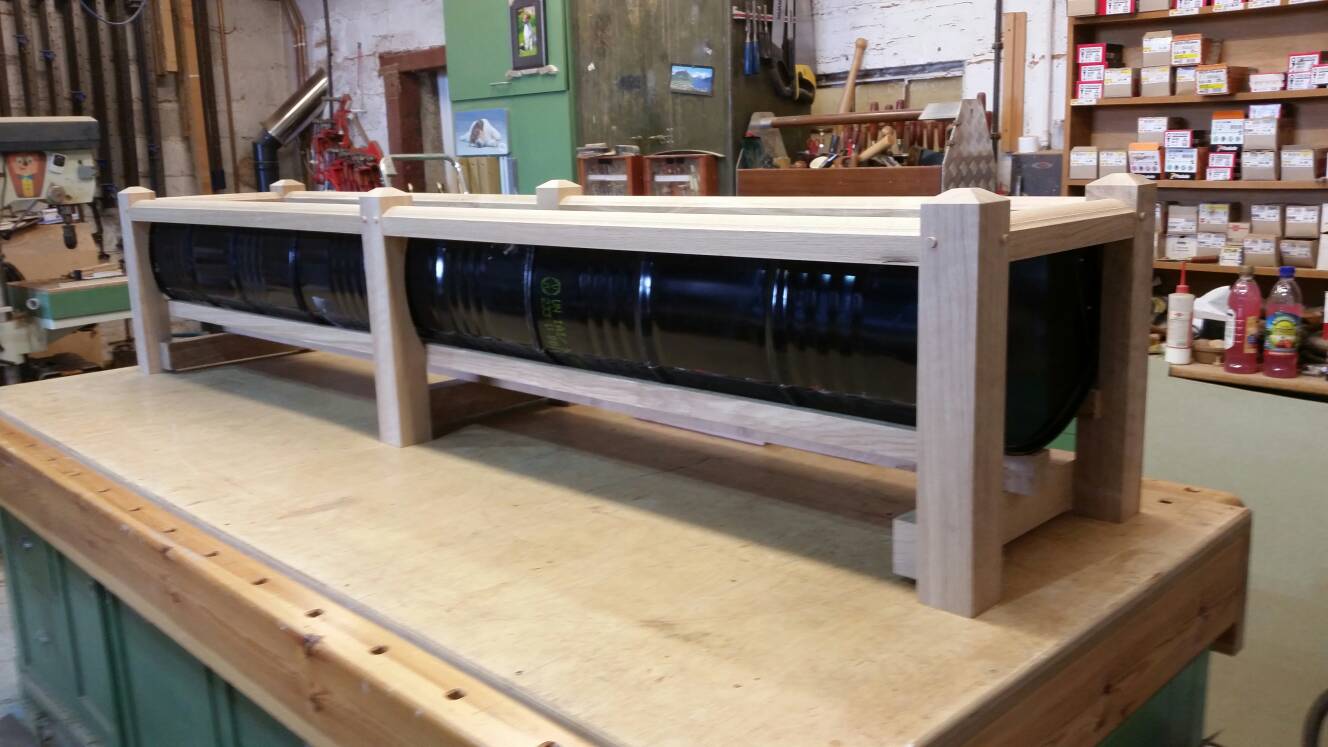
Progress
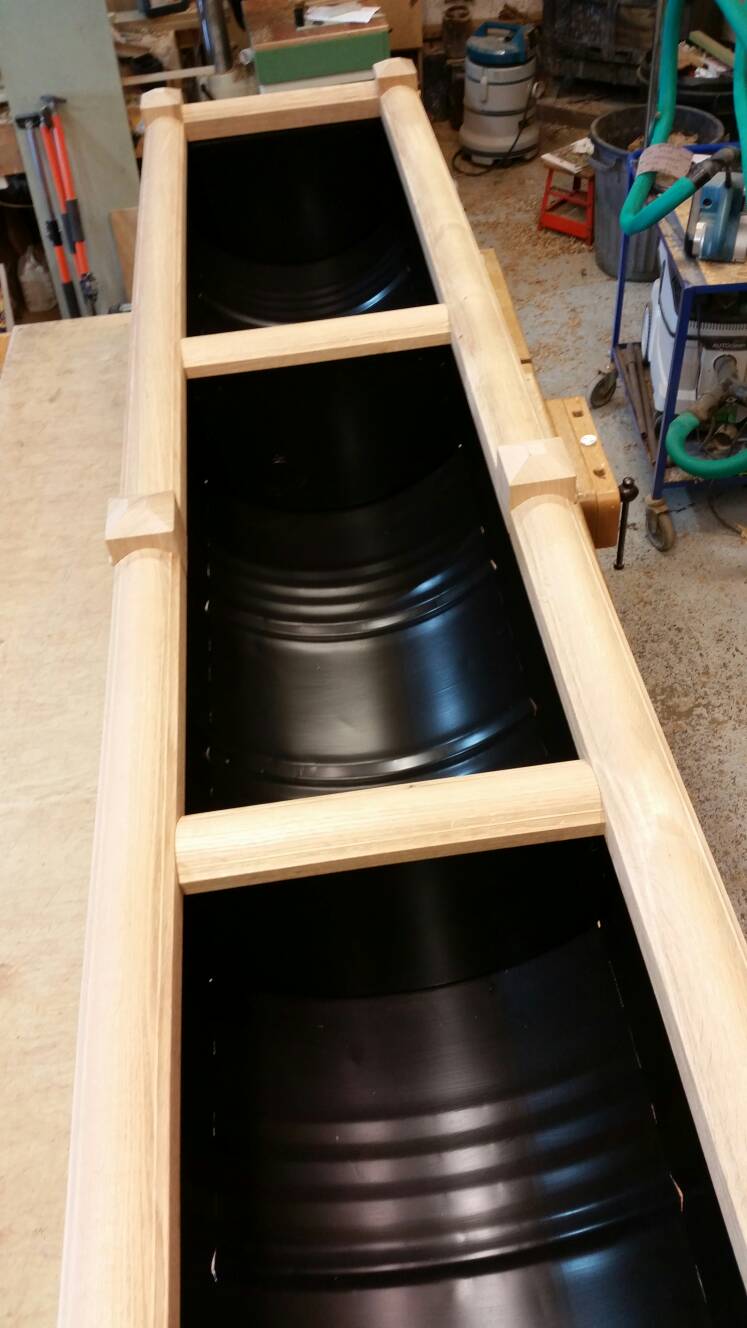
My dad had a pile of rusty sheets I thought I could use for the sides. After I'd chucked it in my car he began telling me how bad he felt giving me all his rubbish :lol: he even offered to buy me some new sheets !!!
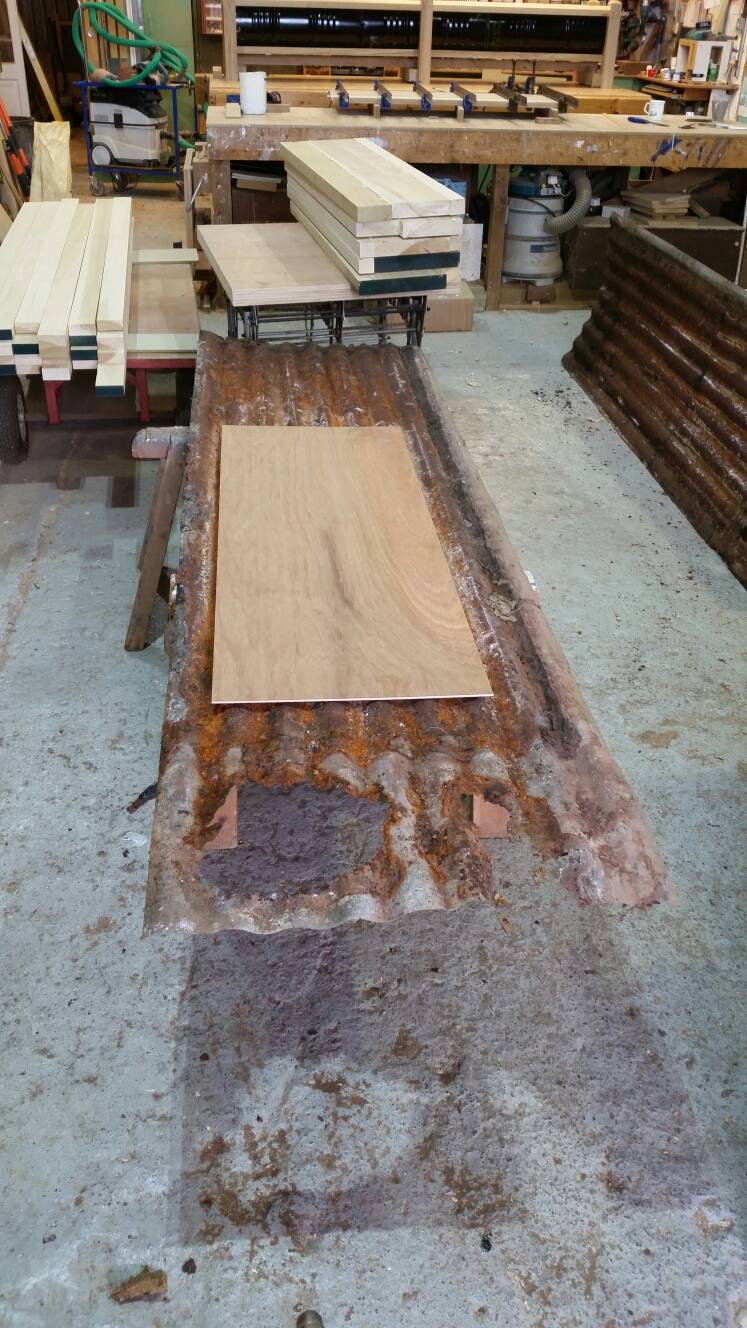
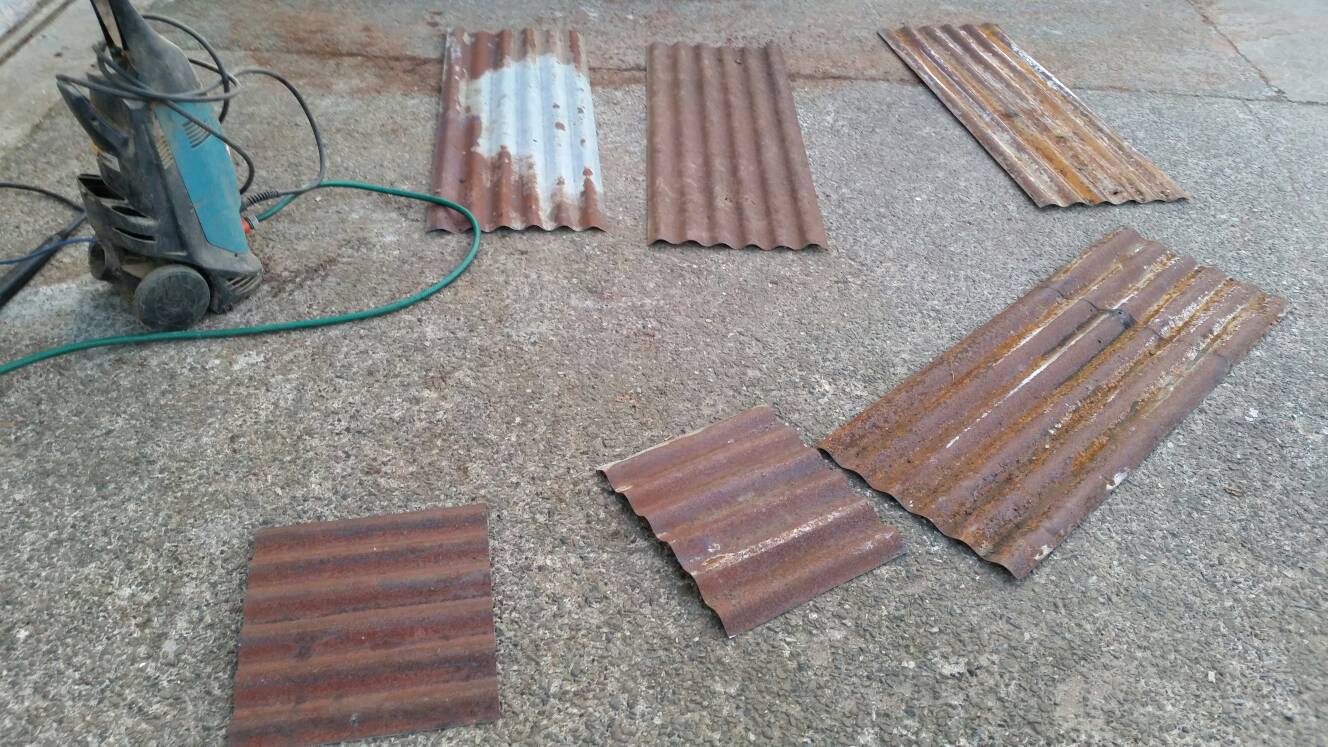
Pressure washing the muck off was scary !! I think I blew a few extra holes in it!

I put a couple coats of rust curer on, to try to prevent it rusting out as quick.

Fixing the sheet concerned me (I thought it might disintegrate) so I put a small saw cut in the rail for it to slot in.


4 screws in each sheet should hopefully make it a simpler task to replace. I originally thought I'd glue them in aswell but 4 screws seemed to hold it in nice and steady.

Holes drilled in the bottom for drainage.

360 litres of compost and it was filled.

I've ordered 6 steel balls to go where the lights are. When they finally decide to give up at least it'll cover the hole I drilled in the top of the legs. I'll leave them outside so hopefully might look as rusty as the sides,when the time comes.
I've had a bag full of bulbs I've been meaning to plant for a while. I decided I'd have Wednesday off to make this - I was still making it thursday night at 8.30pm, then doing final assembly yesterday for a few hours :lol:
Hopefully get the bulbs in this weekend.
The only real cost for me was the solar lights and my time. The most frustrating expense was wrecking a new m42 bandsaw blade. I was cutting packing to level the legs in. lesson learnt- don't rush, even if it means finishing a job. Did I mention I wrecked/kinked the newish bandsaw blade ? Argghhh, balls !!!
Cheers, thanks for reading if you've got this far
Coley
Sent from my SM-G900F using Tapatalk
For some reason I really like using oil drums. There free, strong and seem a waste to chuck out.

After recently painting the side of my shed there was a large space a long planter could go- brighten it up a bit.

I cut some slots in the drums and pop riveted them together. I knocked six inches off the width which meant I could still get the car to fit on the drive, also meant I could have a decent amount of soil depth near the edges.

I've had a small pile of green oak I've needed to get rid of, so this seemed like a good time to use it up.


The overall width is just under 550mm so it's 30mm smaller than the original 580mm diameter drum.

The notches in the legs were a pain in the butt ! Unfortunately I've had to build the frame around the drums as there was no way to get them in once the joints of the frame were drawbored. If/when I need to replace the drums, I'll have to drill out a couple pins to get it apart :?

A few bits of oak between each drum end, to allow me to fix a cover piece on the drum joints.

Spreaders on the legs supporting a long length of wood that keeps the drums up tight.

Progress

My dad had a pile of rusty sheets I thought I could use for the sides. After I'd chucked it in my car he began telling me how bad he felt giving me all his rubbish :lol: he even offered to buy me some new sheets !!!


Pressure washing the muck off was scary !! I think I blew a few extra holes in it!

I put a couple coats of rust curer on, to try to prevent it rusting out as quick.

Fixing the sheet concerned me (I thought it might disintegrate) so I put a small saw cut in the rail for it to slot in.


4 screws in each sheet should hopefully make it a simpler task to replace. I originally thought I'd glue them in aswell but 4 screws seemed to hold it in nice and steady.

Holes drilled in the bottom for drainage.

360 litres of compost and it was filled.

I've ordered 6 steel balls to go where the lights are. When they finally decide to give up at least it'll cover the hole I drilled in the top of the legs. I'll leave them outside so hopefully might look as rusty as the sides,when the time comes.
I've had a bag full of bulbs I've been meaning to plant for a while. I decided I'd have Wednesday off to make this - I was still making it thursday night at 8.30pm, then doing final assembly yesterday for a few hours :lol:
Hopefully get the bulbs in this weekend.
The only real cost for me was the solar lights and my time. The most frustrating expense was wrecking a new m42 bandsaw blade. I was cutting packing to level the legs in. lesson learnt- don't rush, even if it means finishing a job. Did I mention I wrecked/kinked the newish bandsaw blade ? Argghhh, balls !!!
Cheers, thanks for reading if you've got this far
Coley
Sent from my SM-G900F using Tapatalk


