Aled's Plane Kit WIP - Finished

UKworkshop.co.uk

Help Support UKworkshop.co.uk:

This site may earn a commission from merchant affiliate links, including eBay, Amazon, and others.

Harbo

In Memorium
Joined
13 Nov 2006
Messages
5,548
Reaction score
6
Location
Hampshire
What with several trips abroad and Grand-parenting duties I have not had much time in the Shop over the last few months:
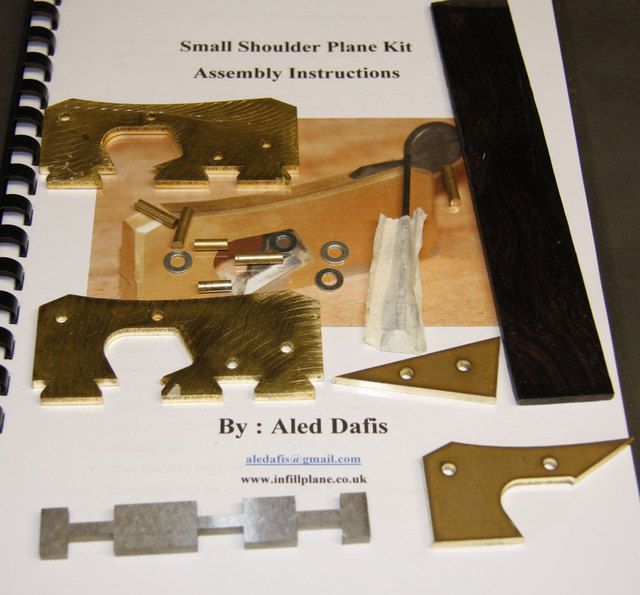
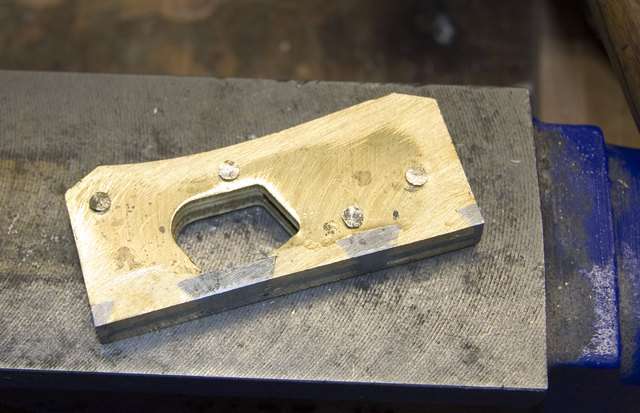
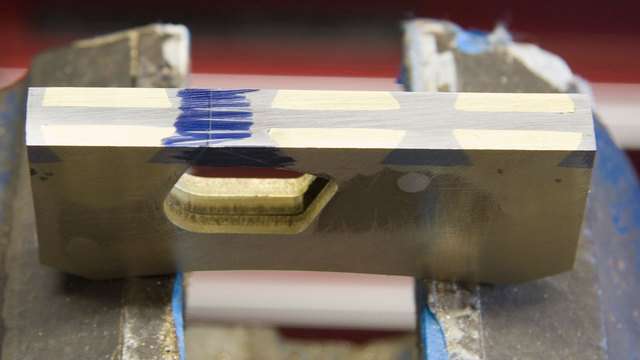
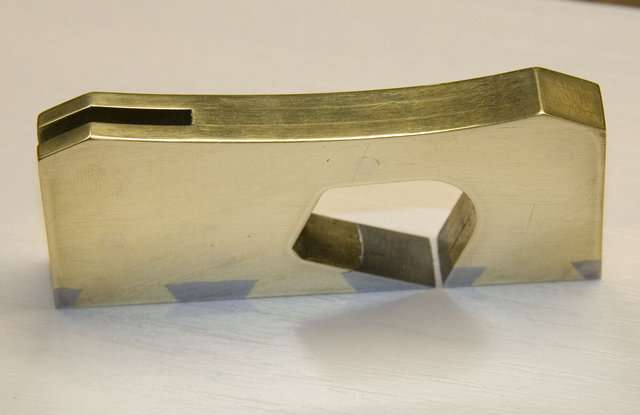
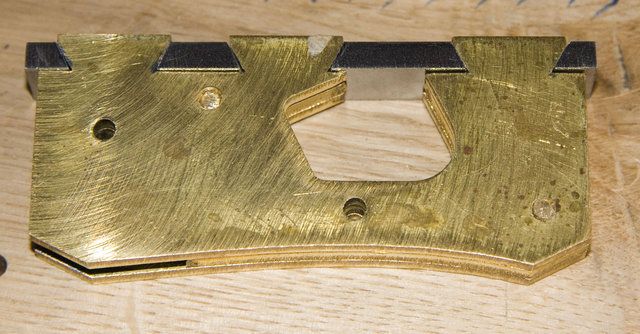
However in between stripping the paint from my garage door I managed to do a bit on Aled's Small Shoulder Plane Kit

planekit1.jpg


shoulderplane1.jpg


shoulderplane2.jpg


Dovetails cut and filed and temporary rivets fixed.
Now ready for peening!
(Some of the "shadows" are marker pen marks).

Rod
 
I finished mine some months ago.

Made a few slight mistakes but am very chuffed with the result, given my general cack handedness.

Highly recommended & satisfying project.
 
Looking good Rod.

I'm glad that you managed to get your head around the filing of the compound dovetails. This was by far the most difficult part of the manual to explain, and I'm still not sure whether I managed to make the process as clear as I'd have wished.

Looking at your dovetails, they should peen together nicely, but I'd be extra carefull with the centre dovetail in your first pic, you'll need to drift the brass a fair way in order to fill the gap completely. If I were you, I'd pein this particular one from the side first, so that the steel works it's way around the brass a little to help with filling the void. The round head punch will help a great deal with drifting the brass, so you shouldn't worry too much.

Carry on with the good work, I can't wait to see how you get on.

Cheers

Aled
 
matt":nmoyz6de said:
Out of interest... Is the manual published anywhere (e.g. PDF)? I'd be interested to know what's involved in assembly before making a purchase.

Unfaortunately not, as yet. It's something I've considered, but the Word document is around 50 odd Megabytes which makes a download off my website a bit of a pain. I don't have a PDF writer so that's also out of the question at the moment.

I'll look into it and get back to you.

Cheers

Aled

Edit: I now have a temporary fix. The text is fine, but the pics are crap and the software I used has left a watermark on the page showing that I used an unregistered version.

If you'd like a "rough" copy, e-mail or PM me your e-mail address and I'll forward it to you.

In the meantime, I'll try to work out a more professional solution.

Cheers

Aled
 
DaveL":2mzj7n95 said:
lurker":2mzj7n95 said:
I finished mine some months ago.

Jim,

Have you posted pictures of this? We need to see how you did.

Dave,

No pictures posted :oops:
I've still to work out how, until recently I've got on the forum via my company PC and we are restricted regards to pictures. Now have Broadband at home & getting my head around how to do pictures.

Matt,
Go for it!!
If I can make a semi decent job you will be fine. Mine looks much like Aleds finished one until you look really close where I did not get the peining of the pins absolutely right.
The plane works really well.
The kit & instructions are as near as damitt idiot proof.
 
Aled, thanks for the advice what keen eyesight you have :)
I got a bit carried away with the filing and perhaps made the "compound" bits too deep?
I have bought myself some parallel pin punches (my rigged up one did not work!) so will continue with the peining when the decorating allows :)

Rod
 
Here's the latest stage after peining, riveting and "rough" filing.
Peining not 100% successful due to my over-filing!

shoulderplane3.jpg


Rod
 
Rod, you're making good progress.

Cutting the mouth probably sounds a lot scarier than it really is. Just use the top of the vice jaws as a guide for the hacksaw, and it'll be plain sailing.

Go for it!

Cheers

Aled
 
Following the previous requests for a PDF version of the instructions for this plane, I've now resized all the pics in the document and managed to produce a PDF uzing Bullzip.com Thanks guys for your kind offers and advice.

If anybody would like a copy, just drop me a PM or e-mail.

Cheers

Aled
 
Here's the latest update.
Plane having initial polishing before chamfers filed and wedge made.

shoulderplane5.jpg


I was having trouble getting a really good finish despite working through numerous grades of wet & dry up to 4000. Minute scratches seemed to reappear spoiling the finish?
Reading my stuff on clock making it seems that each abrasive can only be rubbed once, as any build up of brass can cause minor scratches. The surface has to be cleaned off of any residue after each rub using Kleenex Ultra Soft tissues - other makes or cleaning cloths (unless special ones are used) can cause scratches! The different grades to be kept completely separate from each other to prevent "grade" contamination.
A bit of a fad for a tool but I am using this to practise for my clock as the brass parts for it will probably be gold plated to prevent tarnishing.
It seems in clock making the finish is just as important as its accuracy.

Rod
 
looking good Rod,

I see you made the same mistake as me: not leaving enough pin sticking out to fully fill the hole when peining - I can just see one of the pins. :wink:

For final finish I used sheets of wet & dry on a glass plate and a paintbrush loaded with water to clean away the slurry. Even so the surfaces are a bit short of scratch free.

I found the difficult bit was maintaining the square edges where you are abrading soft brass & hard steel, once I got this right ( square ) I made myself stop. Cosmetics being a secondary consideration.

My guess is when you do all brass components you will find it easier to attain the scratch free finish
 
By the way, I made a soft wood version of the wedge as practice & for a template. Made life easier when I came to using the wood supplied.

Take time to consider how the grain runs in the supplied wood
 
Hi, Harbo

I think you are not cleaning the plane well enough before each stage and contaminating the wet and dry with grit from a previous stage.

Its looking good, you will have trouble keeping it polished I use car wax on my brass shoulder plane but it still oxidises
DSC_0062.jpg


Pete
 
Back
Top