advise - Eucalyptus bur

UKworkshop.co.uk

Help Support UKworkshop.co.uk:

This site may earn a commission from merchant affiliate links, including eBay, Amazon, and others.

miles_hot

Established Member
Joined
27 Jul 2008
Messages
1,489
Reaction score
0
Location
Swindon
Once I have finished the current bowl - expected to be later today - I will start on my Grandmother's bowl. This was going to be a bowl from a plank but as I am running out of time (presentation will be Saturday) and I've never done anything like that before I will do that in slower time! :)

She'd still love a bowl and I have an interesting bit of Eucalyptus bur which has been sitting under the bed for more than 5 years so should be fairly dry (I assume) however this is a new wood to me.

I plan to turn a fairly simple single curve bowl and make it moderately thin but I have some questions:
1) how thin? The blank is around 10cm diameter and I seem to remember George mentioning that if it is thin enough it allows light through but how thin does it have to be to do this - i.e. is it something that a newby like me should shoot for?
2) any techniques / hints for cutting or finishing it? I understand when wet it will move like lightning - is this still likely to be the case?
3) what finish will show it off well? I have finishing oil, lemon oil, hard wax oil and food safe oil.... I can get other stuff if it is better but that's a dangerous trip to the tool post land of temptation :)

Many thanks all :)

Miles
 
hi Miles- is this blank completely coverd in wax by any chance? if it is it will still be very wet and not suitable for your project- if it isnt and it is a rare dry eucalypt blank then it wont be transulcent when thin as this only applies to when the wood is wet.
dry eucalpt turns lovely and neg scrapes brillantly- any finish will work well.
 
cornucopia":1vbzy3wn said:
hi Miles- is this blank completely coverd in wax by any chance? if it is it will still be very wet and not suitable for your project- if it isnt and it is a rare dry eucalypt blank then it wont be transulcent when thin as this only applies to when the wood is wet.
dry eucalpt turns lovely and neg scrapes brillantly- any finish will work well.

The blank is covered on the edge but not the two faces. Does this mean that it is still wet and will move around? If so am I bet getting it reasonably thin but above all even? Hence I don't have to chase the translucent bit?

Thanks

Miles
 
Crystal ball time Miles :?: - as an eductaed guess and given that its eucalyptus which is known for extreme movement i would edge my money on it being still wet and in need of rough turning but until you get it on the lathe and cut it you wont know- have you got a second choice blank?
edit- i forgot to say if it is wet and you do turn it you must get it perfectly consistently thin-all eucalypt's are very unforgiving and the burr's are the worst.
 
Make sure that you have a souwester or something on :lol: As George says Eucalyptus is unbelievable stuff. I have turned small pieces that have not split on me but have become art forms after moving. Turns like cheese when wet.

Pete
 
If you are up against the kosh, I'd highly recommend you don't turn the Euca. Leave that for when you don't have any pressure of finishing. Choose a safer blank. Trust me, I've destroyed some beautiful pieces of wood through being too adventurous and rushing towards a deadline. The first time I turn something like wet Euca, I will fully expect to loose it. If it survived then it'd be a bonus.
 
wizer":3gtmfupb said:
If you are up against the kosh, I'd highly recommend you don't turn the Euca. Leave that for when you don't have any pressure of finishing. Choose a safer blank. Trust me, I've destroyed some beautiful pieces of wood through being too adventurous and rushing towards a deadline. The first time I turn something like wet Euca, I will fully expect to loose it. If it survived then it'd be a bonus.

yep i'm with tom on this one - if you are going to take your grans present down to the wire you need a safer bet than a eucalypt burr :shock: not just because of that sort of wood needing the time to do it carefully but also because iot could well twist and split after you've given it to her

could be time for a trip to toolpost for some kiln dried woody goodness ;)
 
I thought you already had a shed load of woody goodness?
 
wizer":1fm2ee95 said:
I thought you already had a shed load of woody goodness?

The majority of the wood in my woody goodness store came free from storm clearance and is thus a bit damp - I suspect this is also true of miles' pile

hence the suggestion that for something that has to be finished and stable by friday , he ought to seek some kiln dried woody goodness

anyway as you know tom, one can never have too much wood, and this is a perfect excuse to buy more :lol:
 
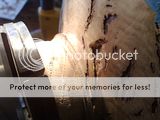
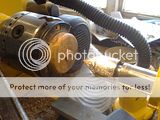
Well I started on this before I saw the replies. I have to say it's a very scary looking blank.


There's no moisture coming off it at all and it feels pretty hard with a very interrupted cut. I've given myself till tomorrow lunch time to make significant progress / blow it up so that I have sufficient time to recover - especially now that I've seen all your comments! I will be heading over to Tool Post tomorrow to get a buffing system as I've finally run out of patience with the new Hard wax oil finish (I'll update that thread after bed time) so I will be able to get a nice blank or two if I need to.

My current intention is to turn it thin so that all the cracks and fissures become natural piercing - may of them run about 5 mm deep so that shouldn't mean I have to go stupidly thin however this might be too much for my skill. I suspect the bowl might just look ugly if left thick...

Wish me luck

Miles

 
miles_hot":22u58psj said:
There's no moisture coming off it at all and it feels pretty hard with a very interrupted cut.

if by interupted cut you mean that the tool is bouncing on your cracks etc , then higher speed is your freind in that regard , however....

miles_hot":22u58psj said:
My current intention is to turn it thin so that all the cracks and fissures become natural piercing - may of them run about 5 mm deep so that shouldn't mean I have to go stupidly thin
...I would turn the speed down as it gets thin as with that number of fissures there is a good chance of it going bang and becoming woody shrapnel (also make sure you are wearing full face pro - not just your air ace and goggles)
you might also want to wrap the outside in tape while hollowing the inside to reduce the chances of catastrophic failure if you get a bad catch

miles_hot":22u58psj said:
I'll update that thread after bed time

I'm impressed by your dedication that you even post while in bed , doesnt the missus mind :lol:
 
Thats not the eucalypt burr i know and love-it is probably still a eucalyptus variety but i was expecting the tight burr of coolabah,mallee,york gum etc i think thats a red gum burr-rock hard-little pockets of resin-a bu**er to turn-good luck
 
big soft moose":2xqju5mz said:
miles_hot":2xqju5mz said:
There's no moisture coming off it at all and it feels pretty hard with a very interrupted cut.

if by interupted cut you mean that the tool is bouncing on your cracks etc , then higher speed is your freind in that regard , however....

miles_hot":2xqju5mz said:
My current intention is to turn it thin so that all the cracks and fissures become natural piercing - may of them run about 5 mm deep so that shouldn't mean I have to go stupidly thin

...I would turn the speed down as it gets thin as with that number of fissures there is a good chance of it going bang and becoming woody shrapnel (also make sure you are wearing full face pro - not just your air ace and goggles)

you might also want to wrap the outside in tape while hollowing the inside to reduce the chances of catastrophic failure if you get a bad catch

miles_hot":2xqju5mz said:
I'll update that thread after bed time

I'm impressed by your dedication that you even post while in bed , doesnt the missus mind :lol:

Yes - that seems to be the root of it all - scream if you want to go faster territory :) I will finish and then wrap the outside = I guess I make the wrapping fairly tight to provide some measure of support to bits which might only be held on by one end of a shard by the time I'v finished? Gaffa for strength or masking for ease of removal? Or better yet I guess masking on the inner surface and then gaffa on that????

Miles
 
cornucopia":3uklfm5n said:
Thats not the eucalypt burr i know and love-it is probably still a eucalyptus variety but i was expecting the tight burr of coolabah,mallee,york gum etc i think thats a red gum burr-rock hard-little pockets of resin-a bu**er to turn-good luck

That's a shame! Ah well, we'll see how I get on today...

Miles
 
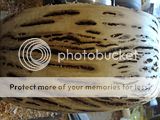
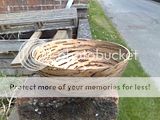
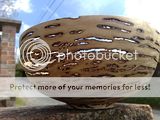
It'll not be the bowl for Grandma - far to rough and stabby due to the points etc presented by the gashes but it is never the less an interesting bowl...


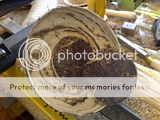
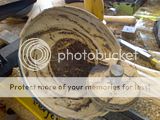
It was by no means plain sailing! This is where I'd got to last night


I shaped the glue block to take dovetail jaws in expansion and shaped the outside, sanding through the grades with the Griper Disk system. The wood took a very nice finish. The stuff which I thought was wax inside the holes seems to occur throughout the blank giving more weight to George's thought that they are not bark inclusions but resin pockets.


The bowl was then turned around and the inner was started - I figured on working down the bowl in 1" sections sanding as I went, which sort of went according to plan. The major deviation from this plan was when a catch on the central section (which I was leaving for as long as possible) caused the centre to fly off knocking the bowl out of the jaws! Looking at the way that one of the pockets went all the way across the failed section I think it would have been a miracle if it hadn't failed!


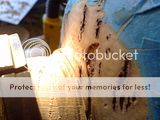
With the bowl back on the dovetail jaws (not sure how it managed to come off without breaking something important) the inside was turned out to a fairly even 3mm. The outside was wrapped with masking tape without which there's no way that this bowl would have survived!
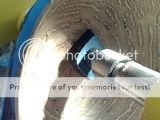
Reversing the bowl to turn off the foot was impossible - I could squeeze the bowl into an oval with the slightest of pressure so I decided to try parting off for the first time :) Bringing the live centre up onto a section of mouse mat provided the support.

I thought I'd try using the skew to make a v shaped groove. This was a mistake - the skew caught, jumped up, cut a grove and then with a nasty bang knocked the bowl off centre in the chuck.


Having re-centred the bowl I tried my best 80 gouge to remove the incriminating gouge but it was basically too deep so I was forced to re-shape the foot using a bowl gouge in a scraping cut as nothing else would fit into the space. The was very nerve wracking as the area I was cutting into was 3-5 mm thick and I needed to take around 1 mm out of it. After sanding it didn't look too bad.


I then used my parting tool (maybe the name should have given me a clue? :)) which I've never had much success with but I sharpened it 3 times during the cut and used it a lot lower down that I've previously done so and seemed to have some success. I was getting close to the point where I thought I'd need to start slowing the lathe and doing it one handed etc when it flew offl, hit me in the shoulder and fell to the floor (in the process I lost the little thing that fits over the pointed live centre to make it a ring centre - rats that's £6.11 I'll not see again).


I have to say I was rather annoyed that I'd trashed the bowl in the last cut :evil: :eek:pps: , but upon picking it up the bowl seemed to have had an easy time of it with no visible damage. I suspect that it was so flexible that it had absorbed all the impact. :)
Peeling the tape off was scary - only one small bit came away but the whole thing was flexing around something horrible. One major hole goes more than half the way around and almost joins up with other holes so that only about 7 mm in total (across two places) holds the upper third of the bowl onto the rest of it :) Blowing all the dust out with the compressor (outside) showed me just how many gaps there actually are!

I rather like the bowl however it is seriously fragile and is unlikely to survive the journey into London with Grandma so I will have to make another one for her :)

Any comments on the bowl gratefully received :)

Miles
 
Have a look at this guys site and see if anything looks familiar. Different way of achieving the effect but very similar. You did well tom get that completed by the look of it and personally i really like the effect

pete
 
cornucopia":mz5k1od8 said:
For saying what a awkward wood it is to turn-and teh problems you've had- i think you've done a great job Miles

yep - i'd second that , by the sound of it you did well to produce any kind of bowl from that blank.

btw on the subject of the ring centre adaptor - i find they go missing all the time - it doesnt take much to make them jump off , so my solution (tho its not my idea originally) is to cut a X in a tenis ball or a squash ball if you need to fit it into a small space, and shove it over the pointy centre.

how are you set for special wood for grandma now ? - I can have a rummage in my pile for character blanks if you want.
 
Exceptional Job. I think this is the nicest piece I've seen you turn Miles (to memory). Reading your account of what happened reminded me of countless occasions where I've has some or all of those things happening whilst turning something. You did well to keep your cool and get it finished. Well Done indeed.
 
Looks like a huge Banksia !

Well done Miles, No injuries and a completed bowl !
 

Latest posts

Back
Top