Advice needed regarding Record Hand Plane re-finishing

UKworkshop.co.uk

Help Support UKworkshop.co.uk:

This site may earn a commission from merchant affiliate links, including eBay, Amazon, and others.

GazPal

Established Member
Joined
30 Jul 2010
Messages
1,136
Reaction score
0
Location
North East England
In order to avoid the risk of de-railing an extremely positive thread concerning a nicely re-furbished Stanley 5,1/2 I thought it best to begin my own thread.

Since retirement and in spite of taking good care of my tools, I feel my Record hand planes (Mostly pre mid 1950's and some pre-war) are in need of a little TLC in terms of re-finishing. The vast majority being in my possession since my apprenticeship, with a few bought soon after its completion or as replacement pieces. My aim is not so much regarding aesthetics, but more to do with keeping them in sound working order and one way I'd like to approach this would be by freshening them up a little.

Most are in very fine condition, but a few definitely need a new paint job.

The questions are;

1. Which type and/ or brand of paint/enamel to use?

2. Which shade of blue. I've read it's Roundell Blue, but can't seem to find it's equivalent.

3. Where on earth do I source the materials to carry this work out? I'm fine with both brush and spray painting, but would rather start out on the right footing rather than run the risk of having to strip back freshly laid finish due to fluff ups revolving around paint type.

I've re-finished two from my set, but would rather stop now and wait until the proper materials are in place.

Any help or advice will be greatly appreciated.
 
Well it is all down to opinion really to some extent.

Do you want "original" - if so leave them alone. Do you want "restored as close to original as possible" then get hot or cold Japanning done by a pro.

If you need "near as possible to original" try the cold Japanning receipes knocking around...I am trying the asphaltum and marine varnish mix at the moment....testing on some old needle nose plier handles first to see what happens...so far...so good!

If painting...I really love that HT or JapLac look on Edd's No.5 1/2 you mentioned....I would do one like that in the future...

I used smooth blue Hammerite on Records...it is close to the original but not real Japanning as you can appreciate, but it will protect if you don't mind "not original".

Why not upgrade the irons and caps at the same time?

Jim
 
Hi Jimi,

I had a turn of luck this morning - shortly after posting this thread - as a supplier I'd contacted via email last Friday evening responded and told me they have the desired stove enamel (BS110- Roundell Blue as per Record spec) and can supply in gloss, satin or matt finishes. We'll see how things turn out once the enamel has arrived in a few days time, but I'm hoping for positive results.

I'd have gone the cold japanning route if it weren't for the colour and although I'm not a collector I do tend to prefer to keep things in as original condition as possible. I suppose it has something to do with my conditioning during my apprenticeship and ongoing practices, but good tools deserve looking after as they're the means of making your wages.

I'll be moving onto re-plating parts in nickel and chrome before I know it. :lol:

Of the paints commonly available, I'd tried Hammerite smooth blue and dark blue, but they seemed to fall either side of the actual shade needed when tested on sample pieces. It may be something to do with the age of the tools in question as Record apparently varied shades at various times. My next attempt uncovered Plasti-Kote's fast dry enamel and their shade of night blue is as near a damn it to the actual colour. The only drawback regards questions concerning surface hardness - once cured - and potentially adhesion afterwards and during use. I'd hate to pick up a plane and have half a sheet of paintwork fall or flake away. :oops:

All in all I'd prefer to leave as is (Most are in great condition) and only restore the tools that have the most battle scars. I don't tend to sell tools but they will be passed down the family line once I'm beyond the point of being able to use them.

Mrs P is away visiting relatives for a few days and may be returning home with a chest of tools our sister-in-law inherited from her dad (Also a cabinetmaker who'd inherited his father's tools) earlier this year. There should be some good user planes and tools among the selection.

If you don't hear from me after this coming weekend, I'll be in the doghouse with the tools, paint sprayer and oven. :lol:
 
jimi43":tg3ik6ao said:
Hi Gary

Good news...let us have some WIP pictures if you have the time.

What temperature do they recommend baking the stove enamel at?

Jim

I'm hoping the camera should be home after it's tour of the Lake District before this weekend, so should be able to take pictures before, during and after the work has been done. I'll not be fettling soles or sides because they're all in full working order and work beautifully, but they should have a nice paint job and I'll re-finish their front knobs and rear handles. :)

I'll have to double check on baking temperatures (I think it's in the range of 110deg C), but believe they're well within range of domestic ovens. I'm actually hoping I can cold cure rather than resort to baking. I've plenty of time for cold cure, plus I'd dred the sound of cracking iron if something was to go wrong.

Thankfully my numbers 06, 07 and 08 are in good shape otherwise I'd be heading down to the nearby pizza parlour for a little oven time. :lol:
 
I'm watching this thread with extreme interest as I'm considering cosmetically upgrading some sorry looking old Records too.
GazPal":ic9upkmp said:
I had a turn of luck this morning - shortly after posting this thread - as a supplier I'd contacted via email last Friday evening responded and told me they have the desired stove enamel (BS110- Roundell Blue as per Record spec) and can supply in gloss, satin or matt finishes.
Mr Lynch (www.recordhandplanes.com) says Record used low temperature stoving enamel from RJ Stokes Ltd. Is this what you're considering, or are you looking at a different brand?

Cheers, Vann.
 
Vann":3c4kezcy said:
I'm watching this thread with extreme interest as I'm considering cosmetically upgrading some sorry looking old Records too.
GazPal":3c4kezcy said:
I had a turn of luck this morning - shortly after posting this thread - as a supplier I'd contacted via email last Friday evening responded and told me they have the desired stove enamel (BS110- Roundell Blue as per Record spec) and can supply in gloss, satin or matt finishes.
Mr Lynch (www.recordhandplanes.com) says Record used low temperature stoving enamel from RJ Stokes Ltd. Is this what you're considering, or are you looking at a different brand?

Cheers, Vann.

Hi Vann,

It's a different brand, but the same spec stoving enamel and colour BS110. I'm awaiting delivery as I type. :)
 
The enamel arrived this afternoon and I'm so far impressed by both colour, ease of application and cleanup and overall finish.

I had a few pieces ready stripped - a #04.5 frog and #0101 block plane - and set to with an intial coating. Air drying is suggested at 2hrs touch dry, 8hrs handling dry and re-coat after 16hrs. After coating both pieces I placed the plane frog in a pre-heated oven (110deg C) for a half hr and have left the block plane to one side to air dry for the allotted period. We'll see how things go, but baking certainly shortened tack time down from 8hrs to 1hr.

I need to be sure there aren't any rejection problems before naming the product, but so far so good.

Having wondered about high temp enamels I erred on the side of trying to keep things as reasonably close to original spec as possible (Outlined via David Lynch at www.recordhandplanes.com). A major plus for me is the fact this type of product shares many similar properties with the original finish and can readily be stripped back and re-done whenever necessary.

It costs less and is also far easier to apply by brush and cleanup than Hammerite (Simple white spirit cleanup) and can be thinned for spraying via white spirit instead of thinners.
 
Hi Gary

Very good review and results...can't wait to see the pictures.

I had the asphaltum mix in the oven at 100 degrees too today and it set it fine...it was tacky before even after 4 days air drying.

I will try to take pictures later...only an old pair of needle-nosed pliers but I wanted to test it on something before hitting the good stuff!

Cheers

Jim
 
I can't blame you for waiting before hitting the good stuff, but it's good knowing your chosen process is working out well Jim. I'm still awaiting the return of my camera, but as soon as it's here I'll begin a full plane strip down and re-finish. The handplanes are queueing (I think I've six Record planes that need re-finishing), but I've plenty of time.

If all fails I'll use Mrs P's high tech camera phone once I've figured out how to switch it on. :lol:
 
jimi43":1m53yxdv said:
I had the asphaltum mix in the oven at 100 degrees too today and it set it fine...it was tacky before even after 4 days air drying.
I think Derek is just teasing us with his "air drying" suggestion. Perth's 40 degrees C, with no humidity, just doesn't compare with around 15 degrees here in Wellington NZ (at high noon) - and probably about the same in the UK. If I ever try asphaltum, it'll be straight into the oven on one of the days SWMBO works.

Cheers, Vann.
 
Vann":3punz10h said:
jimi43":3punz10h said:
I had the asphaltum mix in the oven at 100 degrees too today and it set it fine...it was tacky before even after 4 days air drying.
I think Derek is just teasing us with his "air drying" suggestion. Perth's 40 degrees C, with no humidity, just doesn't compare with around 15 degrees here in Wellington NZ (at high noon) - and probably about the same in the UK. If I ever try asphaltum, it'll be straight into the oven on one of the days SWMBO works.

Cheers, Vann.

We can only ever dream of 40deg C temps........... especially in the North East of England. :lol:

I'm fortunate to have SWMBO visiting relatives this week, so can bake planes 'til my heart's content :p , but lack the camera to take pic's of the process :( , because (I've only just discovered) she's apparently taken it with her. :cry:

If all fails, I'll see if I can mug a passing tourist or neighbour and nab their camera for an hour or so. :lol:

Although I think I could describe the process well enough, pictures would possibly help those who can't quite visualise the order of things. Especially in terms of end results, as pictures would prove the process works, instead of people having to rely on mental images.
 
Just received an email response from a paint supplier I'd contacted with a price estimate for one litre of paint plus catalyst and thinners possibly exceeding the value of all of my planes put together. :shock:

Luckily I'd put my coffee down and taken my quiet life pills before opening the mail. :lol:

I think the spec for that one may have been a tad on the high side for handplanes. :oops:
 
Just a quick update on the "cold Japanning" idea that Derek gave us...

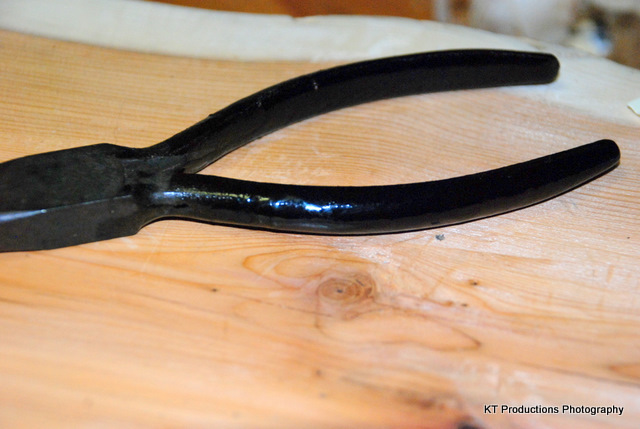
It worked brilliantly! Excuse the "thrown on" look...I wasn't going for accurate coverage - just a paint test on these old pliers...

DSC_0229.JPG


It did not set or dry at all until I baked it and only did it at 110 degrees Celcius for about 1 hour....

I was disappointed at first as it was still sticky when it came out but overnight it hardened off really well and I anticipate it to go rock hard in a couple of weeks.

But I am very impressed indeed. It has that correct "oily blue" tinge black look...and an old set of pliers get a new coat!

Now to get a basketcase to try it on!

Thanks Derek! You are a star as usual!

Jim
 
It certainly looks good Jim and I bet the finish improves with each additional coating if you choose to add more. The hardest part - I suppose - is finding a balance between a crisp, tough finish and one which won't crack or fall away if struck accidentally.

The marine varnish definitely seems a good carrier for the asphaltum as the iridescent effect shines through very nicely. I'm going to have to hunt for one of my old Stanley planes and give this one a go, but may despoil ye olde worlde Paramo as an experimental piece. :twisted: :D

:idea: My brother-in-law is a printer so may be able to give me pot of asphaltum for the sake of test driving this finishing technique.
 
Just to say I've not forgotten about the plane restorations, but a couple of health problems have cropped up and it may be a few days before I can begin work on them.

Plus Mrs P left the camera connection lead and charger behind (After visiting raltives last week), so we're now waiting for the postman. :lol:

On a more positive note....... Both paints have proven solid for use on planes, with one marginally lighter in colour than the other. The lighter of the two being the original Record colour BS110 and great for an original finish, while the slightly darker one would suit the aged appearance and very possibly suit those who prefer the aged darker look.
 
Hi Gary....sorry to hear of your health issues...I do wish you well soon! I am looking forward to pictures of the results but there is really no rush!

Of course that is something to take into account, isn't it. The aging of the colour! I had not factored that in before but it is a key element in colour selection for restoration.

The colour may be from the exact batch as the original but look totally wrong as it is not how we "see" it after 70 odd years.

I have the same issue with vintage guitars and it didn't enter my head unti you mentioned it!

At least this test has produced two options!

I look forward to the pictures.

Jim
 
Many thanks for your kind wishes Jim. It's just an RA flareup and should hopefully settle by the end of the week, but for the time being I'm down to one fingered typing instead of two. :lol:

I totally agree in terms of trying to achieve that aged look. Especially when restoring/repairing musical instruments and the various concoctions we'd cook up, but in this instance I'm aiming to just go with the original colour. A positive side-effect during my experiments has been my tripping over a couple of matches for the aged look and it may help those who've more interest in faithful restoration rather than re-conditioning.

Colour matching had struck me fairly early on as I began trying to source the correct Record Blue (BS110). Newly made Irwin Record planes are even lighter in shade than the originals, but Record did apparently vary shades over the years. The ones I own have three distinct shade variations, so there's perhaps leaway for a little variation. :wink:

My primary goal was to go for original factory finish, but two paints and shades I've sourced so far are;

Rust-Oleum - with an exact match to BS110 factory finish. An enamel paint and primer combined which covers extremely well, brushes out easily and clean up is via white spirit, so no need to invest in specialised cleaners/thinners. Two coats provides a solid finish which also removes a little of the sharpness in the lettering and gives a factory finish appearance.

It's also comparatively low odour, so you don't get all that high if painting in the smallest room of the house with window and door sealed shut. :lol:

Plasti-Kote quick drying enamel - Slightly darker "Night Blue B7" It was a shock to me too, but this water based paint does what it says on the tin and is both flexible and very tough once fully cured.

Both are fully cured well within six days. You could put the plane to use after 24hrs, but leaving the finish to harden properly helps save on grief.

I'm presently trying to source another shade to match the aging on planes from the 1930's, so watch this space for news on that one. Once I've pinned down shades that match the various degrees of aging seen on older record planes I'll source colour matches from a standard point of reference and be able to provide accurate details regarding these via a single manufacturer. Hopefully with a British Standards number similar to the original Record Blue - BS110.

I've 99.9% faith in Rust-Oleum, but need to test drive Plasti-Kote before recommending it as a rock solid paint to use for this purpose.

Handle restoration is another topic, but uncovering the means of retaining original decals while staining and re-finishing has been a little challenging.
 
Hi Gary

Thanks for the update. Rustoleum was a paint very popular the other side of the pond. When I lived in the tropics it had a great reputation of preventing rust by the use of special "fish based" oils and whenever I used it for such things as iron garden furniture etc.....it certainly worked in that capacity.

Plasticote is a really nice paint, isn't it? I love those little handy tins too!

Re the handles....you are very brave trying to preserve decals whilst retoring the rest of the wood. I believe they actually sell facsimilies of the decals as waterslide jobbies in the USA....that may be an option. For handles which I want to tart up a bit and retain the existing logos...I tend to smooth down the handle part with fine mesh 3M abrasive to take off the gloss and then recoat with Garnet or Button polish. I am not sure of the longevity of this route...but it works remarkably well.

Jim
 
jimi43":1x8k7ry2 said:
Hi Gary

Thanks for the update. Rustoleum was a paint very popular the other side of the pond. When I lived in the tropics it had a great reputation of preventing rust by the use of special "fish based" oils and whenever I used it for such things as iron garden furniture etc.....it certainly worked in that capacity.

Plasticote is a really nice paint, isn't it? I love those little handy tins too!

Re the handles....you are very brave trying to preserve decals whilst retoring the rest of the wood. I believe they actually sell facsimilies of the decals as waterslide jobbies in the USA....that may be an option. For handles which I want to tart up a bit and retain the existing logos...I tend to smooth down the handle part with fine mesh 3M abrasive to take off the gloss and then recoat with Garnet or Button polish. I am not sure of the longevity of this route...but it works remarkably well.

Jim

I was surprised by how well both paints proved themselves to be. Much of my time has been spent dealing with varnish and lacquer work, so painting is definitely new territory for me, but it all went well. I've passed a couple of planes (One with Rust-Oleum and the other Plasti-Kote) over to my son to use for the week so he'll be giving the finish on each a run for it's money.

I'd thought about running with fresh decals, but there are only a couple of planes with intact transfers, so thought why not give it a go. :lol: The first step was matching stains to existing shades, with one being antique mahogany (Liberon) and the other Indian Rosewood (Colron).

In spite of taking good care of tool handles (wire wool & shellac) over the years, much of the original underlying finish is crazed, so I broke out the Nitromors (I also used this to strip the plane bodies), stripped back to bare timber, wire wooled, stained and Danish oiled the handles and knobs. So far so good and the resulting finish is as smooth as a baby's behind with consistent shading to the underlying timber. :D

Dings and cracks were easily dropped filled using superglue, before scraping back to a consistant surface. :wink:

How to leave decals intact? I stripped the finish around the decals, before staining their surroundings and used superglue to both drop fill the crazed finish, seal the decals in place and finish this part of the handle. The beauty of this technique is the crazing disappears and you're left with an extremely resilient finish on the handle cap. Total cost on that element was 50p for the superglue and a little patience. :D
 
Back
Top