Old tool cleaning part 1 - use of wax

UKworkshop.co.uk

Help Support UKworkshop.co.uk:

This site may earn a commission from merchant affiliate links, including eBay, Amazon, and others.

AndyT

Established Member
Joined
24 Jul 2007
Messages
12,030
Reaction score
543
Location
Bristol
I was pleased to find that I'd won an eBay auction for what looked like a decent assortment of old woodworking tools and collected them from the seller this week. Rather than just gloat about them, I thought I would show some more pictures of the very simple cleaning and restoring that I will do.

So, first up, we have an ebony and brass mortice gauge and a sixpenny brace. This is how they were:

IMG_1326.jpg


IMG_1341.jpg


Dirty from a shed or an attic, with the steel parts lightly rusted, enough to make your hands turn orange - not nice to use.

However, they are a century or more old, and I don't want them to look new, just cared for. Following advice from others on here, (mostly Jim!) and from TATHS members, I have finally bought a little pot of "Renaissance" brand microcrystalline wax, and that's what I used on these.

The first step was just to rub the loose dirt off with an old hand towel and a toothbrush, used dry. Nothing difficult there!
The next step was to use a tiny smear of the wax on a bit of rag on the end of my finger, and gently rub the dirt away. You can see the dirt coming off on the rag, but it doesn't remove any of the surface of the metal or wood. I also put a tiny rub of wax along the moving surfaces, which helped the adjuster move properly smoothly.

This is the mortice gauge adjuster before:

IMG_1328.jpg


and after:

IMG_1349_zps9aaa5307.jpg


The head half way through:

IMG_1345.jpg


all finished:

IMG_1348.jpg


The brace before:

IMG_1344.jpg


On this rust, I used the wax on some superfine steel wool. This is cleaned on the right hand side:

IMG_1350.jpg


and further along:

IMG_1351.jpg


On the wooden head I just used a soft cloth and a smear of wax. Before:

IMG_1342.jpg


After:

IMG_1353.jpg


This was all ridiculously quick and easy to do. The end result is just what I wanted; they still look old, but are clean and pleasant to touch. Other brands of microcrystalline wax are available, but I am sure this little tub will last me years and years so I don't plan to do a side by side test.

However, I will do some more posts on some of the other contents of the box, but it may be a while. Someone seems to have left an unfinished step/chair on the bench and it's slowing down my progress!
 
Interesting post Andy, thanks. I have the same tub of wax and have used it very successfully to prevent rust on my bandsaw table and a few other metal parts as well as a finish for wood. It's brilliant stuff but hadn't realised it could be used in this way for cleaning up old tools.
 
Hi, Andy

That works very well, so where do you get it from and how much?

Pete
 
Racers":2on89kb7 said:
Hi, Andy

That works very well, so where do you get it from and how much?

Pete

I followed Jim's lead and bought it from MJR Supplies on Amazon at £12.99 for 200ml.

Roger - that's useful to know that the Chestnut product is the same - had I been placing an Axi order that's probably what I would have bought.
 
There has been much said about whether to clean/restore old artefacts at all...and if you decide on following this route...how far do you go.

Most cleaning products clean by either abrasion or chemical action and in doing so...remove the natural patina which is so much beloved by collectors.

If you are one of the reserved brigade...and indeed this is supported by some museums...the goal is to remove the ugly flotsam and jetsam of life whilst retaining a fine patina.

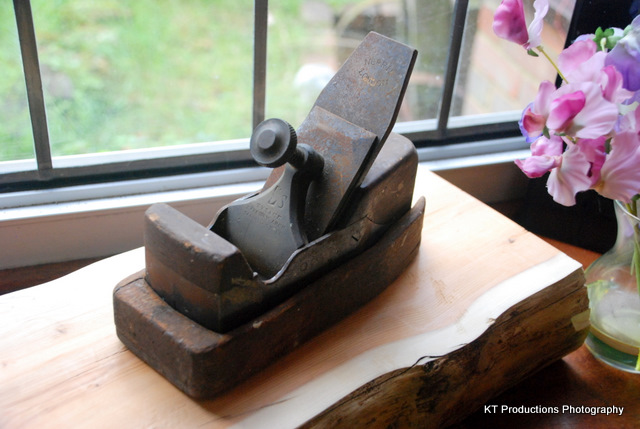
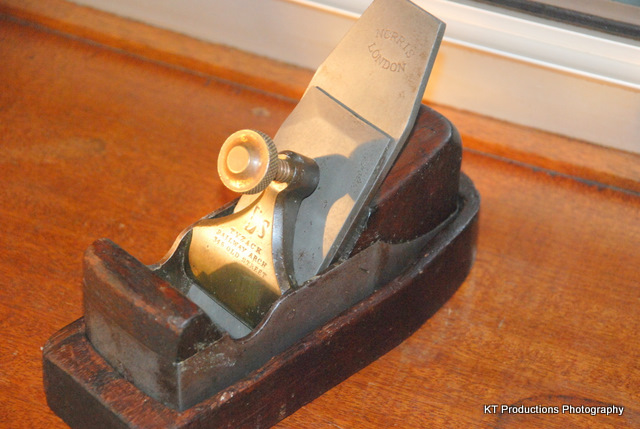
As the British Museum recommended the use of Renaissance Wax...and I can only assume the same applies to any other "micro-crystalline" variety....I thought I would try it on the first of a series of infills I acquired which I felt justified it...

DSC_0176.jpg


This old Tyzack/Norris combination did not need repair so it was the first candidate for this treatment...

And I think it worked well....

DSC_0283.JPG


....though I have to admit...the old Norris iron needed a little more in the way of Corro-Dip to get it this fine!

The results you have achieved with this cleaning/restoring/preserving wax are fine examples of when to use this and why.

There are those who will still prefer resorting to Brasso and bling...and that's fine by me too...after all...they own the tools and they can do what they darn well like with them! I just cringe a little when I see it on FleaBay...and move on swiftly!!!

Cheers for posting Prof...can't wait for part deux!! =D>

Jim
 
Quite so Jim - nicely put!

The thing that I like about that plane is how you've made the old green brass look like brass again - but old brass. One of the other tools in the queue for treatment is this second ebony and brass mortice gauge - any extra tips for something with that much metal on?

IMG_1322-1_zpsca69862f.jpg
 
That's most impressive!

I must admit to being a tad surprised at the use of wax as (effectively) a cleaning agent, I'd always thought of it as a finish after cleaning; but the results speak for themselves.

PS - nice little brace, and those mortice gauges look good for a few years service, as well. Must look out for an nice oval headed one - mine's a modern square-headed thing, and comfortable to use it isn't.
 
Only that even Renaissance Wax or MAAS polish will eventually remove the patina so just go as easy as you have done on the other items...

The wooden parts can withstand more elbow grease as you can see by the brace end...nicely done that!

Jim
 
I use raw linseed oil diluted half n half with turpentine. It soaks into wood, protects metal and flows into all nooks n crannies and protects everything immediately. It takes a few days to dry but after that it polishes up really nicely either with use, or with elbow grease.
It's less glossy than the wax above, more 'natural' looking and cheaper.
 
Fantastic results there AndyT. Well done.

Noted. I have a few antique planes/braces that I need to work on, so I'll give that a try.

Nice one.

Jonny
 
mrbadexample":1sguwjie said:
Is there any perceived issue with waxing wooden plane wedges? Would they still lock in place ok? :?:
Yes, I would only ever wax the curvy bit of the wedge that shows, or not wax at all. Normally this part will look dark where it has been in the light but dry and light on the working faces.
Best steer clear of the working faces.
 
I was pleased to find that I'd won an eBay auction for what looked like a decent assortment of old woodworking tools and collected them from the seller this week. Rather than just gloat about them, I thought I would show some more pictures of the very simple cleaning and restoring that I will do.

So, first up, we have an ebony and brass mortice gauge and a sixpenny brace. This is how they were:

IMG_1326.jpg


IMG_1341.jpg


Dirty from a shed or an attic, with the steel parts lightly rusted, enough to make your hands turn orange - not nice to use.

However, they are a century or more old, and I don't want them to look new, just cared for. Following advice from others on here, (mostly Jim!) and from TATHS members, I have finally bought a little pot of "Renaissance" brand microcrystalline wax, and that's what I used on these.

The first step was just to rub the loose dirt off with an old hand towel and a toothbrush, used dry. Nothing difficult there!
The next step was to use a tiny smear of the wax on a bit of rag on the end of my finger, and gently rub the dirt away. You can see the dirt coming off on the rag, but it doesn't remove any of the surface of the metal or wood. I also put a tiny rub of wax along the moving surfaces, which helped the adjuster move properly smoothly.

This is the mortice gauge adjuster before:

IMG_1328.jpg


and after:

IMG_1349_zps9aaa5307.jpg


The head half way through:

IMG_1345.jpg


all finished:

IMG_1348.jpg


The brace before:

IMG_1344.jpg


On this rust, I used the wax on some superfine steel wool. This is cleaned on the right hand side:

IMG_1350.jpg


and further along:

IMG_1351.jpg


On the wooden head I just used a soft cloth and a smear of wax. Before:

IMG_1342.jpg


After:

IMG_1353.jpg


This was all ridiculously quick and easy to do. The end result is just what I wanted; they still look old, but are clean and pleasant to touch. Other brands of microcrystalline wax are available, but I am sure this little tub will last me years and years so I don't plan to do a side by side test.

However, I will do some more posts on some of the other contents of the box, but it may be a while. Someone seems to have left an unfinished step/chair on the bench and it's slowing down my progress!
Interesting read, will try some Thanks!
 
Great post Andy, nos Im on here properly (been looking at bits of it for years) will be delving into the site to glean techniques
 

Latest posts

Back
Top