sploo
Somewhat extinguished member
I've been collecting a number of old Stanley and Record hand planes, but as some have pretty sad looking handles I wanted to try to make some replacements. Starting with the templates here http://www.leevalley.com/us/wood/page.aspx?p=63262, I put together a single image that contained both a #4 and a #5 drawing, squashed together so I could cut them from a smaller sheet of stock.
I don't have all the required imperial forstner bits, so I added centres to the drawings for some of the nearest metric equivalents.
The purpose of this thread is mostly in the hope it'll help others; I previously cut some prototypes from pine, and made adjustments to my process as a result. Needless to say there were more "learning points" with the actual build.
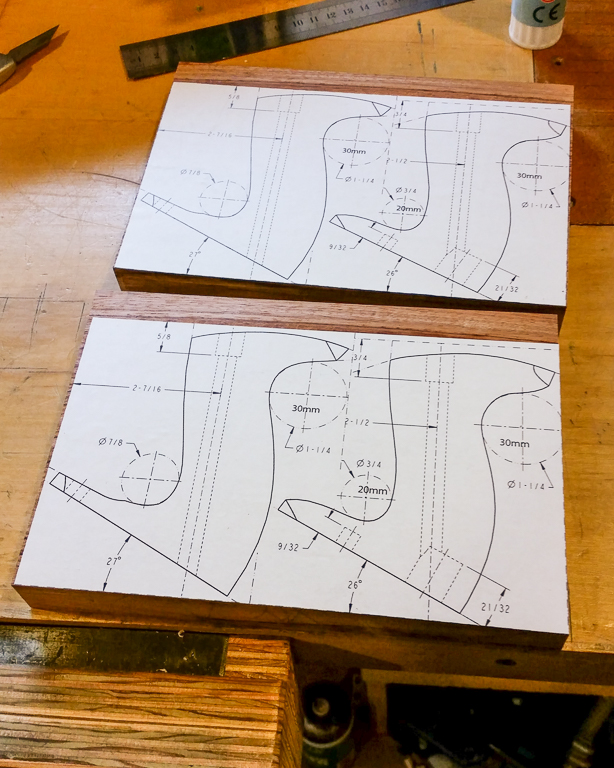
I got some 200x200x50mm bubinga, which I resawed and hand planed down to the required 15/16" thickness. I then glued two templates to the stock:
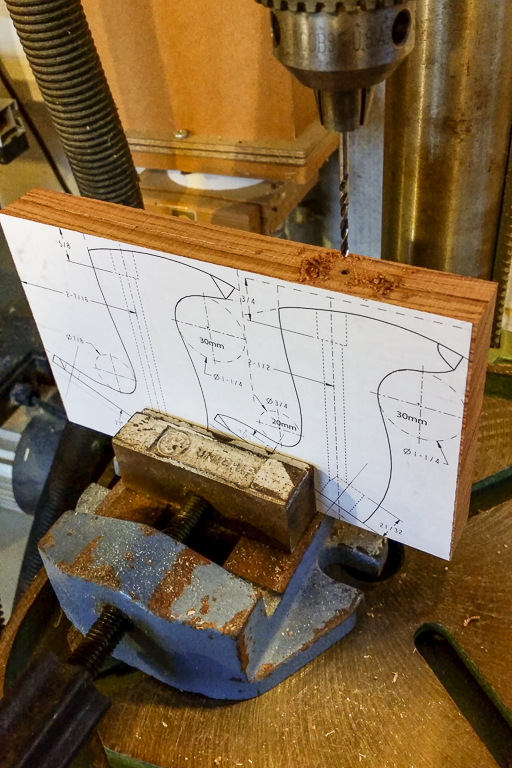
From lessons learned with the prototypes, I used a small diameter drill bit to cut a reasonable distance into both the top and bottom ends for the main fixing bolt:
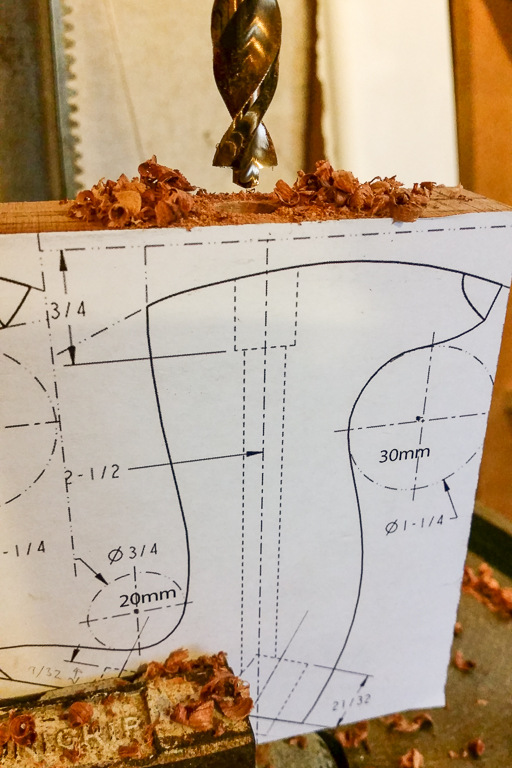
The plans call for a 7/16" (11.1125mm) drill for the nut at the top of the tote. I found that was a bit tight, so I used an 11.5mm bit - the pilot hole diameter was chosen to hopefully guide the tip of that bit:
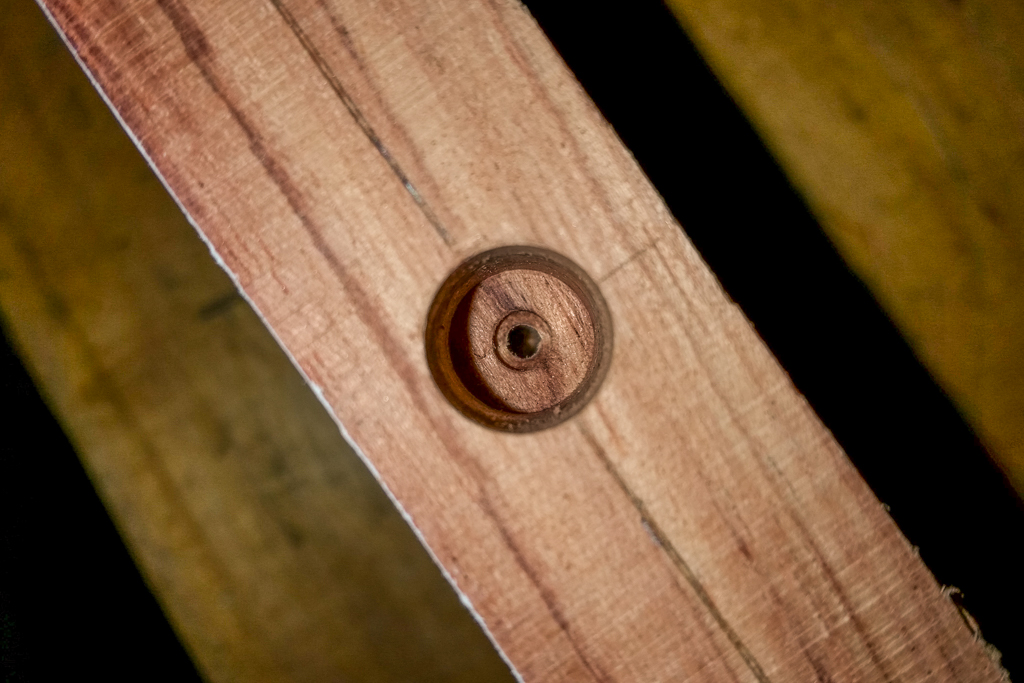
That looked to work well - the smallest hole is the pilot, and next is the 11.5mm tip, and the rest is obviously the 11.5mm pocket:
I then drilled the bolt hole. The plans call for 5/16" (7.9375mm) but I found a 7mm bit is more than enough, with plenty of "wiggle room" for the bolt.
When cutting the pockets and holes at the bottom of the totes on the prototypes I had problems with the drill bits entering the stock at an angle - especially the forstner required for the #4. So I cut away some of the stock, parallel to the bottoms of the totes, and then use the marking gauge, square and knife to find the drill points:
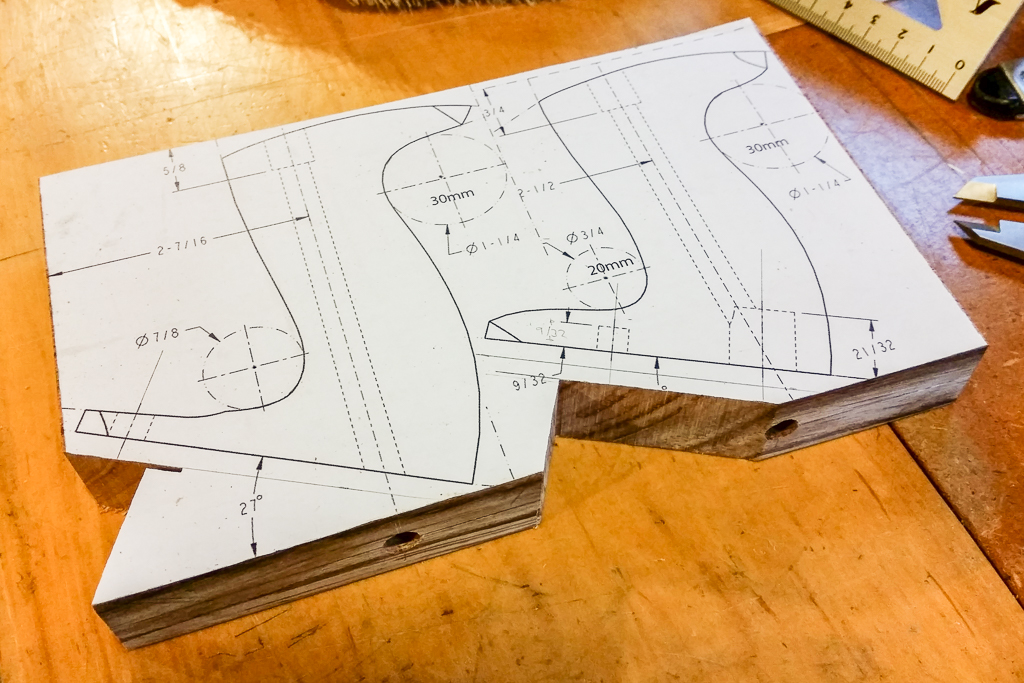
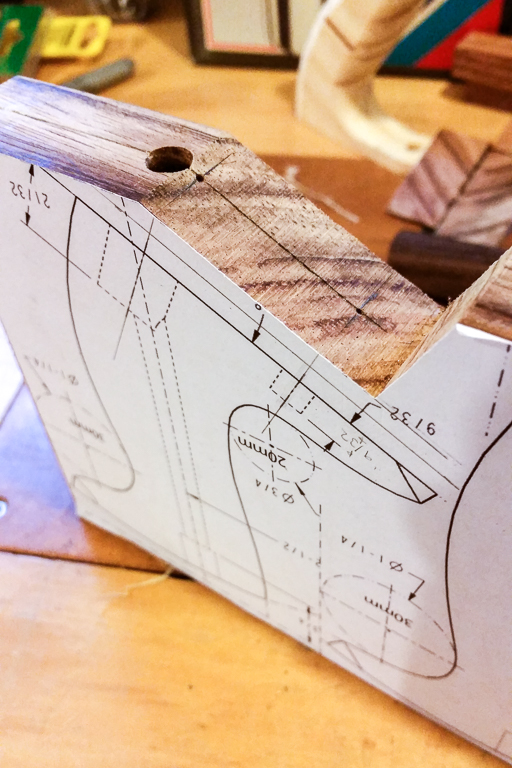
When I drilled the large forstner holes on the prototype I got a bit of blow-out on the opposite faces. It didn't matter that much as the edges are rounded, but this time I drilled small pilot holes through in order to use the forstner bits from both sides:
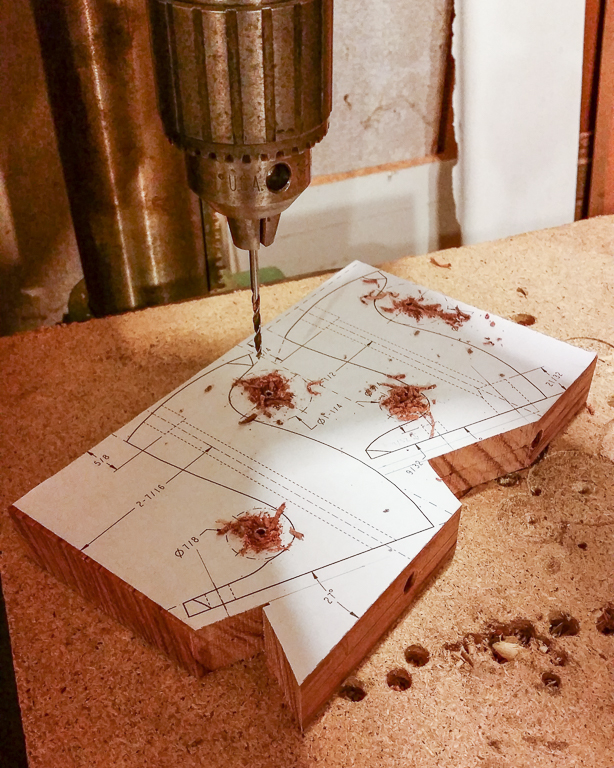
I then drilled the bottom pockets (note: I used a 15mm bit as I didn't have a 9/16", and found 14mm was too tight):
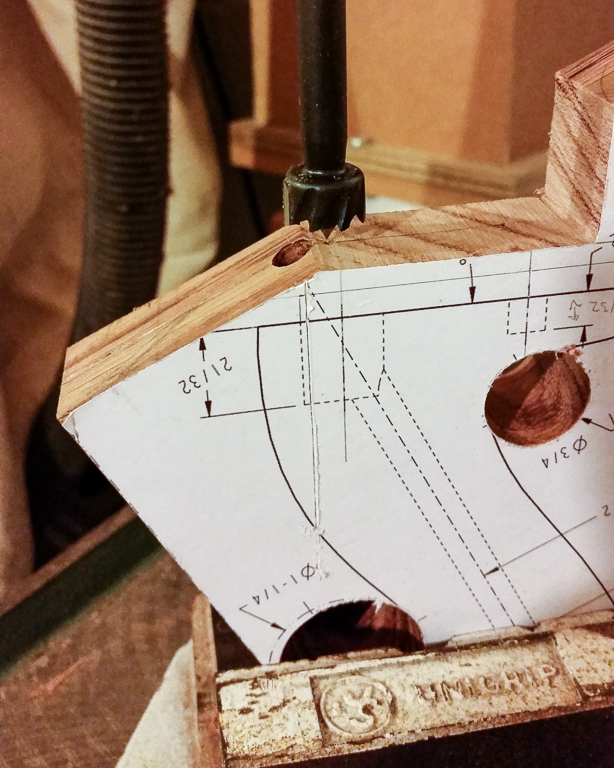
And the results... were terrible:
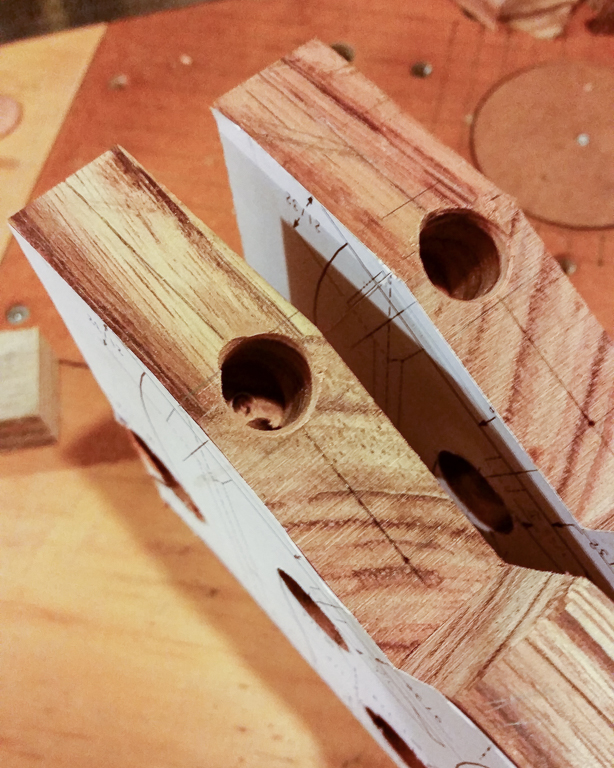
The problem is that, despite everything being clamped really well (and using a very high quality bit) the 7mm bolt hole undermines the cut as it causes the forstner to "fall" into the wrong path.
Hindsight #1: If I made more in the future I think I'd leave just the small pilot hole for the bolt at the bottom end, and cut the stock parallel to the bottoms much closer to the line. That way there's less chance of a small out of square issue meaning the pockets end up in the wrong place, and less chance of the forstner wandering. The bolt hole could then be finished to 7mm as it's much less critical at the bottom in terms of looks (and more forgiving in terms of being a mm or so out - the pockets however need to be exactly right for the stubs on the plane casting).
Alternatively, if it looks as though you've got the stock really nice and square in both planes on the drill press, I'd be tempted to drill the bolt hole down from the top only, and stop just as you break into the space that'll be removed by the 9/16" (or 15mm) forstner bit. That way there'd be no hole in the bottom to affect the forstner (at least until it's nearly finished the cut) and if the bolt hole is a mm or so off at the bottom you'll probably get away with it.
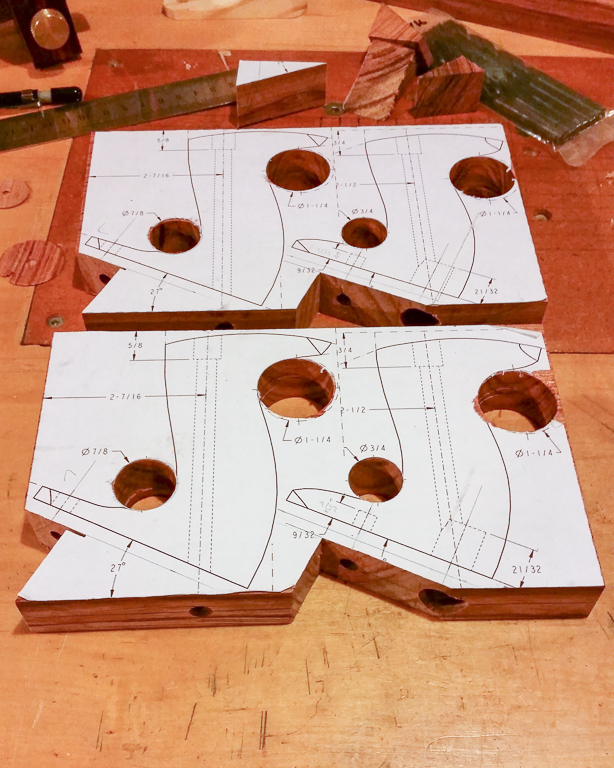
The stock ready for the bandsaw:
Once cut out with the bandsaw (a good 1-2mm away from the lines) I cleaned up the convex curves on the disc sander, and the concave on the bobbin sander (for the observant: yes, I was too lazy to change the base ring as I used different sanding sleeves):
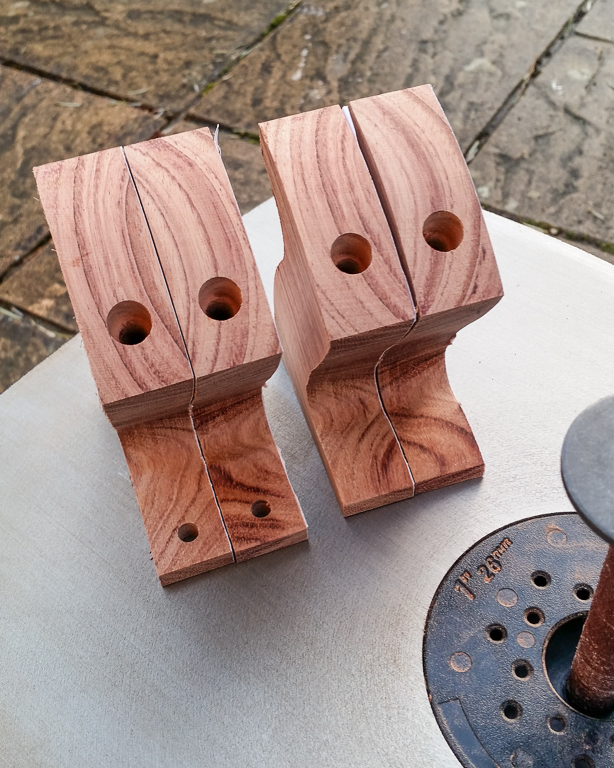
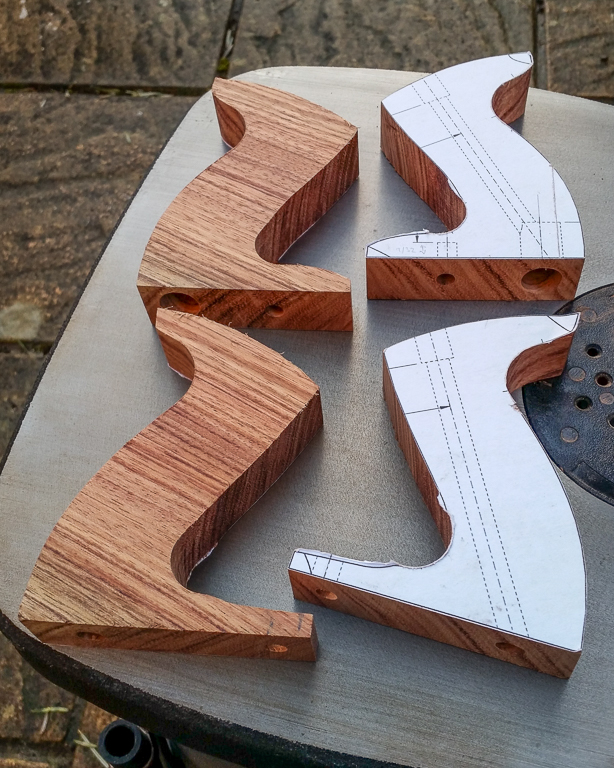
Hindsight #2: The forstner cuts from both sides didn't line up perfectly (0.5mm or so off), so actually just created more sanding work. If you have a bobbin sander with suitable diameter sleeves I'd be tempted to save time by not using the forstners, and just rough cut the shapes with the bandsaw - the bobbin sander will deal with the concave curves just fine.
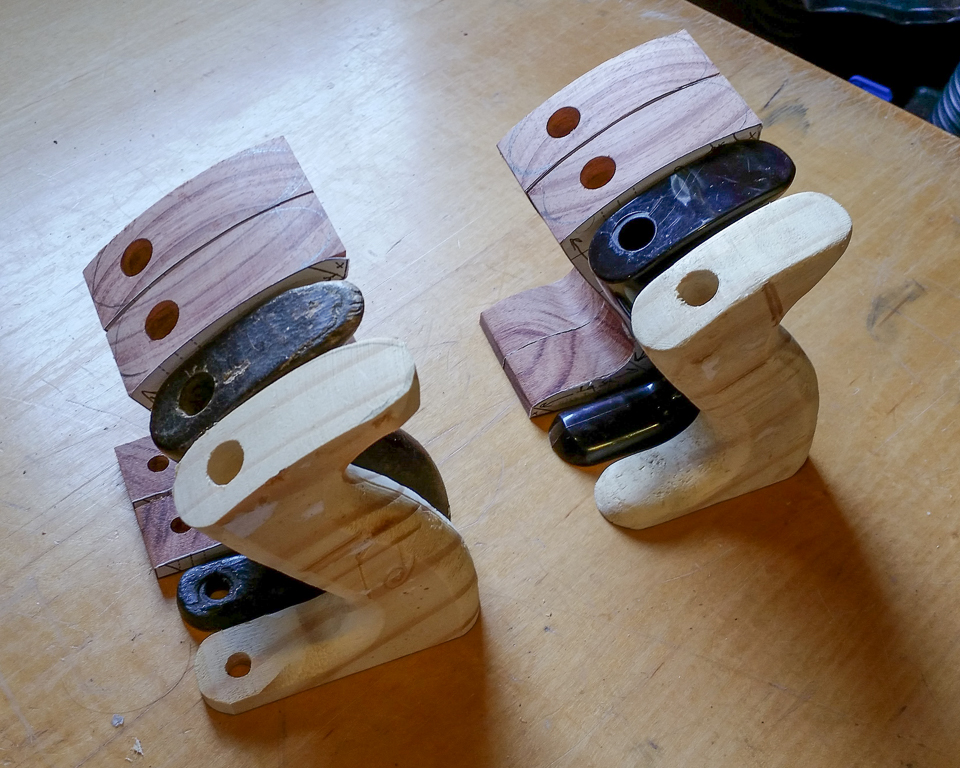
A shot of the #5 and #4 bubinga totes, with an original #5 1/2, an original plastic #4, and the pine prototypes:
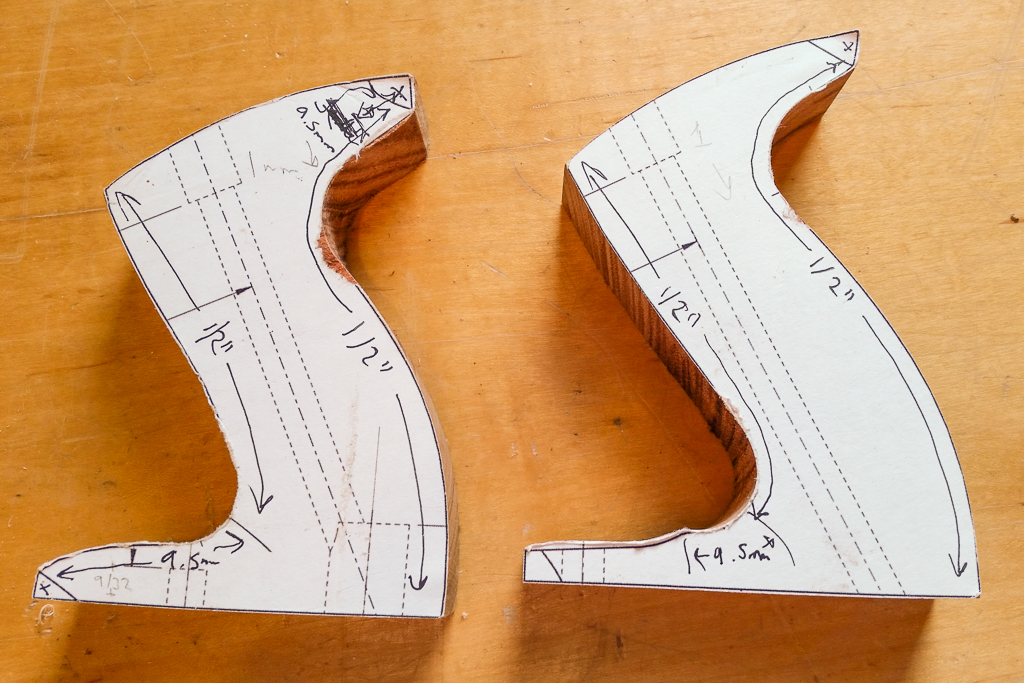
Looking at the originals, the vast majority of the roundovers are 1/2" radius. That's a small problem as 15/16" stock means you can't safely use a bearing guided round over bit to full depth (think about it). The very top sections and toes seemed to work better with a 9.5mm (3/8") round over - though the flat toe section on the #5 is not touched at all.
Despite taking a lot of shallow passes on the router table, and careful climb cuts at the ends, I did get some chipping on the bottoms. I held some scrap against the bottoms for subsequent cuts to alleviate the problem.
Note that it is possible to hold these on a router table but you need to be really concious of where your fingers are, and which way the material would get pulled if it kicks. Do a few dry runs with the router off, and ensure you've never got a finger hooked over an edge - it's very tempting for control, but suicidal for your digits.
The end results weren't bad:
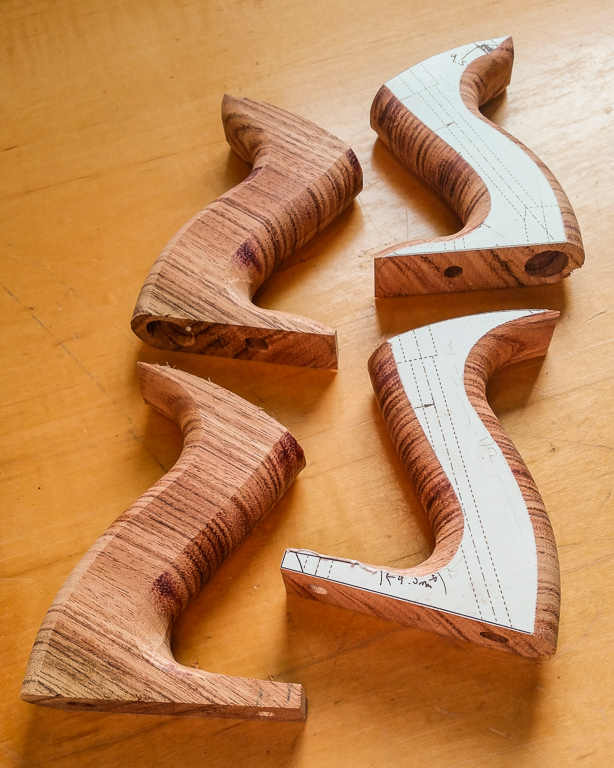
Hindsight #3: When cutting out the shapes on the bandsaw, I'd leave a bit of material (~3mm height, maybe 5-10mm long) sticking out below the heel, and a similar "horn" above the front/top. After rounding the edges over you'd bandsaw them off and use the disc sander to smooth the top and bottom face - it means any router bit chipping would happen on those waste stubs. If that's not clear, put a paper cut out on your router table and see where you'd be at risk of chipping. The only downside of that approach is that you can't test fit the totes to the plane until you've gotten this far. However, unless you've massively screwed up, you should find they'll fit (even if you need to take a small rasp to your bottom pockets on the #4).
That's as far as I've got for the moment. I think the chipping (fortunately to the bottoms of the heels only) is repairable. Next it'll be a lot of rasp and file work do the final shaping - but they do feel OK in the hand already.
EDIT: If you want to skip straight to the "done" post, it's here: post1040556.html#p1040554
I don't have all the required imperial forstner bits, so I added centres to the drawings for some of the nearest metric equivalents.
The purpose of this thread is mostly in the hope it'll help others; I previously cut some prototypes from pine, and made adjustments to my process as a result. Needless to say there were more "learning points" with the actual build.
I got some 200x200x50mm bubinga, which I resawed and hand planed down to the required 15/16" thickness. I then glued two templates to the stock:

From lessons learned with the prototypes, I used a small diameter drill bit to cut a reasonable distance into both the top and bottom ends for the main fixing bolt:

The plans call for a 7/16" (11.1125mm) drill for the nut at the top of the tote. I found that was a bit tight, so I used an 11.5mm bit - the pilot hole diameter was chosen to hopefully guide the tip of that bit:

That looked to work well - the smallest hole is the pilot, and next is the 11.5mm tip, and the rest is obviously the 11.5mm pocket:

I then drilled the bolt hole. The plans call for 5/16" (7.9375mm) but I found a 7mm bit is more than enough, with plenty of "wiggle room" for the bolt.
When cutting the pockets and holes at the bottom of the totes on the prototypes I had problems with the drill bits entering the stock at an angle - especially the forstner required for the #4. So I cut away some of the stock, parallel to the bottoms of the totes, and then use the marking gauge, square and knife to find the drill points:


When I drilled the large forstner holes on the prototype I got a bit of blow-out on the opposite faces. It didn't matter that much as the edges are rounded, but this time I drilled small pilot holes through in order to use the forstner bits from both sides:

I then drilled the bottom pockets (note: I used a 15mm bit as I didn't have a 9/16", and found 14mm was too tight):

And the results... were terrible:

The problem is that, despite everything being clamped really well (and using a very high quality bit) the 7mm bolt hole undermines the cut as it causes the forstner to "fall" into the wrong path.
Hindsight #1: If I made more in the future I think I'd leave just the small pilot hole for the bolt at the bottom end, and cut the stock parallel to the bottoms much closer to the line. That way there's less chance of a small out of square issue meaning the pockets end up in the wrong place, and less chance of the forstner wandering. The bolt hole could then be finished to 7mm as it's much less critical at the bottom in terms of looks (and more forgiving in terms of being a mm or so out - the pockets however need to be exactly right for the stubs on the plane casting).
Alternatively, if it looks as though you've got the stock really nice and square in both planes on the drill press, I'd be tempted to drill the bolt hole down from the top only, and stop just as you break into the space that'll be removed by the 9/16" (or 15mm) forstner bit. That way there'd be no hole in the bottom to affect the forstner (at least until it's nearly finished the cut) and if the bolt hole is a mm or so off at the bottom you'll probably get away with it.
The stock ready for the bandsaw:

Once cut out with the bandsaw (a good 1-2mm away from the lines) I cleaned up the convex curves on the disc sander, and the concave on the bobbin sander (for the observant: yes, I was too lazy to change the base ring as I used different sanding sleeves):


Hindsight #2: The forstner cuts from both sides didn't line up perfectly (0.5mm or so off), so actually just created more sanding work. If you have a bobbin sander with suitable diameter sleeves I'd be tempted to save time by not using the forstners, and just rough cut the shapes with the bandsaw - the bobbin sander will deal with the concave curves just fine.
A shot of the #5 and #4 bubinga totes, with an original #5 1/2, an original plastic #4, and the pine prototypes:

Looking at the originals, the vast majority of the roundovers are 1/2" radius. That's a small problem as 15/16" stock means you can't safely use a bearing guided round over bit to full depth (think about it). The very top sections and toes seemed to work better with a 9.5mm (3/8") round over - though the flat toe section on the #5 is not touched at all.

Despite taking a lot of shallow passes on the router table, and careful climb cuts at the ends, I did get some chipping on the bottoms. I held some scrap against the bottoms for subsequent cuts to alleviate the problem.
Note that it is possible to hold these on a router table but you need to be really concious of where your fingers are, and which way the material would get pulled if it kicks. Do a few dry runs with the router off, and ensure you've never got a finger hooked over an edge - it's very tempting for control, but suicidal for your digits.
The end results weren't bad:

Hindsight #3: When cutting out the shapes on the bandsaw, I'd leave a bit of material (~3mm height, maybe 5-10mm long) sticking out below the heel, and a similar "horn" above the front/top. After rounding the edges over you'd bandsaw them off and use the disc sander to smooth the top and bottom face - it means any router bit chipping would happen on those waste stubs. If that's not clear, put a paper cut out on your router table and see where you'd be at risk of chipping. The only downside of that approach is that you can't test fit the totes to the plane until you've gotten this far. However, unless you've massively screwed up, you should find they'll fit (even if you need to take a small rasp to your bottom pockets on the #4).
That's as far as I've got for the moment. I think the chipping (fortunately to the bottoms of the heels only) is repairable. Next it'll be a lot of rasp and file work do the final shaping - but they do feel OK in the hand already.
EDIT: If you want to skip straight to the "done" post, it's here: post1040556.html#p1040554


